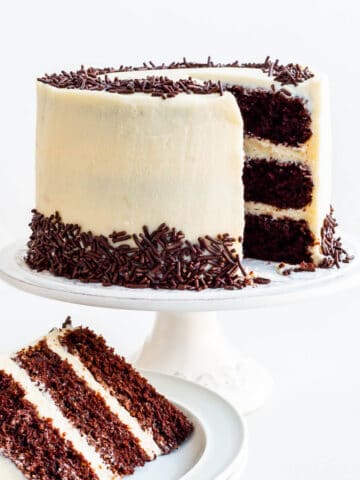
This caramel chocolate cake is made from layers of chocolate with salted caramel filling and chocolate fudge frosting.
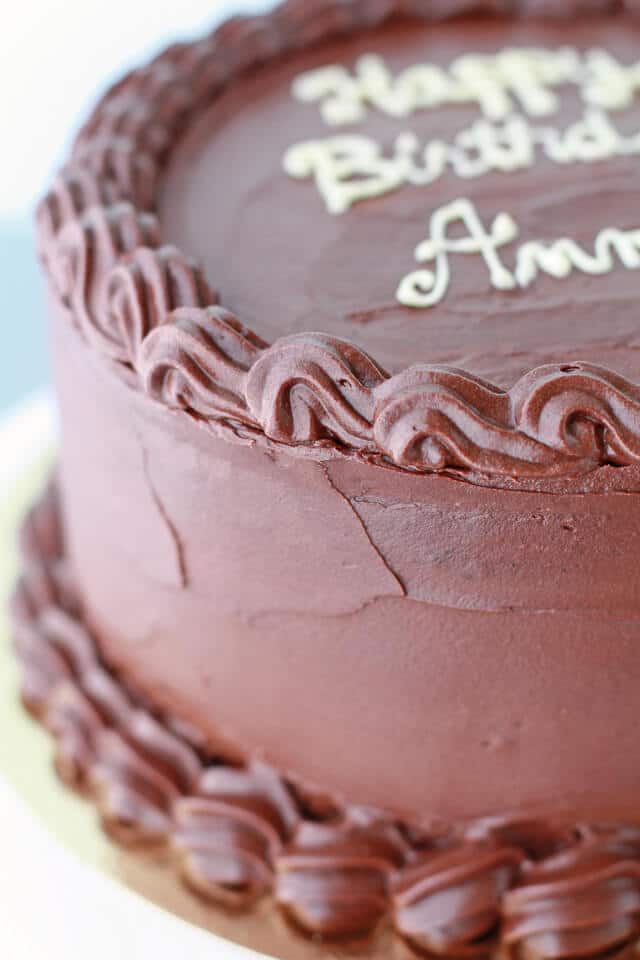
There's something so nostalgic about a chocolate layer cake made with chocolate fudge frosting. It's perfect as is, but most adults would agree that sneaking layers of caramel between the layers makes the classic even better.
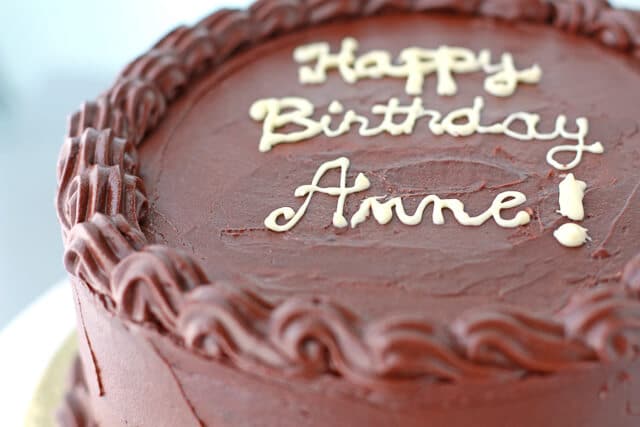
This is actually my second attempt at a chocolate caramel layer cake and it held together MUCH better than the first.
To make this version of the cake, I baked three 8-inch chocolate cake layers (using another great recipe from Anna Olson's Back to Baking available on Amazon—I highly recommend this book if you don't have it!).
Take the time to prepare the cake pans before baking, by buttering the pans, lining the bottom with parchment, and dusting the sides with flour. This way your cakes will slide right out, without getting stuck to the pan. I sandwiched caramel sauce (that I cooked down to thicken it first), and a delicious fudge frosting (also from Anna Olson's available on Amazon) between the layers.
How to store this cake
Given this chocolate layer cake has a salted caramel filling and a chocolate frosting, it's best to store it in the fridge. If you've cut into the cake, just cover the cut edges with pieces of parchment to prevent them from drying out. Place the cake in the fridge until the frosting is firm and cold, then cover the whole thing with aluminum foil. You can store this cake for up to a week, or freeze slices for later.
For a detailed explanation, read about how to store cake.
📖 Recipe
Caramel Chocolate Cake
Equipment
- cake board
Ingredients
For the cake layers:
- 300 grams bleached all-purpose flour plus a little extra for dusting cake pans
- 95 grams Cacao Barry extra brute cocoa powder
- 7.5 mL baking powder
- 2.5 mL baking soda
- 2.5 mL Diamond Crystal fine kosher salt
- 170 grams unsalted butter room temperature, plus a little extra melted butter for the pans
- 436 grams light brown sugar
- 4 large egg(s) room temperature
- 10 mL pure vanilla extract
- 375 mL buttermilk (1 % fat)
Caramel filling
- 200 grams granulated sugar
- 60 mL water
- 58 grams unsalted butter room temperature and cut into cubes
- 125 mL whipping cream (35 % fat) warmed on the stove
Fudge frosting
- 170 grams unsalted butter
- 170 grams 70 % dark chocolate
- 45 grams Cacao Barry extra brute cocoa powder
- 15 mL pure vanilla extract
- 345 grams icing sugar
- 250 mL sour cream (14% fat)
For assembly:
- white chocolate melted for writing on cake
Instructions
For the cake layers:
- Preheat the oven to 350°F (175 °C). Prepare three 8x2-inch (20.5x5 cm) cake pans by evenly brushing with melted butter, flouring, and lining the bottom of each with a parchment round. Set aside.
- Sift the flour, cocoa, baking powder, baking soda, and salt into a medium bowl. Set aside.
- In the bowl of an electric mixer fitted with the paddle attachment, cream the butter and the brown sugar.
- Add the eggs, one at a time, beating between each addition until light and fluffy. Add the vanilla and beat again.
- Add the sifted dry ingredients, alternately with the buttermilk. Be sure to scrape the sides and the bottom of the mixture with a spatula to make sure every ingredient is evenly incorporated.
- Divide the batter between the three pans, smooth, and bake the cakes for about 30 minutes or until a cake tester inserted into the middle comes out clean.
- Let the cakes cool for 20 minutes before unmolding onto a wire rack to cool completely.
Caramel filling
- Set out all your ingredients before beginning. This is very important. Have the cream heating on a back burner so that is is warm, but don’t let it boil.
- In a deep 3 quart saucepan, pour the sugar, and then the water. Don’t stir it.
- Bring the mixture to a boil over medium–high heat. If there’s sugar stuck on the sides of the pan, carefully brush it with a heat-resistant silicone brush dipped in a little water.
- Continue to boil the caramel until it turns amber in color (the temperature will read somewhere between 350°F and 360°F with a candy thermometer). As soon as the caramel has reached the desired color, slide the pan off the heat, and turn the burner off.
- Slowly and carefully drop in the cubed butter (it will bubble and erupt so be careful!). Pour in the cream, slowly and carefully, a quarter at a time.
- When the bubbling has calmed down, begin to gently whisk the caramel until it is smooth and homogeneous.
- Put the caramel saucepan back on the burner, and cook it to 242°F to thicken it.
- Let the caramel cool to room temperature before sandwiching it between the cake and frosting layers.
Fudge frosting
- Melt the butter and the chopped chocolate together in a small bowl over a double boiler. When completely melted and uniform, set aside to cool to room temperature.
- In the bowl of an electric mixer fitted with the paddle attachment, beat together (starting on low) the cocoa powder, vanilla, half the icing sugar, the cooled melted chocolate mixture and the sour cream. When the mixture is smooth, add the rest of the icing sugar, and continue beating til it’s smooth and fluffy.
To assemble:
- Peel away the parchment and trim the layers using a serrated knife so that each is flat and leveled.
- Begin assembling the cake directly on an 8-inch cake board placed on a cake turntable, beginning with the first layer of chocolate cake. Pipe on one even layer of frosting (using a 10-mm round piping tip). Smooth it with an offset spatula, then pipe a border of frosting (to hold in the caramel and better adhere the layers).
- Dollop the caramel (or drop small spoonfuls) over the frosting but staying within the piped border.
- Top with the next layer of cake, pressing slightly.
- Again, pipe on a layer of frosting, smooth it, then pipe a border. Dollop with caramel (you may not want to use it all).
- Top with the third layer of cake, pressing slightly.
- Using an offset spatula, crumb coat the top and sides of the cake. Set the cake in the fridge to firm up for 20 minutes or so. Then frost the cake with an even layer of frosting. Again, put it in the fridge to set.
- Transfer the cake (carefully) to the 10-inch cake board (I glued the two boards together with Elmer’s white glue) or the serving plate. Pipe a border around the top of the cake, and along the base edge (I used a star tip—D7).
- If desired, write a message on the cake with melted white chocolate.
- Store the decorated cake in the fridge to set up. Pull out of the fridge 20 minutes or so before serving to let it warm slightly.
Notes
- I like to use an extra dark cocoa powder like the cocoa from Cacao Barry available on Amazon
- For the dark chocolate, I used Cacao Barry Ocoa 70 % dark chocolate.
- When baking chocolate cakes, if you find dusting cake pans with flour leads to a white finish on the outside of the cake, you can try dusting the pans with sifted cocoa powder instead, which will lead to a darker finish.

michelle says
I made this cake and it was fabulous! I used 2% Greek Yoghurt instead of sour cream for the icing because that's what I had on hand and it turned out perfect. Thanks!
Anonymous says
Icing is wayyyyyy too thin. Ran down the sides of my cake. What did I do wrong?
Janice Lawandi says
That's strange because I've made this frosting recipe a few times. I wonder if you let the melted chocolate mixture cool enough before proceeding. If you didn't, that could be the problem! Good luck!
Anonymous says
The recipe for the icing makes no mention of when to add the sour cream. I'll just add it with the 2nd half of the sugar and hope for the best!
Janice Lawandi says
You're right! Sorry about that (I'll update the recipe). I just blended it in at the end, but I think you could also add it to the mixer bowl with the cooled chocolate mixture, vanilla and first half of icing sugar. Let me know how it turns out!
veggiebentolove says
The piping and the photography are stunning! Nicely done 🙂
Julia says
Stunning photography!
Medeja says
happy birthday to your mom! And the cake looks pretty good for me! I am sure I wouldn't be able to decorate it so nicely.. :/
Melissa@Eyes Bigger says
my piping is ridiculously bad. this looks pretty damn fine to me. and I'll take a cake from you any day no matter what the piping looks like... just don't think it would ship very well (but then, it wouldn't matter how the piping was would it!?)
Caroline says
Oooh, I like that. Would you happen to have a picture of a slice of the cake so that we can see the layers?
Jan says
Unfortunately, I don't because we cut the cake at night and it was way too dark to photograph 🙁
Hopefully, I'll make it again soon, and update the post with a picture of a slice!