
This super easy maple syrup pie is made with a simple food processor all-butter pie dough and a custard-like maple syrup filling. This pie needs to chill so you can make it the day before serving it.
One of our favourite ways to enjoy maple syrup, besides in maple fudge and maple cream cookies, is in a maple syrup pie, which is usually served in the spring during the sugaring-off season and the months when maple syrup is produced (March and April).
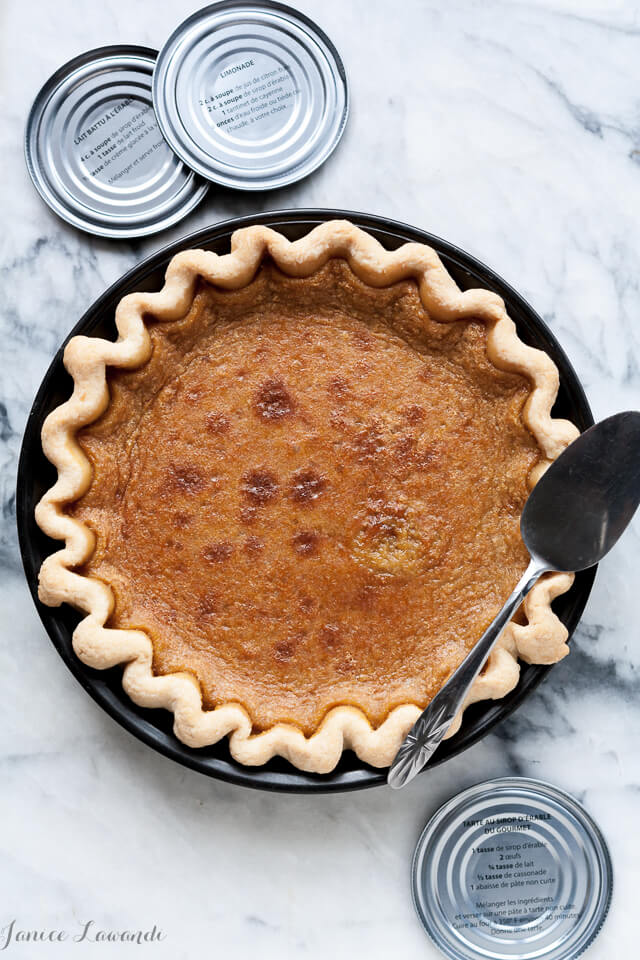
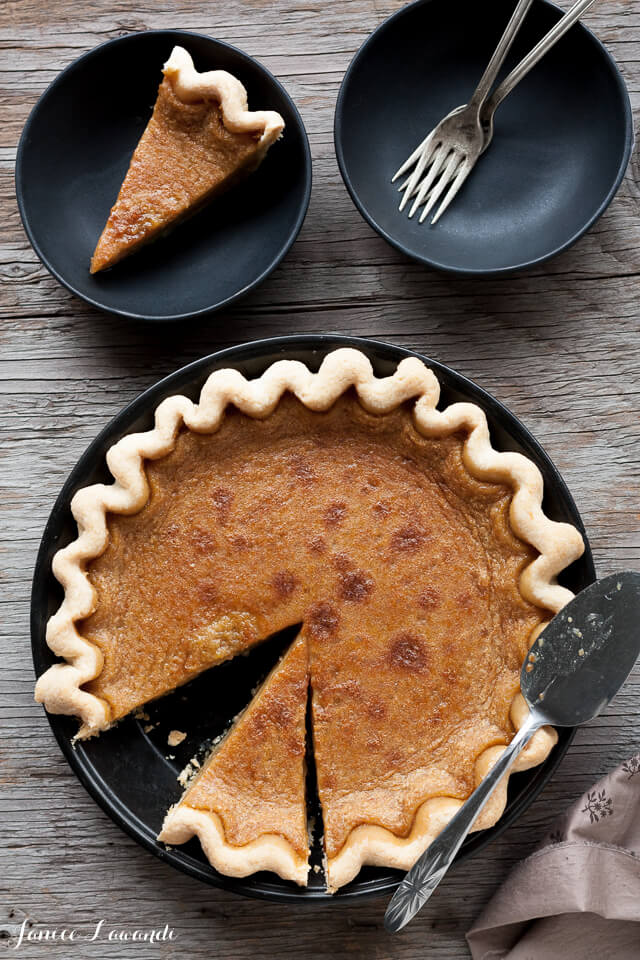
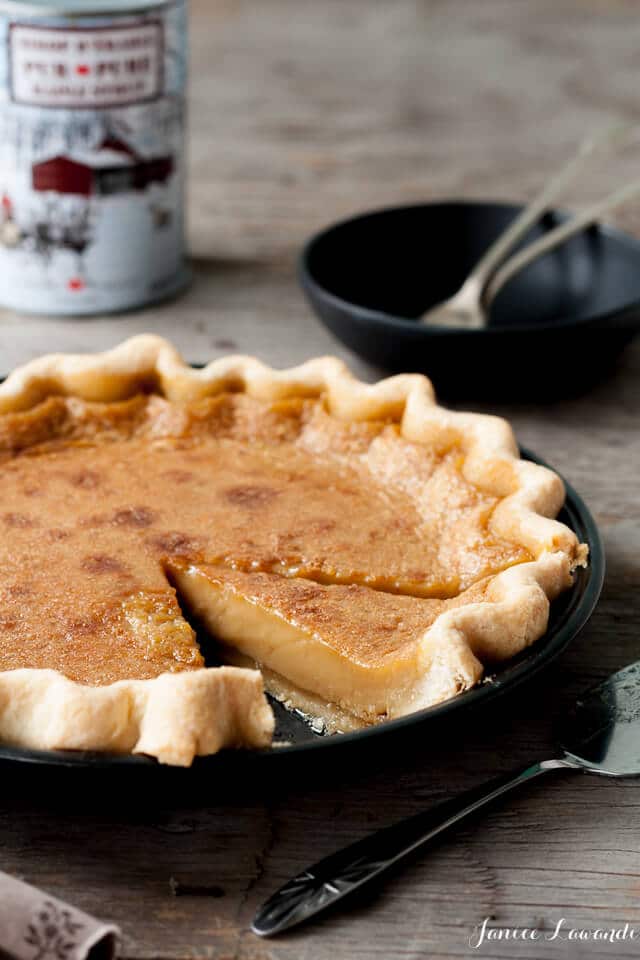
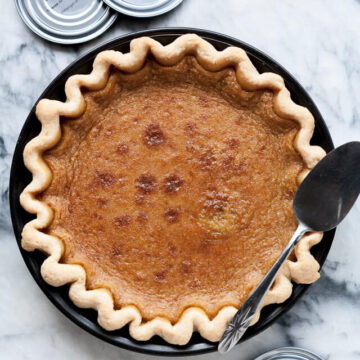
A maple syrup pie is also referred to as a maple pie or even a sugar pie. Maple pie is traditionally a single-crust pie with a filling made of eggs, maple syrup, milk or cream.
The maple filling is adapted from a recipe printed on the lids of some cans of Quebec maple syrup. The original recipe called for brown sugar, but I used maple sugar because I didn't want any other sugar flavours interfering with my beloved maple. The filling is like a maple custard that is perfectly set, smooth, and with a pronounced maple flavour. I encourage you to serve this pie à la mode with homemade vanilla bean ice cream.
Jump to:
What You Need to Make This Maple Pie
- pie crust-store-bought or homemade (you can make pie crust in the food processor, pie dough by hand, or flaky pie crust in a stand mixer)
- maple syrup-use a medium or dark maple syrup which has more flavour. Don't confuse maple syrup and maple-flavoured pancake syrup (which is corn syrup)
- maple sugar-available in grocery stores and farmer's markets in the North-East of the US and Eastern Canada, but you can also buy it online
- eggs-use large eggs or the texture of the filling may be looser or firmer
- milk-I prefer to make this pie with whole milk (3.25 % fat)
Inevitably, when you make a pie, you will be left with a pile of pie dough scraps. Gather them, press them together to shape them into a disk, and use them to make pie crust cookies!
Please see the recipe card for the exact ingredients and quantities.
Substitutions and Variations
- Sugar-Some add brown sugar to the filling, in which case, less maple is used. Though brown sugar does add a nice molasses flavour to the filling, some may add more brown sugar than maple syrup to reduce the costs of making maple pies since brown sugar is much cheaper than maple syrup and maple sugar. For this maple pie, I used a combination of maple syrup and maple sugar.
- Flour-Some recipes also add a little flour to the maple pie filling which acts as a thickener and also ensures that the consistency of the filling is more even throughout the pie after baking. Without the flour, you may notice a little maple syrup between the filling and the baked crust.
Whether or not you add flour to the filling is a matter of personal preference. Maple pie is, by far, one of my favourite maple syrup recipes.
How To Make a Pie With Maple Syrup
Maple pie is as easy to make as most single crusts pies, like these pumpkin tarts or this apple butter pie:
- Make the pie dough: The crust is made from an all-butter pie dough made in the food processor, so it truly doesn't get easier than that.
- Chill the pie dough: Chilling the pie dough helps the gluten relax a little and allows the butter to firm up. The water in the recipe hydrates the flour as the dough chills, making the pie dough easier to work with.
- Roll out the pie dough and line the pie pan: I like to use a French rolling pin and a metal pie plate when I make pies. I find I have more control when I roll out doughs with tapered French rolling pins and the metal pie pans help the bottom crust bake better and brown more. Here's an example of a dark metal pie pan from Amazon and a French rolling pin from Amazon so you can see examples of what I mean.
- Chill the unbaked crust while you make the filling
- Whisk together the maple pie filling ingredients, a mixture of maple syrup, maple sugar (or brown sugar), eggs, and milk.
- Pour the filling into the chilled unbaked pie shell.
- Bake the pie. The filling will puff and bubble and you may end up with a few caramelized spots. All signs of a good maple pie.
- Cool and chill. The toughest part of making a maple pie is the waiting because not only does the pie have to cool to room temperature, but then you also have to chill it in the fridge for several hours to ensure the filling is properly set. Patience!
If making pie crust from scratch scares you, be sure to check out my pie crust masterclass, which includes video tutorials for making pie crust in the stand mixer, food processor, and by hand!
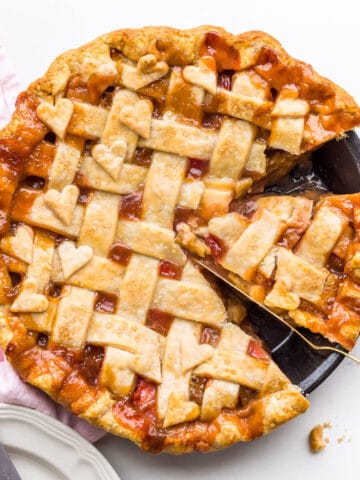
If you are looking for a more traditional fall fruit pie with lots of maple syrup flavour, try my maple apple pie. Or if you hate making pie dough, you might prefer this maple apple clafoutis recipe.
This maple pie recipe makes a great maple-flavoured sugar pie. I baked this pie on the bottom rack of my oven, without blind baking the shell first, and it was baked just enough on the bottom. I appreciate being able to skip the blind baking step. Ain't nobody got time for that!
If you tried this recipe for the best maple syrup pie (or any other recipe on my website), please leave a ⭐ star rating and let me know how it went in the comments below. I love hearing from you!
📖 Recipe
Maple Syrup Pie
Ingredients
For the crust
- 219 grams bleached all-purpose flour
- 115 grams salted butter cold, cut into cubes
- 75 mL cold water more or less
For the maple filling
- 250 mL pure maple syrup medium grade
- 100 grams maple sugar
- 2 large egg(s)
- 188 mL whole milk (3.25 % fat)
Instructions
- In the bowl of a food processor, pulse together the flour and the Stirling Creamery butter until the mixture resembles a fine crumble. Add the water, bit by bit, until a dough forms. Pat the dough into a disk and wrap in plastic wrap. Refrigerate for at least 45 minutes.
- Preheat the oven to 375 °F (190 °C). Roll the dough to ⅛" thick (~14" diameter circle) and transfer to a pie tin (preferably dark metal). Trim and crimp the edges. Chill while you prepare the filling
- In a medium bowl, whisk together the syrup, sugar, and eggs, then whisk in the milk.
- Pour the filling into the chilled tart shell and bake on the bottom oven rack for approximately 50 minutes (note the filling will still seem very fluid and jiggly, but you will notice some spots where it's beginning to bubble and brown).
- Let the pie chill on a wire rack for at least 4 hours, then overnight in the fridge.
Notes
- This recipe calls for Diamond Crystal fine Kosher salt. If using regular table salt, add half the amount or the recipe may be too salty!
- I like to make pie crusts with higher-fat European butter (82-84 % fat) if possible.
Explore More With AI
Nutrition
Nutrition information is automatically calculated and should only be used as an approximation.
Other recipes to make with maple syrup
Maple syrup is such a unique source of sweetness that adds so much flavour to recipes. Maple syrup tastes great and can be used to make:
- maple butter, also known as maple cream, a creamy maple spread made from pure maple syrup
- maple apple pie, where you use maple syrup to flavour the apples in a traditional double crust apple pie
- maple cinnamon buns with layers of maple sugar rolled in between layers of buttery brioche
- maple walnut fudge, a classic fudge flavour that is always a hit
I do my best to bake with the finest ingredients. Stirling Creamery, a Canadian company, has provided the butter for this post.


Ann says
Hi, can i make these into mini muffin size pies, and what would the baking time and temperature be?
Janice says
Hi Ann, Yes, you can! They’d take 20 to 30 minutes at 375ºF, I think, if you make mini pies using a regular muffin pan. You could also follow the baking directions for the butter tarts where I blind-baked the mini crusts first in a muffin pan to make sure they bake properly before baking with the filling. Here’s the recipe https://bakeschool.com/an-all-butter-crust-recipe-my-love-hate-relationship-with-butter-tarts/
Ann says
Thank you so much
Annette Taylor says
Beautiful site!
So happy to read that among ingredients in your Maple Syrup Pie, was Stirling Creamery specialty butter. I live in Stirling and because the creamery is located on the main street, one can drive by and in the large front glass windows, see mounds of freshly made butter on the large tables.
Can you explain more thoroughly, the unique qualities of the butter you used.
Thank you,
Annette Taylor.
Shira says
Yum. I have a question about your beautiful crust! I always shape mine the way you've shaped yours, with little waves, but half the time the edge shaping melts away when the pie is in the oven. The waves will be somewhat intact, but some parts will have puffed up and lost their shape. Do you have advice for how to keep the crust edging looking good? I've tried shaping it then putting it back in the fridge to solidify some more, but it doesn't help that much. Any thoughts? Thank you!!
Janice says
Such a great question, Shira! If you notice puffing, to me that means you had a big piece of butter in that area that melted and the water in the butter forms steam and a pocket in the crust (that's how you get the flaky layers in crusts).
I did this crust in the food processor and pulsed it so the butter pieces were quite small and fine.
I'd love to see your crust recipe because I wonder if you also have more butter in yours. More butter, means more flaking and probably more puffing in areas of the dough.
If your crust were to lose its shape while baking but in a more melty kind of way, I would have assumed that your oven was too low so the butter melts and the dough loses its shape before the crust has time to set and dry.
Well, I hope some of this will make sense and help solve your crust mystery! Let me know what you think!
Shira says
Thanks for your thoughts on this! I just got a food processor, so maybe that will solve my problems. I've always worked in the butter by hand, so it's likely that there were bigger bits of butter in the crust.
I can't really remember which pie dough recipes I've used (I don't have a favorite so I tend to switch it up a lot) but I think I generally use a half butter/half shortening crust.
Janice says
I think crusts made by hand, with bigger chunks of butter, tend to be flakier, but if you do get to try this crust recipe, let me know how it compares!
I have trouble with shortening just because I'm so accustomed to handling butter. I am a little butter obsessed, haha!
Elizabeth says
Oh, I love collecting too. The dishes I own often dictate what I make. I love this beautiful pie so much... it's so pretty and looks so delicious.
Ashley | Spoonful of Flavor says
Everything about this pie is perfect! Maple syrup adds sweet flavor that is perfect for pie. I'll take a piece, please!
Alanna @ One Tough Cookie says
This looks absolutely delicious, and I love that you used the high-fat Stirling butter! It's great to finally have someone who makes it in Canada!
Ayngelina says
So delicious. What a great taste of Canada.
Jo-Anna@APrettyLife says
Too funny...your collecting sounds just like how I collect! I have an entire cabinet (and maybe some drawers) full of stuff just waiting for the perfect moment! And I collect recipes too...I really should try to make some of them one of these days! Glad you finally used one of the maple syrup lids...your pie looks delicious!