• Skip to primary navigation
  • Skip to main content
  • Skip to primary sidebar
  • Skip to footer
  • Start here
  • Baking 101
  • Recipes
  • Shop

The Bake School

menu icon
go to homepage
  • Start here
  • Baking 101
  • Recipes
  • Shop
  • Subscribe
    • Facebook
    • Instagram
    • Pinterest
    • Twitter
  • subscribe
    search icon
    Homepage link
    • Start here
    • Baking 101
    • Recipes
    • Shop
    • Subscribe
    • Facebook
    • Instagram
    • Pinterest
    • Twitter
  • ×

    Home » Sauces & spreads

    Published on: March 2, 2019 by Janice; Updated on: March 6, 2023 51 Comments

    How to make homemade maple butter

    3.0K shares
    • Facebook569
    • Yummly
    • Email
    Jump to Recipe Print Recipe
    homemade maple butter spread onto whole grain toast

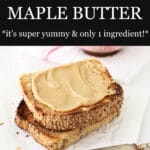
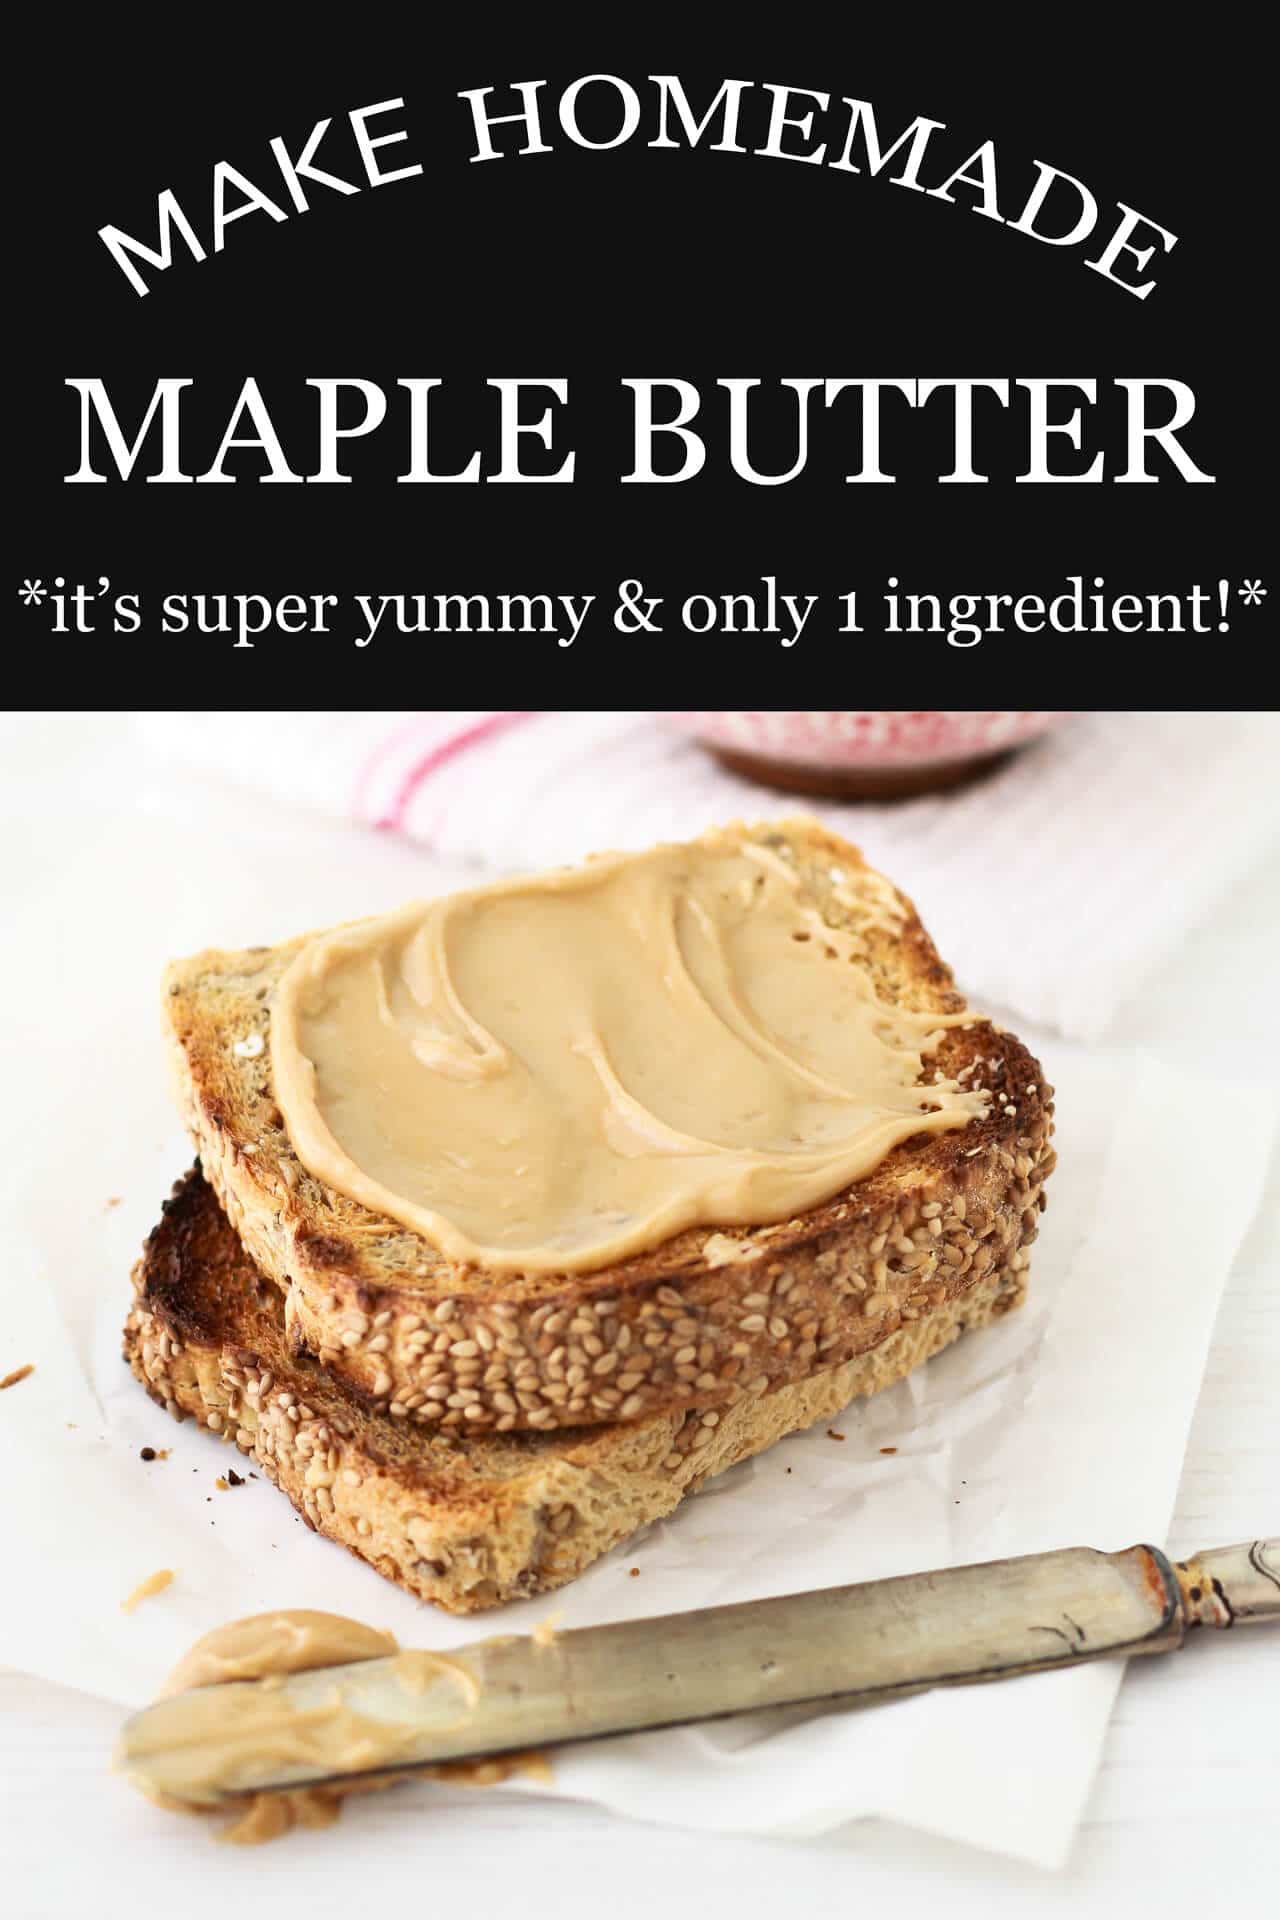
    If you've ever wondered how to make maple butter, this post is for you. Making maple butter from pure maple syrup is fairly easy. Grab your digital thermometer and follow these steps to transform pure maple syrup into a pure maple cream spread.

    homemade maple butter spread onto whole grain toast
    Disclosure: As an Amazon Associate, I earn from qualifying purchases.

    Jump to:
    • What it is
    • What's in it
    • How to use it
    • How to make it
    • Trick to prevent sugar syrups from boiling over
    • Troubleshooting and frequently asked questions
    • Storage and shelf life
    • 📖 Recipe
    • Where to buy it (if you have zero desire to make it at home)

    What it is

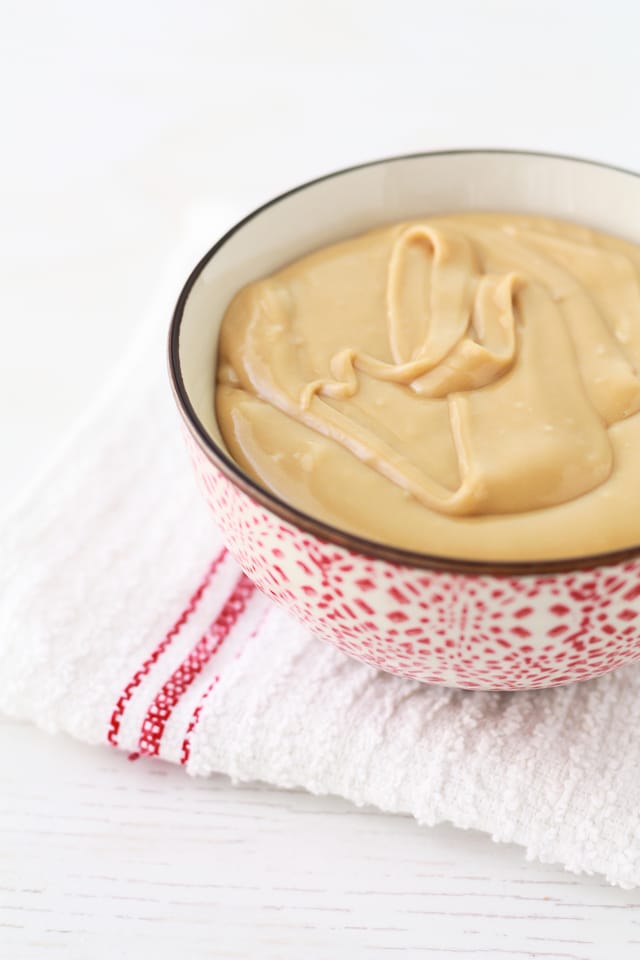
    The name maple butter, also known as maple cream, is a misleading name: there's no cream or butter in pure maple butter. Maple butter is a spread made from pure maple syrup that has been boiled, cooled, and whipped so that the syrup crystallizes in just the right way to give it this spreadable smooth, creamy texture.

    Maple butter is made through the controlled crystallization of sugar. So, while you are trying to prevent sugar crystallization when making caramel sauces, with maple butter, you are aiming to force the sugar to crystallize in just the right way to achieve the correct, soft, smooth, spreadable consistency. It's readily available in the New England area, as well as Quebec and Ontario, where most maple products are made. In Quebec, it may be labelled as "beurre d'érable."

    Maple butter versus maple compound butter

    Though some will post "easy maple butter" recipes that are made by creaming together softened butter and maple syrup, that's actually not what maple butter is at all! Don't be fooled! Real maple butter is made from pure maple syrup. It's a maple spread that is vegan and dairy free. If you want to make maple compound butter by mixing butter and maple syrup, that's another option and you can follow this honey butter recipe.

    Homemade maple butter on toast smeared with a knife from a red and white bowl of maple butter

    What's in it

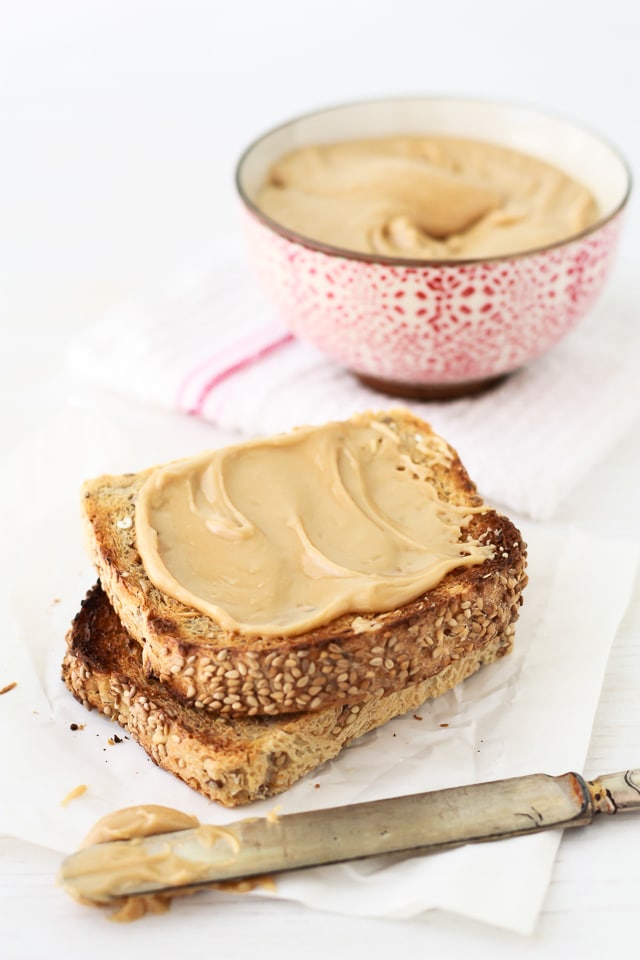
    Maple butter is made from pure maple syrup and nothing else. You may also add a tiny amount of vegetable oil (or canola oil) when you make it to prevent the maple syrup from boiling over, but there are no other ingredients in pure maple butter.

    How to use it

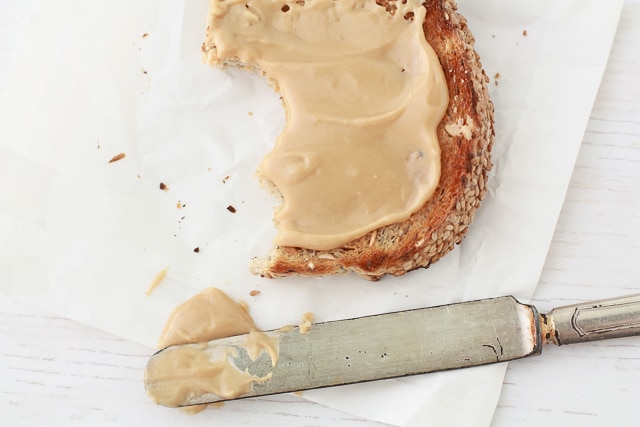
    There are so many recipes you can make with maple syrup. You can use maple syrup to sweeten an apple pie. You can use it in this maple fudge recipe or a maple syrup pie. However, maple syrup is quite fluid and "loose" so it doesn't make the best topping or filling in certain instances. This is why maple butter is more interesting in baking: it has less water!

    Assembling a sheet pan of maple cookies by spreading a maple cream filling on one maple shortbread cookie, and topping with another.

    This delicious, creamy, thick maple spread is a more practical way of baking with maple syrup without the mess of dealing with the extra water in the syrup. In instances where you want a maple-flavoured filling, maple butter is what you should use:

    • sandwich it in between two cookies to make maple cream cookies where the maple butter is mixed with butter and maple sugar to make a filling for maple shortbread cookies
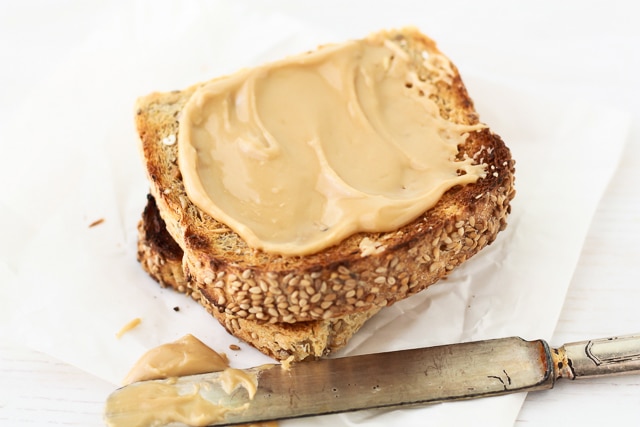
    • spread it on toast for breakfast, like this no-knead cinnamon raisin bread or this Irish soda bread with raisins
    • spread it on homemade brioche bread for the ultimate decadent breakfast!
    • eat it straight with a spoon

    How to make it

    This maple butter recipe is the simplest of the maple syrup recipes and it's made from only 1 ingredient, as a rule: maple syrup. The science behind maple butter is relatively simple but the temperature is key to success!

    Homemade maple butter and toast smeared with a knife
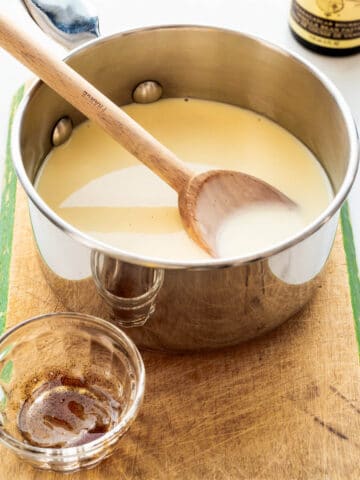
    • Boil maple syrup until it reaches 235°F (that's 112ºC), which is 22–24°F (12ºC) over the boiling point of water. By doing this, you are basically concentrating the sugar, making it easier to crystallize because all the tiny sugar molecules are now really close to each other in the syrup.
    • Cooling the concentrated syrup in an ice bath quickly drops its temperature. This is an essential step favouring crystallization (and specifically smaller, finer crystals over bigger, chunky crystals).
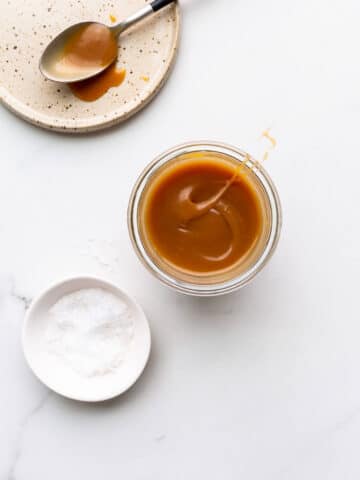
    • Stirring the cooled mixture for a very long time (crystallization is a process, so patience is key here): eventually, it will turn opaque/creamy-looking and become maple butter.

    I encourage you to sample after cooling the syrup both before and after the long stirring process because the mouthfeel is really quite different, and that's how you know it's "done". However, avoid sampling the boiling hot syrup. It may be tempting, but it'll burn you really badly. Hungry for more recipes with maple syrup, I have a whole category of posts dedicated to baking with maple syrup to explore.

    Homemade maple butter in a red and white bowl

    Trick to prevent sugar syrups from boiling over

    Though maple butter or maple cream is made from pure maple syrup, you might have noticed that this maple butter recipe also calls for ¼ teaspoon of canola oil (you could also add a little butter, if you prefer). There's a reason for that oil. If you've ever boiled a large amount of maple syrup, you will probably have noticed that boiling maple syrup has a tendency to boil over and make a real mess of your stove if you aren't careful.

    By adding a tiny amount (¼ tsp) of canola oil to the pot, the chances of maple syrup boiling over are greatly reduced because the oil helps burst the larger bubbles. This trick with oil works with boiling pasta water, though some purists will argue that the little bit of oil may interfere with the sauce sticking to the pasta. I'll leave that discussion for another time.

    Troubleshooting and frequently asked questions

    It's too hard to beat

    Temperature is key when making maple butter, just like when you are making maple fudge. Cooking the syrup enough to achieve the right concentration of sugar is key, but the cooling phase is also very important. You need to cool the syrup enough that the sugar will crystallize, but if you cool it too much, it will harden into a block that is impossible to whip.

    So how do you know how much to cool the mixture? A thermometer is your best bet, but it's important to use the right thermometer for this job. Your thermometer has to be instant-read, which means your thermometer is fast to record a change in temperature. Some cheaper thermometers are not instant read. They can take several minutes to register an increase or a drop in temperature. This kind of thermometer will not work here and you will inevitably cool the mixture too long. It will be too hard to beat.

    I use a Thermoworks Thermapen, which can register temperatures and temperature changes within 3 seconds. This means you can catch the maple butter at exactly the right temperature! The Thermoworks ChefAlarm thermometer would be better suited for this recipe because of it's a hands-free probe that comes with a pot clip.

    Thermoworks DOT probe thermometer
    Thermoworks Thermapen Mk4
    Thermoworks ThermoPop

    It's still liquid after beating

    If you beat your cooked/cooled maple syrup for a long time and it never forms a creamy, opaque spread, this means the syrup wasn't concentrated enough. Your best bet is to transfer the mixture back to the pot and cook it again.

    Homemade maple butter smeared on toast with a knife

    Storage and shelf life

    Maple butter, also known as maple cream, is a creamy spread made from 100% pure maple syrup. This spread is dairy free and vegan. Maple butter can be stored at room temperature in a sterilized mason jar for up to a month, but it's best to refrigerate maple butter to help improve shelf life.

    At room temperature, the maple cream is more likely to break down and liquefy: maple syrup may separate out. At room temperature, mold may also be an issue to watch out for. In the refrigerator, maple butter can be stored for up to 6 months. By the way, the same goes for maple syrup: store maple syrup in the fridge too to reduce mold production.

    📖 Recipe

    Homemade maple butter
    Save Recipe Saved! Print Pin
    4 from 4 votes

    Maple butter

    Prevent your screen from going dark
    Ever wonder how to make maple butter from pure maple syrup at home. This maple butter recipe will help you make creamy smooth maple butter from pure maple syrup at home.
    Course Breakfast
    Cuisine American
    Keyword maple butter, maple cream
    Cook Time 20 minutes
    Total Time 20 minutes
    Servings 24
    Calories 56kcal
    Author Janice

    Equipment

    • ChefAlarm thermometer
    • 5-quart KitchenAid Artisan mixer
    • Mason jars

    Ingredients

    • 500 mL (2 cups) pure maple syrup, I used Grade A, amber syrup from Quebec
    • ¼ teaspoon (¼ teaspoon) canola oil

    Instructions

    • In a deep saucepan, boil the maple syrup with the oil, until it reaches about 235°F (112ºC) on medium–high heat. Monitor the temperature using a fast-reading digital probe thermometer like this one from Thermoworks.
    • Immediately, transfer the boiled syrup to your stand mixer bowl, and drop the bowl into a big ice bath to cool the syrup down to about 60°F (15–16ºC). Then let the syrup warm back up to room temperature.
    • With the paddle attachment, beat the syrup on low for a very, very long time (like 30 minutes even) until it turns opaque and the color of sesame butter (the texture on your tongue when you sample it will go from syrupy at the beginning of the process to very finely powdery).
    • Quickly transfer the maple butter to a large jar and store in the fridge.
    • If the maple butter separates at any point, just give it a good stir before using.
    Give backIf you enjoy the free content on this website, say thank you!

    Notes

    Temperature is very important when making maple butter (or maple cream) at home: use a thermometer so that you boil the maple syrup to the correct temperature (235ºF or 112ºC) and then you have to cool it down to the correct temperature (60ºF or 15–16ºC). This digital probe thermometer from Thermoworks is a good option: the DOT
    Tried this recipe?Mention @bakesomethingawesome or tag #bakesomethingawesome!

    Nutrition

    Calories: 56kcal | Carbohydrates: 14g | Sodium: 1mg | Potassium: 46mg | Sugar: 12g | Calcium: 23mg

    Where to buy it (if you have zero desire to make it at home)

    Maple butter spread, also called maple cream, is available where other maple products are sold, but as you can see, you can also make it at home. In Canadian grocery stores, it's either in the aisle with the maple syrup or stocked next to the breakfast spreads (jams, jellies, peanut butter, caramel spreads). In Quebec and Ontario, maple producers usually have stores where you can stock up on maple products, including maple syrup, maple butter, maple sugar, and maple flakes. Farmers' markets in Ontario, Quebec, and the New England area usually have maple stands run by local maple producers where you should be able to find maple butter.

    More Recipes for dessert sauces

    • Rubbing lemon zest into granulated sugar in a bowl to make lemon sugar.
      How to make lemon sugar
    • A saucepan of homemade crème anglaise (custard sauce) that is flavoured with vanilla bean paste.
      How to make crème anglaise
    • Homemade salted caramel sauce in a jar with a little pinching bowl of sea salt and a ceramic plate with a spoon with salted caramel on it
      How to make salted caramel sauce
    • sweet flavoured butters
      Sweet compound butters
    3.0K shares
    • Facebook569
    • Yummly
    • Email
    • Facebook
    • Instagram
    • Pinterest
    • Twitter

    Baking resources

  • Baking conversion charts
  • Baking ingredients and pantry staples
  • Baking substitutions
  • Common baking conversions
  • Choosing baking pans
  • How to measure ingredients for baking
  • Mixing methods
  • Reader Interactions

    Comments

    1. Liz says

      May 24, 2013 at 1:57 am

      I am so making this soon! Since we have so much maple syrup in our area I can't pass this recipe up! Thanks for sharing! 🙂

      Reply
      • Janice Lawandi says

        July 28, 2013 at 9:15 pm

        Definitely! Let me know how it goes 🙂

        Reply
    2. Sarah @ The Woks of Life says

      July 25, 2013 at 2:18 am

      Saw this on tastespotting. This looks beyond easy. I'm so making this!!

      Reply
      • Janice Lawandi says

        July 28, 2013 at 9:15 pm

        You must! Seriously! I had no idea how good maple butter was until I made it, and then I couln't stop eating it 😉

        Reply
    3. Kelly @ IdealistMom.com says

      July 26, 2013 at 7:32 pm

      Thank you for this tutorial! Pinning it now 🙂

      Reply
      • Janice Lawandi says

        July 28, 2013 at 9:15 pm

        I hope it helps and that you get to make maple butter soon!

        Reply
    4. Jamie says

      September 07, 2013 at 3:08 am

      maple syrup for the win!! this looks awesome

      Reply
      • Janice Lawandi says

        September 07, 2013 at 8:54 pm

        I know, lol! I don't think I could live without maple. Thanks for stopping by 🙂

        Reply
    5. Lynn @ TheActorsDiet.com says

      September 07, 2013 at 5:13 pm

      Oh genius.

      Reply
      • Janice Lawandi says

        September 07, 2013 at 8:54 pm

        Thanks. I wish I can claim that I invented this one 😉

        Reply
    6. Unknown says

      September 07, 2013 at 10:37 pm

      This looks incredible. Two questions: 1. do the temperatures need to be exact - do I really need a candy thermometer? 2. Will a hand-mixer do if I don't have a stand mixer? Thanks!!

      Reply
      • Unknown says

        September 07, 2013 at 11:13 pm

        thank you so much!!!

        Reply
      • Janice Lawandi says

        September 07, 2013 at 10:51 pm

        Hand mixer is definitely an option. The beating is a little long, so you will have to stand there holding the hand mixer for awhile, but it'll definitely work! As for the temp, I highly recommend you get a candy thermometer (they even have them at the grocery store!) but if you can't, you can test the maple syrup temp by dropping a little in a cup of cold water: it should be just at the soft ball stage. Here's a chart explaining this: https://www.craftybaking.com/howto/candy-sugar-syrup-temperature-chart

        Reply
      • Janice Lawandi says

        September 08, 2013 at 9:35 pm

        My pleasure! Please let me know how it goes 🙂

        Reply
    7. Jennifer Grubb says

      September 28, 2013 at 2:38 am

      Does anyone know if you can waterbath can this?

      Reply
      • Janice Lawandi says

        September 28, 2013 at 7:42 pm

        I'm not positive, but I think canning is possible BUT the maple butter separates with time, so if you store it too long, then you will have a syrup layer over the butter. According to this site, it's best to freeze it for long term storage to preserve texture and flavor: https://www.goodwinmaple.com/faq Hope this helps!

        Reply
        • Penny says

          October 11, 2022 at 10:53 am

          I purchased maple butter this year at the store in 4 oz jars (commercial canning). Sometimes it does have a skim of maple syrup on top (separation over time). But if they can do it, you probably can too. I just wonder why the whole thing doesn't "melt" or uncrystalize when you boil it in the hot water bath. I'm guessing the processing time is very minimal after adding your jars & returning the water to a boil. My mom used to buy refrigerated maple butter when I was young. It never lasted long enough to worry about spoilage!

          Reply
    8. Colleen Clas says

      February 01, 2014 at 12:40 am

      About how long would this last in the refrigerator? Just curious.
      I am pinning this and would love to attempt this. I've been wanting to do this...cornbread with FRESH maple butter..
      Thank you!

      Reply
      • Janice Lawandi says

        February 03, 2014 at 4:13 am

        I am so glad you will be making this maple butter! It would definitely be excellent on fresh cornbread 🙂
        It's hard to say how long this keeps as websites recommend keeping up to 6 months. It's important to keep it refrigerated in a closed jar. And another thing to note: some syrup might separate out of the maple butter after storing for a little while, so you might have a layer of syrup over the maple butter in the jar. Hope that helps!

        Reply
    9. Samantha Whipps says

      February 10, 2014 at 5:47 pm

      I made this, but I'm not sure if I've done it right. XD it's still beating on my kitchenaid and the colour looks right but the texture seems very thin. Oh well, if it doesn't come together I'm still going to eat it. Perhaps I didn't cook it long or hot enough.

      Reply
      • Janice Lawandi says

        February 10, 2014 at 9:03 pm

        Definitely, still delicious even if it's a little thin 😉
        You are right, Samantha, it could be a temperature issue, but it also might keep crystallizing and "setting" as it cools. I find even when I think it's cooled, it still sets more a little afterwards. Good luck and let me know how it turns out in the end!

        Reply
    10. Aimee @ Simple Bites says

      May 23, 2014 at 10:08 pm

      I can tell you how long this lasts in the refrigerator: zero days because I will eat it all first!!

      I need to make this soon for my kids and impress them. 😉

      Reply
    11. Jasmyn says

      January 22, 2015 at 6:24 pm

      Three questions...

      1. We don't have a stand mixer. Will it work with either a blender or an electric mixer? Does it really have to be a half hour of mixing?

      2. Since real maple syrup is in low abundance here in Hawaii and, subsequently, ridiculously expensive, we've always made our own out of corn syrup and maple extract (or is it called maple flavoring?)... would it work with that or would it HAVE to be maple syrup?

      3. I also have a barley malt syrup. Would it work with that, too? I'd love a malt butter!

      Reply
      • Janice says

        January 25, 2015 at 9:25 pm

        Hi Jasmyn,
        To answer your questions:
        1. I think an electric handheld mixer should work but yes it really does have to mix for that long, which is why a stand mixer makes it even easier. Technically you could even make this by stirring with a wooden spoon, but personally I'm too lazy to mix something by hand for that long...
        2. you definitely cannot add in corn syrup to the maple syrup because the corn syrup will prevent the crystallization process of the maple syrup, so don't try adding in corn syrup. I wrote a post about sugar crystallization explaining this: https://bakeschool.com/focus-on-crystallization/
        3. As for using barley malt syrup, to be honest, I'm not sure. I know malt syrups contain maltose (while maple syrup is over 90% sucrose). Again, I'm worried the malt syrup won't crystallize... If it's cheap, I'd give it a try, but I have never attempted to make malt butter (though now that you've brought it up, it sounds yummy!). If you try, let me know how it goes please!

        Good luck and I hope my answers were helpful!

        Reply
        • KK says

          October 05, 2019 at 5:36 pm

          I used a candy thermometer and mine is half rock hard in the pot after the ice bath. Help! What am I doing wrong?

          Reply
          • Kate says

            April 21, 2020 at 4:02 pm

            Mine too, had the throw the whole thing away. Such a waste

            Reply
            • Janice says

              April 21, 2020 at 5:42 pm

              Hi Kate,

              I'm sorry this happened to you. You could try to dissolve the crystallized syrup to recover it and use it for something else so that it doesn't go straight to the garbage. Could it be your thermometer isn't registering temperature correctly? I'm also wondering how fast your thermometer is to register. The last time I made this, I tested two thermometers simultaneously, and when I was cooling the mixture, they showed vastly different temperatures, so I could see how this could lead to the mixture getting colder than it should and crystallizing into a block. I think this could be the problem if you followed the recipe as written. Anyways, I'm sorry this happened. If you have questions, please write back or you can also email me!

      • April Sims says

        March 17, 2015 at 2:36 am

        I know this is back from January but I just wanted to throw in my 2cents on the mixer situation. As far as using corn syrup and barley syrup I have no clue about that subject.

        I've made this recipe 3 times (first 2 by hand after I burned the motor out on my hand mixer) this last time I used my ninja blender and it worked out excellently. You can only let the mixture cool to 135 ℉ to 125 ℉ so it can be easily removed from the pot. Based this recipe and many others the sryup must be taken off the burner and cooled in the pot or poured from a hot pot to an "iced" pot and then cooled down to 100 ℉ to room temperature ( around 60 to 70 ℉). Because my ninja a plastic container not glass one (if your blender is glass you don't have to let it cool as much but still will need some cooling) you can't pour the extremely hot mixture directly into it. But if cooled to the stir temperature it's a beast to get into the blender.

        Hope this helps about the mixing question.

        Reply
        • Janice says

          March 25, 2015 at 7:10 pm

          This is so helpful, April! Thank you for all the extra info and for taking the time to add in your suggestions in the comments here!

          Reply
        • Pookie says

          March 28, 2022 at 9:31 pm

          I make the occasional candy, mostly old fashioned fudge and some caramels. I am wondering how the mixture should be stirred as it's heating. For some caramels you shouldn't stir at all to encourage the right crystals to form, but with fudge you have to stir constantly to prevent burnt spots. Any insight on what to do here?

          Reply
    12. Teresa says

      March 25, 2015 at 9:08 pm

      Okay, this is one recipe I DON'T need to know how to make! Maple butter is my Kryptonite - I can't leave it alone. 🙂

      Seriously, though, this is a great recipe and it's cool to find out how to make it.

      Reply
    13. Shareba says

      March 26, 2015 at 4:15 pm

      I've seen maple butter for sale before, but I had no idea it was this "easy" to make. And by "easy" I mean, I think it looks simple enough but I will probably mess up my first batch 😛

      Reply
    14. Irena says

      June 01, 2015 at 9:19 am

      Thanks for sharing this great idea! However I have already tried to make this maple butter twice without success. I've followed the instructions exactly and used a candy thermometer to determine the temperature. It seems to me that my maple syrup is weird. Every time I heat it up to 235 F it already becomes similar to a thick very sticky caramel, that is extremly hard to stir. After I've been stirring it continuously, it changes its color but gets really really thick and sticky, more like a caramel ball than a spread. When I try it, I can't taste any cristals and the consistency seems ok, but its just not spreadable. The only thing I think might have made a difference is the maple syrup I've used. Has anyone had similar experience? I've used grade A maple syrup.

      Reply
      • Mark says

        December 17, 2016 at 10:30 am

        I've made it once by hand and it sounds like you didn't stir it enough. It takes a REALLY long time, almost an hour. I am going to try it in my kitchenaid this morning.

        Reply
    15. Blair says

      September 07, 2015 at 9:23 pm

      How long will this last after you make it? Can you freeze it? I suppose if you can hide it in the freezer, you wouldn't inhale it too quickly!

      Looks delicious!!

      Reply
      • Mark says

        December 17, 2016 at 10:31 am

        It will last a month in the fridge. You can freeze it indefinitely no problem.

        Reply
    16. Pam Tanner says

      December 21, 2017 at 1:00 pm

      I made this today and love the taste! However, I seemed to have stirred it just a bit too long... it became unpourable quickly and had to scrape it out of my pot. It 's not real pretty in the jar or easily spreadble. I'm wondering if I can restore it to a softer, smoother, more spreadable texture at the point?

      Reply
    17. Lori Bolton says

      March 13, 2019 at 11:08 am

      Hi I made this a couple of weeks ago and it worked and well didn't last long. Made it again last night and it just didn't set. It was too much like a caramel sauce. Put it in the fridge over night. Should I let it come to room temperature and then try to churn it in the mixer again? Or should I boil it again to 235, cool & remix?

      Reply
      • Janice says

        April 12, 2019 at 9:58 pm

        If it didn't set, even after refrigeration, I suspect that it might mean you didn't hit that key temperature when you boiled the syrup. It'll still be yummy served on ice cream, or pancakes, or crêpes, but if you want that spreadable thick consistency, you might want to reboil and go through the cooling and whipping process again. Hope that helps!

        Reply
    18. John says

      April 21, 2019 at 12:03 am

      Mine went quickly to the color of sesame butter within minutes with the hand mixture, was tough to beat but softened over time then turned to cookie dough consistency that relaxed. The entire beating process took less than 15 minutes. At what point did I go too far?

      Reply
    19. Allison says

      June 23, 2019 at 4:13 pm

      I have tried twice and can’t get it up to 235 degrees. It only goes up to like 225. i am using a powerful nuwave induction burner. What am I doing wrong?

      Reply
    20. Margaret Gerrietts says

      November 19, 2019 at 5:28 pm

      230 or 235?

      Reply
    21. Angie says

      April 02, 2020 at 12:30 pm

      Hello, I am making maple butter. boiled syrup to 240 degrees, cooled and put into the butter machine. churned it and it will not thicken. Need help. Thank you.

      Reply
      • Janice says

        April 02, 2020 at 5:12 pm

        Hi Angie, I'm sorry your maple butter isn't setting. Are you sure it's cooled enough? If it truly has cooled enough and it's still not thickening, then you will have to put the syrup back in a saucepan on the stove and heat it up again. Is it possible your thermometer isn't registering temperatures properly? It seems like the syrup didn't heat to high enough temperature and that's why it's not crystallizing.
        Also, I'm not familiar with a butter machine, but I'm guessing it just whips the liquid you put in it?

        Reply
    22. Karen says

      September 30, 2021 at 3:17 pm

      I thought I was ordering pure maple spread and go organic pure maple sugar. Can I open these jars and melt the sugar to become maple syrup and go from there??

      Reply
      • Janice says

        October 05, 2021 at 12:38 pm

        Hi Karen, the trouble with the maple sugar is that it has no water, so when you melt it, it's going to want to solidify/crystallize back to the solid form and you may have a difficult time getting it to melt evenly. On the other hand, maple syrup does contain water (I gather it could be around 30-33 % water). I think this has an impact on how the syrup behaves when you boil and cool it. If you want to make maple butter from it, you may have to mix in some water (use the percentage above as your guide to how much. I have no idea if this will work. I've never tried it. But if you really want to try to make maple butter from the sugar, I guess it's worth trying to see what happens!
        Let me know how it goes if you do try...

        Reply
    23. Crystal and Virgil Lund says

      December 07, 2021 at 7:59 pm

      A bit frustrating! I have now made this recipe two times. I used a candy thermometer and let the maple syrup reach (exactly) 235º when boiling, and then down to (exactly) 60º in the ice bath, and then back to room temperature before using my kitchen aid on low to mix it. Both times the maple syrup went opaque within a couple minutes but became a VERY sticky / caramel-like texture that would be impossible to spread. The second time I kept mixing to see if the consistency would change and it became very powdery and clay-like.

      Reply
      • Janice says

        December 19, 2021 at 11:52 am

        Hi! That is very frustrating and I'm sorry this isn't working for you! If the mixture becomes dry and sandy, it sounds like it's boiled too long. Is it possible your thermometer might be off? I've had this problem in the past with fudge, where the fudge ends up too dry because I apparently overcooked the mixture even though my thermometer indicated I was at the right temp.

        You could check by boiling a pot of water and measuring the temperature with your thermometer to see if it's registering the correct temp: 212 degrees Fahrenheit (100 degrees Celsius) and then if it's off, you will have to adjust the cooking temperature accordingly. I hope that helps!

        Also you should be able to salvage it. The dry maple sugar can be ground up and used to make maple cookies, for example.

        Reply
    24. Malinda says

      April 06, 2022 at 12:11 am

      Have done this twice. Followed the instructions, and everything goes as described until the very end. Instead of a spread it goes straight to chalk. I'm at a low elevation, and very low humidity. My first reaction is that I'm boiling too long, but I'm getting it up to 235 as fast as possible. And pulling it immediately. Any guesses what the fix is? I don't have a candy making background, but I'm not sure if decreasing the temp is a possibility? Or if getting it to 235 specifically is key? Halp!

      Reply
      • Janice says

        April 06, 2022 at 12:03 pm

        I'm so sorry the temperature of 235 F doesn't seem to be working for you. Is it possible your thermometer isn't calibrated? From your description, it sounds like you've lost too much water and so the maple syrup is crystallizing and setting "dry." I think that would mean your syrup boiled to 245–255 F, which is the temperature for making blocks of crystallized maple sugar.
        If your thermometer is off by 10–20 F, then I'd try boiling to 215–225 F to see if that solves the problem. It's so tricky because sugar syrups are so sensitive to temperature that if the boiling temperature is off, the texture is completely different. I use a Thermapen which is calibrated. It's a little more pricey than candy thermometers, but more reliable. I've had mine for over 10 years!
        I hope this helps and let me know how it goes if you try again!

        Reply
    25. Leanne P. says

      June 02, 2022 at 3:54 pm

      Followed the instructions to a tee, only I halved the recipe. Turned out perfectly with the right consistency. I will keep this recipe and it is so easy to make at only a fraction of the actual cost to buy it. I live in Canada and maple syrup is a staple since it is so available to me but the more it is processed, the more expensive the end product. Sometimes making it yourself is the most rewarding.
      Thank you for this great recipe. I think it would be helpful to people if you could put down approximate times since I think so many people rush the steps and don’t realize how long it should actually take. Just bringing it up to 235 should take close to 20 minutes. Then the ice water bath took another 15 or so and then waiting for it to come back up to room temperature is another 30 minutes. Then there is still 30 minutes of mixing. It is a slow process and you must be patient for it to turn out right. Thanks again for the great recipe.

      Reply

    Leave a Reply Cancel reply

    Your email address will not be published. Required fields are marked *

    Recipe Rating


    This site uses Akismet to reduce spam. Learn how your comment data is processed.

    Primary Sidebar

    This is a picture of Janice Lawandi

    Hi, I'm Janice! I am a baking-obsessed recipe developer with a PhD in Chemistry who writes about baking and the science of baking.

    More about me →

    Give back

    If you enjoy the free content on this website, consider saying thank you!

    Eggless chocolate cake

    Chocolate layer cake with cream cheese frosting and chocolate sprinkles on a cake stand.
    Learn to make an eggless chocolate cake with cream cheese frosting!

    Bake for Easter

    • Mini Eggs cookies cooling on a wire rack.
      Easy Mini Eggs cookies
    • Mini Egg bars cut into squares and served on small plates with a glass of milk on the side and a bowl of Mini Eggs.
      Mini Eggs blondies
    • Brownies decorated with Easter eggs cut into squares to serve.
      Easter brownies with Mini Eggs
    • Freshly baked carrot muffins being served on plates with butter.
      Moist carrot muffins
    • A slice of carrot cake layer cake with cream cheese frosting on a pale blue plate with a fork and striped linen napkin.
      Eggless carrot cake
    • Hot cross bun on a pink plate split open and served with butter.
      How to make hot cross buns for Easter weekend

    Bake with citrus

    • Lemon loaf cake topped with lemon icing and fresh raspberries being sliced to serve it
      Lemon loaf cake
    • Jars of homemade lime marmalade on a cooling rack.
      Lime marmalade
    • Pavlova cake filled with whipped cream, lemon curd, and raspberries being served.
      Pavlova
    • Orange pie with saltine crust and topped with orange marmalade glaze.
      Orange pie
    • A pot of homemade marmalade ready to be canned in jars.
      Orange marmalade
    • A pink glass plate with lemon bars.
      Easy lemon bars

    Baking conversions

    Buy the baking conversion charts NOW!

    How to poach pears

    Poached pears on an enamelware plate.
    This easy poached pears recipe is simple and you can use the poached fruit for salads, appetizers, and desserts!
    This is a picture of Janice Lawandi

    Hi, I'm Janice! I am a baking-obsessed recipe developer with a PhD in Chemistry who writes about baking and the science of baking.

    More about me →

    Give back

    If you enjoy the free content on this website, consider saying thank you!

    Eggless chocolate cake

    Chocolate layer cake with cream cheese frosting and chocolate sprinkles on a cake stand.
    Learn to make an eggless chocolate cake with cream cheese frosting!

    Bake for Easter

    • Slices of chocolate babka bread
      Dark chocolate babka for Easter
    • carrot focaccia with feta and almonds
      Carrot focaccia
    • Let's bake with carrots-
      What to bake with carrots
    • Button-shaped cookies - Honey flavoured cookies
      Honey sugar cookies (cut-out cookies)
    • carrot cake
      Glazed carrot cake

    Bake with citrus

    • A pink plate filled with lemon shortbread cookies and with a yellow napkin.
      Lemon shortbread cookies
    • Pink grapefruit marmalade on toast on a plate with a striped linen.
      Grapefruit marmalade
    • Slices of orange cranberry cake served on pink glass plates with forks.
      Orange cranberry bundt cake
    • Drizzling lemon cranberry muffins on a wire rack with lemon icing.
      Cranberry lemon muffins
    • A scoop of lemon ice cream served on a speckled plate with a cone and a black spoon
      Lemon custard ice cream
    • Three fruit marmalade

    Baking conversions

    Buy the baking conversion charts NOW!

    How to poach pears

    Poached pears on an enamelware plate.
    This easy poached pears recipe is simple and you can use the poached fruit for salads, appetizers, and desserts!

    Footer

    If you enjoy the free content on this website, consider saying thank you!

    Buy Me a Pound of Butter

    Footer

    ↑ back to top

    About

    • Meet Janice
    • FAQ
    • Privacy Policy
    • Terms and conditions
    • Accessibility
    • Press

    Newsletter

    • Sign Up! for emails and updates

    Contact

    • Contact
    • Services
    • Portfolio

    As an Amazon Associate I earn from qualifying purchases.

    COPYRIGHT © 2023 · THE BAKE SCHOOL