
The tools and methods you use to measure ingredients for baking can make or break a recipe simply because baking requires a little more precision and accuracy than cooking does. Here's a rundown of how to measure ingredients for baking, which tools to use, how to use them, and why.
As an Amazon Associate I earn from qualifying purchases.
Jump to:
Why you should measure ingredients when you bake
When you cook, in many cases, you can get away without being very precise or accurate. You can eyeball cooking ingredients, taste and adjust as you go. In baking, there's no adjusting. Once your cake is in the oven, there's no going back if you didn't add enough sugar or added way too much butter.
In baking, you have no choice but to measure ingredients from the start. Whether you want to bake an elaborate Earl Grey cake, cardamom banana bread with sour cream, or simple All bran muffins with dates, you have to measure your baking ingredients with a certain amount of accuracy and precision. And the good news is that you have choices when it comes to measuring ingredients for baking: to measure by volume or weight, what type of measuring cups to use, which type of scale...
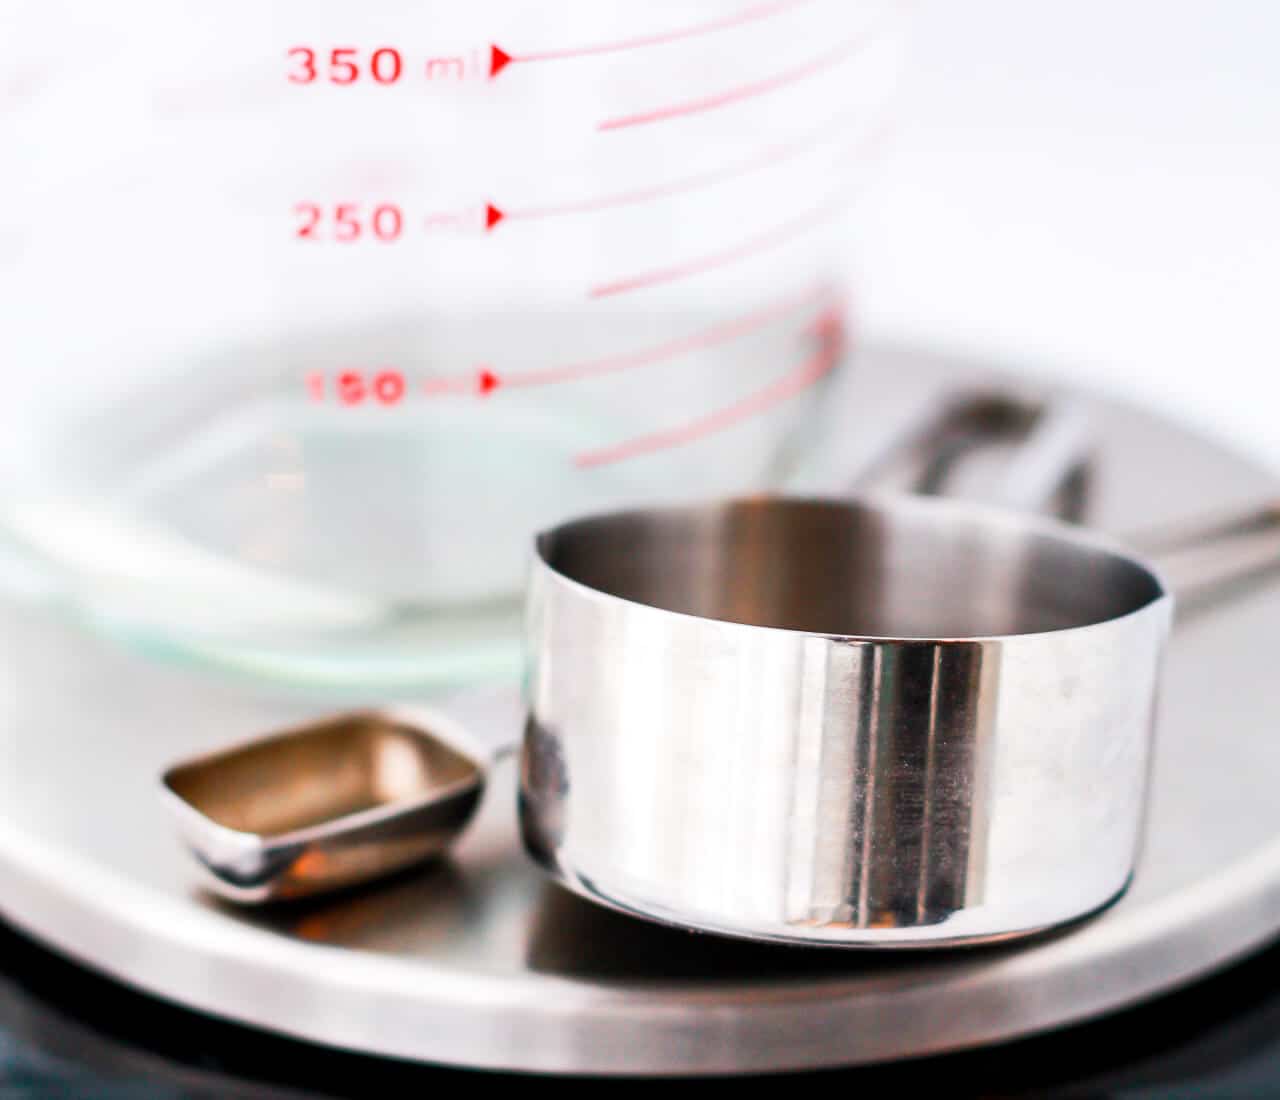
Measuring tools for baking by volume
I have recipe cards from aunts and uncles and grandparents with measurements like "butter the size of a walnut" or "saucer of sugar" but as imprecise as these measurements may seem, these words still express an attempt to measure and quantify volumes of ingredients in a recipe using the visual cues and tools available. That tool could be a saucer or a teacup in some households. Trouble is, saucers and teacups vary in size. So these don't make great measuring tools.
There are well-known household recipes that are based on the volume of a commercial product container, like the classic French recipe for a "gâteau au yogourt." The gâteau au yogourt is a basic loaf cake where all ingredients are measured using a tub of yogurt. Use the tub of yogurt as a measuring cup and all ingredients are measured using this tub: ½ tub's worth of melted butter or oil, 1 tub's worth yogurt, 2 tubs' worth of sugar, 3 tubs' worth of flour, 4 eggs. This recipe can be flavoured with lemon zest or orange zest, vanilla extract, spices, and it can be adjusted with cocoa powder or melted chocolate, chocolate chips, etc.
As imprecise as the recipe for the French gâteau au yogourt seems, it's actually quite precise: the tub of yogurt has a volume of 125 mL (½ cup) and that tub of yogurt is used as a measuring cup in this recipe, so actually this French yogurt cake recipe is quite specific and measured.
Measuring cups are useful for measuring ingredient volumes, whether thats in cups, millilitres, or fluid ounces. It truly doesn't matter if you prefer to measure in cups or in millilitres or in ounces. The unit of measurement is just a unit and as long as you use the measuring cups correctly, the unit isn't very important.
How to use liquid measuring cups
Liquid measuring cups are designed to measure liquids specifically, so they have a pouring spout and the fill volume of liquid measuring cups is at a distance below the rim of the cups. This is to ensure that you can fill the measuring cup to the max volume and walk around, say from the fridge to the mixer, without spilling.
To properly measuring ingredients in liquid measuring cups:
- Set the liquid measuring cup on a flat, hard surface.
- Fill the cup with as much liquid as needed. Use the graduated marks on the side of the measuring cup to guide you.
- Verify that you have measured the correct volume, you should bring your eyes down to the level of the surface of the liquid so that you are reading the numbers straight on to avoid distortions. Adjust accordingly by adding or removing a little liquid until you have filled to the desired volume.
Where to buy liquid measuring cups
I have a set of 3 Pyrex liquid measuring cups that includes a 1 cup (250 mL) measuring cup, a 2 cup (500 mL) measuring cup, and a 4 cup (1 L) measuring cup from Amazon. These Pyrex measuring cups are the traditional glass measuring cups for liquid with graduated volume markings on the side that have to be viewed from the side.
I also have a set of OXO "angled" liquid measuring cups from Amazon. These OXO angled measuring cups have additional volume markings on the inside that are specifically for viewing from the top down. This design feature makes it extremely easy to pour and look at the markings, without having to bend down. For this reason, I highly recommend this set.
How to use dry measuring cups
While filling a liquid measuring cup is pretty straight forward with little variation, there are a lot of different techniques for filling dry measuring cups and that can lead to large differences in how much of an ingredient you are adding to your recipe.
- scoop and sweep method: run your dry measuring cup through the dry ingredient to overfill it, then use the back of a knife to level it off and remove the excess.
- fluff, scoop, and sweep method: fluff the dry ingredient you are measuring with a fork to lighten it, then gently drag your dry measuring cup through the fluffed ingredient to lightly fill it, then use the back of a knife to level it off and remove the excess.
- spoon to scoop method: use a spoon to gently spoon the dry ingredient into the dry measuring cup to overfill it, then use the back of a knife to level it off and remove the excess.
In all cases, never tap or push down the dry ingredients so that you can squeeze in more. This can lead to you adding large excesses of the ingredient, which can really ruin your baking recipes, yielding dryer cookies, a denser cake, popovers or cream puffs that don't rise, etc. Be very careful how you fill your measuring cup. The goal isn't to use more than what is called for in the recipe.
How to use measuring spoons (teaspoons and tablespoons)
To use measuring spoons for dry ingredients, the easiest way is to "scoop and sweep," meaning to gently drag the spoon through the dry ingredient to fill it, the use the back of a small knife (or your finger) to level it. Levelling off the ingredients in a measuring spoon is essential to making sure you don't add too much of the ingredient.
For liquids, simply pour the liquid into the measuring spoon, aiming to fill to the rim of the measuring spoon. This way you will measure out the full volume.
Where to buy measuring cups and spoons
I am all for shopping at the dollar store and artisanal shops, but this is one place where you have to be very careful: are you sure that pewter measuring spoon set was made to conform to the right guidelines, where 1 teaspoon is 5 mL, 1 tablespoon is 15 mL, ½ cup is 125 mL, etc.? Unfortunately, this is one instance where those decorative measuring cups and spoons you bought might not be appropriate for more than decorating your kitchen. Bake with tools that you've purchased from reputable manufacturers whose job it is to make precise, accurate tools.
Measuring by difference
My mom uses this technique to measure ingredients by difference for things like shortening for pie crusts. Shortening often comes in a tub and it can get pretty messy to measure shortening. It's inaccurate to measure it out in measuring cups given that shortening is soft and malleable: it's hard to fill any measuring cup with it. The same goes for butter. If your butter is sold in a big block and the wrapper doesn't have any guides as to measurements, how do you measure ½ cup of butter? There aren't measuring cups to accommodate blocks or slabs of butter. You measure it by difference.
Want to measure out ½ cup of butter or shortening for a recipe? Take a 1 cup liquid measuring cup and fill it to ½ cup. Add butter to the measuring cup until the level of water reaches the 1 cup mark. This means you have 1 cup total - ½ cup water = ½ cup butter (or shortening). You could even do this with a 2 cup liquid measuring cup: fill the measuring cup with water to the 1 ½ cups mark. Add butter until the water level reaches 2 cups. This means you have 2 cups total - 1 ½ cups water = ½ cup butter (or shortening). Get it?
If you measure by difference with water, make sure to strain the ingredient to remove as much of the water as possible. With butter, you can blot it dry with a paper towel. After all, that water could mess up your recipe if you aren't careful!
Measuring tools for baking by weight
Baking by weight is my preferred method because I think weighing out ingredients leads to more precision and accuracy, but also more reproducibility from one batch to another. There are no measuring cups for weighing ingredients. All you need is a kitchen scale and a bowl.
Kitchen scales
What is a kitchen scale used for?
Kitchen scales are used to weigh ingredients. A common misconception is that kitchen scales are only for dry ingredients. That's wrong. Actually many professional pastry chefs will weigh out ALL their ingredients, even the liquids like oil, milk, cream, water, egg yolks, egg whites, etc. So unlike with measuring cups where there are measuring cups for liquids that are different than measuring cups for dry ingredients, the kitchen scale can weigh it all without discriminating.
What does a kitchen scale measure?
Kitchen scales are used to measure the weight of ingredients, in grams or in ounces.
However, some kitchen scales have a button for measuring volume, but that button is to be used exclusively with water (or any ingredient that has a density of 1 gram per millilitre (1 g/mL). Unfortunately, most ingredients don't have the same density as water:
- the density of water is 1 g/mL, meaning that 100 grams of water will have a volume of 100 mL
- the density of canola oil is 0.9 g/mL, meaning that 100 grams of oil will have a volume of 111 mL
- the density of granulated sugar is 0.8 g/mL, meaning that 100 grams of granulated sugar will have a volume of 125 mL
- the density of all-purpose flour is 0.5 g/mL, meaning that 100 grams of all-purpose flour will have a volume of 200 mL
If you want to measure a volume of an ingredient, DON'T use the volume button on your scale. Instead, reach for your measuring cups to avoid problems.
What does kitchen scale accuracy mean?
Accuracy is the ability to come close to the target. If you accurately weigh an object, it means that the weight measurement is close to the true actual value. If you weigh exactly 125 mL of water on a kitchen scale: is the weight recorded very close to 125 grams? If yes, your kitchen scale is accurate.
How to determine precision of a kitchen scale?
Precision is the ability to reproduce a measurement, regardless if the measurement is correct. A precise measurement means that it is reproducible. If you weigh 125 mL of water on a kitchen scale, does it consistently display the same value? If yes, your kitchen scale is precise.
How to use a kitchen scale
Unlike measuring cups that are filled to the correct volume, there are extra steps that you need to take to weigh ingredients.
As an example, let's say you need to weigh out flour into a bowl:
- turn on the kitchen scale
- place an empty bowl on the kitchen scale. The kitchen scale will display the weight of the empty bowl
- press the "tare" button (sometimes labelled as the "zero" button). The tare button will record the weight of the bowl so that when you add flour to the bowl, it will display only the weight of the flour. If you don't tare the scale with the bowl on it first, when you fill the bowl with flour, the scale will measure the weight of the bowl PLUS the flour. That's not what you want. Remember to always use the tare function of your kitchen scale BEFORE adding your ingredients.
- if you want to weigh another ingredient in the same bowl with the flour: tare the bowl with the flour to zero the kitchen scale, then weigh the second ingredient on top of the flour. Note that this is risky so proceed with caution because if you accidentally add too much of the second ingredient, it's nearly impossible to retrieve it without disturbing the layer below.
When to not use a kitchen scale
There's a caveat with kitchen scales: you need to know the lower limit of detection of your kitchen scale, meaning that you need to know just how little you can weigh out correctly. If your scale has a lower limit of detection of 10 grams, you should not use it to weigh out 4 grams of baking powder. That's why for small quantities of vanilla extract, chemical leaveners, baking powder, or baking soda, I prefer to measure by volume, with teaspoons and tablespoons.
It can be difficult to find out the lower limit of detection of kitchen scales because many manufacturers don't provide that information, even if you ask. This information should be printed along with the other product information and instructions or on the packaging.
Types of kitchen scales
- Old-school analog balance scales with two trays for "balancing"
- Analog scales: an example of an analog scale that you are probably familiar with is the scales in the produce section of the grocery store. Analog scales use a needle with graduated markings to display the weight of an item. While there's nothing wrong with an analog scales, most aren't great for weighing small quantities like you would use in baking.
- Digital scales: digital scales allow you to weigh your ingredients on a tray and will display the measured weight on a digital screen. As a rule, digital scales allow you to easily transition from metric weights to imperial weights, grams to ounces.
Which kitchen scale is best?
I have tested a lot of kitchen scales over the years, both analog and digital. I'm not going to recommend an analog kitchen scale because they are usually rather bulky to store and they aren't any cheaper than digital scales, so I just don't see the point in investing.
My top pick for the best kitchen scale: OXO Good Grips Stainless Steel Food Scale with Pull-Out Display (buy it on Amazon):
The OXO Good Grips Stainless Steel Food scale with pull-out display (buy it on Amazon) is an older model kitchen scale from OXO, yet it's still a favourite for America's Test Kitchen and Alton Brown! This OXO scale can measure up to 5 kg (11 pounds), according to the product information. This is the kitchen scale I use and love.
I like that this kitchen scale can be used to weigh by difference. This scale can display negative numbers, meaning you can tare it to 0 grams and remove 50 grams of an ingredient and that amount is displayed as a negative number: -50 g. This feature is VERY useful if you happen to weigh out too much flour and hit zero before you can rectify the amount.
The OXO scale features a pull-out display so if you are weighing a very large bowl that blocks the display, you can pull it out to better see the numbers. It also has a light feature so you can better see the display. And the stainless steel top plate is removable making clean up very easy!
The only drawback with using this scale is that OXO doesn't provide any information for the lower limit of detection. We know it can weigh up to 5 kg (11 pounds) according to the product booklet, but we don't know how little it can weigh, and this is important to know when measuring small quantities like chemical leaveners, baking powder, or baking soda. For this reason, I use measuring spoons to measure smaller quantities. You can buy the OXO Good Grips Stainless Steel Food Scale on Amazon.
Runners up for best kitchen scale:
- OXO Precision scale (buy it on Amazon): this new OXO scale can weigh as little as 0.5 grams (0.02 oz) according to the product information and can weigh as much as 2.73 kg (2 pounds). This new OXO scale was actually designed for pour-over coffee aficionados who look for precision and accuracy when weighing out coffee beans and hot water for pour-over coffee. You can buy the OXO Precision Scale on Amazon.
- Escali Primo P115WR Precision Kitchen Food Scale for Baking and Cooking (buy it on Amazon): this kitchen scale is about half the price of the OXO Good Grips kitchen scale I love. I have both to be honest and this one works great too, though it can't handle negative numbers. If you are looking for an affordable kitchen scale with none of the bells and whistles (no pull-out display and no light), the Escali Food Scale is for you! Buy it on Amazon.
Where to buy kitchen scales
You can purchase kitchen scales on Amazon, or directly from some product company websites. For example, you can purchase OXO's scales directly from their website. Some grocery stores will also sell kitchen scales in the baking equipment section of the grocery store, in the aisle where you may find things like candy thermometers, oven thermometers, and some basic baking pans.
You can find kitchen scales at restaurant supply stores and kitchen specialty stores too. Stores like Williams Sonoma and Crate and Barrel sell them too, but the selection is limited compared to kitchen specialty stores and Amazon.
Once you own a kitchen scale, there will be challenges along the way as you navigate converting your favourite baking recipes from cups to grams. Use this baking conversions chart as your guide.


Thobeka says
Hi Janice,
Thanks for the wonderful article, I have learnt a lot
I am Thobeka from Johannesburg, South Africa
I get frustrated by recipes that give cup measures instead of weights and happy that you agree with that
Thanks
Ejiro says
Tanks alot. Very insiteful. Very inspiring. Pls which rising agent can I use 2 make my cake rise Very well.
Janice says
Hi Ejiro,
I'm so happy you found this article helpful! To answer your question about leavening agents, it's tricky. If your baking a cake with an acid in the recipe, you will likely want to use baking soda and baking powder. Whereas if you are baking a cake without any acid source, you'd use baking powder. Please read about leavening agents, and also these posts about baking powder and baking soda to better understand the difference between them and when to use each.
Essie says
What a wonderful site and I am so glad to have found it. I am a Scot who lives in England, loves Canadian recipes, but has long been frustrated by "cups". I have also found out - to my cost - that American, Canadian and Australian cup measures just aren't the same. As I get older, I find I can no longer guess by eye when baking a lot of the recipes I have done for over 60 years, so your site is very welcome.
Whilst making a load of marmalade this morning and - for the life of me - could not remember the setting point. I found your tutorial on line and my marmalade has set perfectly at 220 degrees F. Thank you so much.