

Brioche is a fluffy, buttery bread usually served at breakfast, made from a yeasted dough enriched with eggs and lots of butter. Here's a recipe for how to make this easy brioche bread at home using a stand mixer, with info about how much to knead brioche dough and the pans you can use to bake brioche.

Both brioche and homemade croissants are made with a lot of butter, but the technique to make them is quite different, leading to completely different textures. When you bite into a really good croissant, the flaky layers will inevitably make a mess. The flaky layers come from laminating the yeasted dough, where a slab of butter is worked into the croissant dough to form very fine layers. These layers of butter yield a flaky, airy texture, and the steam, along with the yeast, both act as leavening agents in croissants.
Brioche is also a buttery bread, but instead of creating fine layers of butter for a flaky texture, the butter is completely incorporated into the yeasted dough, yielding a pillowy soft, fluffy yet buttery dough. Brioche is very light, not heavy, which is surprising considering how much butter it actually contains.
Jump to:
What You Need to Make Buttery Bread Buns
Classic brioche is made from very simple ingredients that you probably already have! Here's what you will need:
- Yeast, specifically active dry yeast, though instant will work here too, though the rise times will be shorter with instant yeast.
- Water, which should be warm but not hot. Remember yeast are living organisms and they will flourish if they are kept warm, but will die if you pour water that is too hot on them. If they die, your bread won't rise properly!
- Sugar, which is fast food for the yeast to grow, but also adds a little sweetness to the buns
- Flour is what provides the structure for these brioche buns so that they rise up, tall and round, and hold their shape. You can use all-purpose flour in this recipe, which has plenty of gluten for this purpose.
- Salt is an important ingredient that helps the gluten network form to give the bread structure. Some bakers say it also slows down the yeast so that the yeast grow at a more controlled rate.
- Butter and eggs are added to the dough to provide richness to this bread, making this an enriched dough from the fat and flavour they provide, along with the sugar.
Please see the recipe card for the exact ingredients and quantities.
Traditional Kneading Method By Hand
When I learned how to make brioche at Le Cordon Bleu, the pastry instructors taught us how to knead the dough by hand. But the French method for kneading brioche isn't how we traditionally knead dough in North America.
Kneading brioche by hand isn't a gentle but firm massaging/folding of the dough with the palms of your hands. To knead brioche by hand is much more of a workout where brioche dough is kneaded by slapping the dough down onto a marble surface and scooping it back up, over and over again, until you form a smooth dough.
Imagine a kitchen with 15 pastry students slapping dough onto marble. It's noisy, to say the least. It's also seriously messy because before the dough has come together in a smooth cooperative mass, there are stages where it is a loose, disgruntled mess, so bits fly all over the place as you slap it onto the counter. Chunks of dough make it up to the ceiling and possibly into your hair. This kind of kneading isn't really for the home kitchen, well, unless you like to clean dough off of your light fixtures.
Kneading Brioche Dough in a KitchenAid Stand Mixer
I got a ridiculous amount of pleasure "kneading" dough using the slap and scoop method in pastry school, but it's just not suited for home kitchens. The good news is that you can make brioche dough in your KitchenAid stand mixer (Amazon) and the results are great!
Using a stand mixer allows you to clean up your kitchen while the mixer does the hard work. And although I love unleashing my stresses onto a poor unsuspecting mass of dough, I have no desire to go searching for that rogue bit of dough that somehow got lost or mixed into a few strands of my ponytail. Kneading brioche dough is less messy.
Two stages for kneading brioche dough in a mixer
For most bread recipes, the ingredients get combined to form a shaggy dough, at which point, you would knead that dough until it forms a smooth, supple, elastic ball of dough. The kneading process is one long step, usually about 6 minutes if you are kneading with the dough hook of your mixer, as you work the dough to build up a network of gluten that is cohesive, elastic, and supple.
For brioche dough, the kneading happens in 2 long stages. The first kneading step happens without any butter and this first amount of kneading is needed to build up the network of gluten. Once you have a smooth, elastic dough, you incorporate the butter into the dough. The butter disrupts the gluten network you formed, causing it to break down. The dough loses its elasticity and so, you have to repeat the kneading to build back that network and strengthen the dough.
The second stage of kneading can take much longer than the first, even double. The goal is to develop elasticity and so you have to knead it until the dough can be stretched without tearing. So if you are wondering how much to knead brioche dough after you've added the butter? The answer is a lot, which is pretty vague. But to check if you've kneaded the dough enough. Pull off a small piece and gently pull on it to stretch it:
- Does the dough tear apart immediately without stretching much? If yes, then you must knead it more to build up that network of gluten
- If your dough stretches as you pull it, becoming thinner and thinner, then you've probably kneaded the dough enough
Brioche Baking Schedule For Home Bakers
This brioche recipe is a two-day process and therefore requires some planning, but don't let this stop you: it's not a laborious two days of never-ending work. The work to make this brioche recipe is minimal.
Day 1
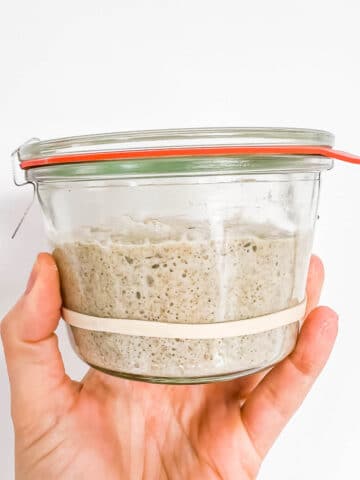
Make the brioche dough in your stand mixer. The mixer does all the difficult kneading for you. For the first rise, I honestly let the dough be while I do something else. The first rise could take an hour if your kitchen is warm, or it could take 3 hours if your kitchen is cold like mine (or if you've over-kneaded the dough, the first rise might also take a little longer). Best to mark the bowl to make sure you can keep track of its progress. When the first rise is done, you deflate the dough and stick it in the fridge 'til morning. Easy peasy.
Day 2
On day 2 of brioche-making, you shape the dough and let it rise a second time before baking it. This last rise, after you've formed the rounds of brioche, can also take a little more time than you'd expect because the dough is fridge-cold, and it first needs to warm up a bit before it can expand, especially since brioche dough is loaded with butter.
I do the second rise in the oven, but with the oven turned off and just the light on inside. I use this technique to gently warm my bread doughs and get them to rise faster. The oven light warms the oven just slightly, enough to coax the dough back to life, without killing the yeast. Sure, brioche might take two days to make, but this bread, freshly baked, is worth all that time and more. It's buttery delicious, and would be the perfect edition to your weekend brunch, especially because you make the dough the day before and let it rest overnight in the fridge.
Shaping Brioche Buns
Brioche buns are easy to make and bake neatly in a muffin tin, but you can also bake brioche dough in a loaf pan to make a traditional "carré". Or you can bake brioche on a sheet pan as a "tresse" (a braid) by splitting the dough into 2 or 3 and twisting (or braiding) it into a loaf before placing it on a parchment-lined sheet pan to rise and bake. In this case, you don't need a special mould.
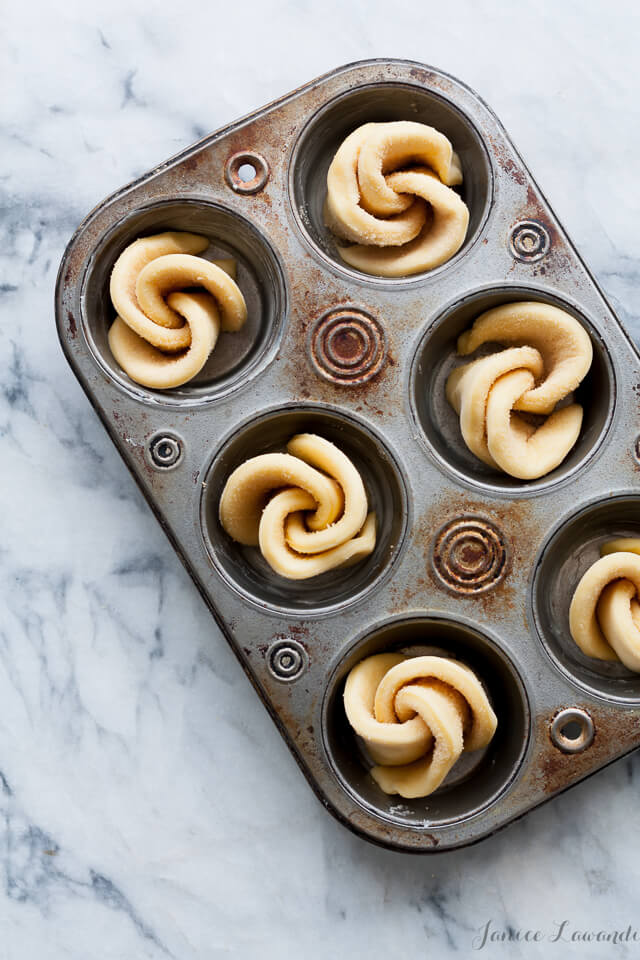
You can also shape brioche dough into swirled brioche "flowers." Roll out the dough into a big rectangle and cut out lots of circles. Stagger the circles to bunch 3 together at a time and roll the 3 circles of dough together. Cut in half and stand up so that you have 2 brioche flowers. Bake these in a muffin pan.

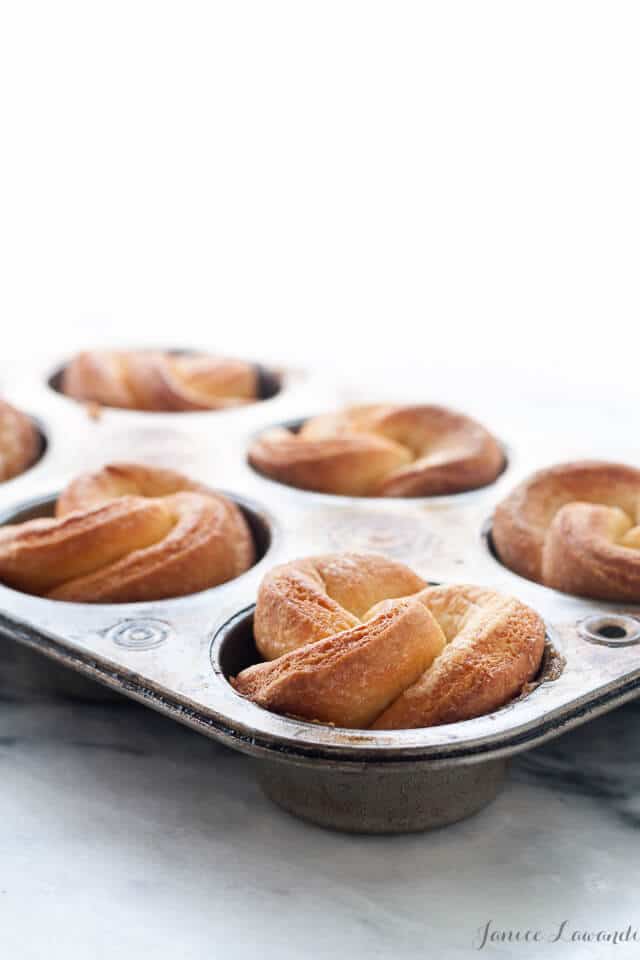
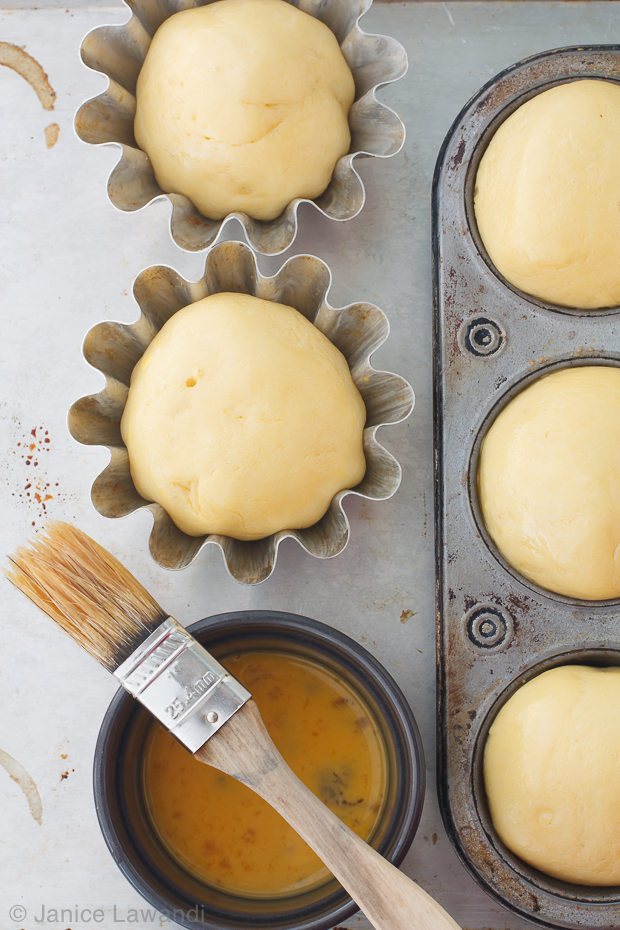
Brioche Pans
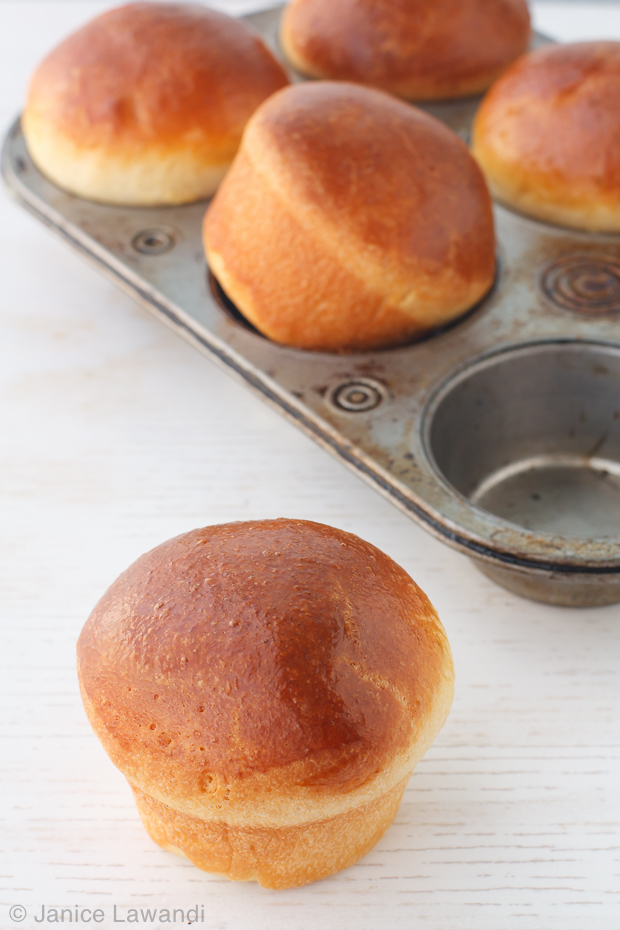
Traditionally, brioche buns are baked in fluted moulds (you can see them in the picture above). These fluted brioche pans are available on Amazon. Since many don't have access to these pans, you can also bake the buns in a muffin tin, as shown. You just won't get the fluted edge, but that's okay! For a full loaf, bake this bread in a loaf pan like this 8.5x4.5" gold touch pan from OXO on Amazon
What to Serve With Homemade Brioche
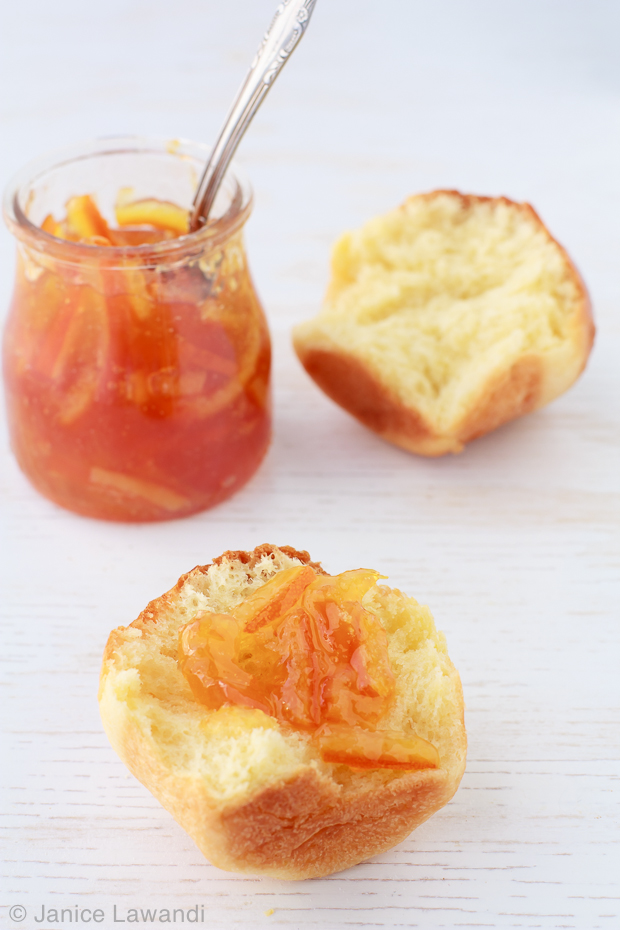
Brioche buns taste amazing plain, but they are also paired with a few breakfast spreads. It's perfect paired with seasonal preserve, like three fruit marmalade in winter, rhubarb jam in spring, plum jam in summer, or spiced apple jam in fall. Brioche plus jam is heaven.
What to Make With Leftover Brioche
Leftover brioche is a blessing because it makes the best French toast. Cut the leftover brioche into cubes to make French toast muffins. Thick slices of brioche can be used to make stuffed French toast. Slather slices of leftover brioche with jam and frangipane to make bostock, which is such a treat! You can also make bread and butter pudding with leftover brioche.
Other Recipes With Brioche
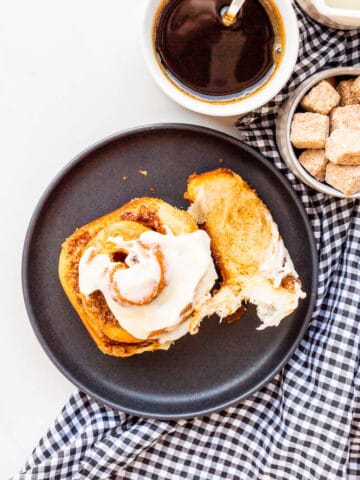
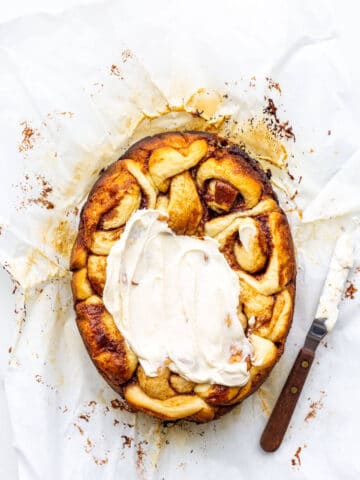
Cinnamon rolls are often based on lean brioche dough. For example, these maple cinnamon rolls start with a dough process very similar to a classic brioche. On the other hand, these cinnamon raisin rolls are a modified version where the butter is included in the dough from the beginning.
If you tried this recipe for the best brioche kneaded in a mixer (or any other recipe on my website), please leave a ⭐ star rating and let me know how it went in the comments below. I love hearing from you!
📖 Recipe

Easy Brioche Kneaded with a Mixer
Ingredients
- 63 mL whole milk (3.25 % fat) warmed to 110-115ºF
- 11.25 mL active dry yeast 1 packet
- 250 grams bleached all-purpose flour
- 5 mL Diamond Crystal fine kosher salt
- 2 large egg(s)
- 30 mL granulated sugar
- 115 grams unsalted butter
Egg wash
- 1 large egg(s)
- 1 teaspoon water
Instructions
- First, start by hydrating the yeast by stirring it with the warm milk in the bowl of an electric mixer fitted with the paddle attachment. Let stand for 8 minutes.
- Add the flour and salt, and mix together on low until you get a dry, shaggy mixture.
- Add the eggs, one at a time, along with the sugar, beating between each addition.
- Switch to the dough hook attachment and beat the dough until you get a smooth dough and the bowl is clean (scrape down the dry bits stuck to the sides as you go to be sure that all the ingredients get incorporated into the dough). This will take about 3 to 4 minutes.
- Switch back to the paddle and dump in all the butter, and beat it into the dough. The dough will break down and become sticky and messy, but when it starts to form a more cohesive mass, switch back to the dough hook and beat on low (speed 2 on a KitchenAid mixer) for about 10 minutes or so, or until the dough is smooth and elastic, and the bowl is clean again.
- Butter a bowl and transfer the dough to the bowl. Cover with saran wrap. Let rise on the counter until it has doubled (I left mine for almost 3 hours), then punch it down to deflate, cover, and leave in the fridge overnight.
- The next morning, divide the dough into 8 pieces, and quickly roll them on the counter to make dough balls. Don't work the dough too long or you risk melting the butter. Butter 8 slots of a muffin tin and place a dough ball in each. Place the muffin pan on a rimmed baking sheet and cover with a sheet of waxed paper. Put the sheet in the oven (turned off!) with just the light on. Let the dough balls rise until they have doubled (about 1.5 hours). When the dough has doubled, take the pan out of the oven and set it on the counter while you preheat the oven to 400 °F (200 °C).
- Meanwhile, mix the egg with 1 teaspoon water and brush lightly onto each bun (there will be leftover egg wash-you don't need to use it all). When the oven is preheated, bake for 15-20 minutes, until the tops are a deep golden brown. Let cool 10 minutes before unmolding. Serve warm with homemade jam or marmalade, and more butter, if you dare.
Notes
- This recipe calls for Diamond Crystal fine Kosher salt. If using regular table salt, add half the amount or the recipe may be too salty!
Explore More With AI
Nutrition
Nutrition information is automatically calculated and should only be used as an approximation.
Emily says
can i sub monk fruit extract or date sugar?
Janice says
Hi Emily, I have never worked with monk fruit extract or date sugar. I'm not sure how they trap water, so it's hard for me to say if it would work. I'm concerned the set may be looser if they don't absorb as much water as sucrose (regular granulated sugar).
Let me know how it goes if you do try this substitution! Good luck!
Cheryl Michaels says
Could I make this with Gluten Free flour, such as Red Mill 1-1 Baking Flour?
Abeer says
This is the first time i make brioche ,i doubled the recipe thanx good because it was easy and delicious.thank you for the recipe Janice❤❤❤.
Stephanie says
This looks perfect! I've always made brioche as a loaf, never as buns.. I really need to try this recipe!I love that feeling when the kitchenaid is kneading the dough, the dishwasher is washing the dishes and I'm just sort of tidying up. I'm all "Me and my robot friends are hanging out in the kitchen! Doing the kitchen chores together" ..and that's how I know I've been alone in the kitchen for too long.
Tora says
Love those robots to death though! Best friends for life!
Liz says
These look delicious! Your pics are gorgeous!
Liz says
An absolutely delicious, calorie-laden treat!