
Learn how to make the best maple cinnamon buns with this easy recipe. These delicious maple buns start with a brioche dough that is enriched with milk, sugar, eggs, and butter, creating a tender, rich cinnamon roll that is slathered in a thick layer of maple butter before serving.
Maple cinnamon buns are also called maple brioche buns in Quebec or "roulés à l'érable" in French. The trick to the best cinnamon buns is starting with a homemade brioche dough recipe, enriched with milk, eggs, sugar, and lots of butter. These maple buns get the most maple flavour from the pure maple butter topping.
Jump to:
What You Need
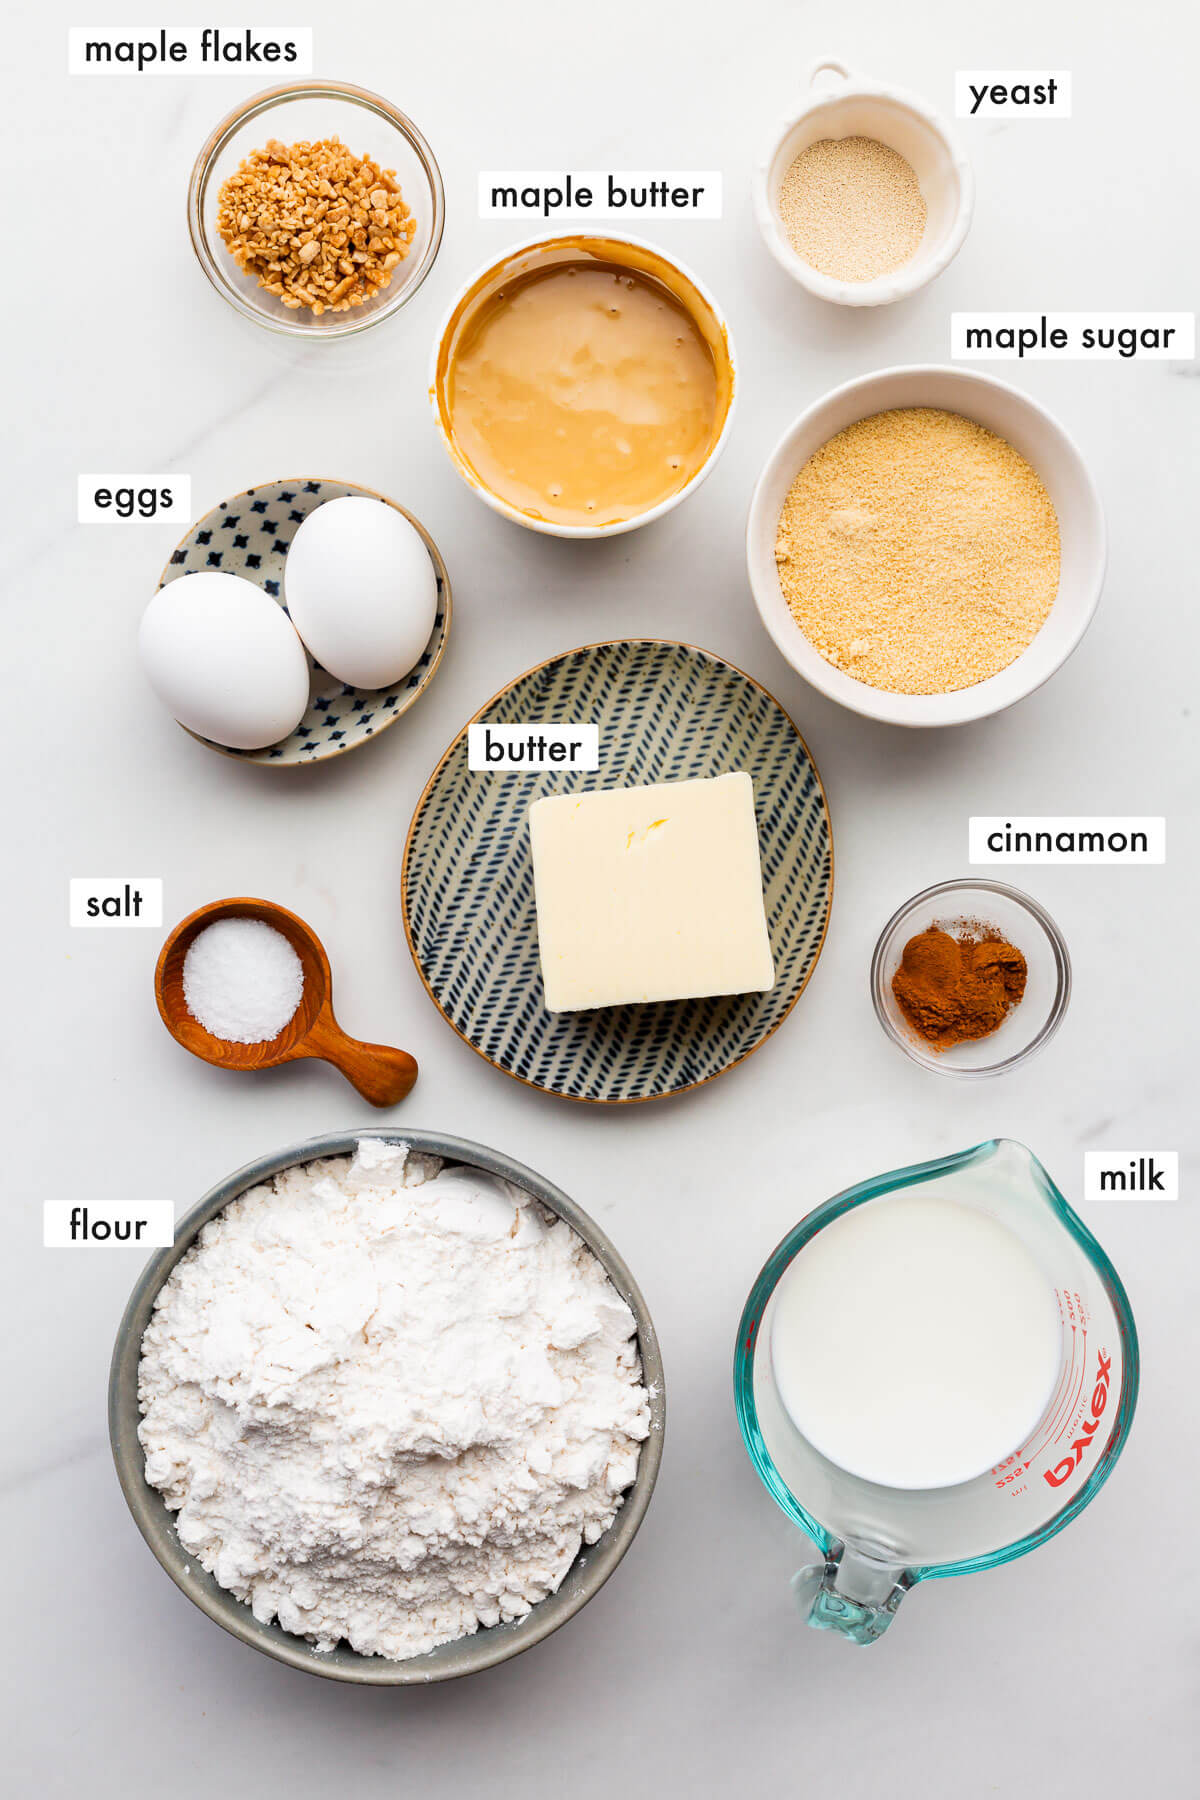
- flour-I used regular bleached all-purpose flour for the brioche dough
- butter-I developed this recipe with unsalted butter. If using salted butter, you may want to adjust the amount of salt you add to the dough
- milk-I used whole milk (3.25 % fat), but 2 % milk also works great here
- eggs-I bake with large eggs. Using eggs that are larger or smaller may affect the consistency of the dough and you may have to adjust the liquids/flour quantities
- yeast-I prefer to use instant yeast. If you are using active yeast, you will have to heat the milk to a higher temperature to proof the yeast and the rise times will be longer and slower
- sugar-for this recipe, I used maple sugar for both the brioche dough and cinnamon bun filling. See the substitutions section for other options
- maple butter, either use homemade maple butter or you can buy it. Remember maple butter is 100 % pure maple syrup and not a compound butter made from butter and maple syrup! These are not interchangeable!
- maple flakes are crunchy, maple-flavoured flaky sprinkles. They are made from pure maple syrup and available at markets and grocery stores all over Quebec. You can also buy them on Amazon.
- cinnamon-regular ground cinnamon is fine. No need for anything fancy
- salt-I bake with Diamond Crystal fine kosher salt. If you are using regular table salt, you should add half the amount to avoid the buns being too salty.
Please see the recipe card for the exact ingredients and quantities.
Substitutions and Variations
- sugar-the maple sugar in the dough can easily be replaced with regular granulated sugar, while the maple sugar in the filling can be replaced with light or dark brown sugar
- maple syrup-you can turn these into maple sticky buns by pouring up to ¾ cup (180 mL) of hot maple syrup over the hot buns as soon as they come out of the oven.
How to Make Maple Brioche Buns
Making this recipe from start to finish will take 3 to 4 hours. Plan accordingly! Here's how to make maple buns:
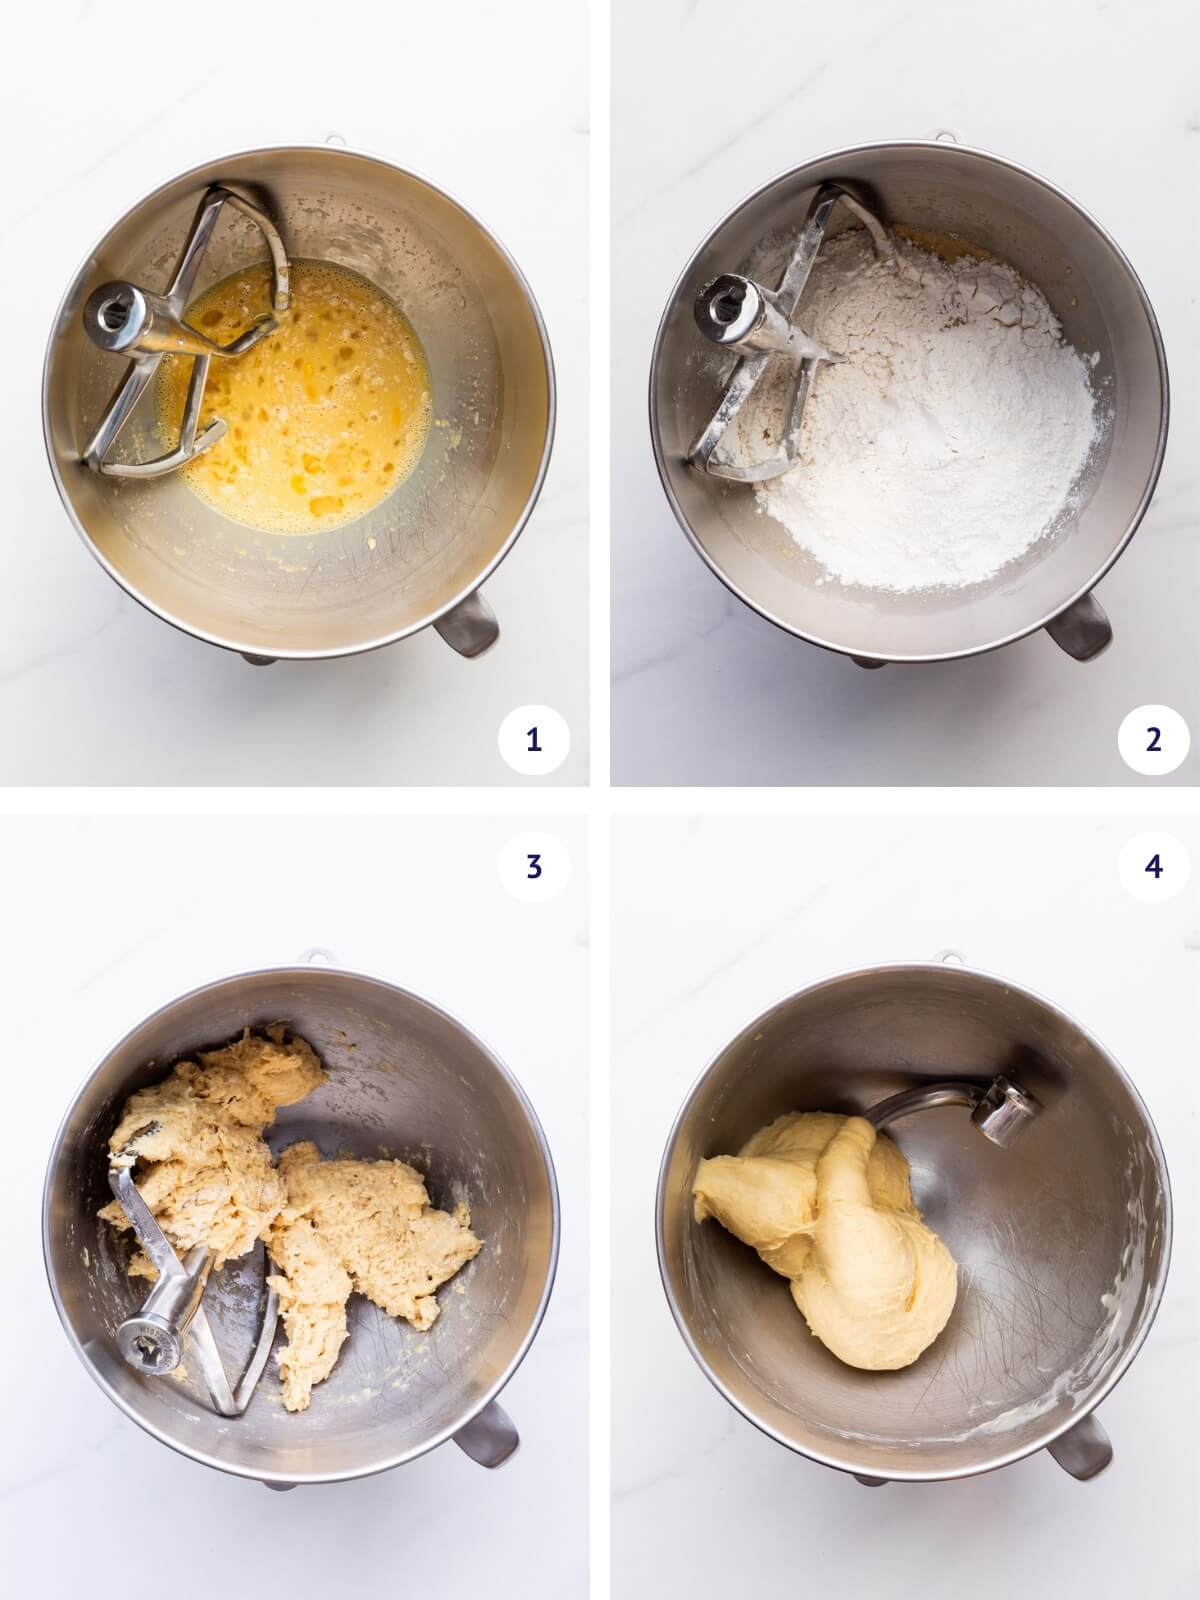
Step 1-In a medium bowl, whisk together the flour and salt. Set aside. Then start the dough by combining the warm milk, maple sugar, yeast, and eggs in the bowl of a stand mixer with a paddle attachment (image 1). Once well mixed, add the whisked dry ingredients (image 2). Stir everything together until a shaggy dough forms (image 3), then switch to the hook attachment and knead the dough until smooth and elastic (image 4).
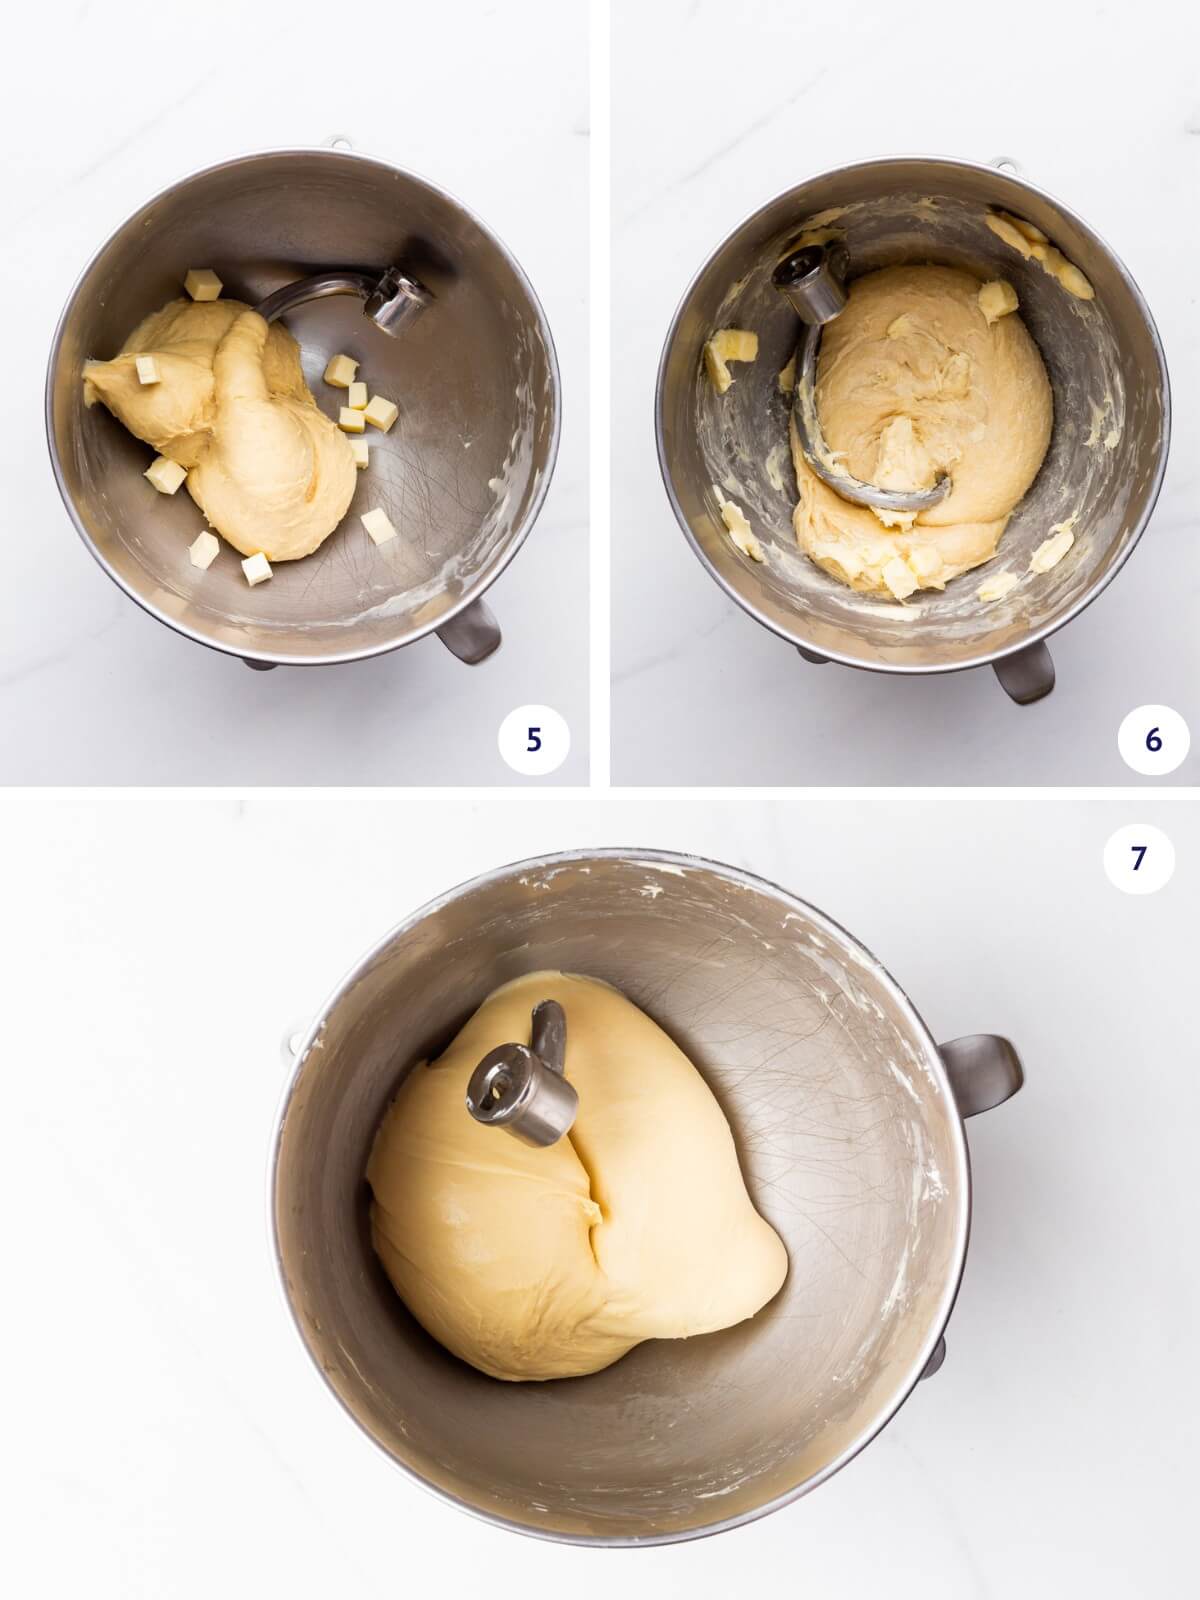
Step 2-Start adding the softened butter, a few pieces at a time (image 5). The smooth dough will become sticky as the fat of the butter interferes with the gluten (image 6). Once all the butter has been added, continue kneading the dough until it is soft, supple, smooth and elastic (image 7).
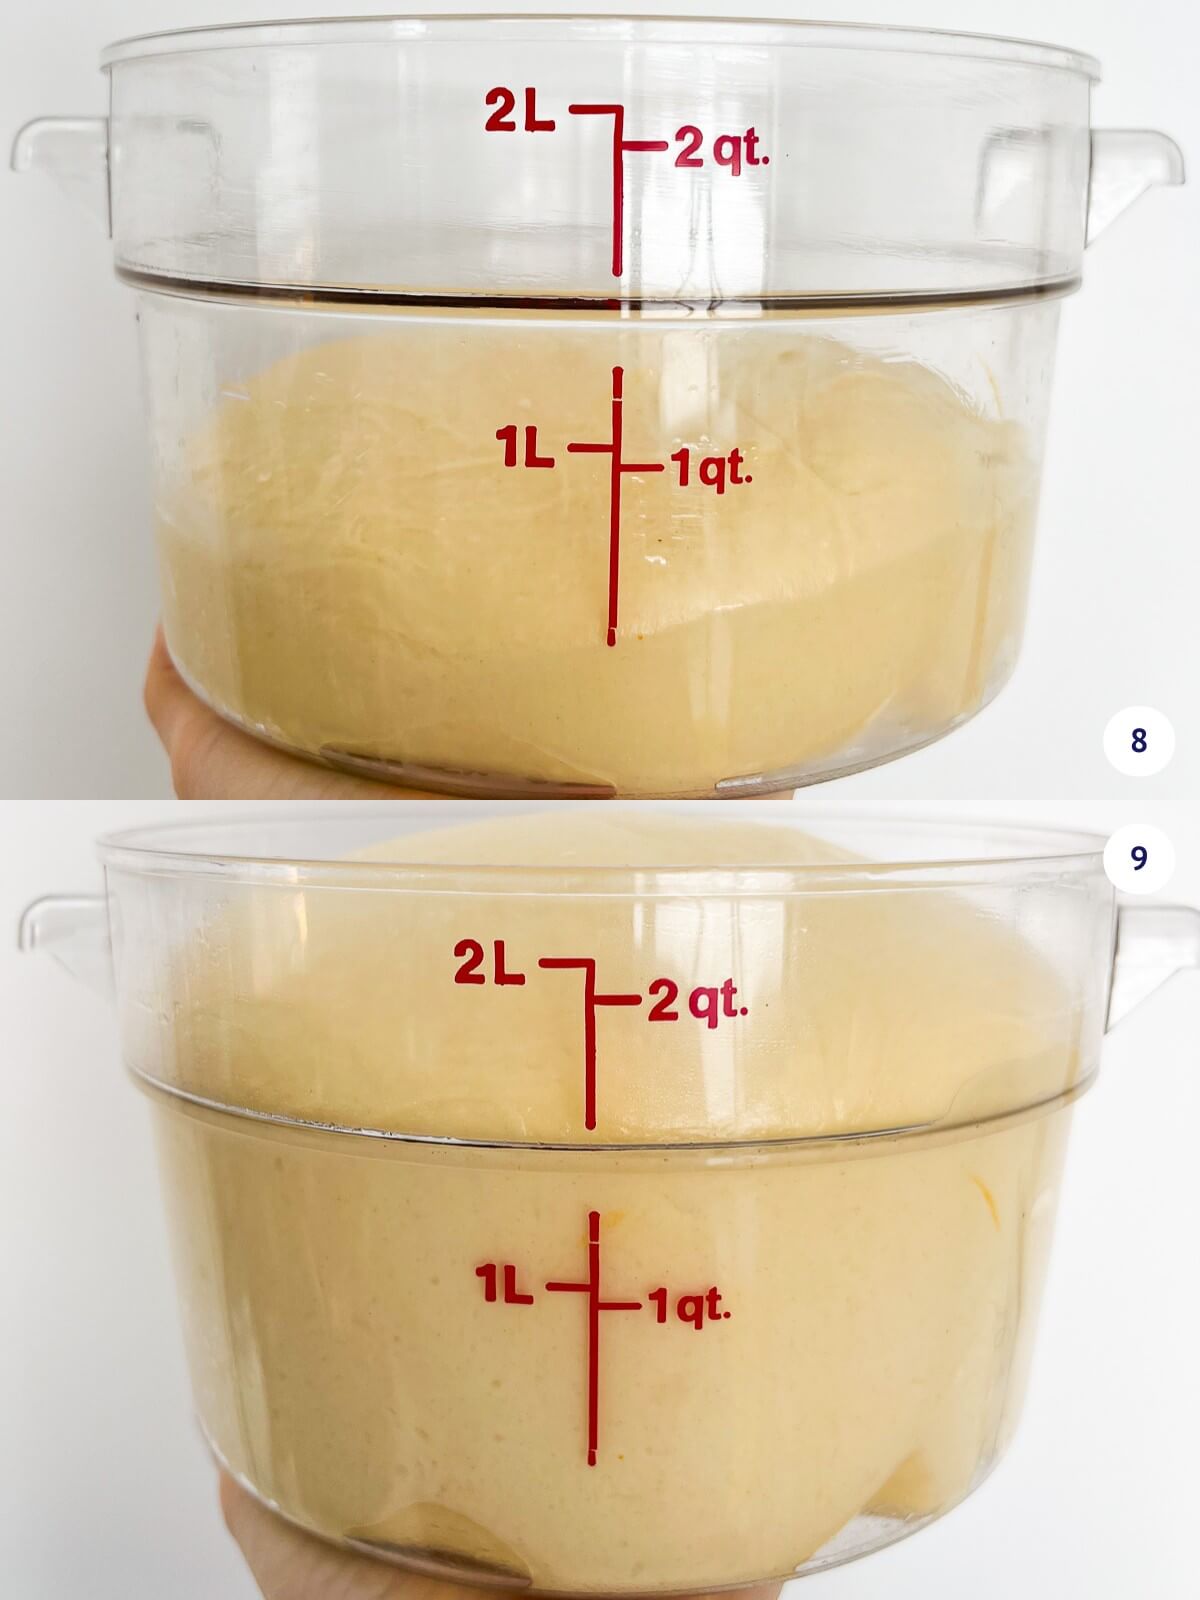
Step 3-Transfer the dough to a clear container (image 8) and mark the container to note where the top of the dough hits. Let the dough rise until doubled (image 9) in a warm, dry place.
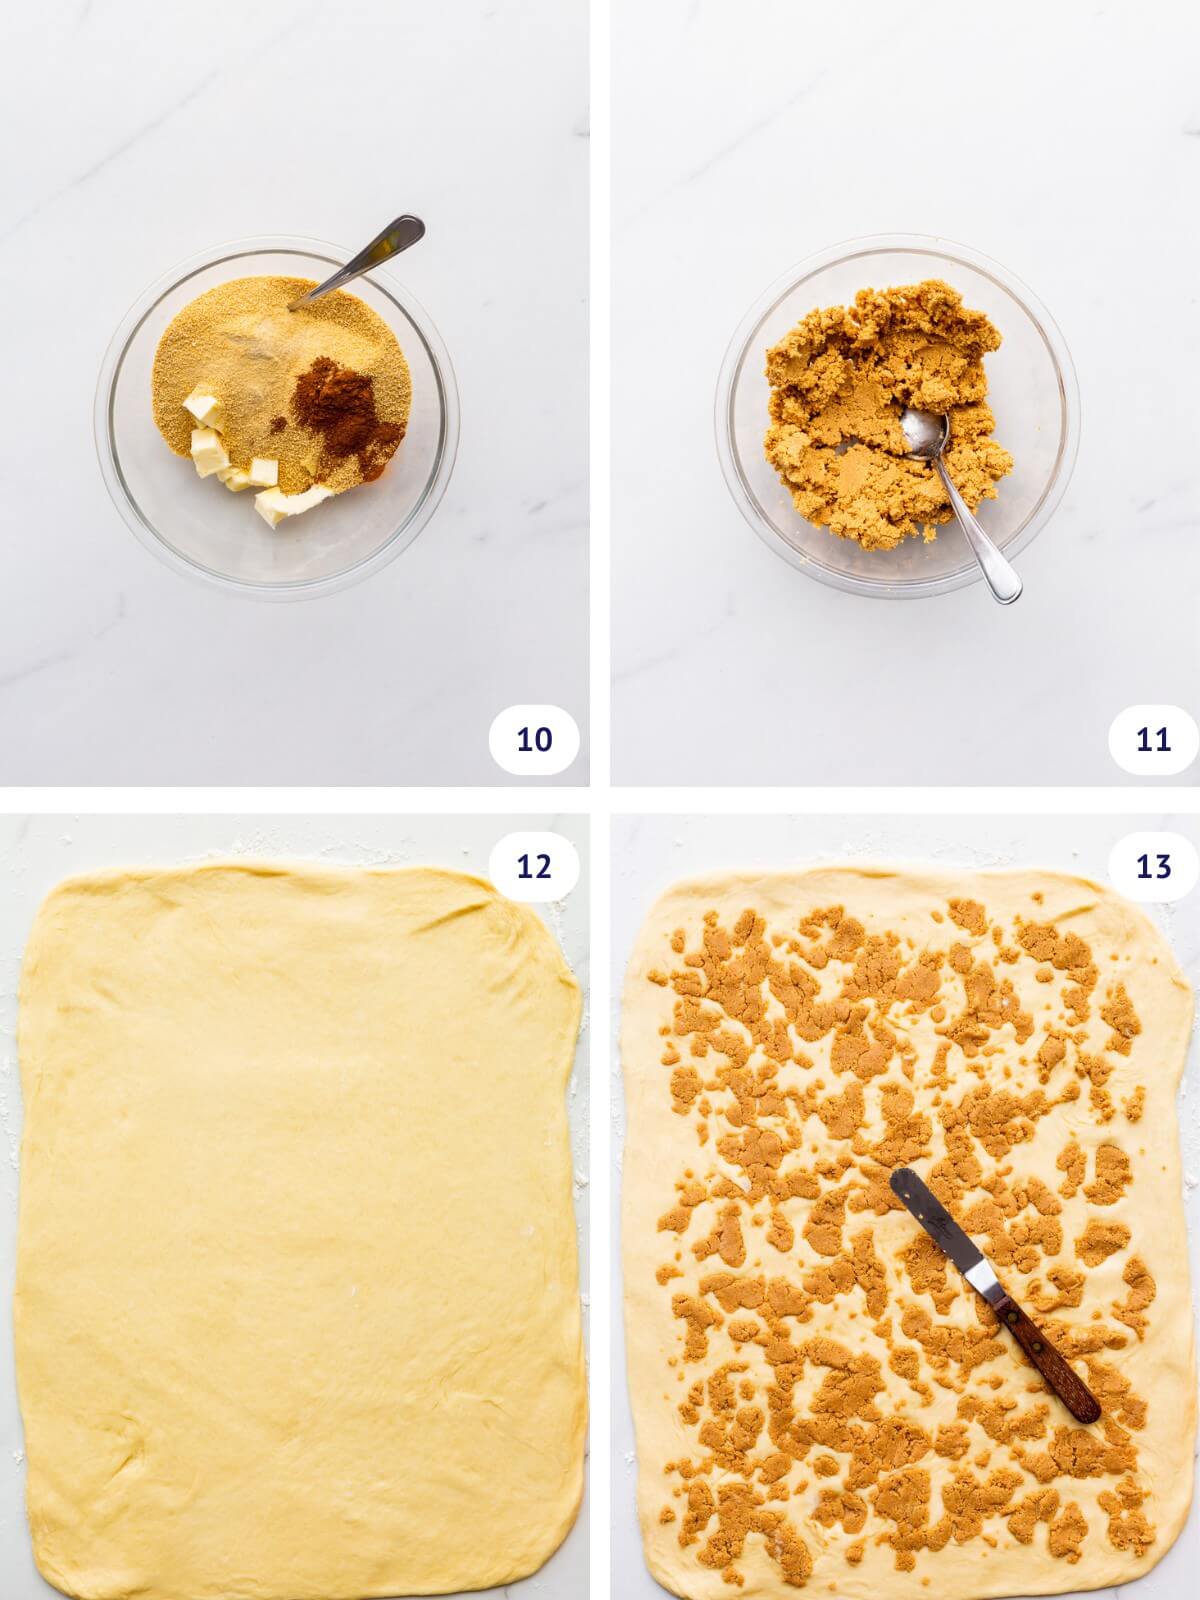
Step 4-Combine the filling ingredients in a small bowl (image 10). The mixture will be crumbly (image 11). Once the dough has risen, roll it out on a floured surface to a 12x16-inch (30.5x40.6-cm) rectangle (image 12) and crumble/smear the filling over top from edge-to-edge (image 13).
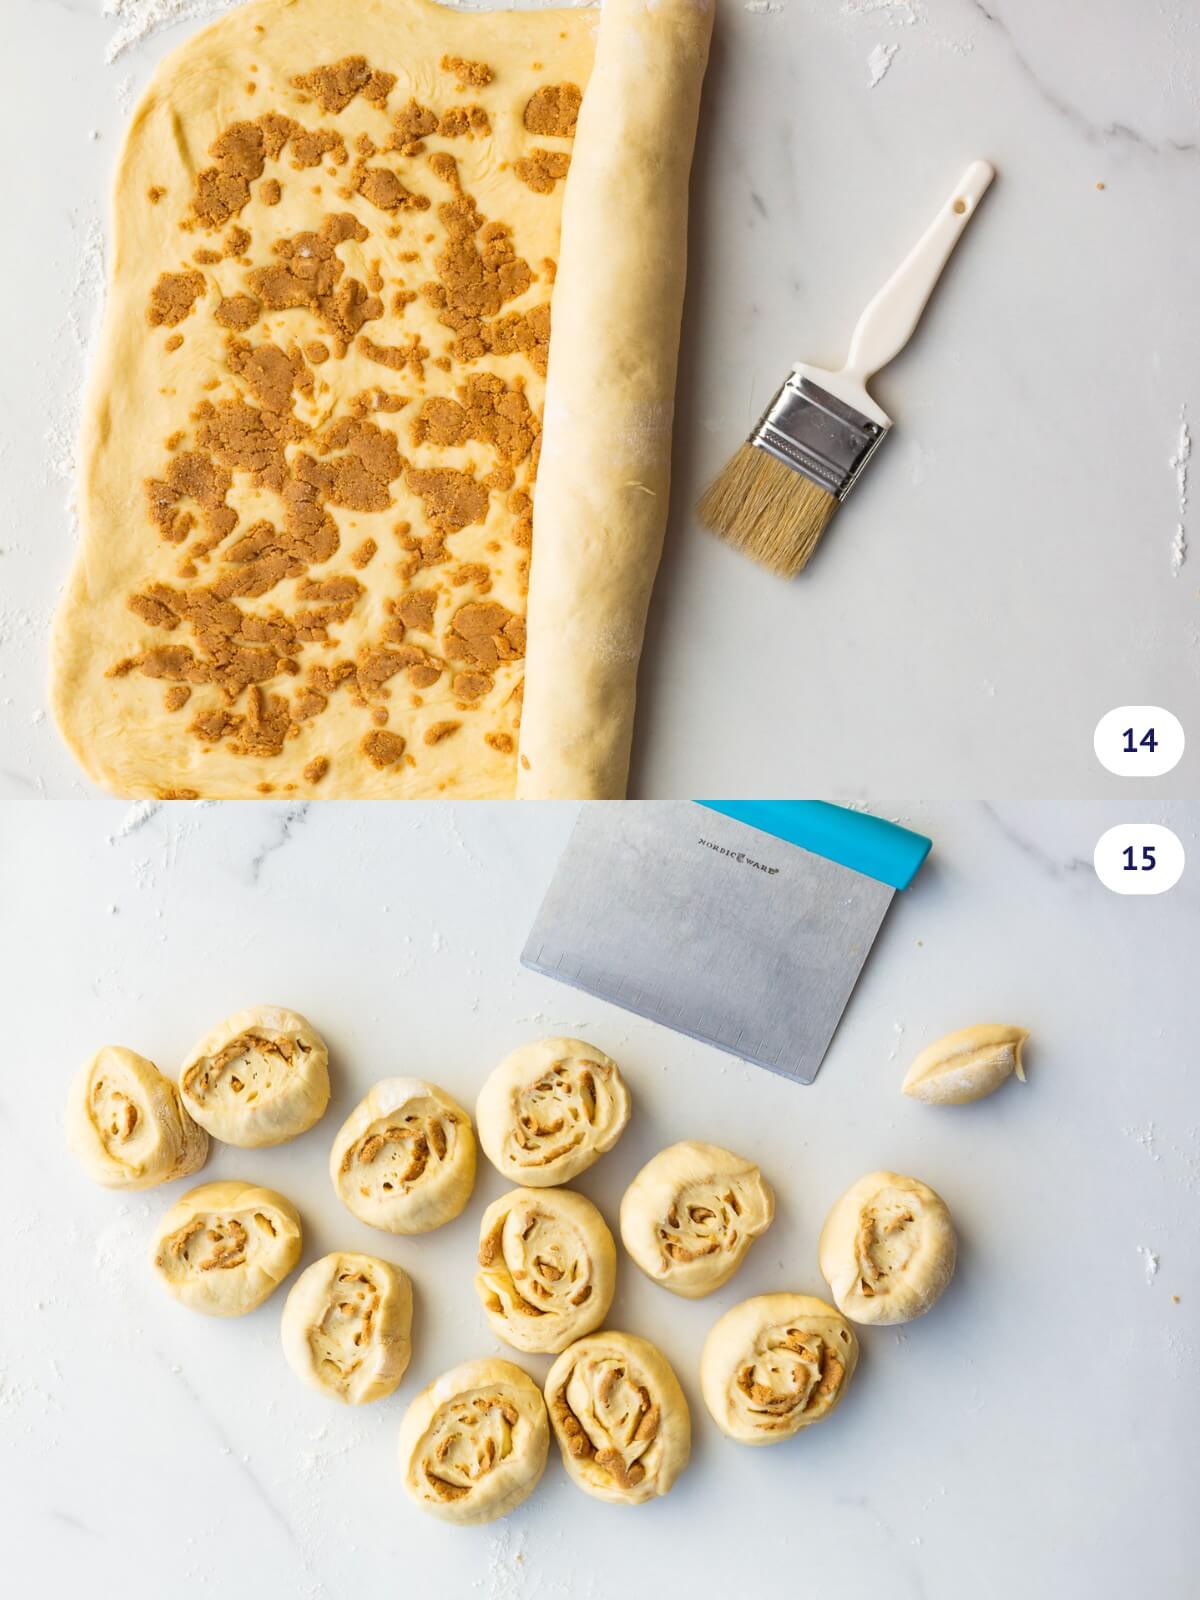
Step 5-Roll the dough into a 12-inch (30.5 cm) log (image 14) and cut it into twelve equal pieces (image 15).
Tip: You can use unflavored dental floss to cut the buns and preserve their round shape, but I generally use a metal bench scraper. Just don't smush the dough too hard with your hands and be swift about it to avoid distorting the shape too much. You can always gently reshape the buns between your palms.
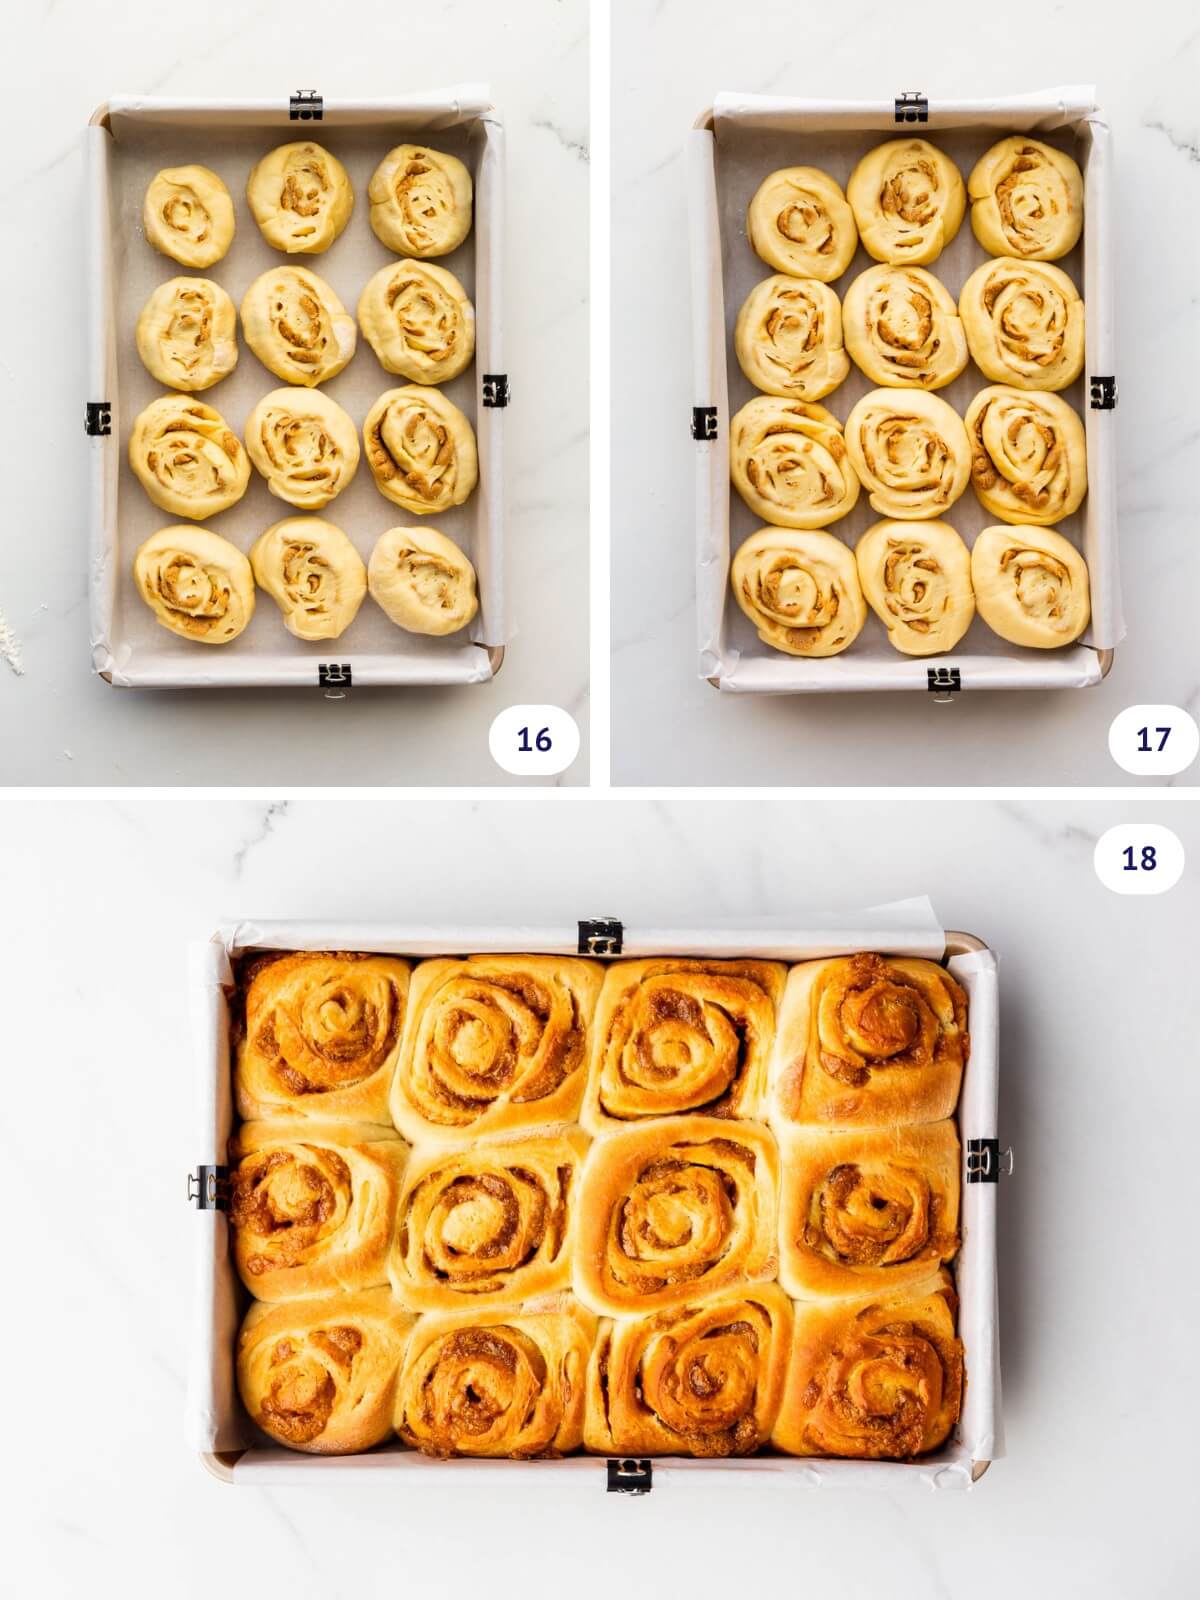
Step 6-Transfer the twelve buns to your 9x13-in pan (23x31-cm) (image 16). Cover and let the buns proof slowly while you preheat the oven. When the buns are proofed (image 17), bake them until golden brown and baked through (image 18).

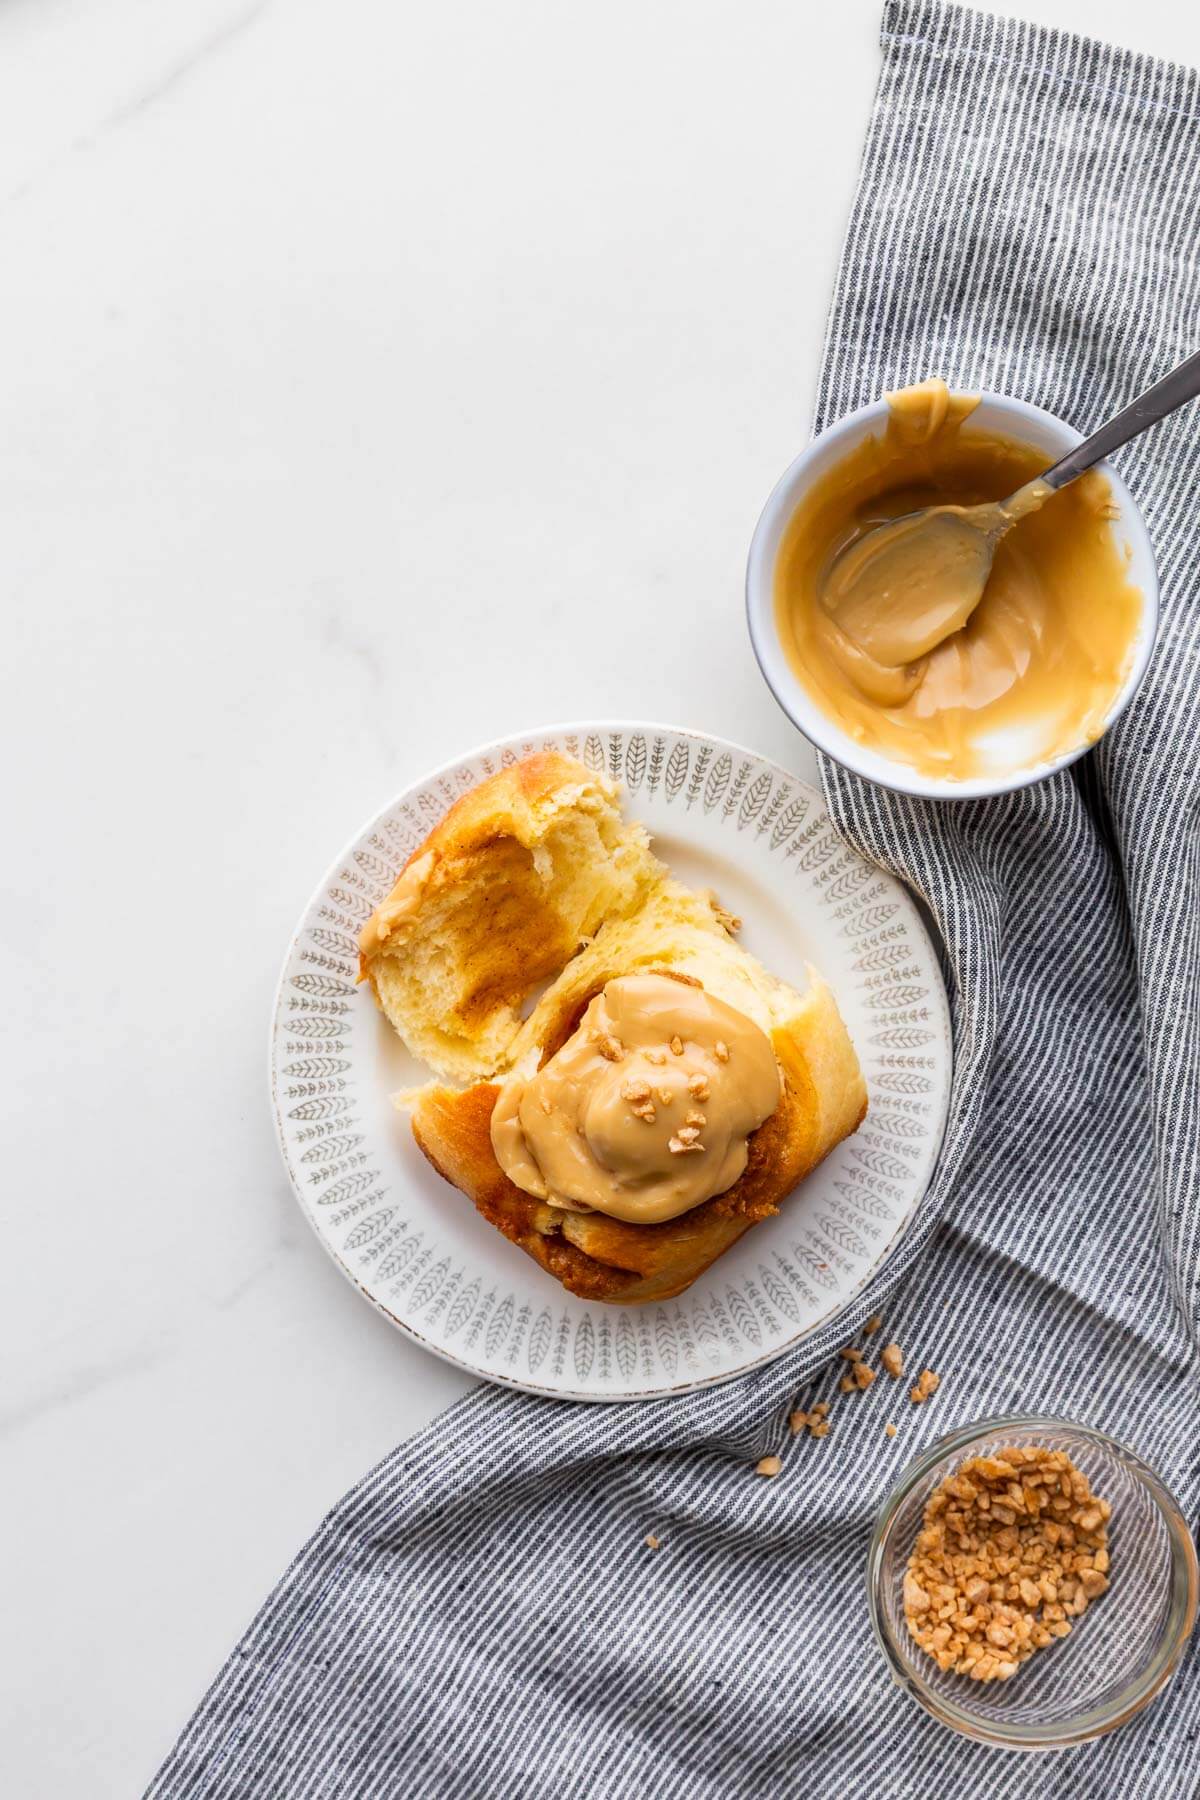
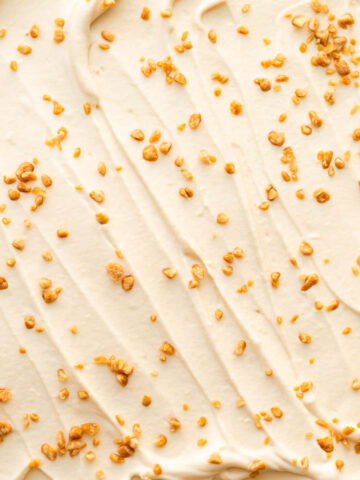
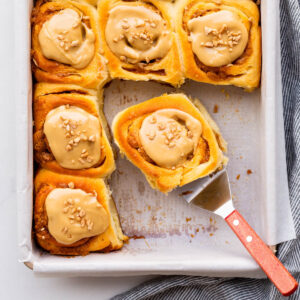
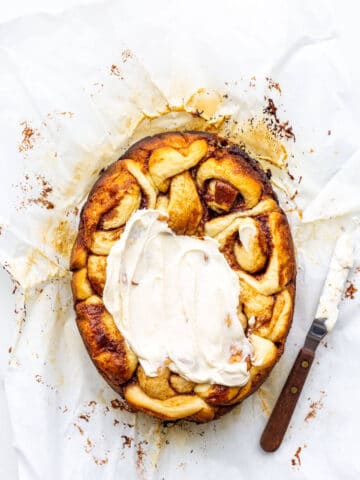
Step 7-After cooling slightly, with the back of a spoon, smear a spoonful of room-temperature maple butter over each bun (image 19) and sprinkle with a few maple flakes (image 20).
Maple Cinnamon Bun Baking FAQs
I prefer to use maple sugar in both the dough and the filling for cinnamon buns and maple butter as the topping. If you want to use maple syrup, I would pour hot maple syrup over cinnamon buns as soon as they come out of the oven to make them maple sticky buns. Remember that maple syrup is not the same as maple-flavoured pancake syrup (which is corn syrup). They are not interchangeable!
Maple butter, also called maple cream, is a pure maple spread made by boiling maple syrup and then cooling it before whipping it. The process creates a creamy, smooth spread without using any dairy (butter or cream). It is a dairy-free product produced in North-East parts of the US and Eastern Canada, wherever maple syrup is produced.
Yes, you can make these ahead. The day before, make the dough, let it rise, roll it out, and shape/cut out your buns, placing them in your 9x13 baking dish. Top with plastic wrap and place in the refrigerator overnight. The next morning, take the buns out as soon as you wake up and let them come to room temperature and let them proof (this can take a couple of hours!) then bake them.
Other Maple-Flavoured Baking Recipes
If you love maple as much as I do, here are a few more maple-flavoured baking recipes to try:
If you tried this recipe for the best maple cinnamon buns (or any other recipe on my website), please leave a ⭐ star rating and let me know how it went in the comments below. I love hearing from you!
📖 Recipe
Maple Cinnamon Rolls
Ingredients
Cinnamon bun dough
- 500 grams bleached all-purpose flour
- 7.5 mL Diamond Crystal fine kosher salt
- 250 mL whole milk (3.25 % fat) warmed to 50-55 °C (122-131 °F)
- 70 grams maple sugar or granulated sugar (see Notes)
- 2 large egg(s) room temperature
- 8 grams instant dry yeast 1 packet
- 150 grams unsalted butter softened and cut into small pieces
Filling for cinnamon rolls
- 80 grams unsalted butter softened
- 200 grams maple sugar or brown sugar (see Notes)
- 5 mL ground cinnamon
Topping
- 250 grams maple butter
- 20 grams maple flakes
Instructions
- Prepare a 9x13-inch (23x33-cm) baking pan by buttering and lining the inside with a large sheet of parchment paper. Set aside.
- Prepare a large bowl or a Cambro, spraying it lightly with cooking spray or brushing a thin layer of neutral oil (like canola) all over the inside. Set aside.
To make the dough
- Whisk together the flour and salt in a medium bowl. Set aside for later.
- In the bowl of a stand mixer fitted with the paddle attachment, combine the warm milk, eggs, 70 grams (⅓ cup) sugar, and instant yeast. Stir them together for a few seconds on low just to get everything evenly mixed and to break up the eggs.
- Add the dry ingredients to the mixer bowl and stir everything together on low speed to form a shaggy, evenly mixed dough.
- Switch to the hook attachment and knead the dough for 5 minutes until it's smooth and elastic dough. The bowl will be clean.
- With the mixer kneading on low, add the butter, a little bit at a time. Note the dough will become rough and sticky with the fat of the butter interfering with the gluten temporarily.
- Knead the dough for 10 minutes in the mixer. You should end up with a smooth round ball of dough. The bowl will be clean again.
- Transfer the dough to the greased Cambro, cover with a towel, plastic wrap, or a shower cap, and let it rise until doubled in size (for about 45 minutes to an hour).
To make the filling
- In a bowl, cream together the softened butter, the sugars, and the cinnamon until you have a thick brown paste. Set aside.
Assemble the rolls
- When the dough has risen, remove the towel. Lightly flour your counter and transfer the dough to roll it out into a big rectangle of at least 12-x16-inches (30.5-x40.6-cm). Don't worry too much if it's a little bigger.
- Spread the filling over the entire surface of the dough, then roll neatly into a long 12-inch (30.5 cm) log.
- Cut the dough into 12 equal buns (you don't have to trim the ends much, if at all) and place them in the prepared baking pan. Cover with plastic wrap or a towel.
- Let the rolls rise until they have puffed and until proofed (if you lightly press your finger into the side of a roll, the indent should very slowly fill out and disappear).
- Meanwhile, preheat the oven to 350 °F (175 °C).
- Bake the buns until golden brown. This takes about 30 minutes. The internal temperature should be at least 190 °F (88 °C)-use an instant-read thermometer for this.
- Let the buns cool in the pan for 45 minutes to an hour before garnishing.
Topping the buns
- Dollop a spoonful of maple butter on each bun and use an offset spatula (or the back of a spoon) to spread it on top. Sprinkle with maple flakes. These are best served the day they are baked.
Notes
- Substitutions and variations:
- sugar-the maple sugar in the dough can easily be replaced with regular granulated sugar, while the maple sugar in the filling can be replaced with light or dark brown sugar
- maple syrup-you can turn these into maple sticky buns by pouring up to ¾ cup (180 mL) of hot maple syrup over the hot buns as soon as they come out of the oven.
- yeast-I prefer to use instant yeast. If you are using active yeast, you will have to heat the milk to a higher temperature to proof the yeast and the rise times will be longer and slower.
- maple butter-you can use homemade or store-bought maple butter. Remember maple butter is pure maple syrup, not to be confused with a maple-flavoured butter made by mixing softened butter with maple sugar or maple syrup.
- You can find maple flakes, maple sugar, and maple butter on Amazon, though I prefer to get them at my local grocery stores and farmer's market.
- This recipe calls for Diamond Crystal fine Kosher salt. If using regular table salt, add half the amount or the recipe may be too salty!
Nutrition
Nutrition information is automatically calculated and should only be used as an approximation.
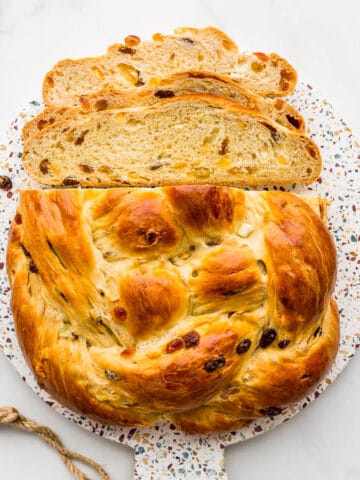
Make the dough and then let it rise, slowly on the counter for 3 hours. Punch it down and put it in the fridge before bed. Then in the morning, you just have to shape the dough into simple brioche buns, or for a different look, you can roll out the dough with a rolling pin, and cut out circles to form these brioche flowers (see step-by-step photos). Make sure you use pure maple sugar (like this one on Amazon and Amazon Canada).
For these mini maple brioche buns, I used maple sugar, the secret ingredient used in this maple apple pie. Maple sugar is crystallized maple syrup so baking with maple sugar allows you to add tons of maple flavour without the water in maple syrup. You can buy maple sugar on Amazon and use it in many other maple recipes or spread it thinly inside rolled crêpes.
Bea says
I love this recipe and love your site! Just found you and so excited about the wonderful possibilities!
Stacey @ Bake.Eat.Repeat. says
These are adorable! I love the flower shape, I've never seen that before, but am definitely going to be doing that next time I make something like this, it's so cute! And I'm sure these were absolutely delicious!
Shareba @ In Search Of Yummy-ness says
These are adorable Janice! I bet they would be good with marmalade... mmm...
Ayngelina says
These are absolutely beautiful, thanks for sharing!
Melissa says
so cute! this makes me want my pastry class even more. Can we make it pastry slash dough making instead?
Also, google "the power of the introvert" and watch Susan Cain's Ted Talk. It will all make sense!
Janice says
I love it when you suggest things for me to read/watch! You are the best!
Katherine Chong (The Piquey Eater) says
These are amazingly cute. The design will lend itself well for many other recipes too! Great recipe 🙂
Janice says
I can totally see this with savoury fillings too, and it's so surprisingly easy!