

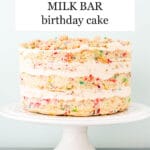
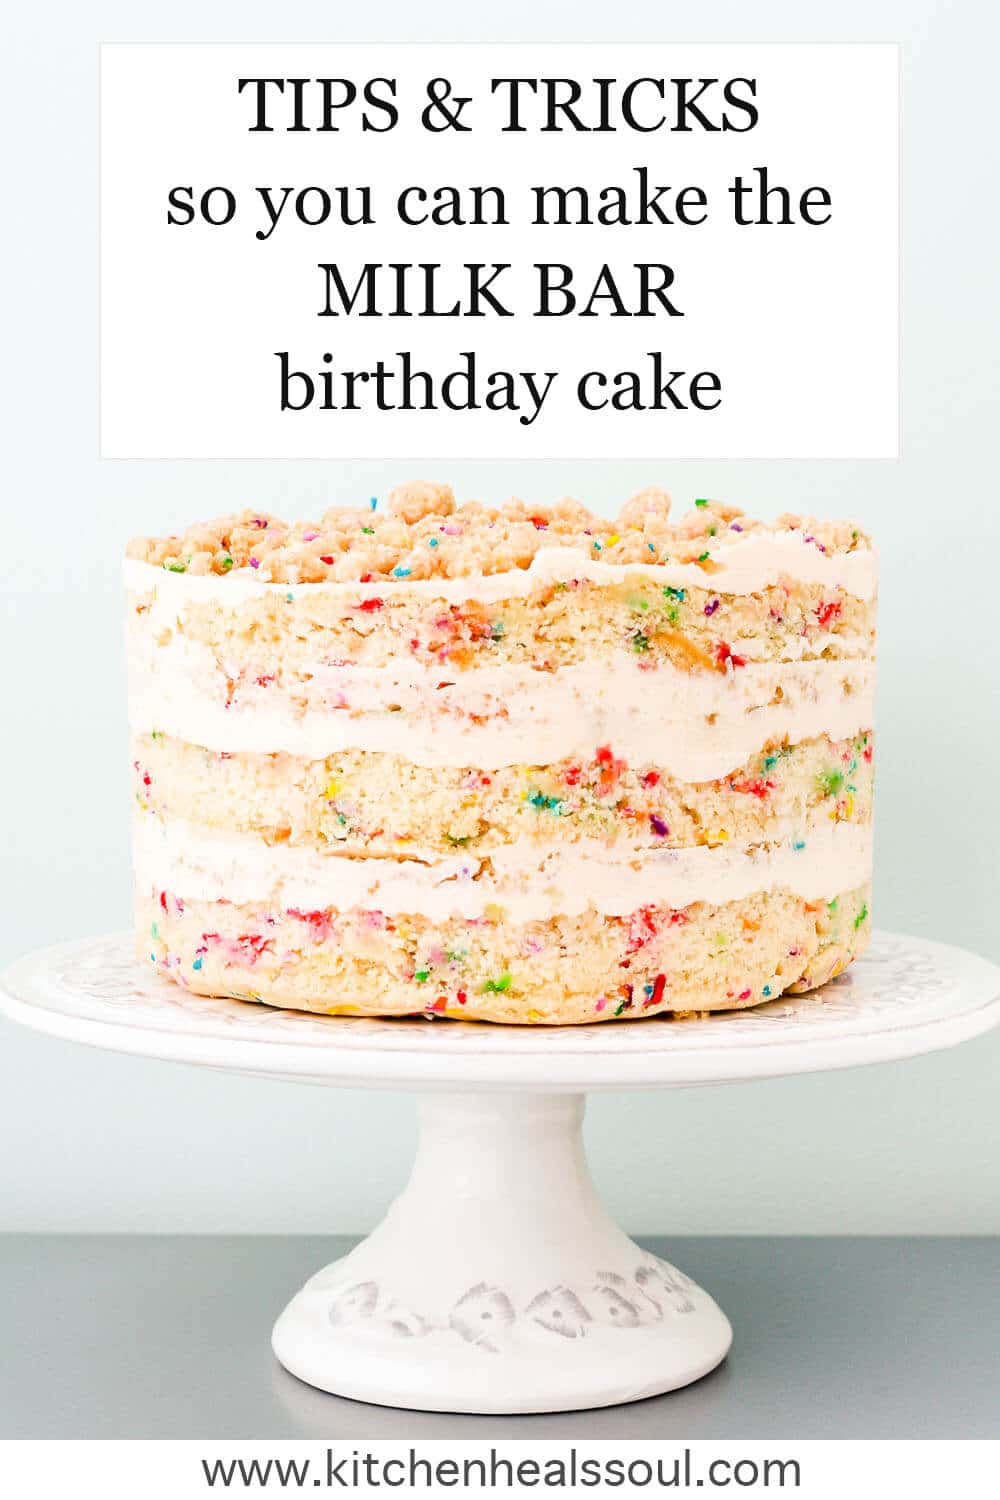
Learn how to make the famous Momofuku Milk Bar birthday cake from Christina Tosi's recipe from the Milk Bar cookbook. This birthday cake is a play on the quintessential funfetti birthday cake loaded with rainbow sprinkles (jimmies).
This recipe has a lot of steps but isn't too difficult. Spread out the work over a couple of days, and you'll be fine!
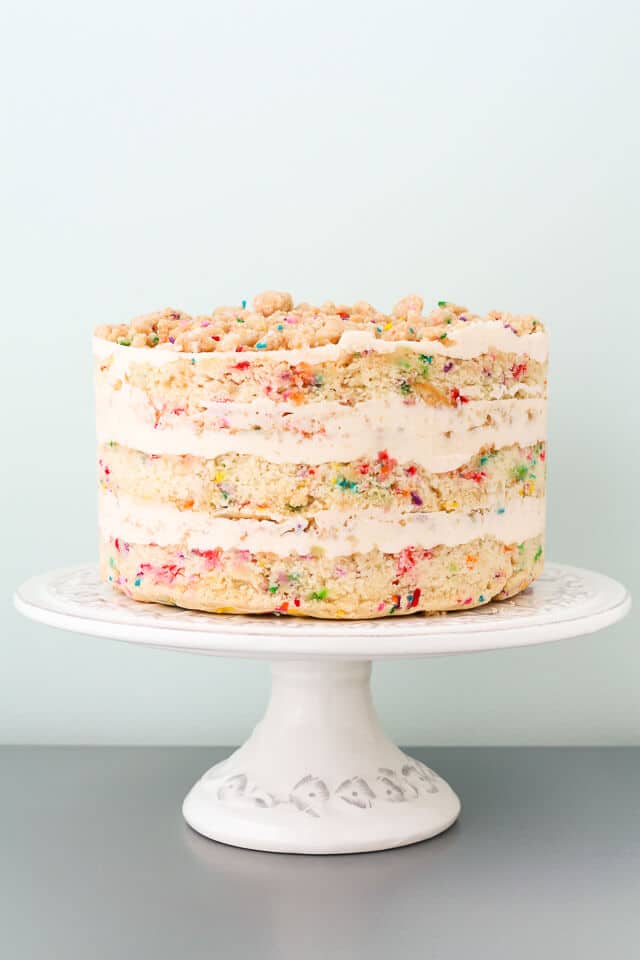
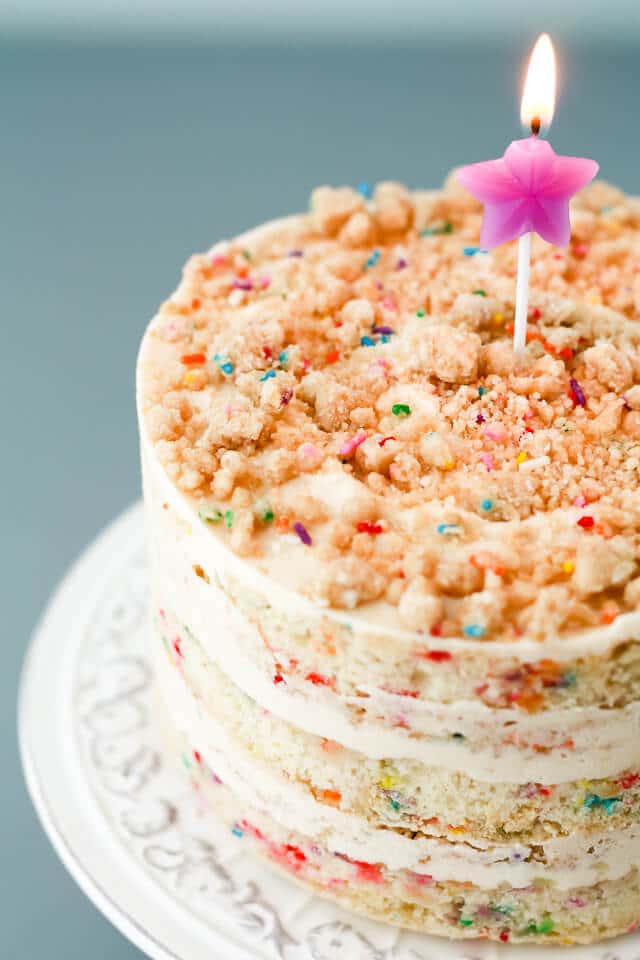
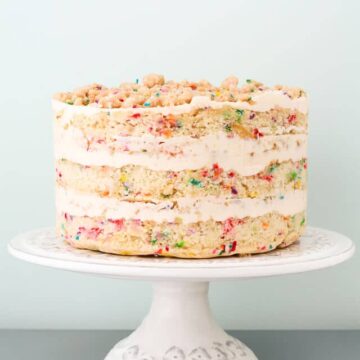
The Milk Bar birthday cake from Christina Tosi's new book Milk Bar available on Amazon is THE celebration birthday cake everybody wants to make and eat.
Christina Tosi is the genius behind the Milk Bar pie, compost cookies, compost pound cake, among others. She is one to follow for nostalgic, yet innovative baked goods.
Jump to:
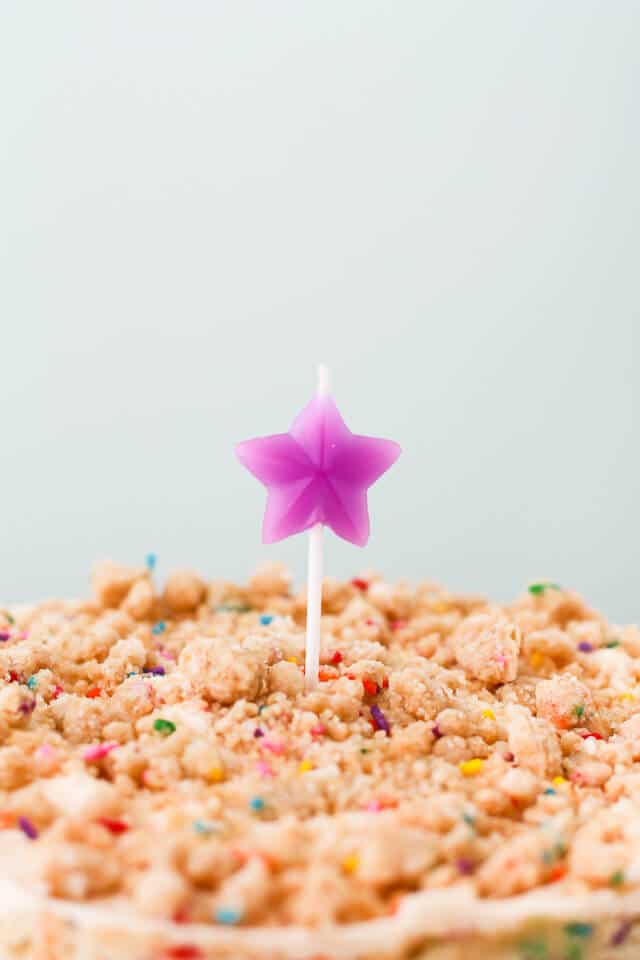
I think this is the perfect cake to say goodbye to my twenties, and to greet my thirties. It's fun, and maybe a little whimsical, full of brightly coloured sprinkles, and birthday cake crumbs. I'd suggest you make an extra batch of the Momofuku Milk Bar birthday cake crumbs so you can make these birthday cake truffles with the cake scraps. Just sayin'.
Everything you will need to make the Christina Tosi's Milk Bar birthday cake
Christina Tosi's birthday cake recipe, like most of her layer cakes, requires a lot of special ingredients and tools that most of us home bakers don't have. It's a fact. Before you make the Milk Bar birthday cake, you will most likely need to buy the following items.
Special ingredients to make the Milk Bar birthday cake
- liquid glucose: you may find it at Bulk Barn or your local bulk ingredients store, or restaurant/baking supply stores in your area. If not, you can Wilton brand glucose from Amazon.
- citric acid: you may find it at Bulk Barn or your local bulk ingredients store. If not, you can order citric acid from Amazon.
- rainbow jimmies: the sprinkles used for this cake recipe are rainbow jimmies, which kind of look like tiny coloured grains of rice. Your grocery store will most likely have rainbow jimmies that you can buy. If not, order them on Amazon.
- cake and pastry flour: cake and pastry flour has a lower protein content than regular all-purpose, which will help you achieve a fluffier, more tender cake. You can find it on Amazon if your grocery store doesn't have it.
- grapeseed oil: grapeseed oil is a flavourless oil. If you don't want to buy grapeseed oil, Tosi recommends using canola oil. If you feel like buying grapeseed oil, you can buy it on Amazon.
- imitation vanilla: Christina Tosi recommends using artificial or imitation vanilla for many of her recipes because imitation vanilla tends to have a more pronounced vanilla flavour that is very nostalgic. Use a clear imitation vanilla extract if you can find it. You can also buy it on Amazon. You can also use real vanilla extract if you prefer, but the flavour won't be the same.
Special equipment to make the Milk Bar birthday cake:
- stand mixer: Christina Tosi has a very specific way of mixing cake batters and they require a ton of beating. Unfortunately, this means using a hand-held electric mixer is a terrible option for this recipe (as is a wooden spoon for mixing by hand). Your best bet is to use a KitchenAid Artisan 5-quart mixer. If you don't have one and you want to bake more, I highly recommend getting one on Amazon.
- 6-inch cake ring: I actually used the ring of a 6-inch springform pan from Amazon to build my cake, but it was not ideal because of the rim/seam on the springform which made it extra hard to unmold. Buy a cake ring from Amazon if you can.
- acetate: when I made this cake, I didn't know where to buy acetate, so I used acetate sheets from an office supply store. No clue if it's food grade. Don't do that. Buy a roll of acetate from Amazon.
- mini offset spatula: I love my mini offset spatula from Ateco and I use it all the time when I am making cakes. You can buy it on Amazon! Tosi actually uses a spoon that she's bent to assemble cakes. That's another option if you don't mind bending one of your spoons.
- quarter sheet pans with rims: I like these Nordic Ware quarter sheet pans on Amazon.
The recipe for the Milk Bar birthday cake is brilliant and inspiring, but if you want to bake this cake (or anything from the Momofuku Milk Bar book), you will need to start baking ahead of time. Here are a few important things to note before you get started:
- How long does it take to make the Milk Bar birthday cake? I made this cake a day ahead, and it took me about half a day to make, so it's really not more time-consuming than any other cake recipe, once you have all the ingredients and equipment
- Can you make the Milk Bar birthday cake ahead? Christina Tosi's layer cakes, like the Milk Bar birthday cake, are made ahead and this is an integral part of the process. So you absolutely can make this cake ahead of time. I froze the assembled cake overnight to set the layers, then unmolded it and placed it on a cake stand in the fridge for san entire day to slowly defrost.
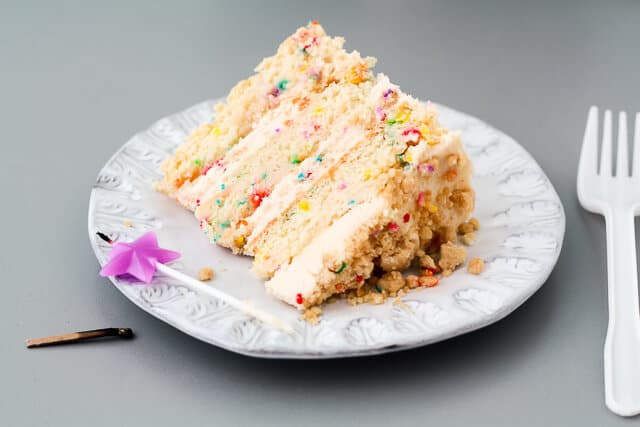
- When you cut into it, use a giant chef's knife to make quick, clean slices, otherwise, you will end up with a mess as the cake crumbs will tear through the delicate cake.
How to store this cake
Given this sprinkle birthday cake is made with cream cheese frosting, it's best to store it in the fridge. If you've cut into the cake, just cover the cut edges with pieces of parchment to prevent them from drying out. Place the cake in the fridge until the frosting is firm and cold, then cover the whole thing with aluminum foil. You can store this cake for up to a week, or freeze slices for later.
For a detailed explanation, read about how to store cake.
The instructions are not identical to those in the book because there are certain things that I do differently. Still, if you love making cakes, buy the book on Amazon. It's a great investment full of insight and tips. If you want to try another Momofuku Milk Bar style cake, try this gorgeous blackberry almond cake recipe.
📖 Recipe
Homemade Milk Bar Birthday Cake
Equipment
Ingredients
Birthday cake crumbs
- 100 grams granulated sugar
- 25 grams light brown sugar
- 90 grams cake flour
- 2.5 mL baking powder
- 2.5 mL Diamond Crystal fine kosher salt
- 20 grams rainbow sprinkles
- 40 grams grapeseed oil
- 15 mL pure vanilla extract
Birthday cake
- Pam or vegetable oil for preparing the pan
- 245 grams cake flour
- 7.5 mL baking powder
- 3.75 mL Diamond Crystal fine kosher salt
- 50 grams rainbow sprinkles
- 55 grams unsalted butter room temperature
- 60 grams vegetable shortening
- 250 grams granulated sugar
- 50 grams light brown sugar packed
- 3 large egg(s)
- 110 grams buttermilk (1 % fat)
- 65 grams grapeseed oil
- 10 mL pure vanilla extract
- 25 grams rainbow sprinkles
Birthday cake soak
- 55 grams whole milk (3.25 % fat)
- 5 mL pure vanilla extract
Birthday cake frosting
- 200 grams icing sugar
- 2.5 mL Diamond Crystal fine kosher salt
- 1 pinch baking powder
- 1 pinch citric acid
- 115 grams unsalted butter room temperature
- 50 grams vegetable shortening
- 55 grams Philadelphia cream cheese (full fat, regular)
- 15 mL Wilton glucose
- 15 mL light corn syrup
- 15 mL pure vanilla extract
Instructions
To make the birthday cake crumbs
- Preheat the oven to 300°F. Line a baking sheet with a Silpat or a piece of parchment.
- In the bowl of an electric mixer fitted with the paddle attachment, combine the sugars, flour, baking powder, salt, and sprinkles and mix them on low speed until they are evenly mixed.
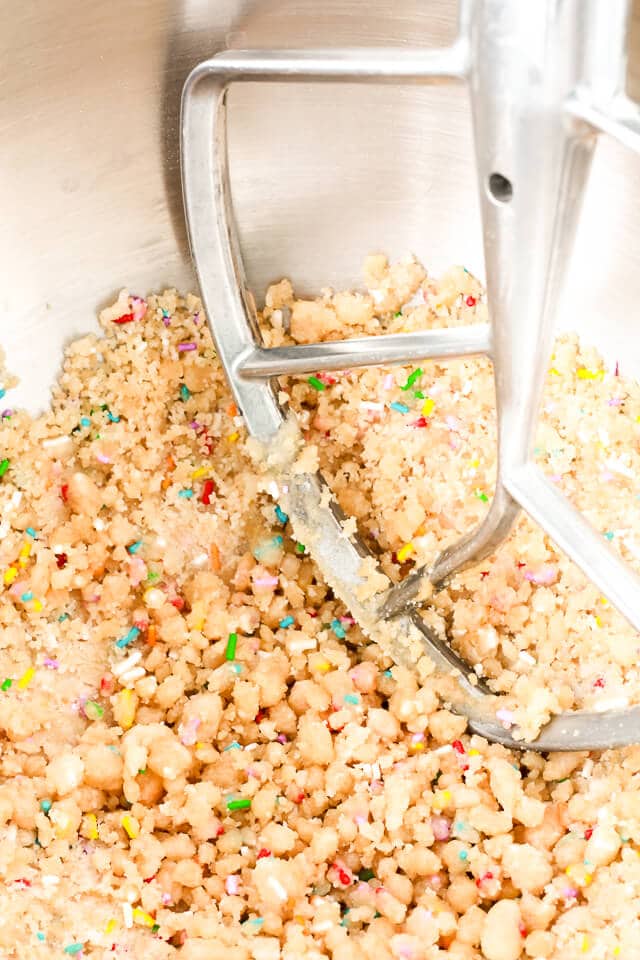
- Add the oil and the vanilla and continue beating the mixture until the ingredients clump and form small clusters.
- Carefully spread the delicate clusters in a thin layer on the prepared baking sheet and bake them for about 20 minutes. They dry and harden as the cool into crispy crumbs. Let them cool completely before using them. By the time you've made the cake and frosting, they will be ready to be used anyways.
To make the cake layers
- Preheat the oven to 350°F (use an oven thermometer to verify the temperature). Prepare a rimmed quarter sheet pan (mine is a 10-x15-inch pan with a 1-inch rim) by spraying it all over with Pam and then covering the base with a sheet of parchment. Set aside.
- Whisk together the flour, baking powder, salt, and 50 grams of sprinkles in a small bowl. Set the dry ingredients aside for later.
- In the bowl of an electric mixer fitted with the paddle attachment, cream together the butter, shortening, and the sugars on medium-high for 2 to 3 minutes, scraping down the bowl as needed.
- Add the eggs (all at once) and then beat again on medium-high for another 2 to 3 minutes. Scrape down the bowl.
- In a 1-cup measurer, weigh out the buttermilk, grapeseed oil, and vanilla. With the mixer on low, add the wet ingredients in a steady stream. Increase the mixer speed to medium-high and beat for another 4 to 6 minutes. The mixture will double in size almost, and will appear light and fluffy. There will be no trace of oil left.
- With the mixer on low, add the dry ingredients, and mix for another minute or so until the ingredients are all combined.
- Pour out the batter into the prepared sheet pan, spreading it out into an even layer. Sprinkle with the remaining 25 grams of rainbow sprinkles.
- Bake for 30-35 minutes until the cake bounces back slightly when gently pressed in the corner. The center of the cake should no longer jiggle when the pan is shook. Cool the cake completely in the pan on a wire rack.
To make the birthday cake soak
- Whisk together the milk and vanilla in a small cup or bowl. Set aside for later.
To make the birthday cake frosting
- Whisk together the powdered sugar, salt, baking powder, and citric acid in a medium bowl. Set aside for later.
- In the bowl of an electric mixer fitted with the paddle attachment, cream the butter, shortening, and the cream cheese for 2 to 3 minutes on medium-high until the mixture is smooth and fluffy. Be sure to scrape down the bowl periodically.
- Add the glucose, corn syrup, and vanilla, and beat the mixture on medium-high again, for 2 to 3 minutes until it is silky smooth and a little glossy. Scrape down the bowl a few times.
- Now add the whisked dry ingredients and incorporate them on low speed. Increase the mixer speed to medium-high and beat the frosting until it is creamy and fluffy, just like the kind that comes in a can.
To assemble
- Cut the sheet cake into two 6-inch circles plus two half-circles using your cake ring as a template. Use a spatula to gently loosen and lift (carefully!) the circles and set them aside.
- Place the cake ring on a baking sheet lined with the 8-inch square of parchment. Line the inner rim of the ring with acetate to form a collar.
- Fill the bottom of the ring with the two half circles of cake. Press them slightly so that they are even. If there are any holes, fill them with the rest of the cake scraps.
- Brush half the birthday cake soak over the base of cake.
- Spread about 100 mL (one-fifth) of the birthday cake frosting over the base layer. Then sprinkle with one-third of the birthday cake crumbs, pressing them gently into the frosting. Top with another 100 mL (another fifth) of the birthday cake frosting, carefully spreading it so that it is even, but without disturbing the crumbs.
- Top with a full circle of cake, brush the rest of the cake soak over this layer, top with more frosting, cake crumbs, and another layer of frosting.
- Squeeze in the other strip of acetate between the inner rim of the ring and the first acetate strips (you are essentially making your cake ring taller at this point). Top with the last circle of cake. and the remaining frosting, spread evenly. Top with the remaining cake crumbs.
- Freeze the cake as is for at least 12 hours to set everything and making the unmolding process much easier.
- Three hours before serving, retrieve the pan from the freezer, and gently push the cake through the ring. Place it on a cake stand or cake plate. Now gently pull off the acetate ribbons.
- Let the cake defrost in the fridge before serving. Cut neatly with a large chef's knife.
Notes
- This recipe calls for Diamond Crystal fine Kosher salt. If using regular table salt, add half the amount or the recipe may be too salty!
Nutrition
Nutrition information is automatically calculated and should only be used as an approximation.
Since in my early twenties, I had a soft-spot for cake mix vanilla and sprinkle cake topped with a generous swirl of that sprinkle frosting in a can, this was the perfect recipe for me. The cake was designed to taste like the typical "funfetti" birthday cake that many of us ate to celebrate the years of our youth. This recipe brings cake from a box and frosting from a can to a whole other level. With every bite, you can pick out the sweet, salty, and sour notes. The crumbs bring a surprising crispy element to the usual creamy texture of frosting.
Please note this post contains affiliate links for Amazon. If you buy a product I recommend, I will get a small commission, and the price you have to pay will not change in any way.
Jen says
This cake turned out amazing!!! AND I have 2 pieces leftover. Thank you so much for the recipe. I'm going to put the cake crumbs into ice cream this summer. This definitely blew my mind. Delicious!
Jan says
Awesome! I'm so glad you liked it 🙂
Jen says
Hello! Can you tell me...is this a single serving cake? I wanted to make it for my husband & big sister's birthday and need to feed 5-6 people. I'm thinking this will be too small. Any suggestions?
Thanks!
Jan says
This recipe makes a 6-inch diameter cake but it's actually quite tall (5+ inches high). It can serve up to 8 people, and it would definitely work if you are feeding 5-6 people. Let me know how it goes 🙂
Ben says
Could you tell me what size acetate sheets you used? I'm looking to make this cake over the weekend and did a Google search thinking I'd find a clear answer and I haven't found one - there are a million different sizes. I just can't map out in my head how tall the cake ends up being and therefore not sure what size I need. Thanks!
Jan says
Hi Ben, I bought a pack of standard 8x11-inch sheets of acetate at an office supply store. I cut them into 8x4-inch strips. I used two sheets of acetate to make 4 strips (keeping the leftover acetate for future cake building...). I started by lining the inside of the cake ring with two strips, built up my first layers of cake, then slipped in another couple strips because the cake is much taller than my cake ring. I hope that helps! Good luck making this cake!
Elly says
This cake is GORGEOUS and it looks soooo yummy!! I hope to try this in the future! xoxo
Unknown says
Why the citric acid-can I skip it? Also all the shortening - hydrogenated fats-yikes ! Couldn't I substitute butter or even lard for the shortening?
Jan says
The citric acid provides some tang to the frosting flavor without adding more liquid to it. You could use some lemon juice instead, and then add a little less milk to compensate. As for the shortening vs butter vs lard, I think the shortening is just a neutral-flavored fat that is a little softer than butter, even when chilled. I guess an all-butter frosting would work too. Good luck!
Keith Bajura says
OMG! I made the cake with the 1155 grams of butter. I have frosting enough to frost 10 more cakes! I should have read the comments before making it. You really should fix your recipe. But it tastes delicious.
Jan says
Oh no! I'm so sorry about that! It seems I replaced one typo with another. I'll be more careful next time! You could probably freeze the leftover frosting to save it.
silt says
Really nice job. It looks beautiful. Even better than the pictures I've seen of the actual Momofuku Milk Bar's version. I'm going to try and make one for my son's birthday. With any luck it'll turn out half as nice as yours.
Jen at The Three Little Piglets says
30 was nothing, but now that I'm coming up on 40... That's a whole different ball game! Hope you had a great day to celebrate, and Happy Birthday!!
Sarah says
Beautiful! It really reminds me of the cakes my mom made for my birthdays growing up, but with a more mature twist. Think I may have to actually try it out for my husband's upcoming birthday.
Ms. Librarian says
Just a fyi - I think you have a typo for the frosting butter - should be 115 grams instead of 1115 grams 🙂
Jan says
Oh! Thank you for catching that! 1115 grams of butter in the frosting would not have been as tasty....
Fixed 🙂