

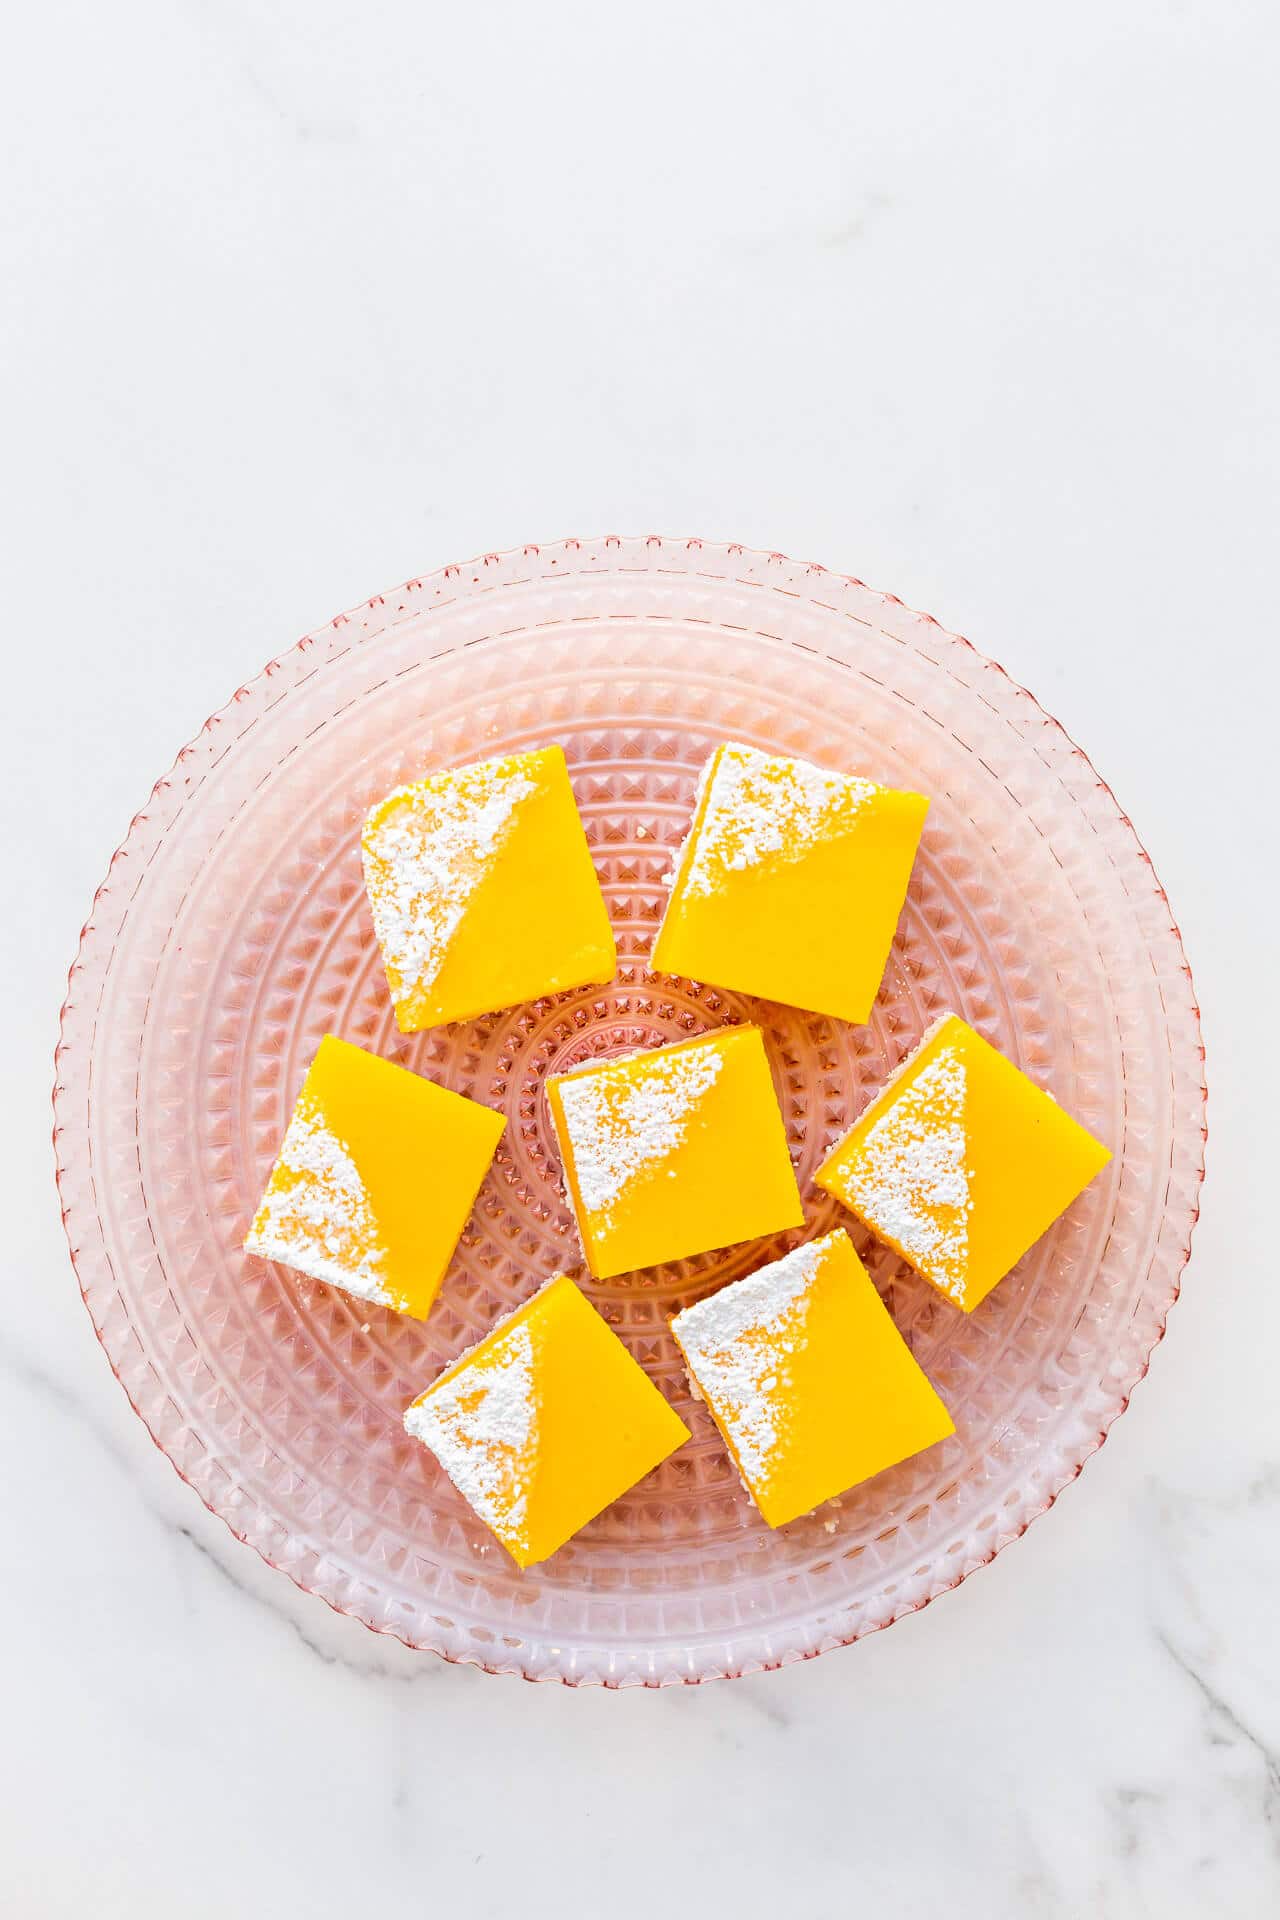
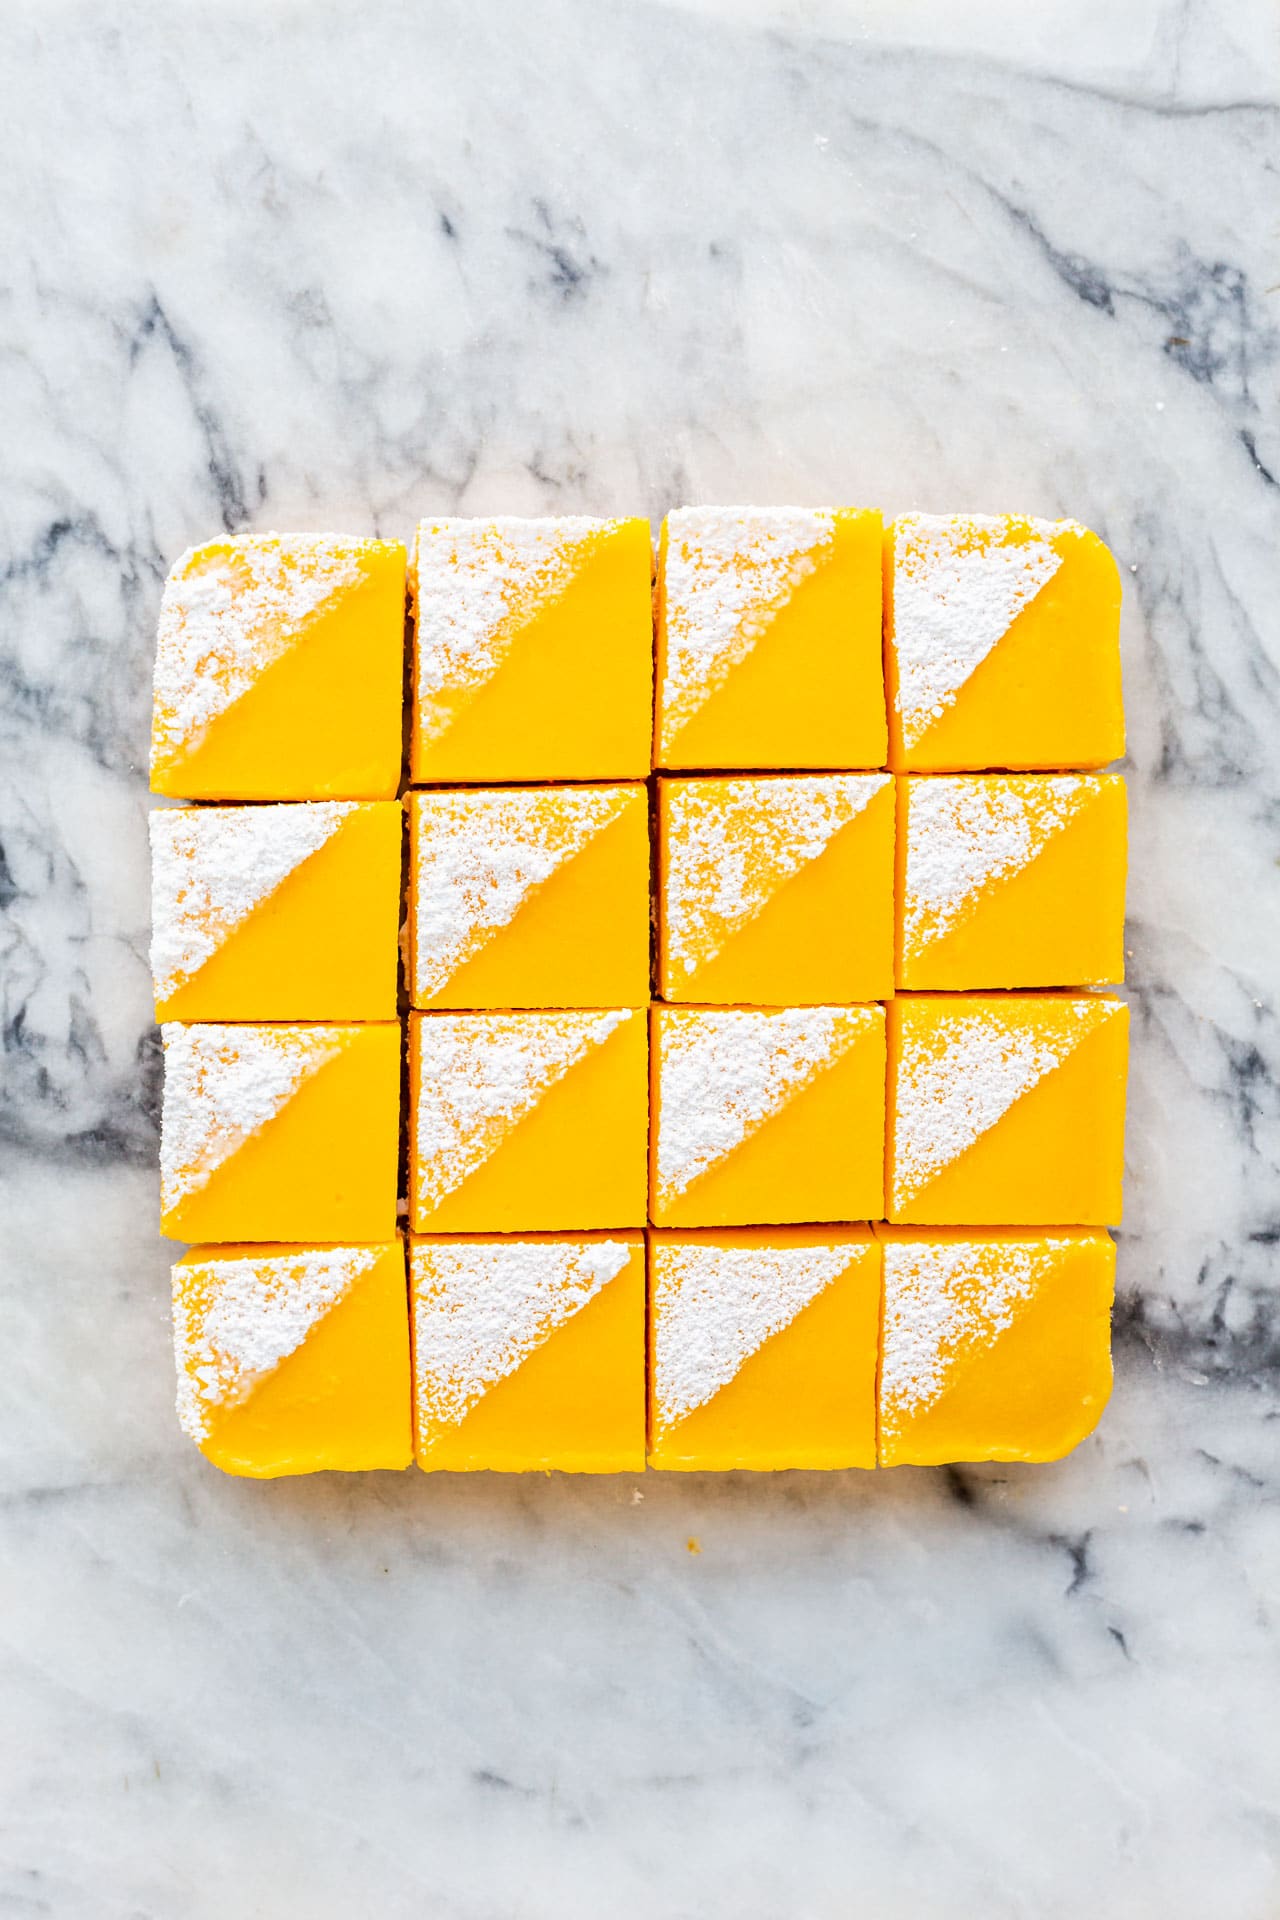
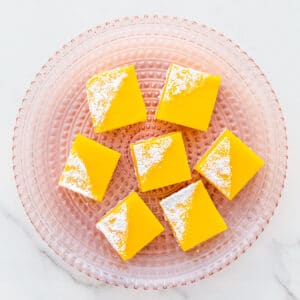
This foolproof recipe for easy lemon bars is made with a shortbread base and topped with tart lemon curd. These lemon squares are bright yellow and very lemony!
This recipe for lemon bars is different than most because you bake the crust separate from the filling, which contains no starches or flour and is cooked on the stove.
With this method and recipe, the thickened filling is much less likely to seep between the edge of the crust and the side of the pan. It makes it almost impossible for you to end up with upside-down lemon bars, which is a common problem with many recipes.
For this recipe, you need to know how to make lemon curd and shortbread cookies.
Jump to:
Cooking Lemon Bar Filling On The Stove
I much prefer this recipe and method for lemon bars where the filling is made from a lemon curd cooked on the stove, without thickeners because:
- the thickeners in lemon bar fillings mask the bright citrus flavour, mellowing it out or even muting it.
- the lemon filling without thickeners has a brighter, tart lemony flavour.
- the thickeners, especially flour, give the filling a whiter, more opaque appearance, which isn't as appealing for a lemon dessert.
- when lemon bar filling is baked on the crust, the liquid filling is poured over the shortbread base when it is very fluid and liquid, and this can lead to it seeping: the filling leaks under the crust. The lemon bar layers may end up reversed!
- the uncooked filling is whisked, which makes a foam that rises to the top of the bars as they bake, leading to a bubbly texture on top that has a white cast, so the lemon bars appear white, not yellow. Cooking the lemon filling on the stove eliminates the foam.
There are a couple of drawbacks to this method:
- there's a risk that the eggs cook to the point of being hard if you cook the filling on the stove. The hard cooked eggs are strained out then, which means there's a risk that the bars won't set properly.
- hard-cooked eggs can cause an eggy taste in the curd.
To avoid the eggs hard-cooking in the lemon filling, constant whisking is essential for a smooth, creamy, glossy result.
What You Need to Make Lemon Squares
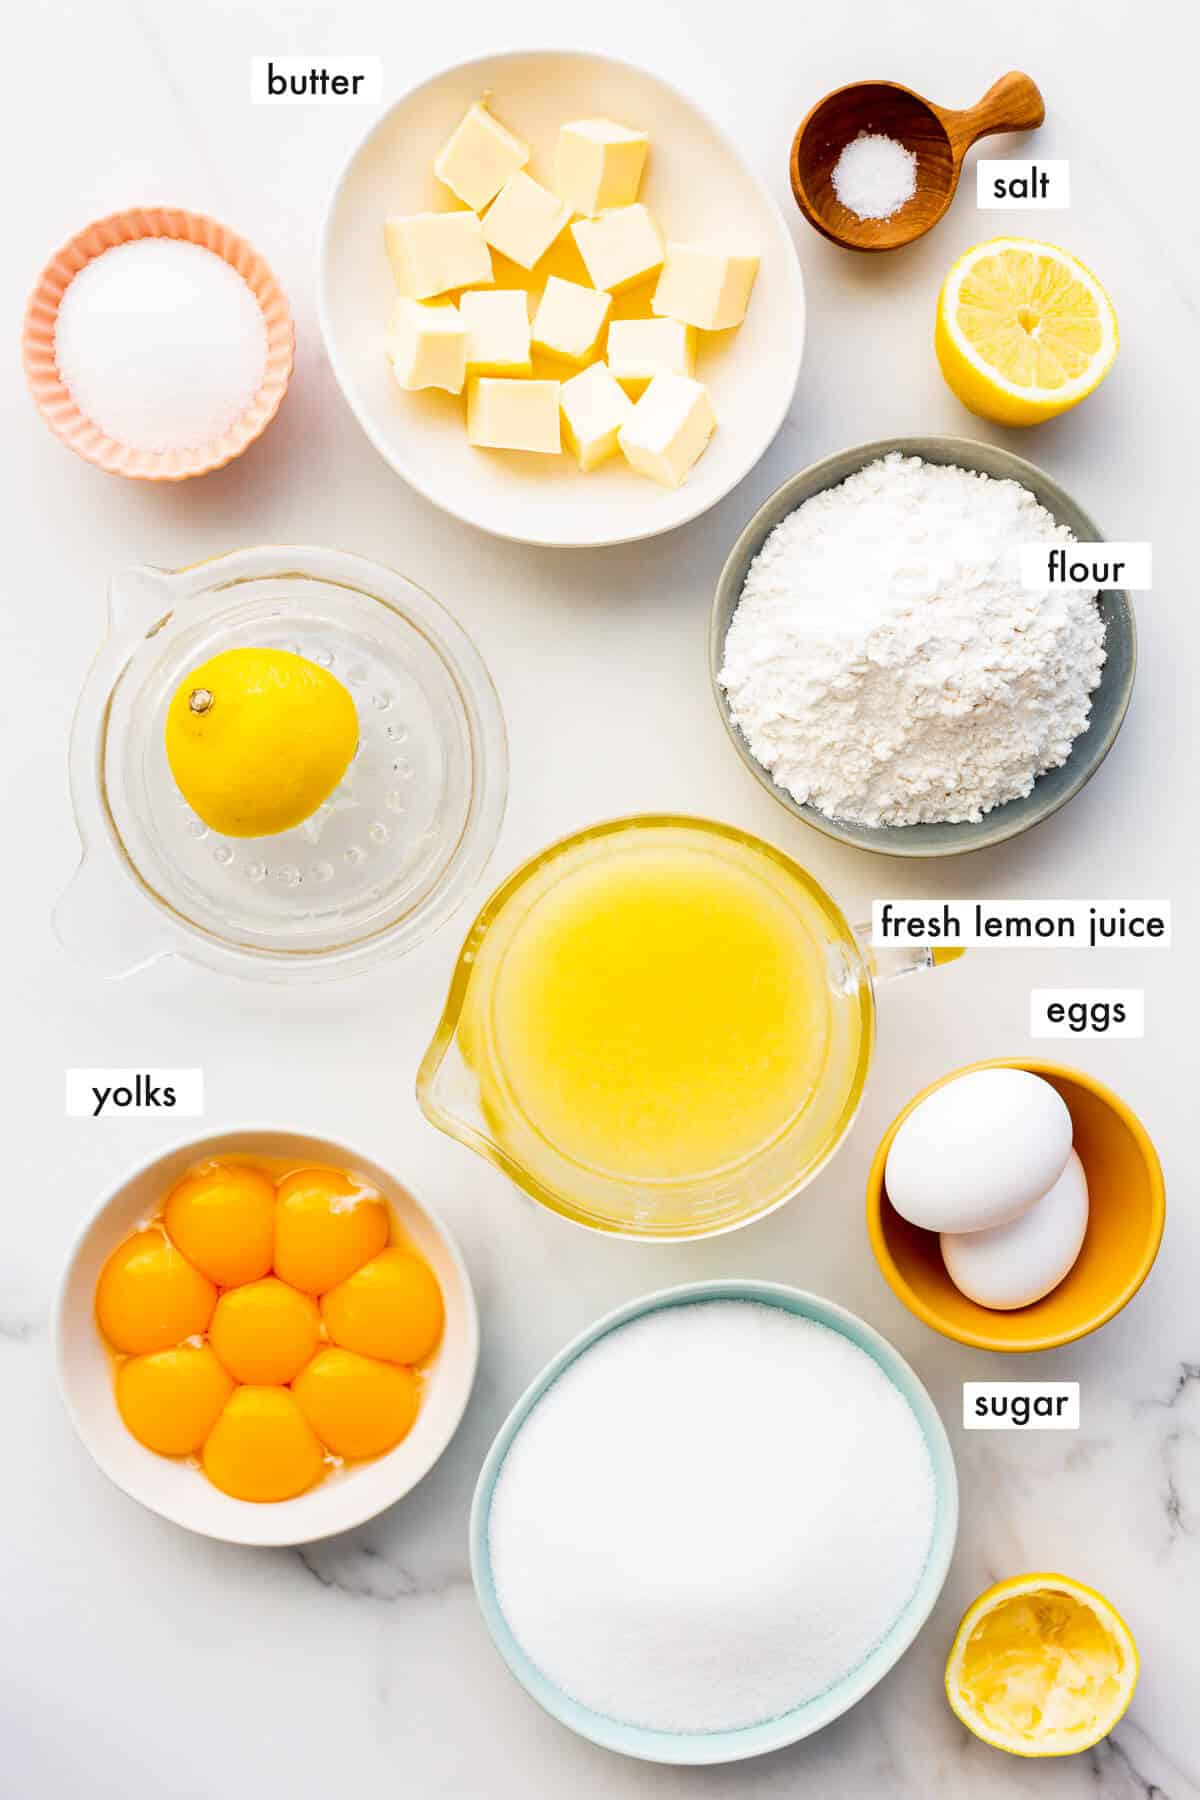
- all-purpose flour for the crust to make a firm base for the lemon filling so that you can easily cut and serve them
- sugar-use granulated sugar (white sugar), not brown sugar because we don't want the flavour of the sugar to mask the brightness of the lemon
- salt-I use Diamond Crystal fine kosher salt but table salt will work. Use half if you make this change.
- butter-preferably unsalted butter though salted butter could work, especially in the crust. Omit the salt from the recipe if using salted butter.
- lemon juice-I highly recommend using fresh lemon juice. Bottled lemon juice doesn't have a great flavour and we want these bars to shine!
- egg yolks and eggs-use large eggs as recommended, otherwise your filling may not set properly and the texture may be affected.
Please see the recipe card for the exact ingredients and quantities.
Substitutions and Variations
The base for these lemon squares is a shortbread cookie crust. You could also opt for a graham cracker crust, made from either store-bought or homemade graham crackers. I have a friend who actually makes the crust for her lemon squares using saltines (salted soda crackers) instead of graham crackers! There's room for creativity here.
How to Make Lemon Bars
To make lemon bars, there are 2 components: a base and a lemon filling. Once baked, the bars are cut into squares and dusted with powdered sugar.
For the base, you can easily fall back on the classic shortbread ingredient ratio of 1:2:3 of sugar/butter/flour, by weight. If you can remember some of the common baking ratios, you could make the base without a recipe! Baking ratios make it easy to scale up and down recipes. We assemble the crust in the food processor to make this recipe really easy.
Pre-cooking the lemon curd filling on the stove also means that you actually don't have to bake the bars a second time. The second baking step is actually optional but it can help the edges of the bars set more firmly, making it easier to separate them from the parchment paper when cutting.
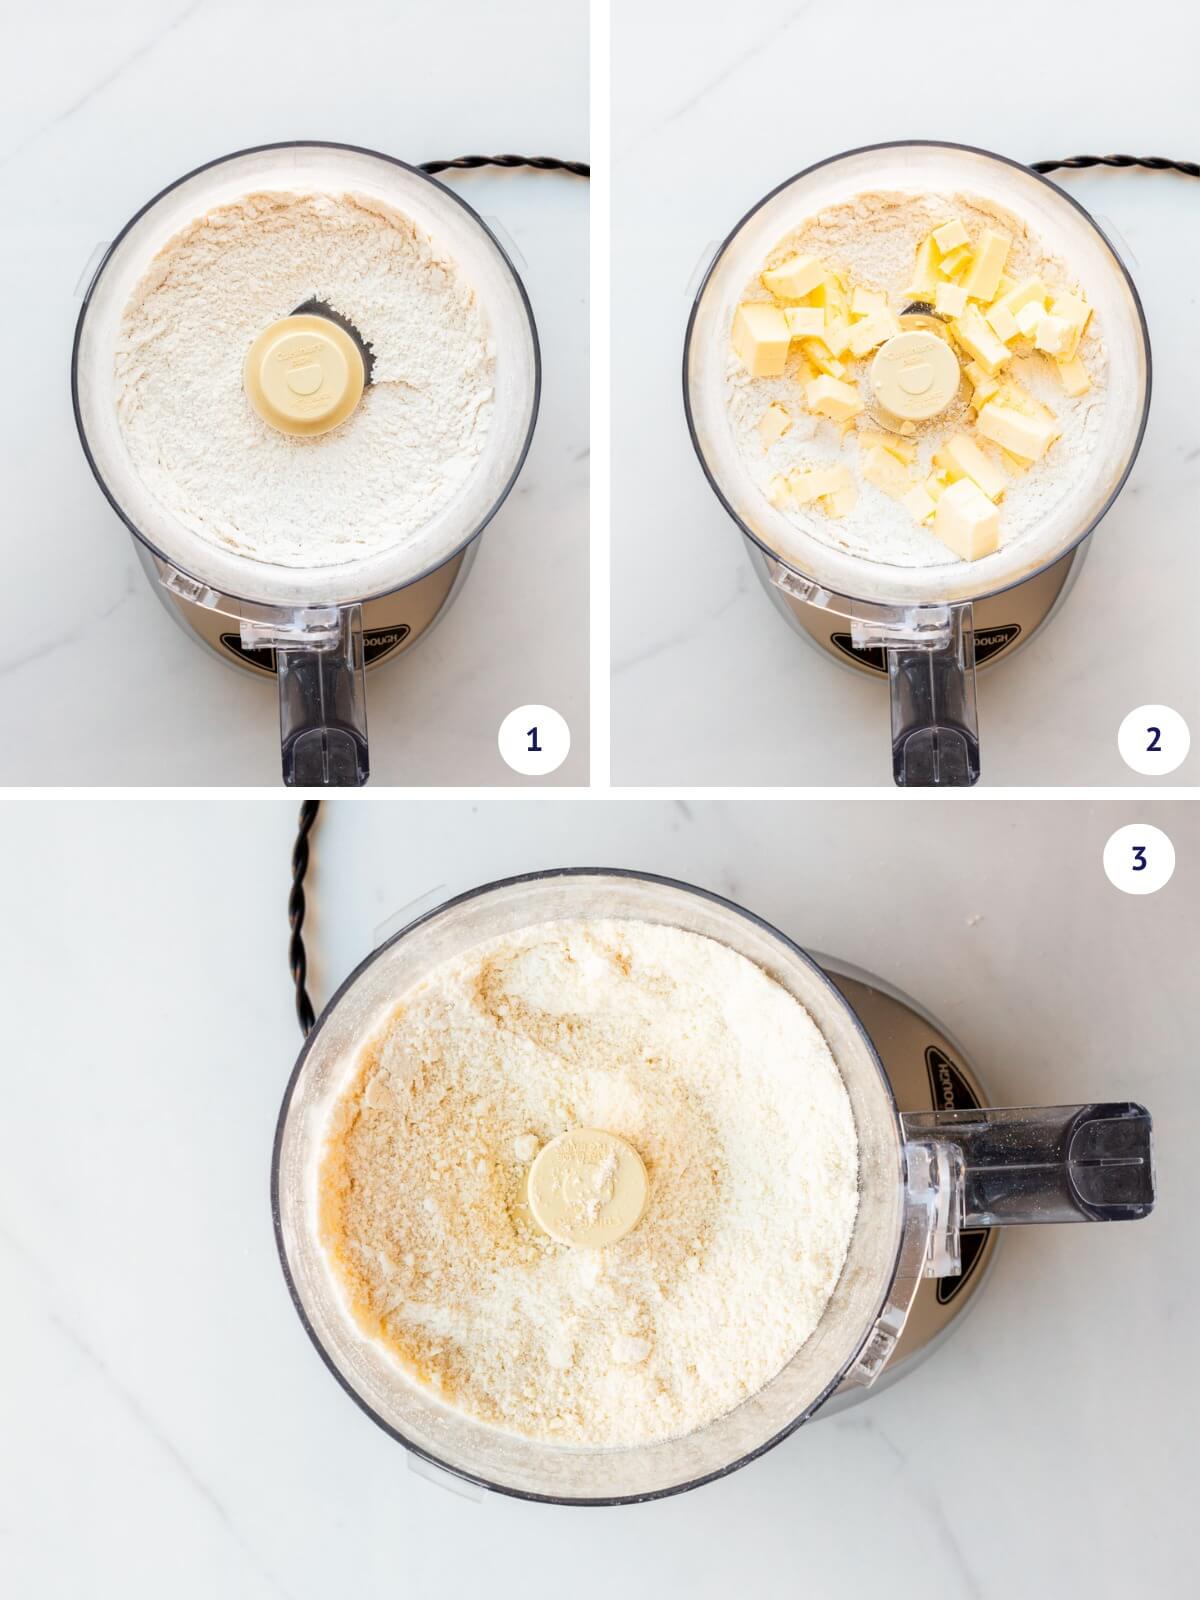
Step 1-Mix the flour, sugar, and salt for the crust in the food processor (image 1) before adding the cold butter (cubed) (image 2). Pulse the mixture until it has the texture of fine, crumbly sand (image 3).
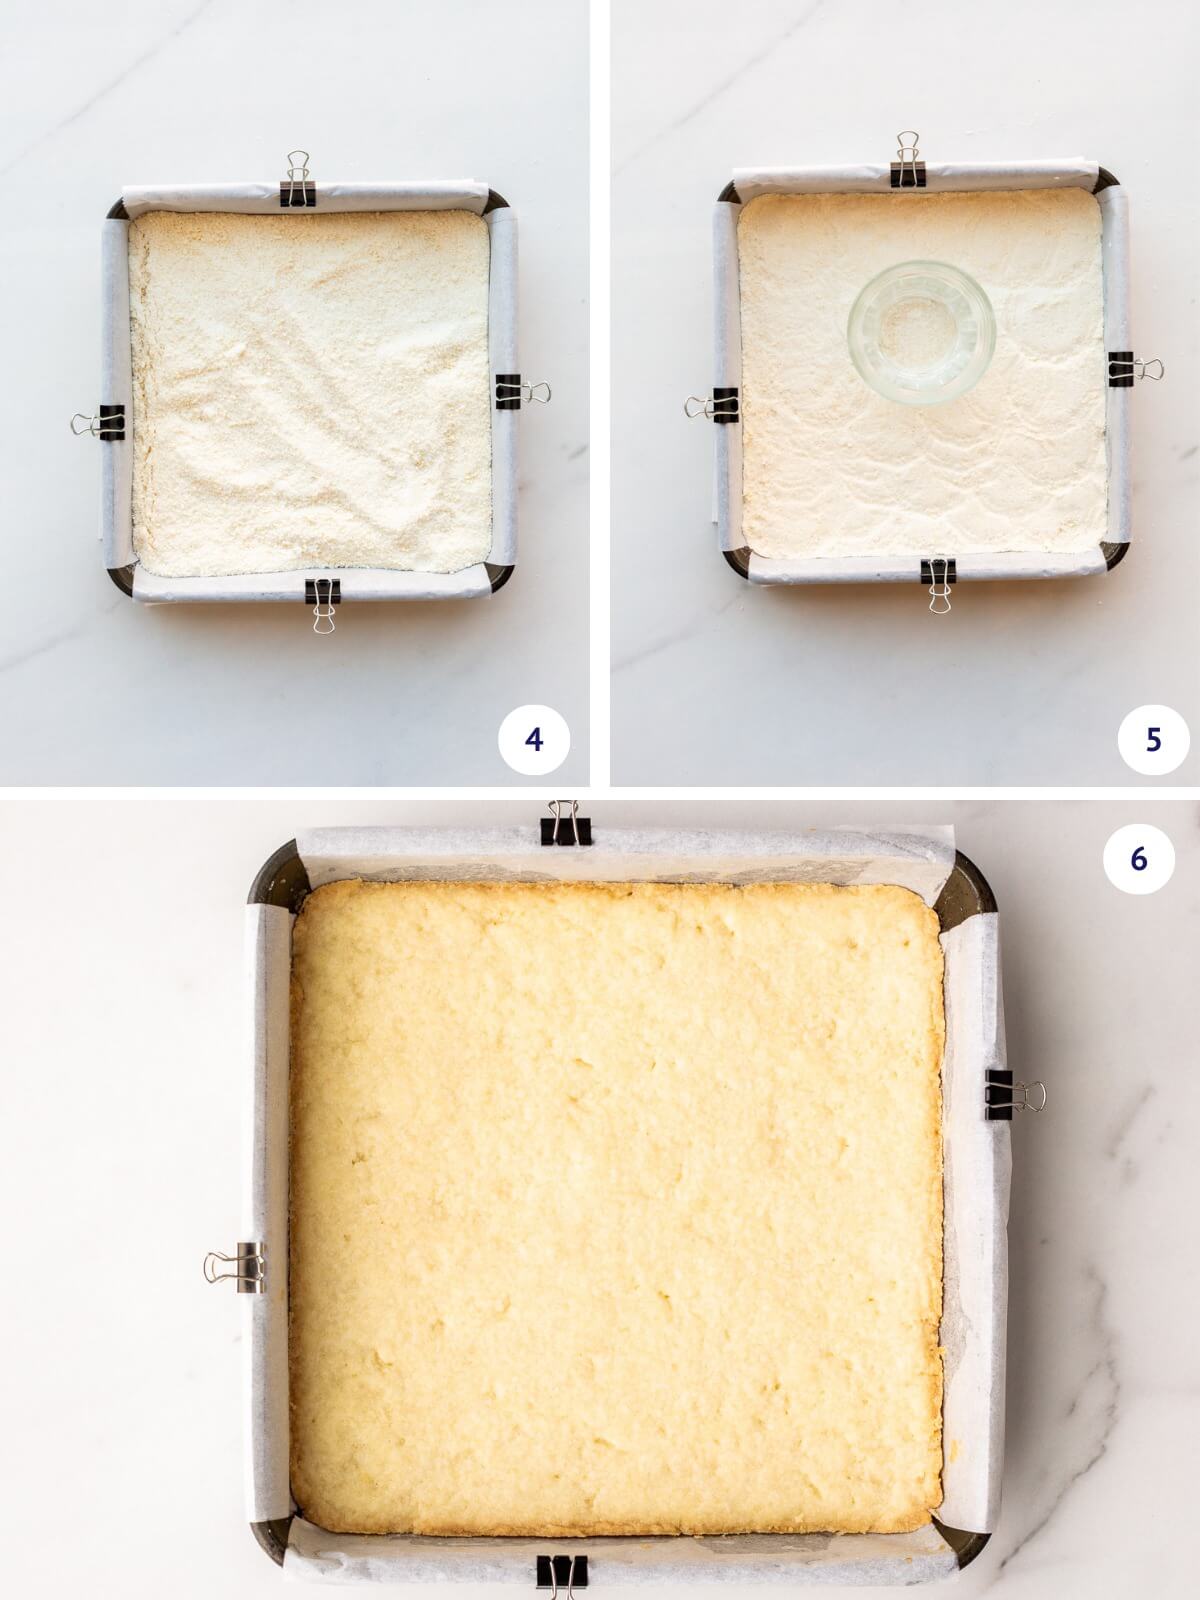
Step 2-Transfer the mixture to a square pan that has been buttered and lined with parchment paper (image 4) and spread it out evenly, pressing it into place with your hands or the flat bottom of a glass (image 5). Bake until set and golden brown (image 6).
Tip-Bake the crust to ensure the base is solid and has good flavour. Underbaked shortbread crust doesn't taste good and may lead to a soggy bottom on these lemon bars.
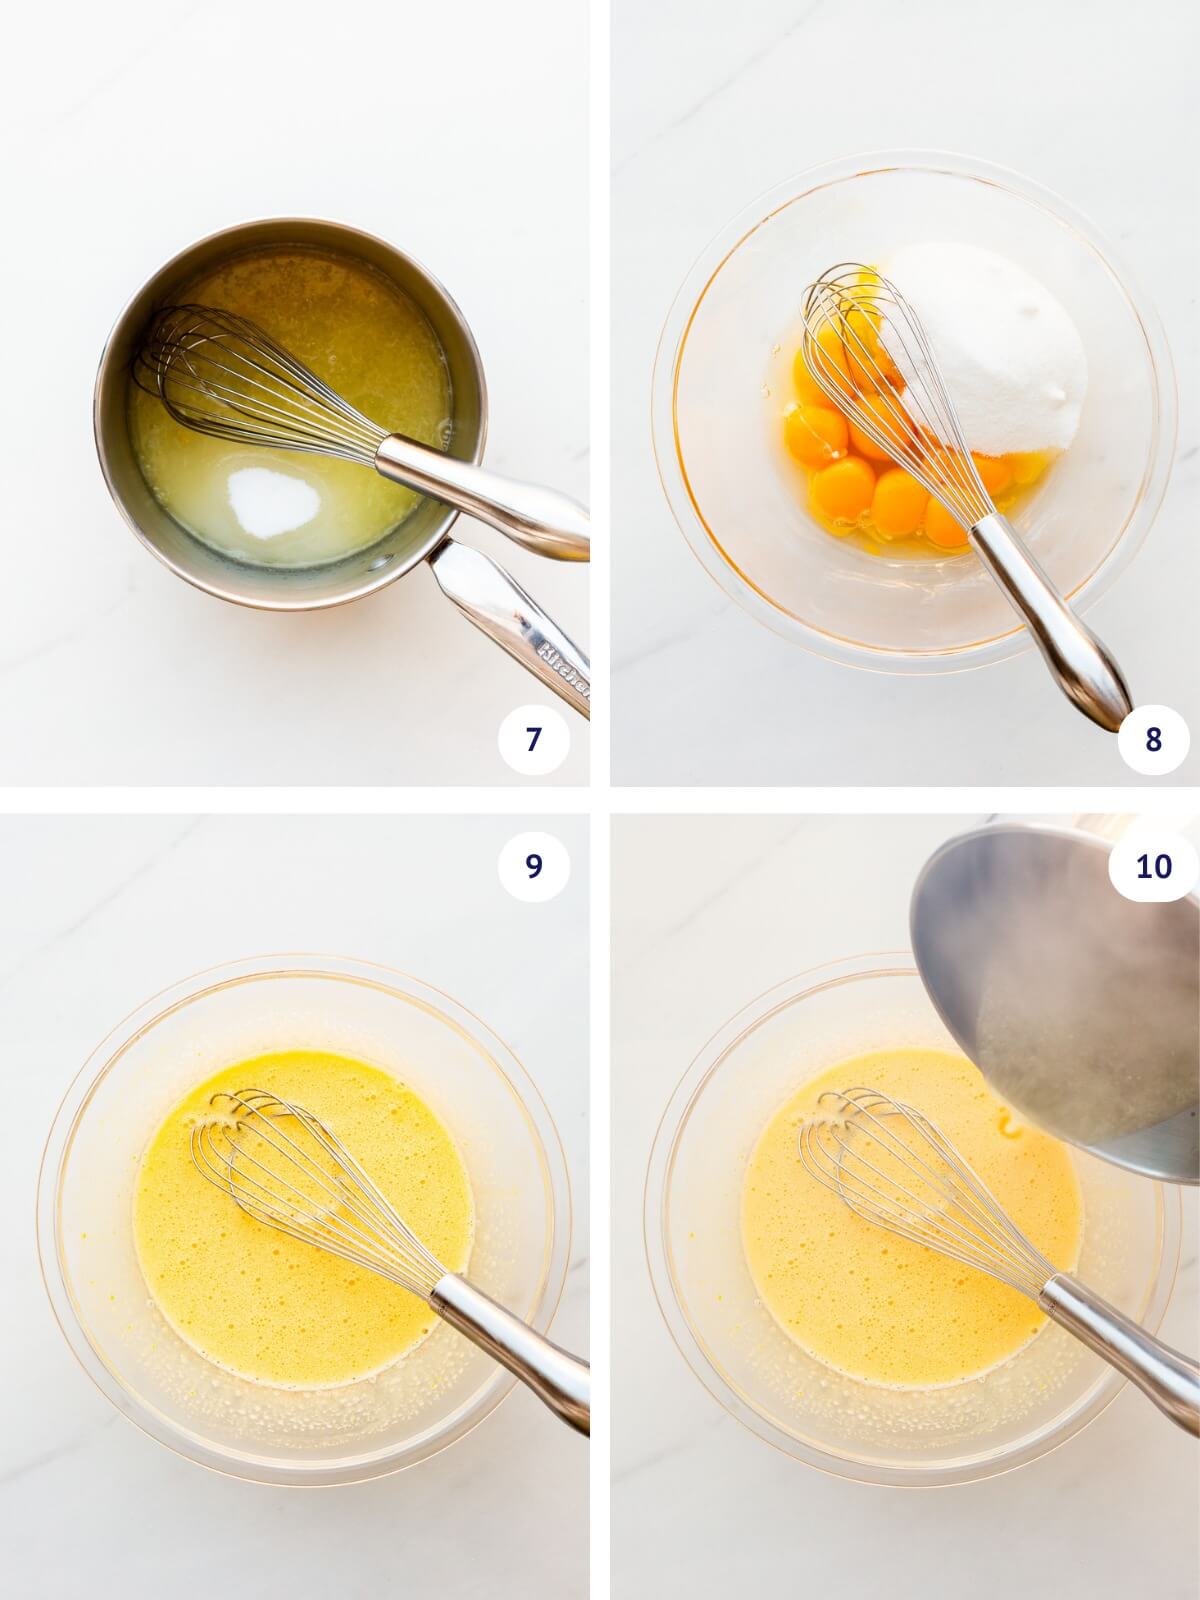
Step 3-While the shortbread base is baking, heat the lemon juice with half the sugar in a saucepan on the stove (image 7) until very hot, while you whisk the eggs and yolks with the rest of the sugar (image 8). Whisk until lightened in colour and foamy (image 9) before pouring the hot lemon syrup over top (image 10). Whisk well.
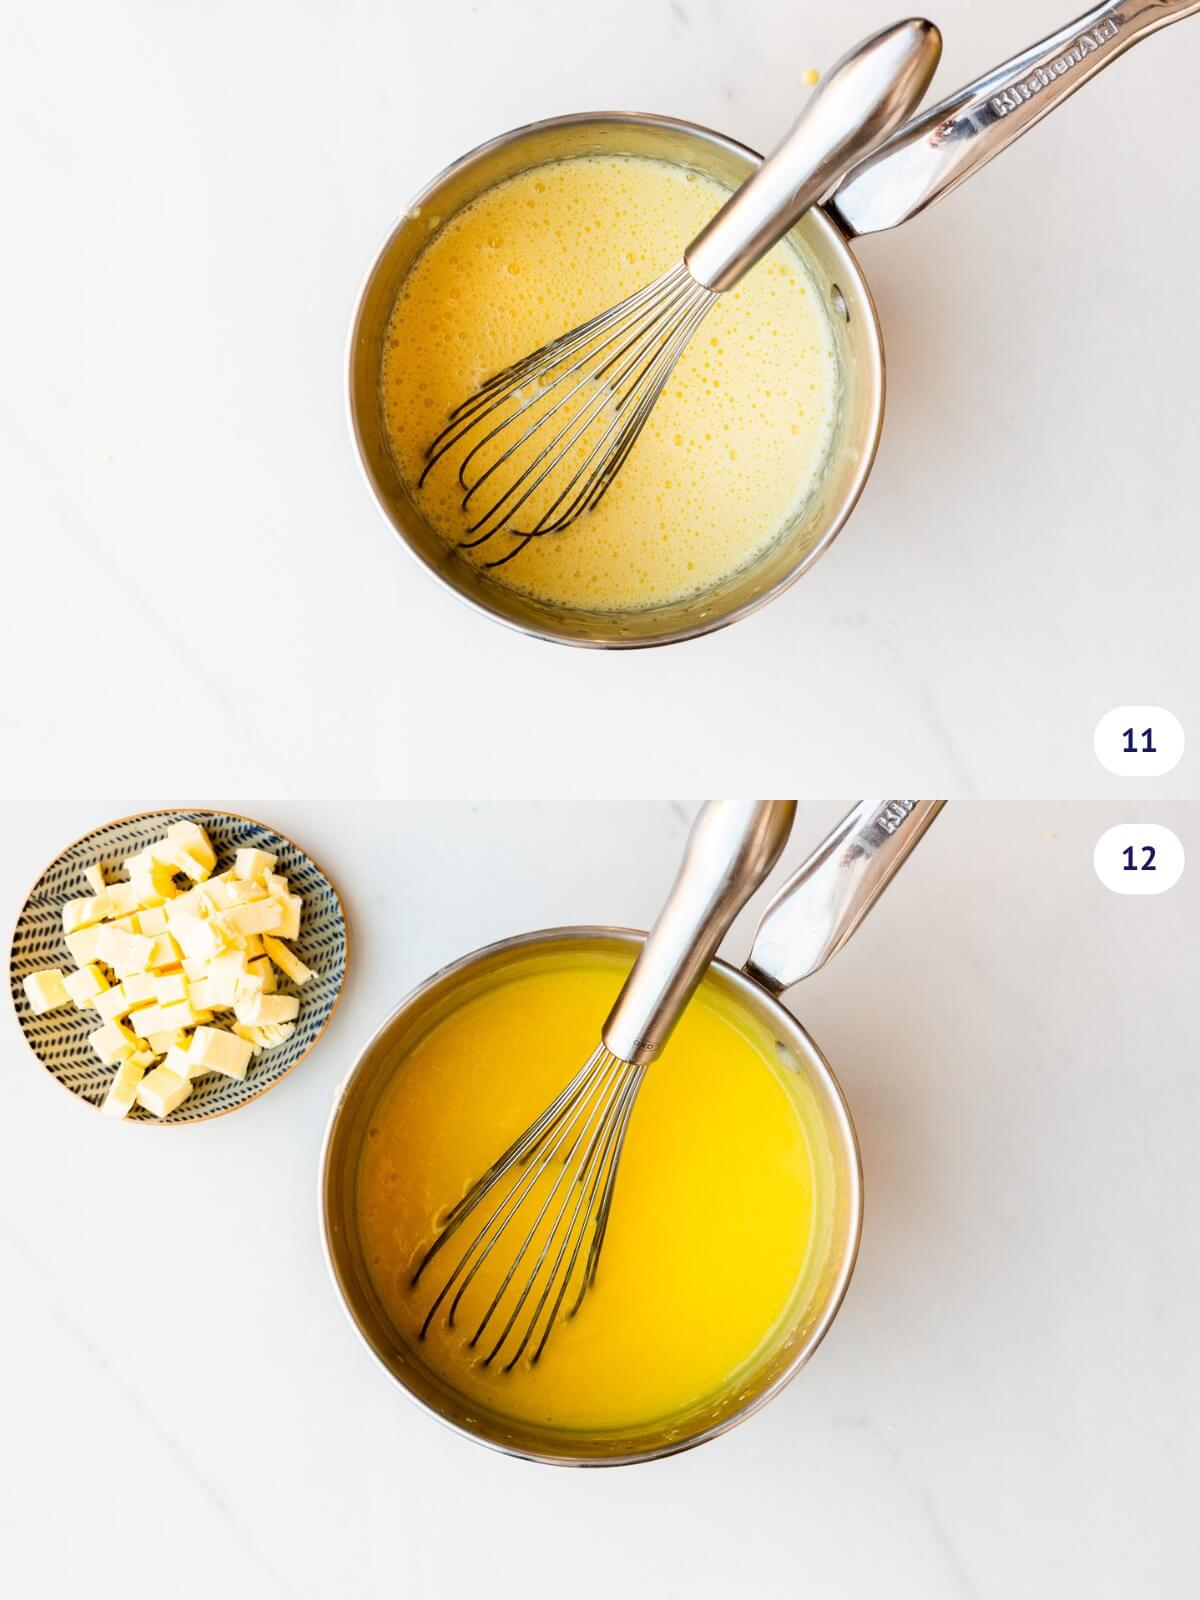
Step 4-Transfer the lemon filling back to the saucepan (image 11) and cook until thick and bright yellow (image 12). Take the pan off the heat immediately.

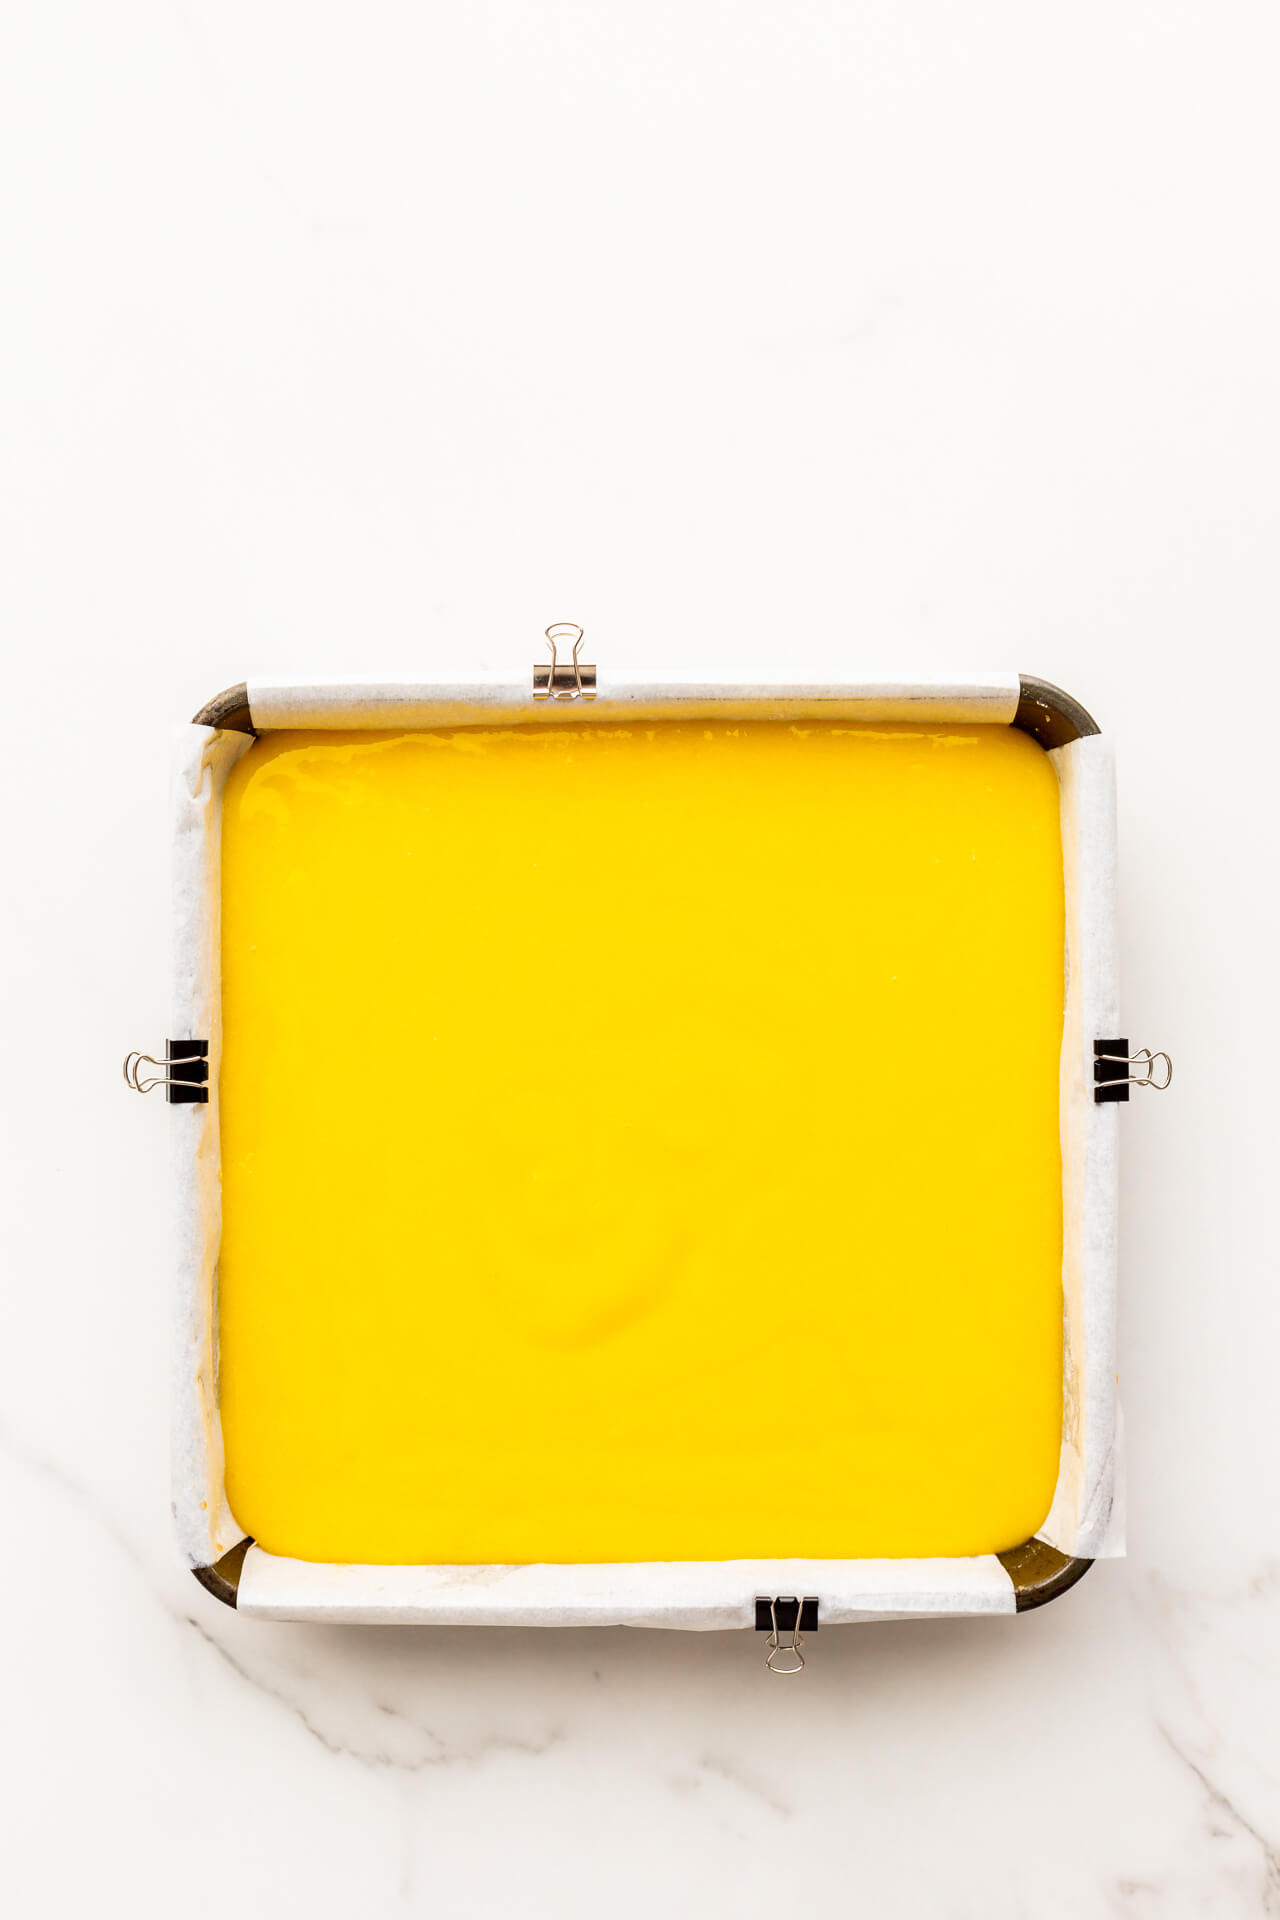
Step 5-Slowly add the cubes of butter, whisking them in progressively (image 13), then strain the lemon filling (image 14) and pour it on the hot, freshly baked shortbread base (image 15). Immediately after pouring the filling, use a mini offset spatula to smooth it out.
Tip-To make lemon bars foolproof, I prefer to cook the lemon curd filling separate from the shortbread base, cooking it on the stove, just like for lemon curd, cooking it between 170 ºF and 180 °F or 77-82 ºC.
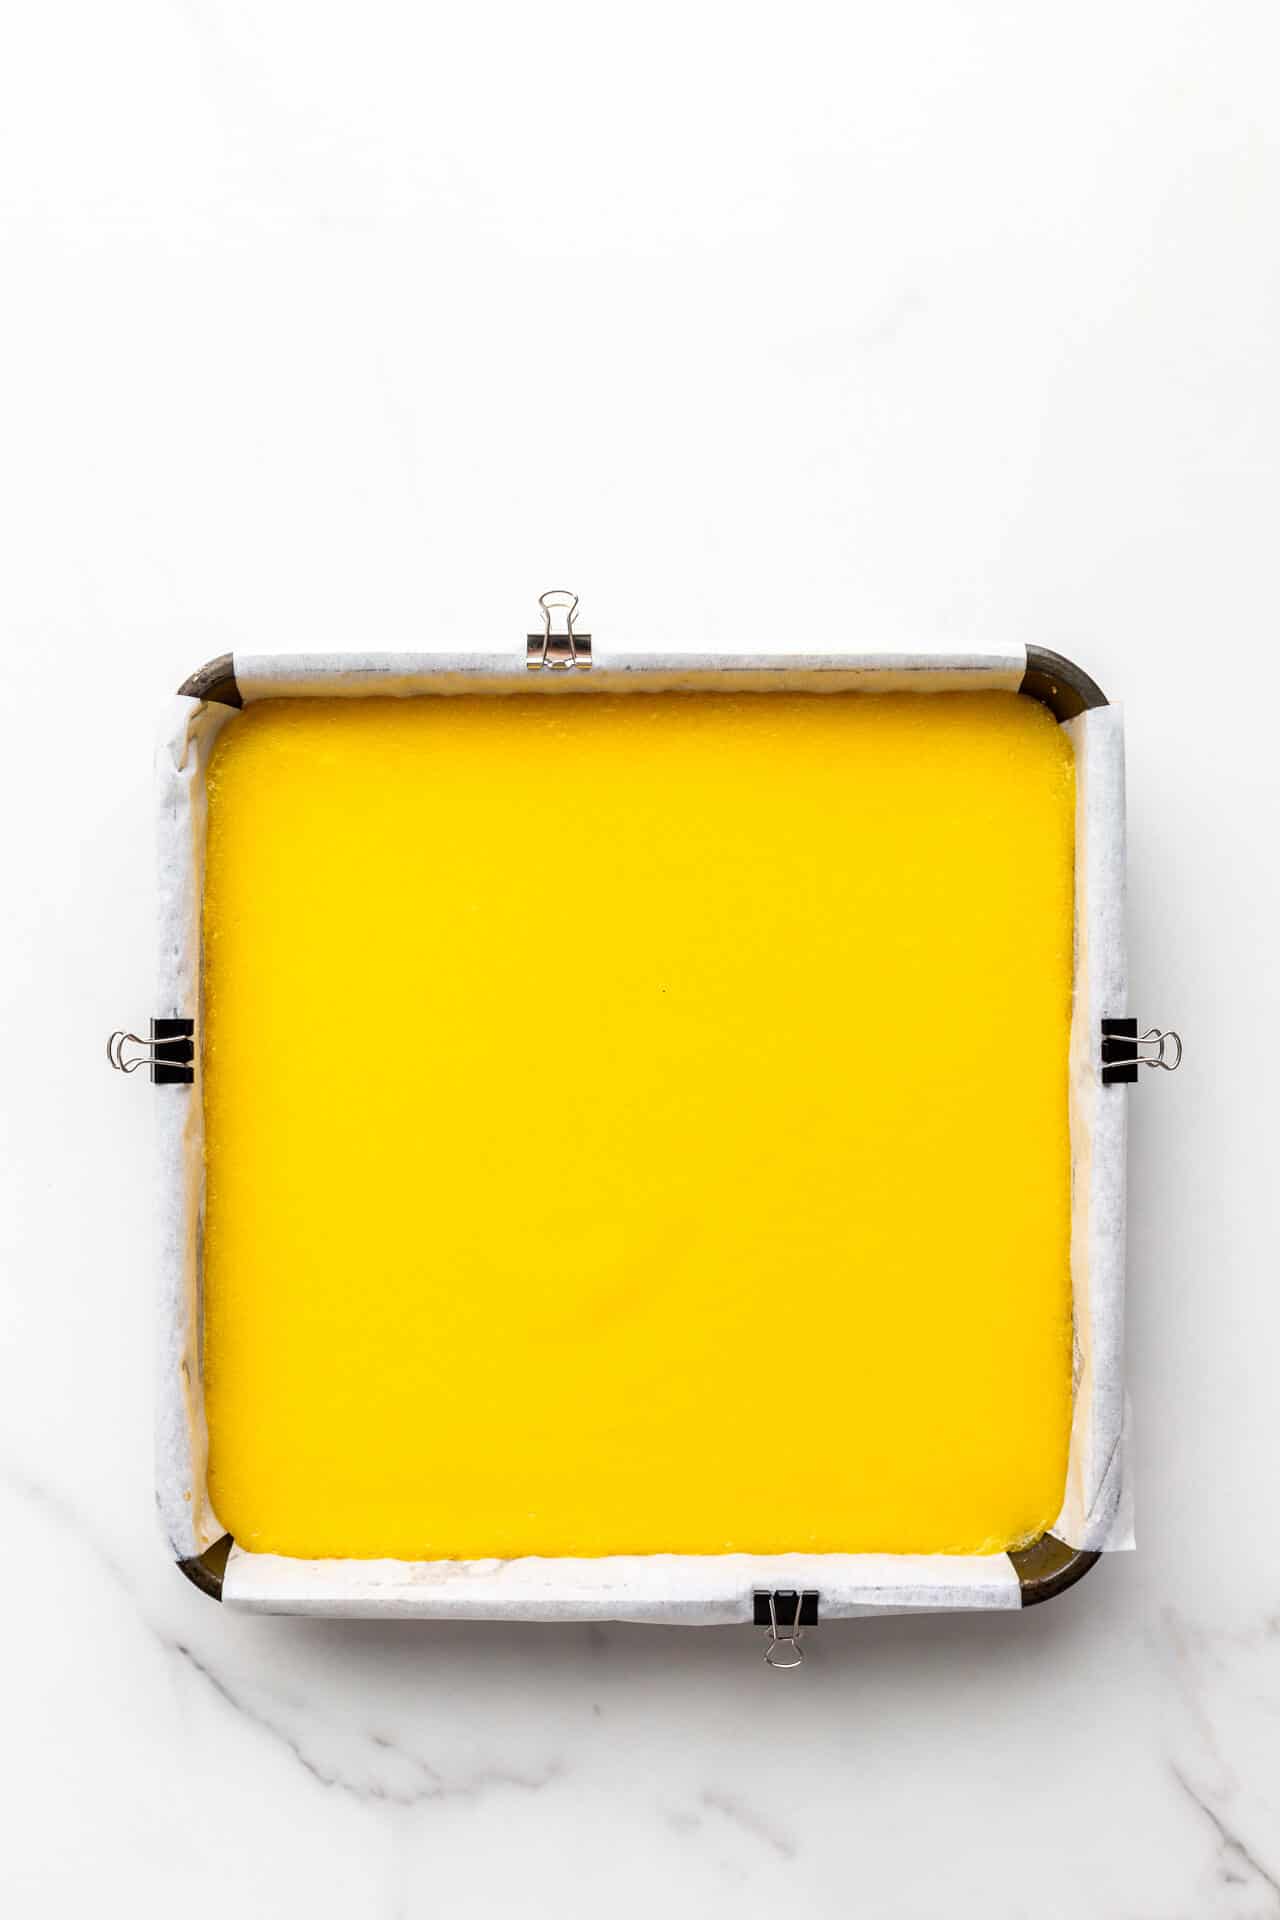
After pouring the lemon card over the base, you may want to bake the bars briefly in the oven because the heat of the oven can help smooth out the top just a little, creating a more smooth, even surface (see images below). This last step is entirely optional and the difference is subtle.
Tip: If you find that your bars sweat a little and have a thin layer of water on the surface after refrigerating, simply blot it with a paper towel gently. Do this right before dusting with powdered sugar and serving.
I used the same filling recipe to make this orange pie recipe, but instead of baking the curd in the pie shell, I added gelatin to help it set firm.
Top Tip For Baking With Lemon
With desserts made with lemon juice and citrus that tend to be particularly acidic, it's important to use non-reactive bakeware. Use an OXO whisk that is made with high quality stainless steel, for example, and bake the bars in a glass square baking dish or a non-reactive metal pan (either made of anodized aluminum, aluminized steel, or a pan coated with a non-stick finish, like this one from USA pans). If you use a regular aluminum pan for this recipe, the edges of the filling may react with the metal, which will give the bars an unpleasant metallic taste.
Beware of vintage or antique metal brownie pans, which are most definitely made of reactive aluminum. They are great at conducting heat but they will impart a metallic flavour to baked goods like these!
Serving Suggestions
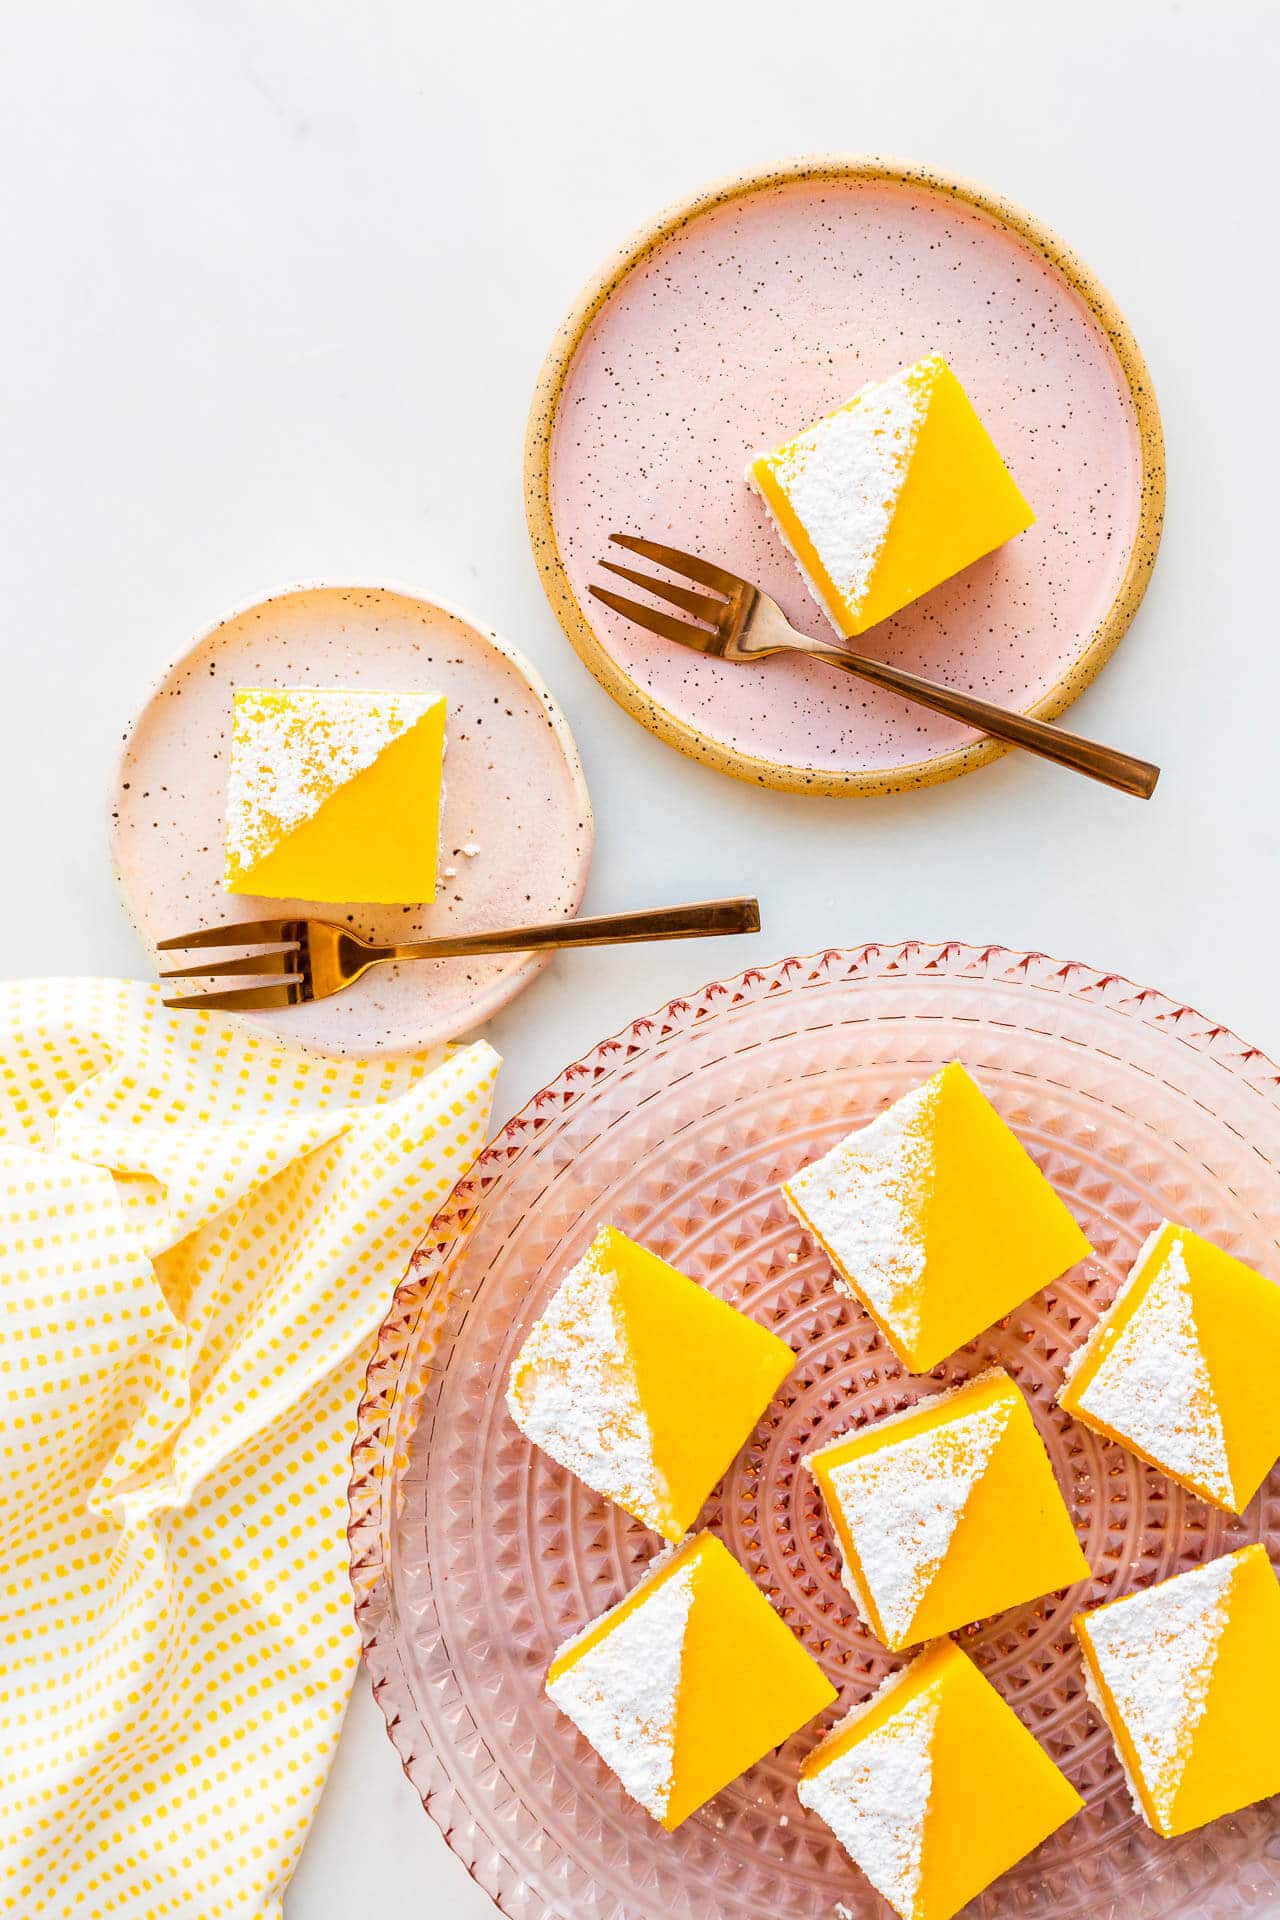
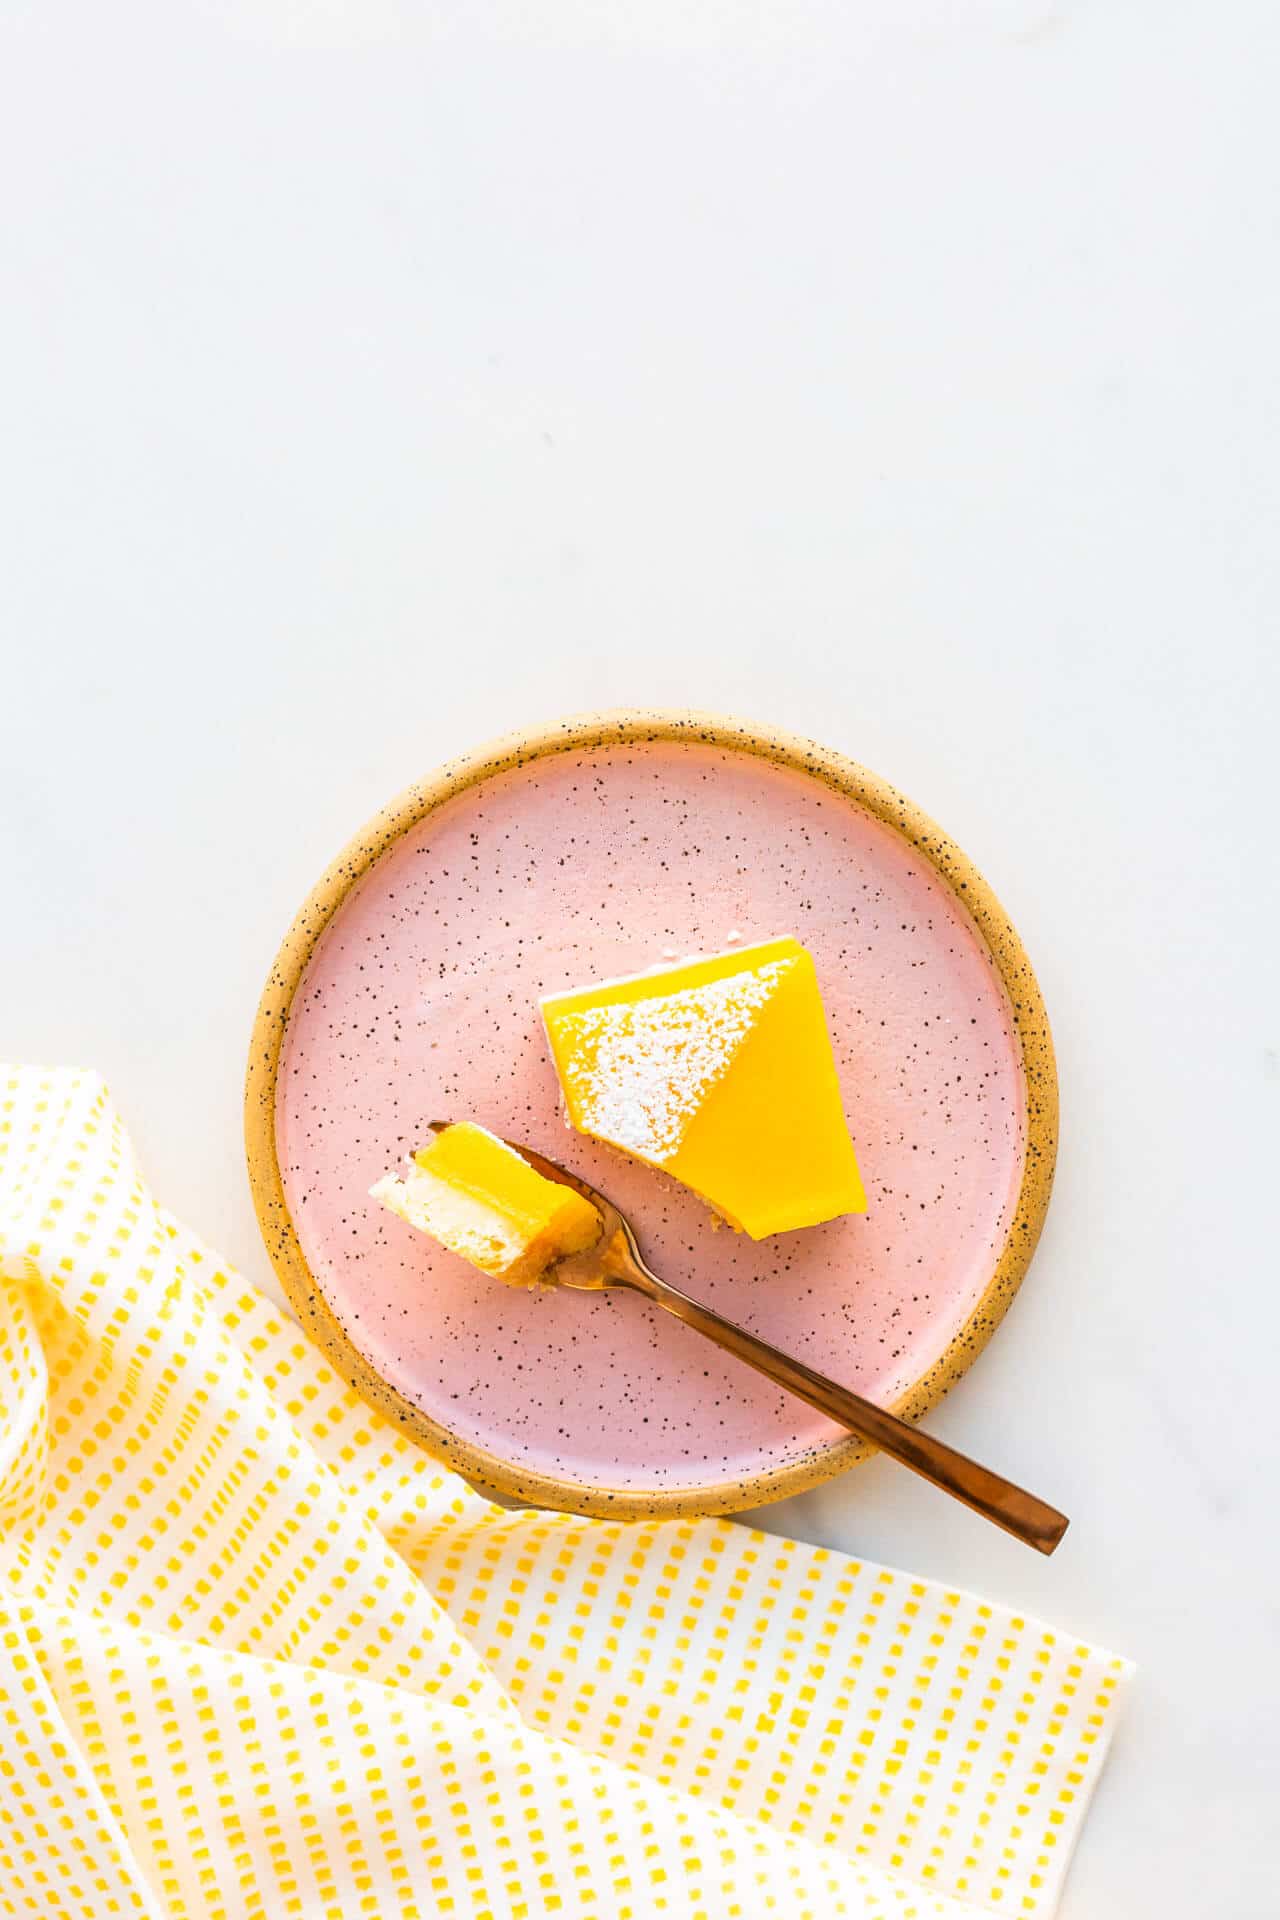
Store these lemon bars in the fridge and keep them refrigerated. Serve them cold. Usually, they aren't served with ice cream or anything more than a dusting of powdered sugar, though a dollop of lightly sweetened whipped cream would be lovely to make these lemon squares into a plated dessert.
Lemon Bar Baking FAQs
Refrigeration is essential to achieve the perfect set with lemon bars because the filling is not stabilized by gelatin. Refrigeration keeps the filling cold, especially the butter in the curd, which keeps the bars firm so that you can slice and serve them easily without the filling oozing.
Lemon bars freeze surprisingly well. I have tested this a few times and I noticed no changes in the consistency of the filling or the crust after freezing and thawing.
To freeze lemon bars, chill the bars in the refrigerator overnight, then cut into squares.
Set the squares on a sheet pan lined with parchment, separating them out to allow them to freeze individually and to allow air circulation between them. Once frozen solid, you can place them in an airtight container or a freezer bag, and seal tightly, removing as much air as possible.
I suggest storing them for up to 1 month, after which the texture of the filling may be compromised.
To defrost lemon bars, take them out of the freezer and place them on a parchment-lined sheet pan. Place in the refrigerator, uncovered, overnight to thaw slowly. Serve cold.
You can also defrost one bar at a time, just place the bar on a plate in the fridge overnight to thaw.
The lemon bars may weep when a layer of water forms on the surface. That water could form if you cover the pan of bars too quickly when they are still warm. Steam will be trapped and condense and drip back down onto the surface of the bars. To avoid this, always cool lemon bars COMPLETELY before covering and storing in the fridge. Sometimes I actually cool them to room temperature, and then I put the pan in the fridge to cool for an hour or two before covering them with foil. This works quite well!
Another option is that the curd was overcooked and in that case, sometimes as the curd cools, the proteins will shrink back and water will be pushed out of the curd. I find it can happen if the lemon bars are made with cooked curd (like here) and then baked for another 10 minutes or so.
The good news is that if water forms on the surface of your bars, you should be able to blot it with a clean paper towel, which will absorb that layer of moisture without ruining the look of the bars. Just be gentle!
If your lemon bars are too soft to cut, it could be that the filling wasn't cooked sufficiently. Make sure to heat the curd to between 77 ºC and 82 ºC (170 ºF-180 ºF) to ensure the curd sets properly and has the right texture, firm enough to cut but still creamy.
Another reason could be that they are too warm. Remember that lemon curd is thick and fairly firm when properly chilled in the refrigerator at 4 ºC, but lemon curd can loosen and become quite fluid if it's sat at room temperature for too long. Make sure to chill the bars for several hours in the refrigerator, or better yet, overnight.
After chilling for several hours (or overnight) so that they are completely cold, if your lemon bars are too soft to cut, you will have to bake them in the oven to try and set the filling. Preheat the oven to 350 ºF while the bars come to room temperature, then place the pan in the oven. Bake until the edges are set but the middle is still jiggly.
If the texture of the lemon curd filling in your lemon bars isn't creamy and smooth, it's probably bits of egg. Did you overcook the curd? The lumps could be bits of hard-cooked egg. Strain the curd before pouring it over the baked shortbread crust.
With other recipes that contain thickeners like cornstarch or flour, you need to whisk all the filling ingredients together very carefully when it's cold in order to properly incorporate the starch or flour. Otherwise, the thickener will be lumpy and the edges will gel, but the lumps will not dissolve or break down. It's very important to whisk the filling well and to make sure there are no lumps before you bake the bars. The recipe below has no starch or flour in the filling, so maybe try this cooked curd filling instead next time!
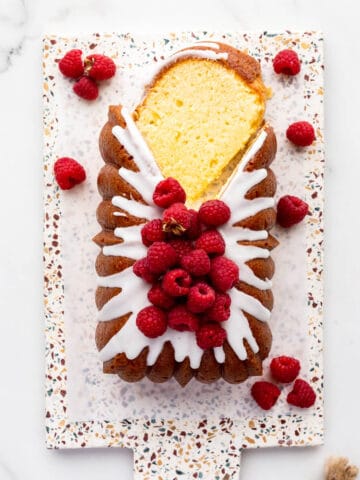
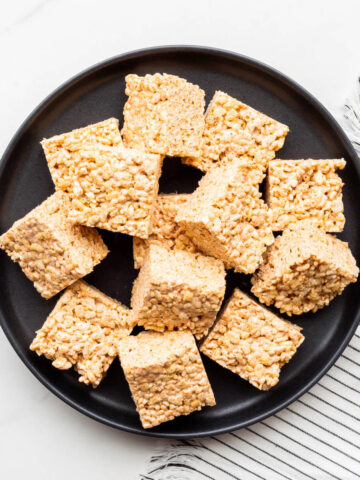
Other Desserts With Lemon and Citrus
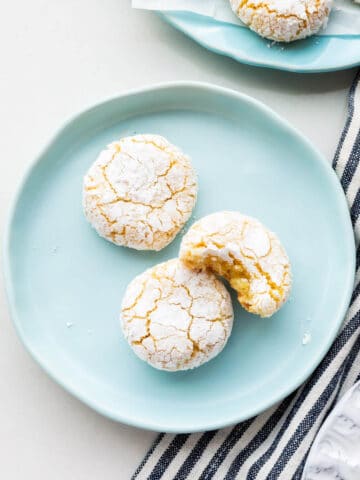
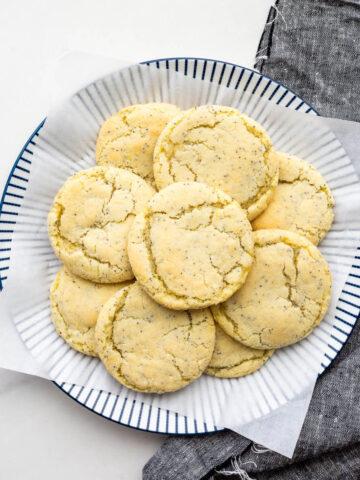
If you'd like to bake lemon cookies instead of bars, try these soft lemon crinkle cookies made with ricotta cheese, glazed lemon shortbread cookies, or these chewy lemon poppy seed cookies (a cream cheese cookie recipe flavoured with lemon zest and poppy seeds). Or take advantage of citrus season to make these other citrus dessert recipes:

If you tried this easy recipe for lemon bars (or any other recipe on my website), please leave a ⭐ star rating and let me know how it went in the comments below. I love hearing from you!
📖 Recipe
Lemon Bars
Ingredients
Shortbread cookie crust
- 156 grams bleached all-purpose flour
- 50 grams granulated sugar
- 1.25 mL Diamond Crystal fine kosher salt
- 115 grams unsalted butter cut into cubes, cold
Lemon curd filling
- 250 mL fresh lemon juice
- 300 grams granulated sugar
- 8 large egg yolk(s)
- 2 large egg(s)
- 115 grams unsalted butter cut into cubes, room temperature
Instructions
- Preheat the oven to 350 °F (175 °C). Butter and line an 8x8-inch (20x20 cm) with parchment paper, making sure that you leave overhangs on all sides. You can use metal binder clips to secure the parchment overhangs to the edge so that they stay upright and in place. Set aside.
Shortbread cookie crust
- In a food processor, combine the flour, sugar, and salt. Let it run so they are well mixed.
- Drop in the cubes of butter, and then pulse to form a coarse sandy mixture.
- Dump the mixture in the prepared pan and press it well into the corners and edges. You can use a flat-bottomed glass to even out the surface and to help you press down the crust firmly.
- Bake the crust on the middle rack for 20 to 30 minutes. The edges should be golden brown. If you like a blonder shortbread crust, bake it for 20 minutes, for a more caramelized cookie crust, bake it for 30 minutes.
Lemon curd filling
- While the crust is baking, cook the lemon curd filling.
- Prepare a fine-mesh sieve and place it over a 4-cup liquid measuring cup with a pouring spout or a bowl with a pouring spout. Set aside.
- In a medium saucepan, combine the lemon juice with half the sugar. Heat it on medium-high.
- In a large bowl, whisk together the egg yolks, whole eggs, and the rest of the sugar until light in colour.
- When the lemon juice begins to steam and is almost simmering, turn the heat off, and pour it over the whisked eggs and sugar, while whisking. Combine everything together and when the filling is well mixed, transfer it back to the saucepan.
- Turn the stove back on to medium heat and whisking constantly, heat the filling until it's 77-82 °C (170-180 °F). The lemon curd should be thick, creamy and coat the back of the spoon.
- Immediately take the curd off the stove and incorporate the cubes of butter while still whisking.
- Once the butter has all been incorporated, pour the curd through the strainer into the measuring cup.
- When the crust has baked sufficiently, take it out of the oven and place the pan on a cooling rack.
- Pour the curd over the hot crust and smooth the surface with an offset spatula if needed. Make sure the curd covers the entire surface, from one edge of the pan to the other.
- Place the pan back in the oven and bake for 10 minutes more. The edges of the curd will appear set but the centre will still be wobbly. Note that this baking step is optional but it can help the edges of the bars set more firmly, making it easier to separate them from the parchment paper when cutting.
- Set the pan on a wire rack to let it cool completely for a few hours. Once cooled to room temperature, chill in the fridge overnight. You may want to leave the pan unwrapped to avoid any condensation, but if any water forms on the surface of the lemon curd, you can easily blot it with a paper towel.
- Once chilled overnight, you can lift the bars out of the pan using the parchment overhangs. Carefully peel off the parchment from the edges of the bars, and place on a cutting board to cut into 16 equal bars. Decorate with powdered sugar before serving.
Notes
- The base for these lemon squares is a shortbread cookie crust. You could also opt for a graham cracker crust, made from either store-bought or homemade graham crackers. I have a friend who actually makes the crust for her lemon squares using saltines (salted soda crackers) instead of graham crackers! There's room for creativity here.
- Please use freshly squeezed lemon juice. Do not use bottled lemon juice because the flavour isn't great.
- This recipe calls for Diamond Crystal fine Kosher salt. If using regular table salt, add half the amount or the recipe may be too salty!
- Use a hand-held probe thermometer or a hands-free model for fast temperature reading so you don't overcook the filling.
Explore More With AI
Nutrition
Nutrition information is automatically calculated and should only be used as an approximation.


Leave a Reply