
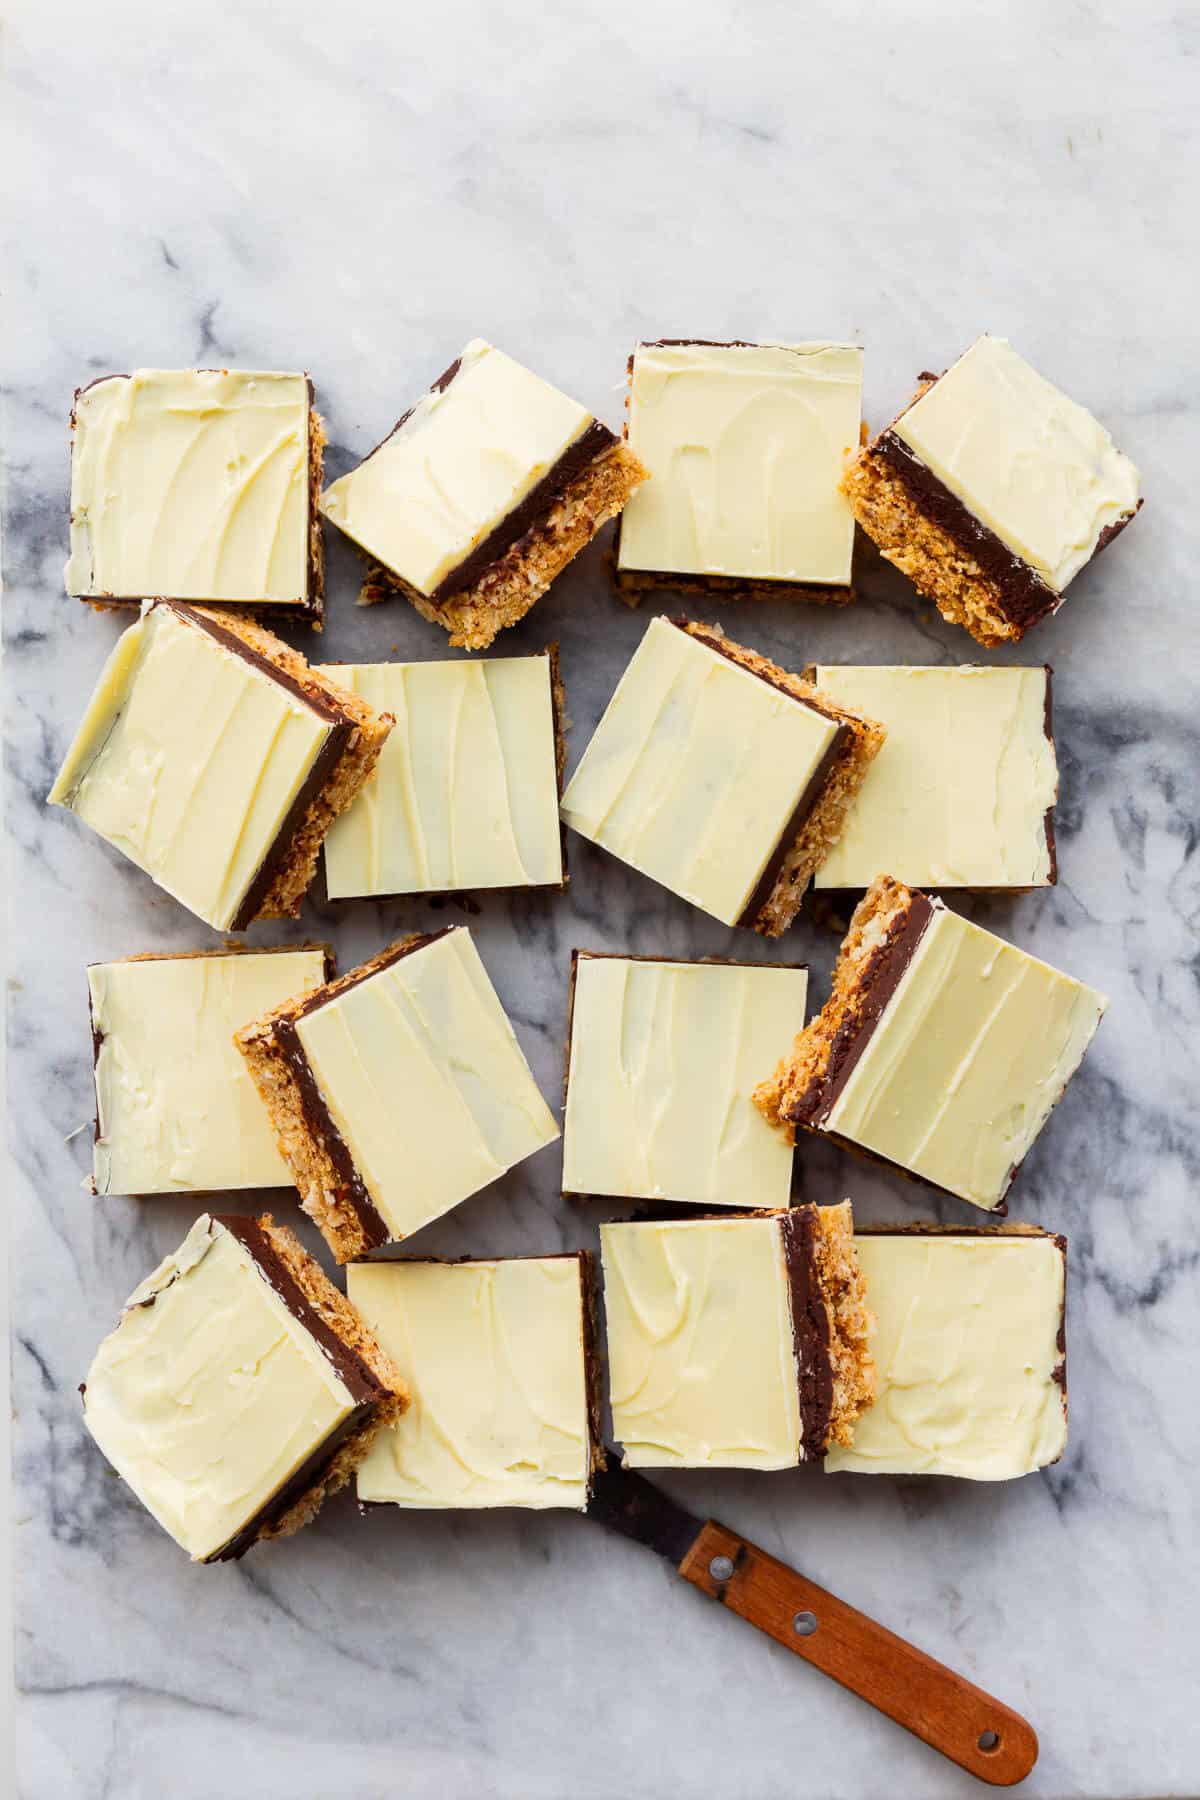
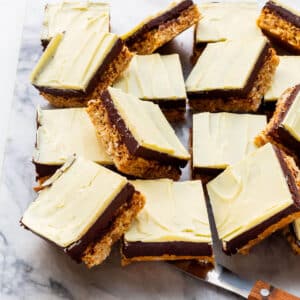
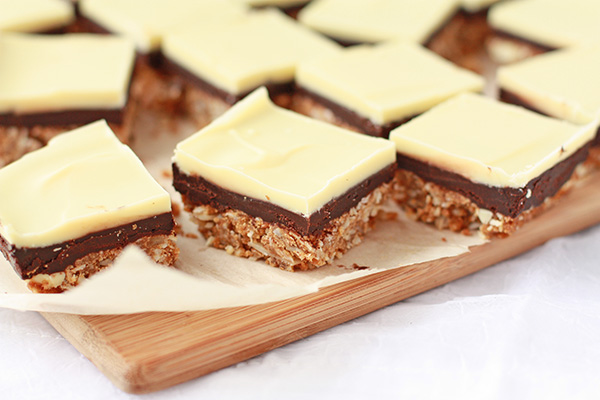
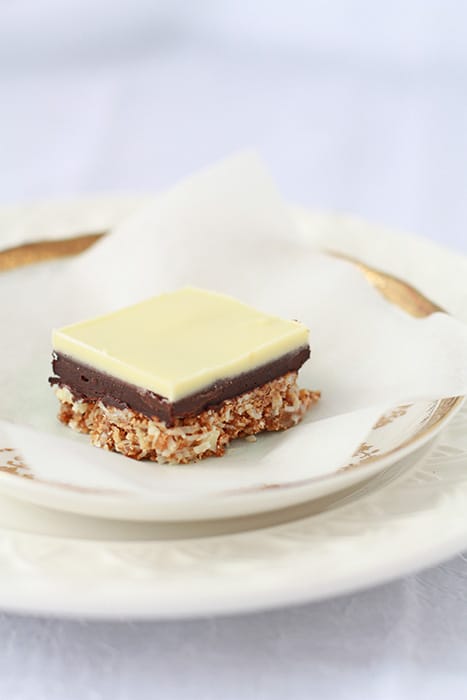
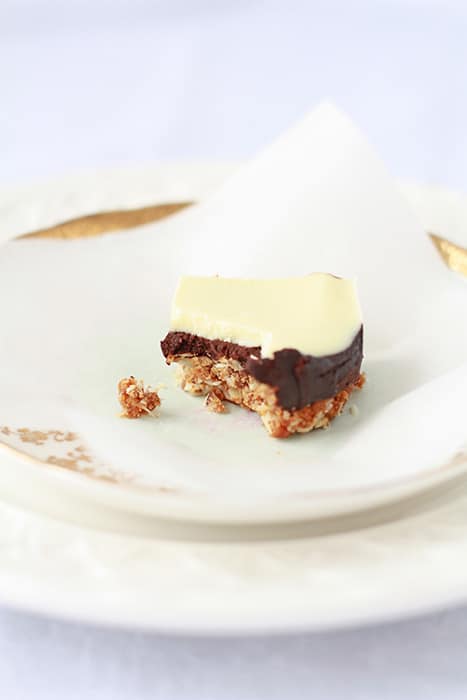
Learn how to make reversed Nanaimo bars, a fun twist on the classic Canadian dessert recipe. These are essentially white chocolate Nanaimo bars with a dark chocolate custard filling, the reverse of the original Nanaimo bar combination.
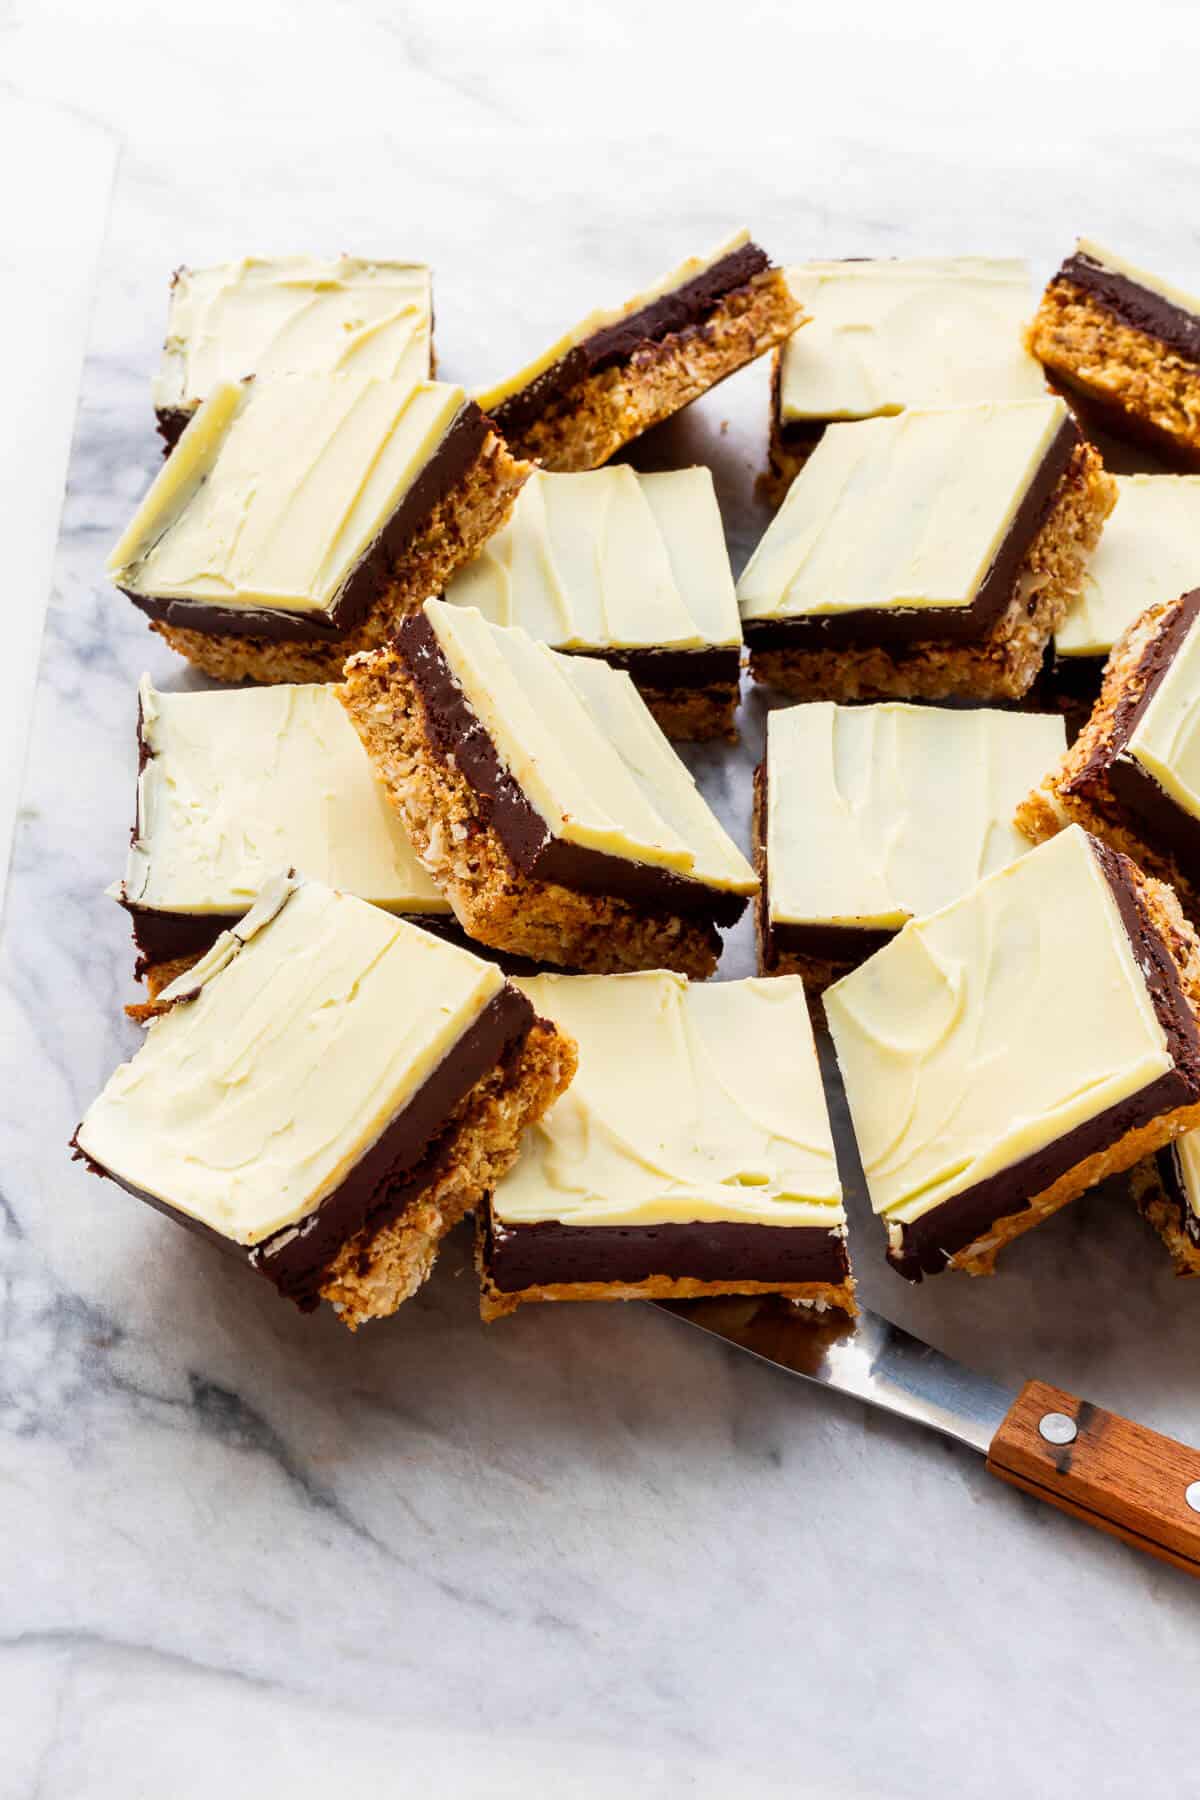
A typical Canadian Nanaimo bar is made up of a dark chocolate/graham cracker crumb/coconut/walnut crust with a sweet, thick vanilla custard filling and a dark chocolate top. The reversed Nanaimo bars are kind of opposite to that, so a white chocolate/graham/coconut/almond crust with a deep dark chocolate custard filling and a white chocolate top.
Honestly, I think I like the reversed Nanaimo bar variation better than the original. It's still got the flavours of the classic Canadian dessert but somehow this version seems less sweet! Try them and let me know what you think?
Ingredients
Just like the classic Canadian Nanaimo bars, these white chocolate Nanaimo bars are made from simple ingredients that you likely have on hand. Here's what you need to make these:
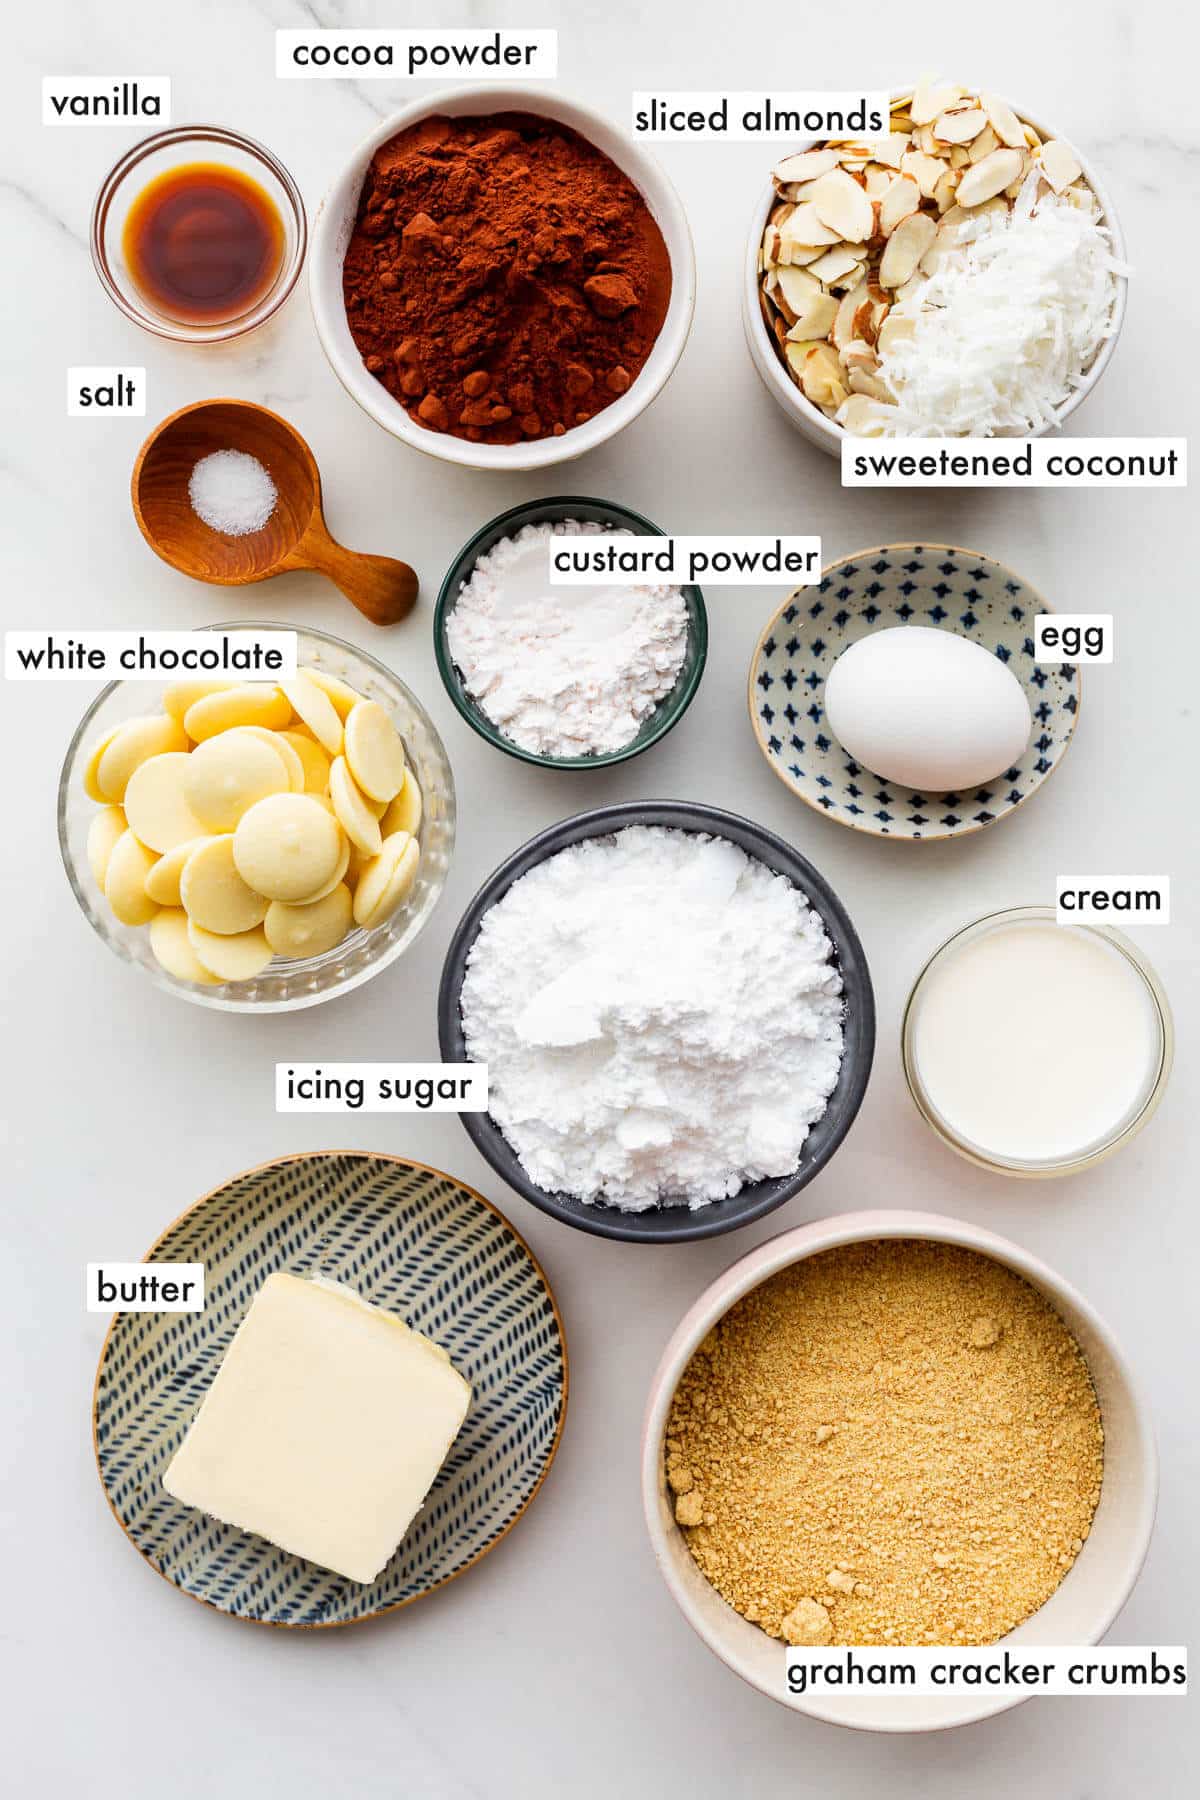
- white chocolate-use good quality white chocolate that you like to eat. White chocolate chips are actually not chocolate, so I prefer to use real white chocolate made with cocoa butter
- butter-unsalted butter is preferable in this recipe because I find the crust can be too salty if you use salted butter
- graham cracker crumbs-you can either make your own crumbs from graham crackers or buy the crumbs
- coconut-sweetened or unsweetened shredded coconut work here, interchangeably
- nuts-I like sliced almonds in the crust recipe
- egg-I bake with large eggs and if you use a smaller (or bigger) egg, the crust may have a slightly different texture
- cocoa powder-I used Dutch-processed cocoa powder, specifically Cacao Barry extra brute cocoa powder which is a rich cocoa powder with a reddish tint (around 22 % fat)
- sugar-use icing sugar for the smoothest filling
- cream-you need to use milk or cream to create a smooth, spreadable filling. I prefer to use whipping cream (35 % fat)
- custard powder-I used Bird's custard powder
- vanilla-I used pure vanilla extract
- salt-most Nanaimo bars have no salt added. I like to add a very small amount of salt to the filling to help it pop. I use Diamond Crystal fine Kosher salt. If using regular table salt, add half the amount because it's saltier.
Please see the recipe card for the exact ingredients and quantities.
Substitutions and Variations
The beauty of Nanaimo bars is that you have some flexibility when it comes to the ingredients, whether you are making the classic or this reversed version. Here are some suggestions of where you can deviate:
- Graham cracker crumbs-you can replace the graham cracker crumbs with vanilla wafer crumbs or crumbs made from social tea biscuits. The flavour will be different but still pleasant. You can enhance the crust with a little cinnamon if using vanilla cookies instead to mimic the spices in graham crackers.
- Custard powder-I always have a box of Bird's custard powder on hand for Nanaimo bars. If you can't find custard powder, your best bet would be to replace the custard powder with vanilla pudding mix. It's not quite the same as custard powder has egg in it, but it's close enough!
- Nuts-I used sliced almonds for the crust, but you can use any nuts. Pistachios would be really lovely (though more expensive). Make sure to chop them finely.
- Coconut-you can use sweetened or unsweetened coconut, but I find the base is a little more flavourful with sweetened coconut. Use a finer shred coconut to make cutting the bars easier.
- For a nut-free version-replace the nuts with extra coconut or incorporate pumpkin seeds or sunflower seeds in their place. Use the same volume.
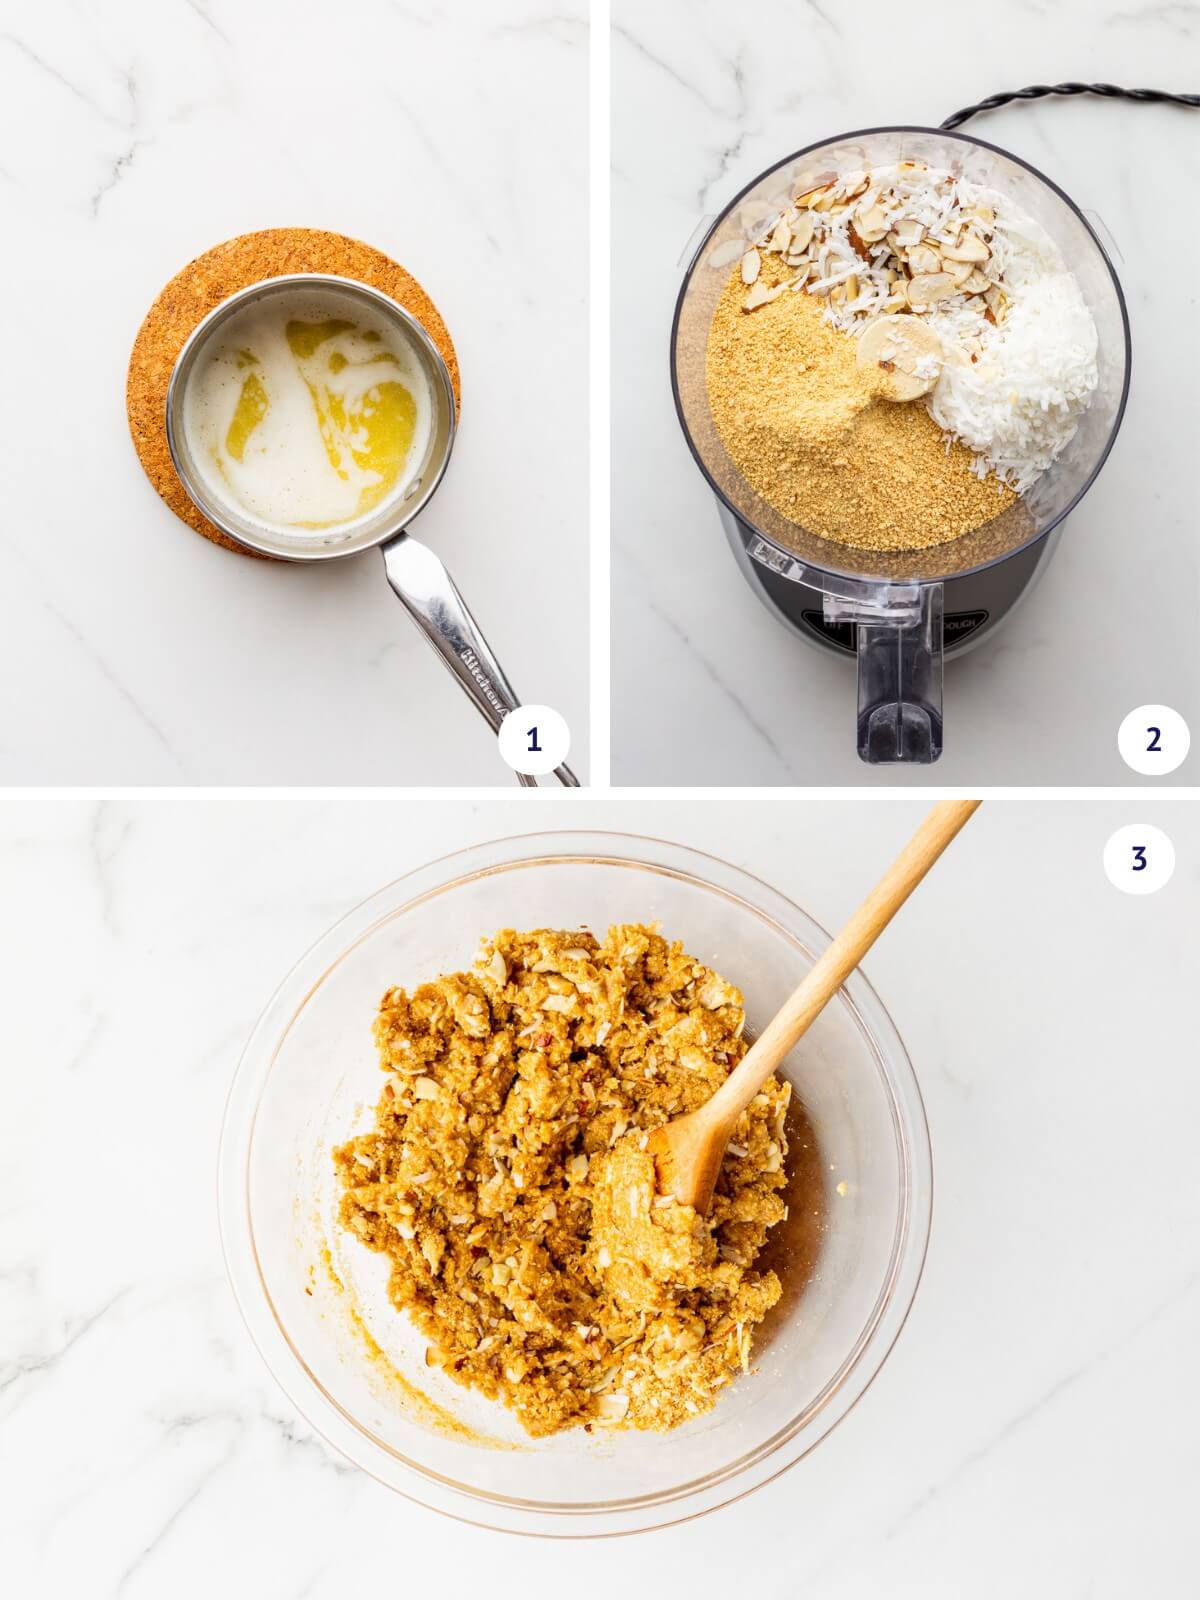
Step 1-Prepare the base for the Nanaimo bars by first melting the butter before stirring in the white chocolate (image 1) while you combine the dry ingredients in the bowl of a food processor (image 2) or a medium bowl, then stir in the melted butter mixture to form a somewhat greasy crumble (image 3). You can do this step either in the food processor or a bowl by hand.
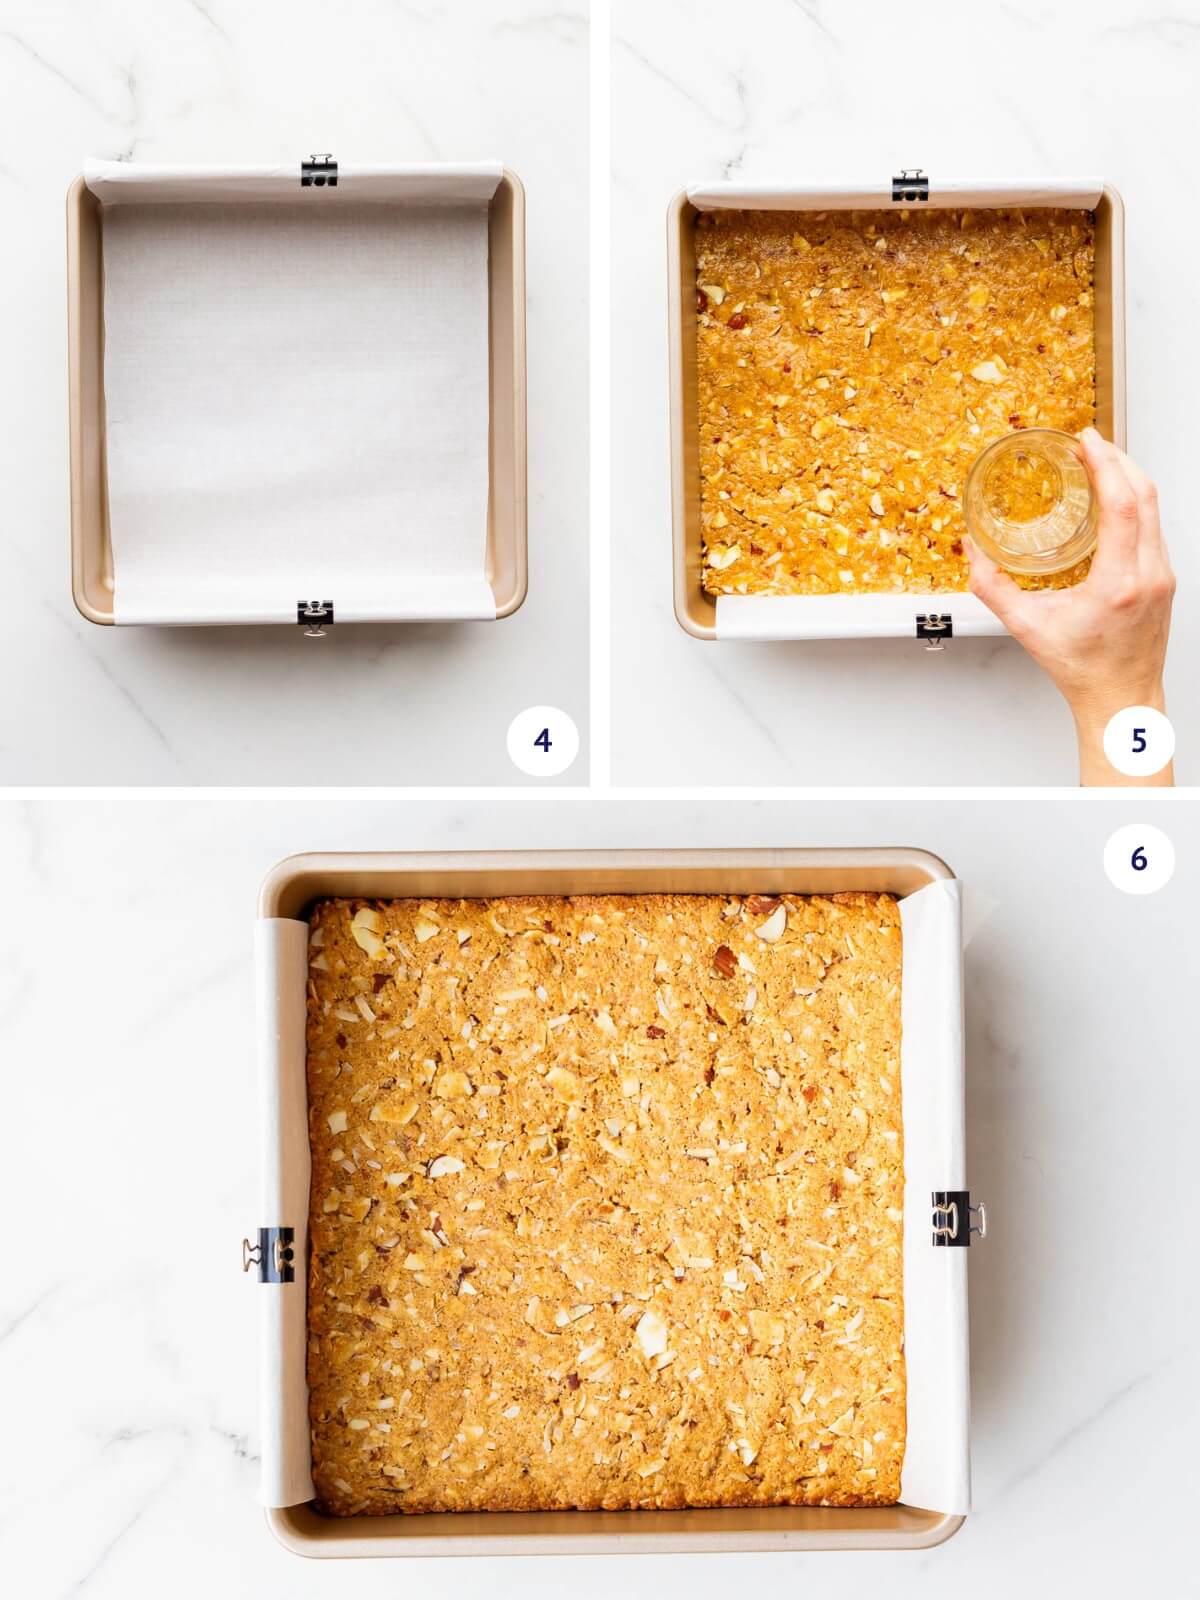
Step 2-Line a metal 9x9 baking pan with parchment paper, leaving an overhang (image 4) then transfer the crust mixture to the pan and press it out using a flat-bottomed glass until smoothed out from edge to edge (image 5). Bake it until the crust is no longer glossy (image 6). I like to use metal binder clips to secure the parchment paper in place.
Note: Do not use plastic binder clips of any kind because they may melt or break down in the oven. Use all-metal clips.
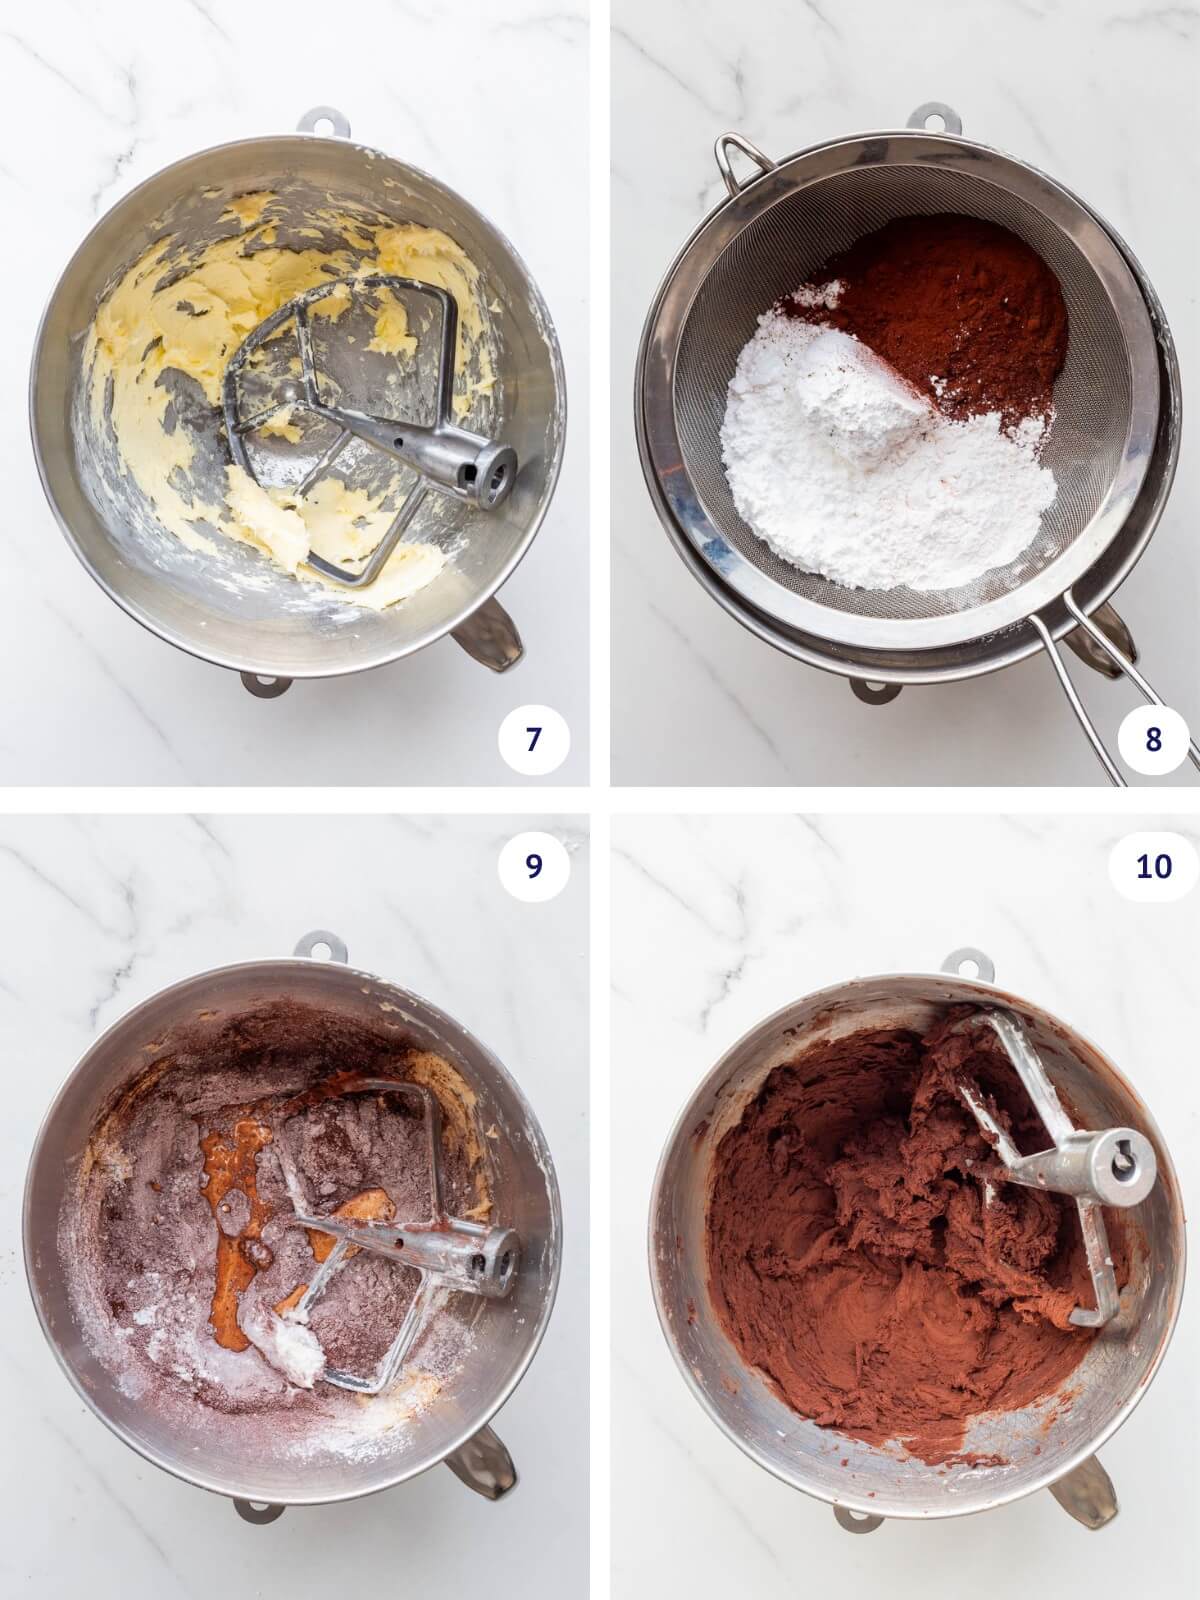
Step 3-While the crust is cooling down, you can make the dark chocolate Nanaimo bar filling by first creaming the butter until smooth and creamy (image 7) then sift in the dry ingredients (image 8) and add the cream and vanilla (image 9), mixing everything together until smooth and thick (image 10).
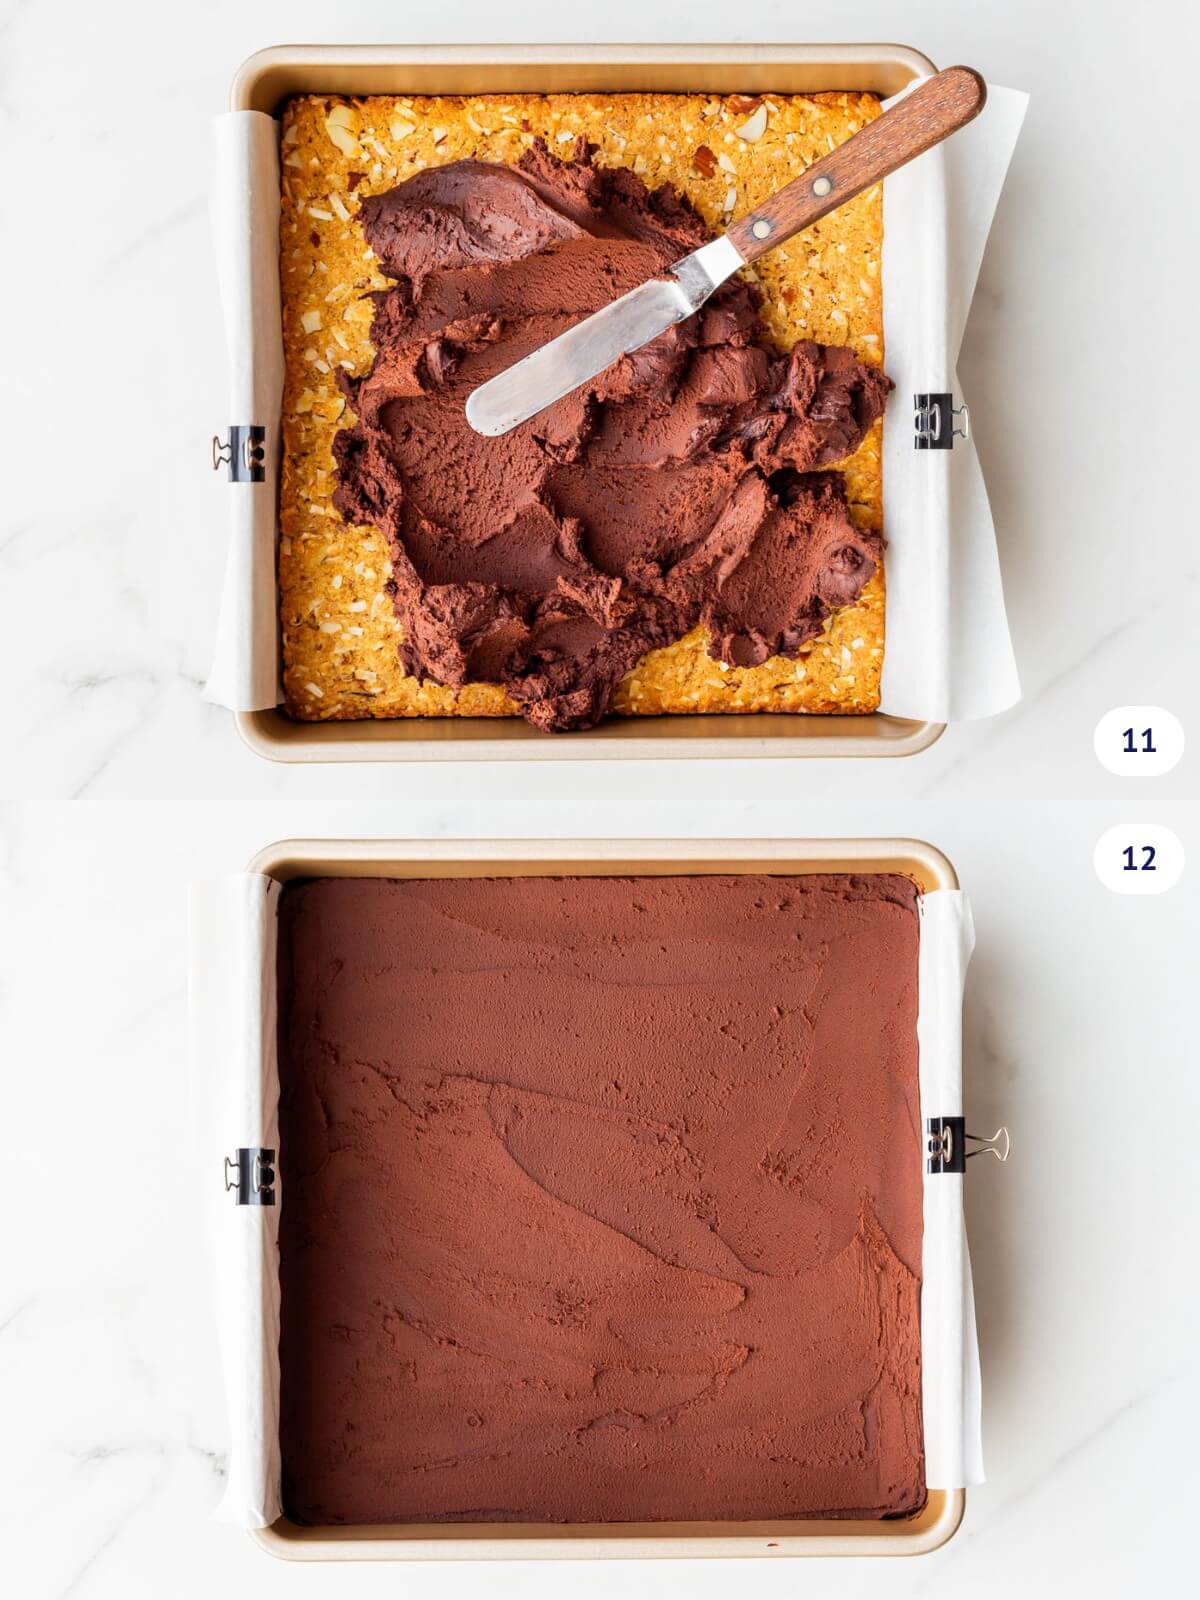
Step 4-Spread the dark chocolate custard filling over the cooled crust using an offset spatula (image 11). Make the chocolate filling as smooth as possible (image 12).
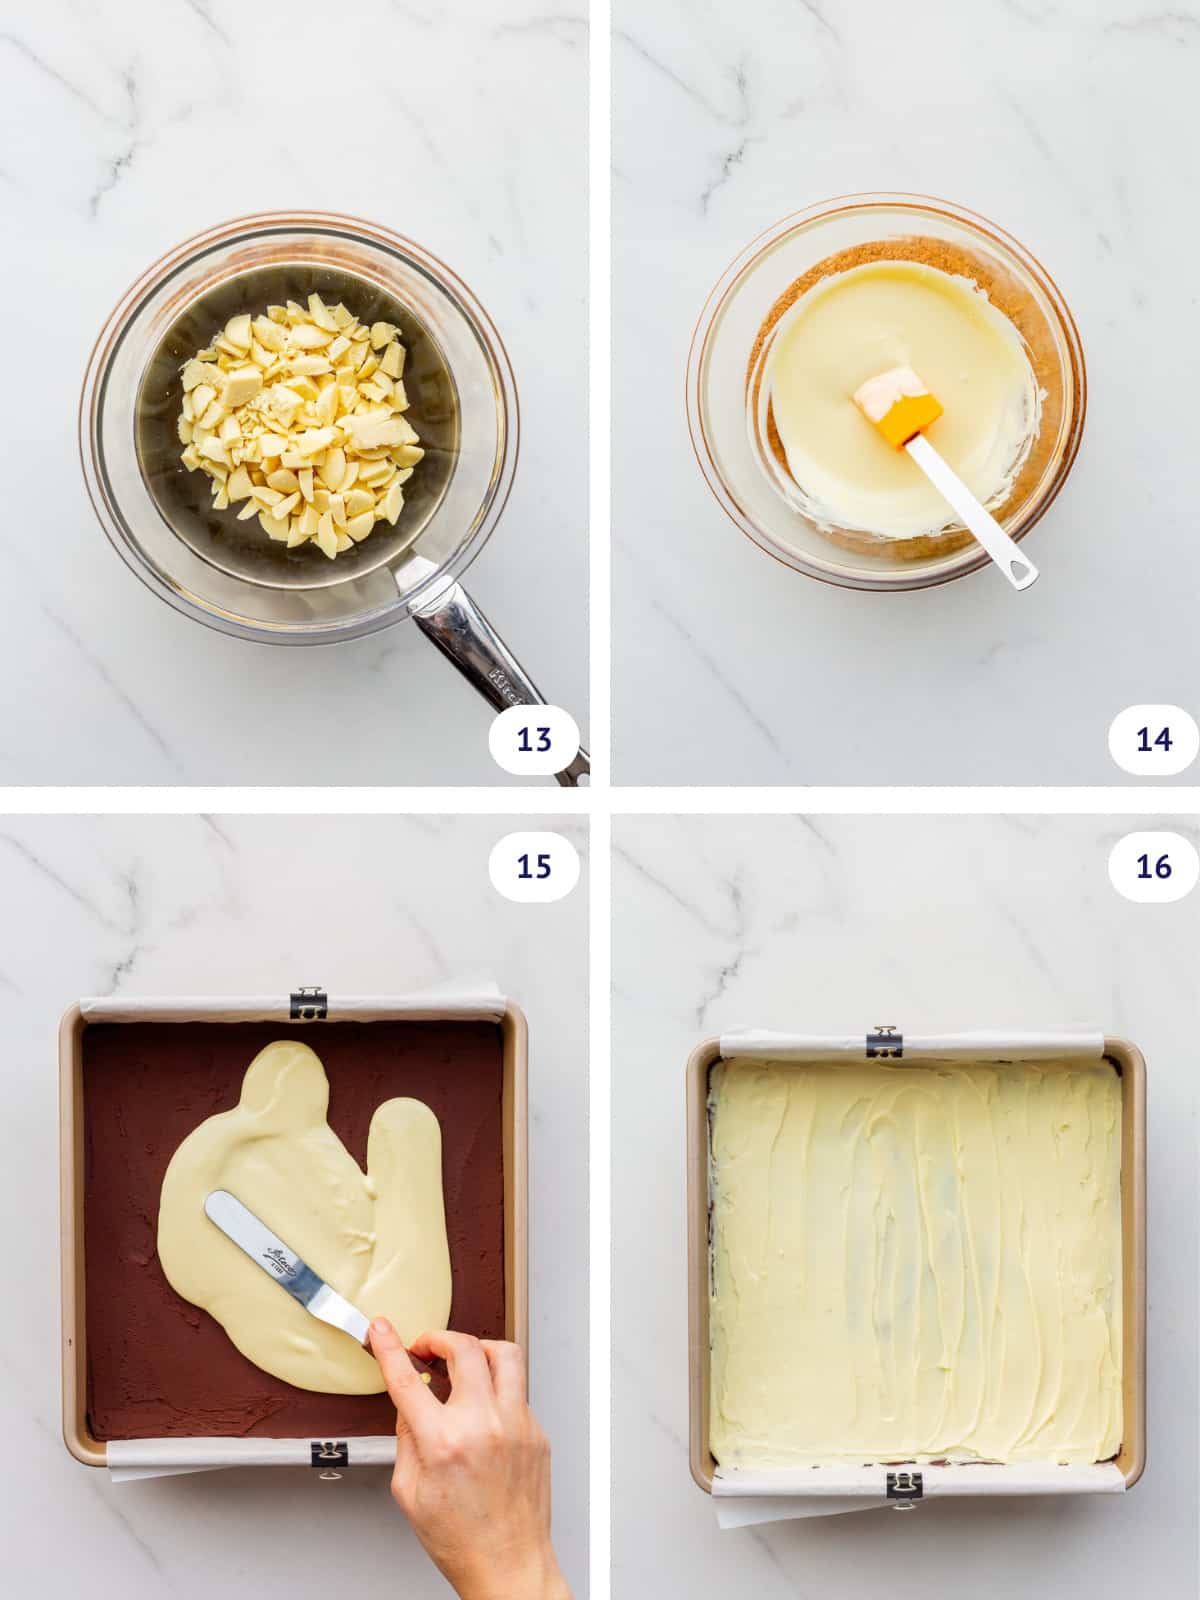
Step 5-Melt the butter with the white chocolate over a double-boiler (image 13), stirring until smooth (image 14), then pour it over the chilled pan of bars and spread it with a mini offset spatula (image 15). You can use the offset spatula to make a swirly design on top if you'd like. Chill until almost completely set before scoring and cutting (image 16).
Tip: Make sure the chocolate layer is properly chilled before topping with melted white chocolate.
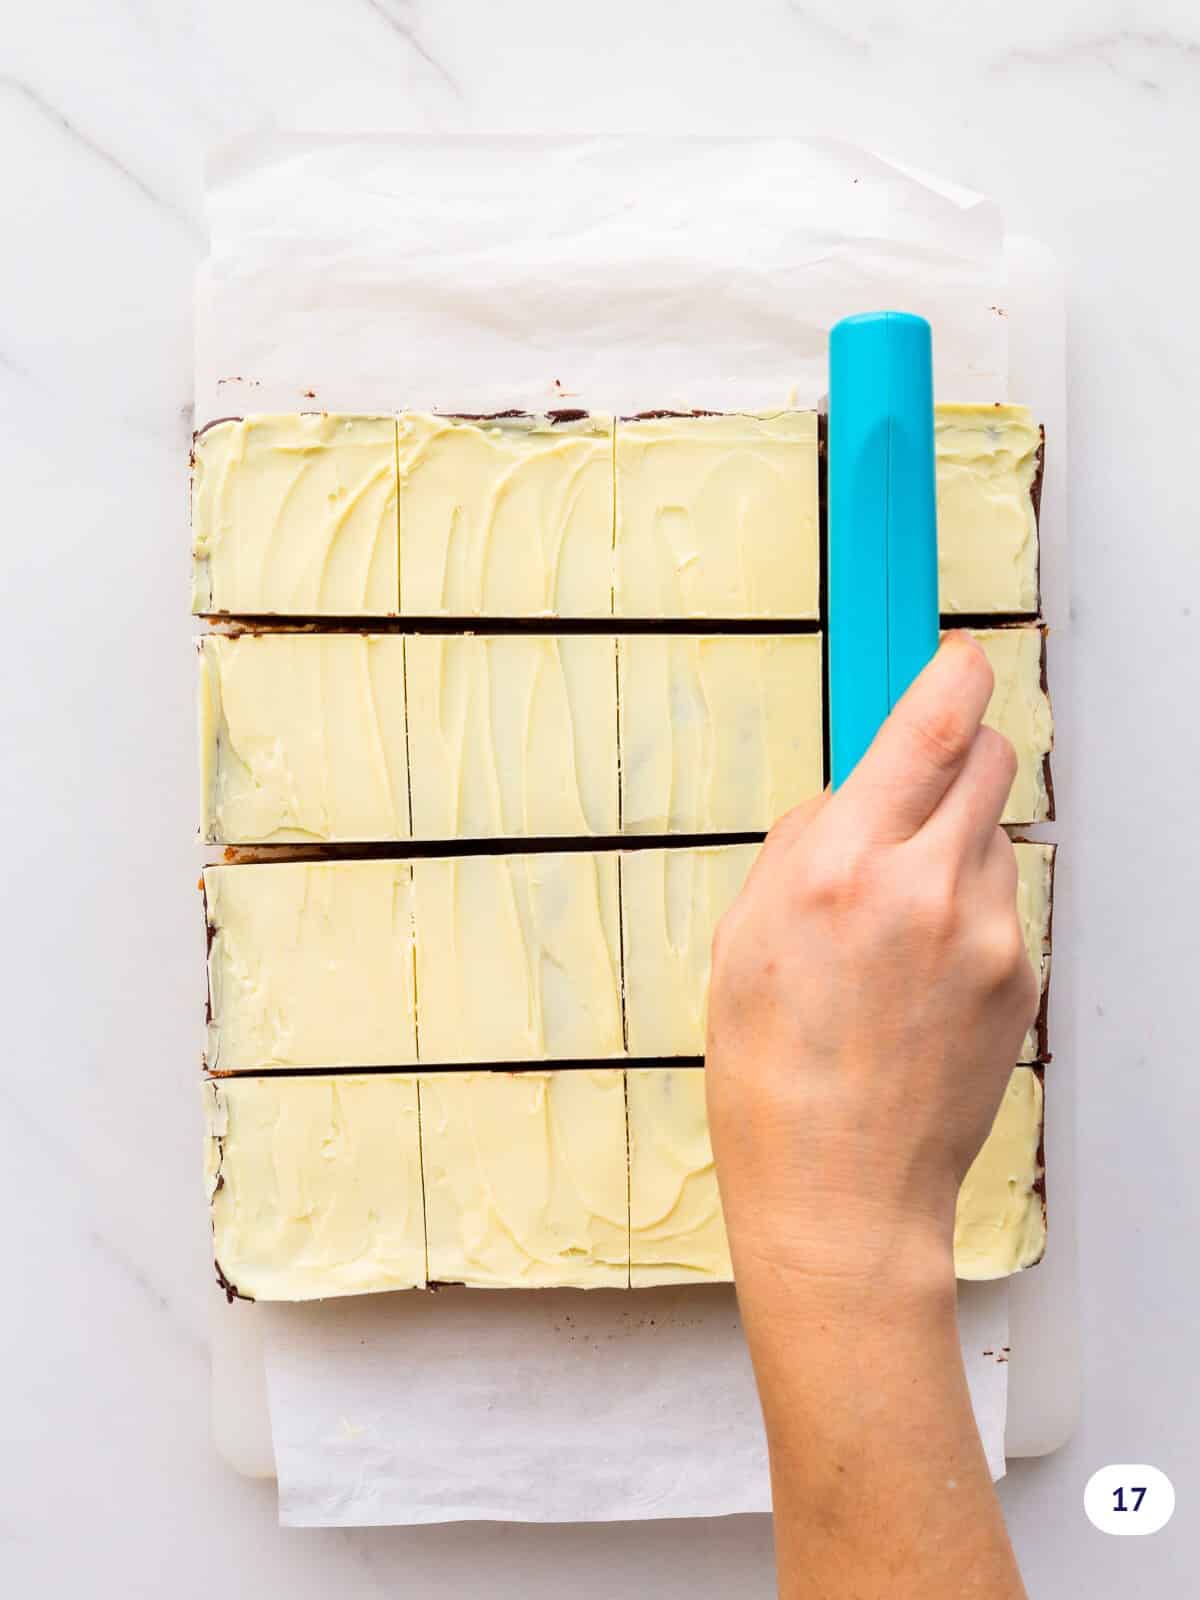
Step 6-I prefer to unmould the bars from the pan at this stage so that I have more room to neatly cut the bars into squares. You will need to run a knife along the edges without parchment to release them. Then, use a ruler and a pastry cutter or a large chef's knife to cut out the squares. Start by scoring the white chocolate layer and then you can use the pastry cutter to cut through cleanly to the bottom (image 17). Clean the bench scraper and knife with every cut to ensure you get clean layers.
Nanaimo Bar FAQs
Honestly, the crust will look oily or greasy before it's baked. In the oven, the graham cracker crumbs have time to absorb the butter as it bakes and the crust will appear dry when it's baked through. This is normal. The base will not taste or feel greasy when you eat it. If you are concerned, you can blot the surface of the crust with a square of paper towel before baking, but really trust the process! It will be fine!
You can store Nanaimo bars for up to 1 week in the refrigerator or for longer storage, store them in an airtight container in the freezer for later. Defrost overnight in the fridge when ready to serve.
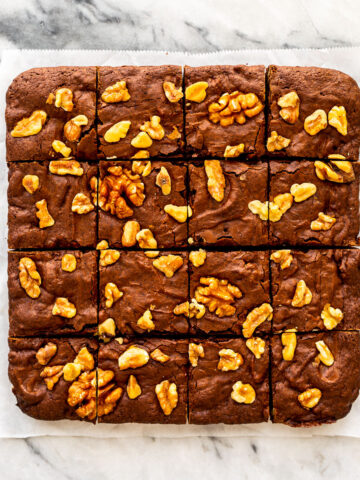
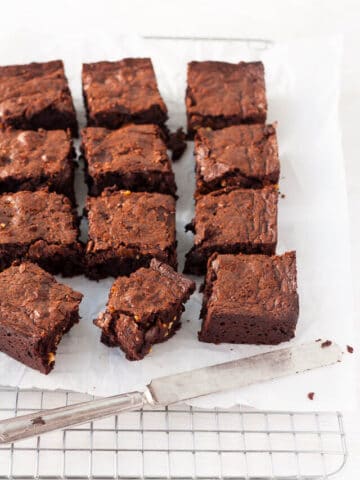
Other Bar Recipes to Try
Looking for other bar recipes like this to bake? Try these:

If you tried this recipe for the best reversed Nanaimo bars (or any other recipe on my website), please leave a ⭐ star rating and let me know how it went in the comments below. I love hearing from you!
📖 Recipe
Reversed Nanaimo Bars with White Chocolate
Ingredients
For the crust
- 115 grams unsalted butter melted
- 60 grams white chocolate chopped
- 200 grams graham cracker crumbs
- 75 grams sweetened shredded coconut
- 60 grams sliced almonds
- 1 large egg(s)
- 5 mL pure vanilla extract
For the filling
- 115 grams unsalted butter softened
- 220 grams icing sugar
- 90 grams Cacao Barry extra brute cocoa powder
- 30 tablespoon Bird's custard powder
- 45 mL whipping cream (35 % fat)
- 5 mL pure vanilla extract
- 1.25 mL Diamond Crystal fine kosher salt
For the white chocolate layer
- 175 grams white chocolate chopped
- 5 grams unsalted butter
Instructions
For the crust
- Preheat the oven to 350°F (175 °C). Prepare a 9×9-inch (23x23-cm) pan by lining it with parchment paper leaving an overhang. Use all-metal binder clips to secure in place if necessary or alternatively you can butter the pan to help keep the paper in place. Set aside.
- In a small saucepan, melt together the butter and the white chocolate.
- Meanwhile in a medium bowl or in the bowl of the food processor, combine the graham cracker crumbs, coconut, and almonds. Stir in the melted butter and white chocolate and mix to combine, then stir in the egg and vanilla.
- Press the crumb mixture into the prepared pan and use a flat-bottomed glass to flatten the crust into an even layer.
- Bake the crust until it looks dry and no longer glosser (about 15 minutes). Place the pan on a wire rack to let the crust cool completely.
For the filling
- When the crust is cooled, make the dark chocolate custard filling by creaming the butter first before sifting in the cocoa powder, icing sugar, and custard powder cream. Add the cream and vanilla also.
- Beat the mixture until smooth and continue whipping for about 5 minutes. This will lead to a less powdery/grainy filling with a smoother texture. You can adjust the consistency of the filling with either more icing sugar (if it's too soft) or more cream (if it's too firm). The filling should be very thick.
- Spread the dark chocolate filling over the cold graham cracker crust. Place it in the refrigerator to set for at least 1 hour or in the freezer for 15 minutes.
For the white chocolate layer
- When the filling is completely cold and firm, make the white chocolate topping by melting together the white chocolate with the butter over a pan of simmering water (double-boiler) or in the microwave. Make sure to stir often so nothing burns.
- Pour the melted chocolate over the filling and spread it out quickly with an offset spatula.
- Refrigerate the pan for about 15 minutes to partially set the chocolate, then with a sharp knife, cut through the white chocolate top layer into 16-25 squares to make cutting easier later on.
- Refrigerate for another hour or so, until the chocolate is completely hardened.
- Cut the squares along the score lines to serve. Wipe the knife between cuts for the cleanest edges.
Notes
- For the white chocolate, I used Cacao Barry white chocolate, which you can find on Amazon
- For the cocoa powder, I used Cacao Barry extra brute, which you can buy on Amazon
- For the graham cracker crumbs-you can replace the graham cracker crumbs with vanilla wafer crumbs or crumbs made from social tea biscuits. The flavour will be different but still pleasant. You can enhance the crust with a little cinnamon if using vanilla cookies instead to mimic the spices in graham crackers.
- For the custard powder-I always have a box of Bird's custard powder on hand for Nanaimo bars. If you can't find custard powder, your best bet would be to replace the custard powder with vanilla pudding mix. It's not quite the same as custard powder has egg in it, but it's close enough!
- For the nuts-I used sliced almonds for the crust, but you can use any nuts. Pistachios would be really lovely (though more expensive). Make sure to chop them finely.
- For a nut-free version-replace the nuts with extra coconut or incorporate pumpkin seeds or sunflower seeds in their place. Use the same volume.
- This recipe calls for Diamond Crystal fine Kosher salt. If using regular table salt, add half the amount or the recipe may be too salty!
- Note a version of reversed Nanaimo bars was originally published in Canadian Living Holiday Special Baking Edition. It was where I got the idea, but I adapted the method and ratios I used for my classic Nanaimo bars recipe for this one.
Nutrition
Nutrition information is automatically calculated and should only be used as an approximation.

Medeja says
I wish you much happier and better New Year 2013! 🙂
I have only heard about Nanaimo bars.. In your pictures they look really tempting!
Janice Lawandi says
Nanaimo bars are so easy and a great sweet treat! You should definitely give these a shot.