

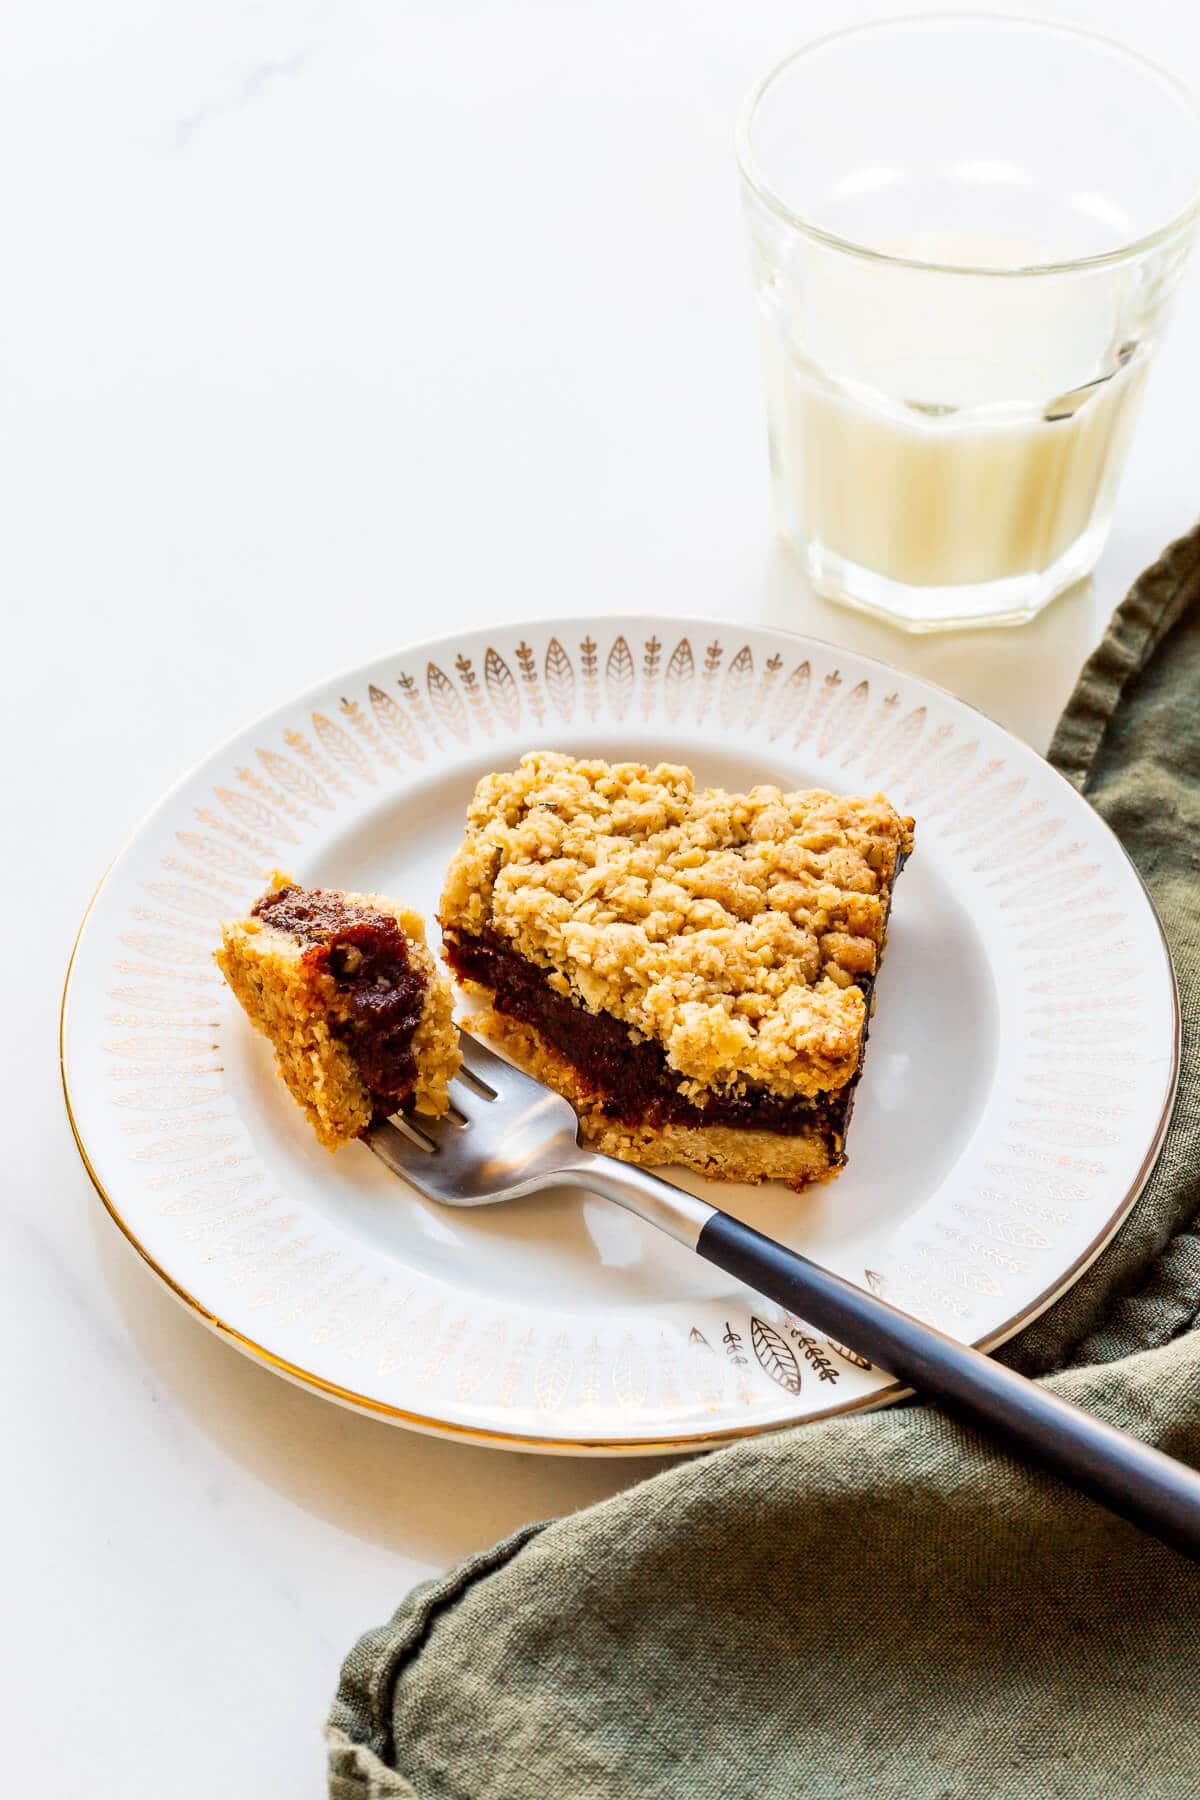
Learn how to make the best date squares with this easy recipe made from pantry staples you probably have already and, of course, a little butter.
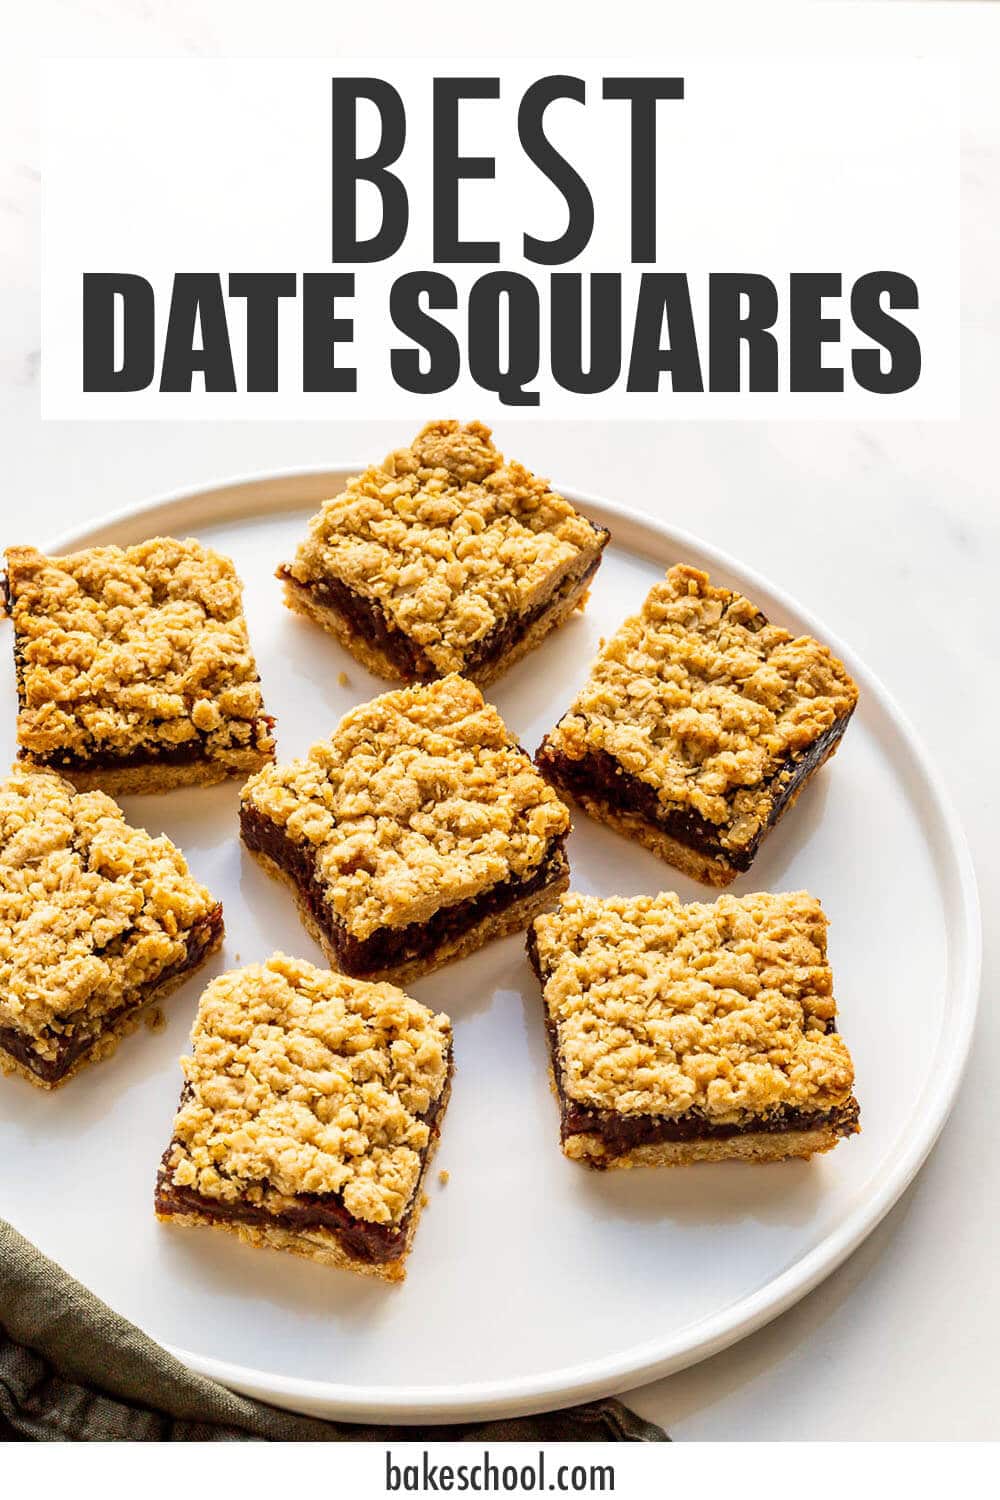
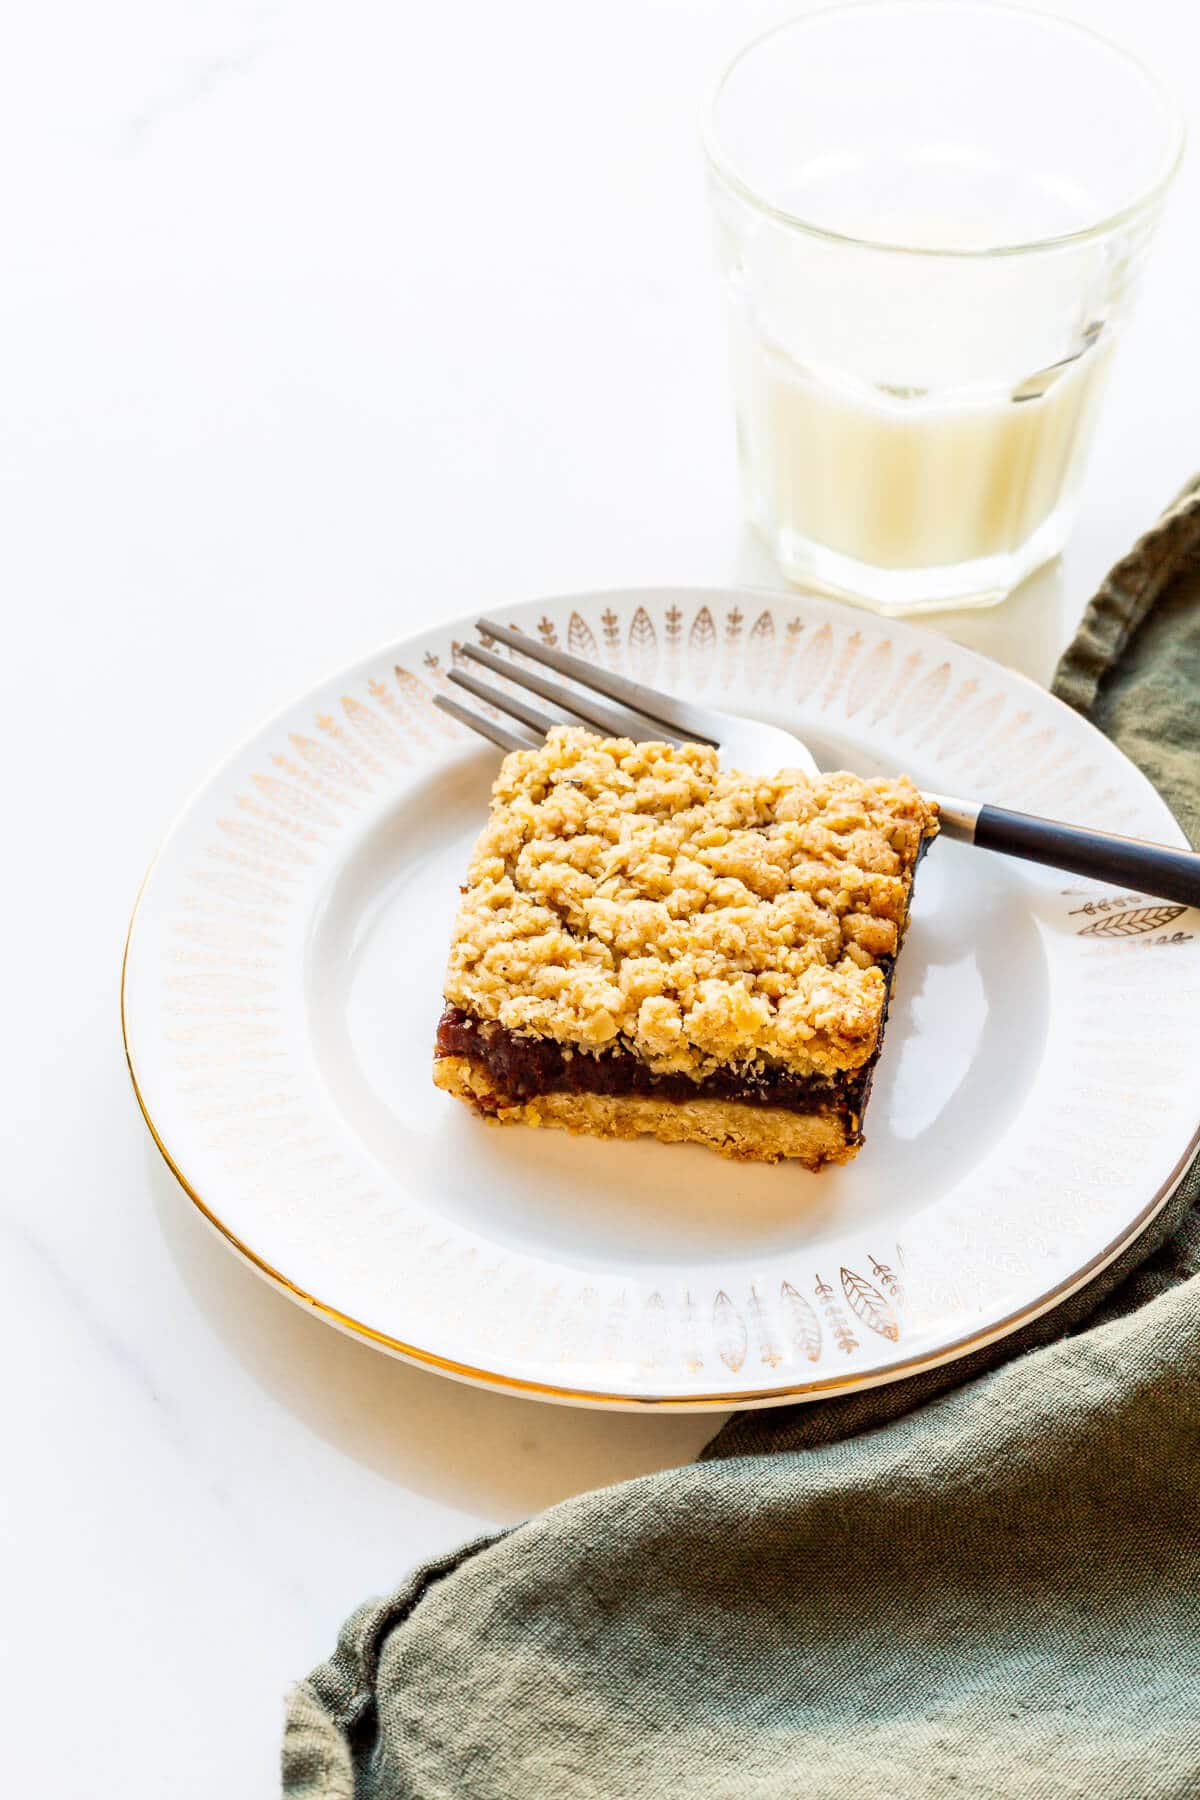
This is my go-to recipe for the best date squares because they are all about the dates: there is no lemon or orange zest here to interfere with the sweet, earthy character of the dates. These bars cut perfectly, store well, and they are sturdy enough that you can wrap them and eat them without creating a crumbly mess!
Date squares are a famous Canadian treat, along with classic Nanaimo bars and butter tarts.
If you love date squares, be sure to check out these apple sauce oatmeal bars, made with the same oat crumble base and topping, with a lightly-spiced filling of apple sauce and diced apple.
Jump to:
What Date Squares Are Made Of
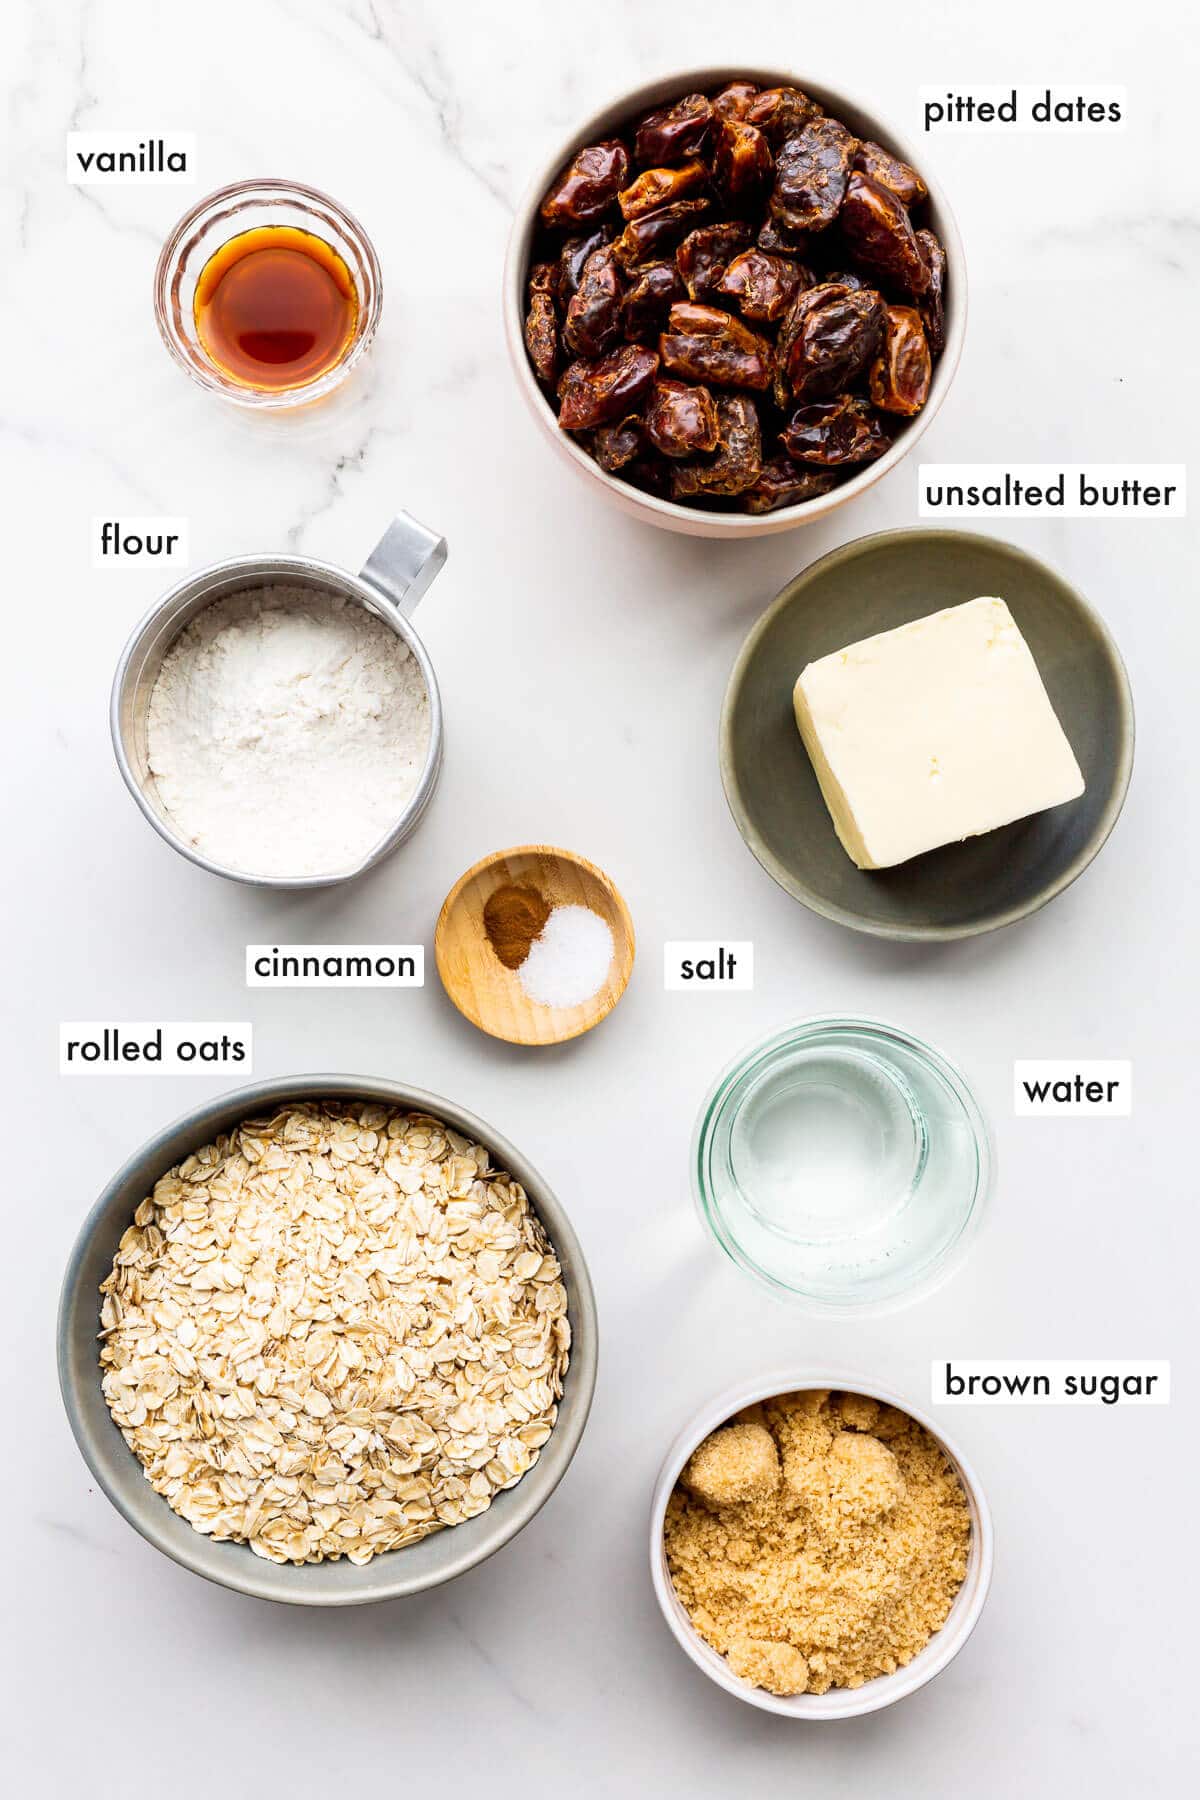
If you want to make the best date squares from scratch, you will need the following ingredients:
- dates, pitted dried dates (the cheap kind) are perfect for this recipe. I have also made these with Medjool dates, which are meatier and much more expensive. It's definitely a splurge to use Medjool dates, but I don't think it's necessary here.
- water is needed to hydrate the dried dates, which will absorb it all. The dates will soften and break down with the water and heat, so that you can have a thick, sweet purée that is the perfect texture to fill these bars.
- large flake oats, also known as rolled oats, provide texture to the crumble layer, which doubles as the bottom crust for these squares. Don't use minute oats or steel-cut oats for this recipe. These are not good substitutions for rolled oats, though the minute oats will likely work if that's all you've got.
- all-purpose flour is needed to bind all the ingredients together and give the bars structure. If you don't use enough flour, your bars will be too soft, and too much flour will make the crumble dry and powdery.
- brown sugar, light or dark, will add both sweetness and a molasses flavour that pairs nicely with the dates.
- butter, preferably unsalted butter because you will add salt to the dough, but if you have salted, it will work. Just adjust the salt in the recipe accordingly otherwise your bars may be too salty.
- cinnamon is optional but added to the crumble, it adds a lovely warm taste that makes the crumble and base more flavourful.
- salt is really important to balance out the sweet molasses flavour. Don't skip it. I like to use Diamond Crystal fine kosher salt, but table salt will work, though the bars will be saltier and you may want to halve the salt in that case.
Please see recipe for complete details on ingredients and quantities.
Substitutions And Variations
- Dates-I prefer to make date squares with dates only, but some bakers like to combine dried prunes and dates to make the filling. You can replace part of the weight of dates with prunes.
- Filling flavours-I'm a purist and I like the flavour of the dates to shine in the filling, but you can also explore adding orange juice instead of the water and even some lemon or orange zest to the filling.
How To Make Date Bars That Aren't Too Crumbly
Date squares are easy! Here's how to make them
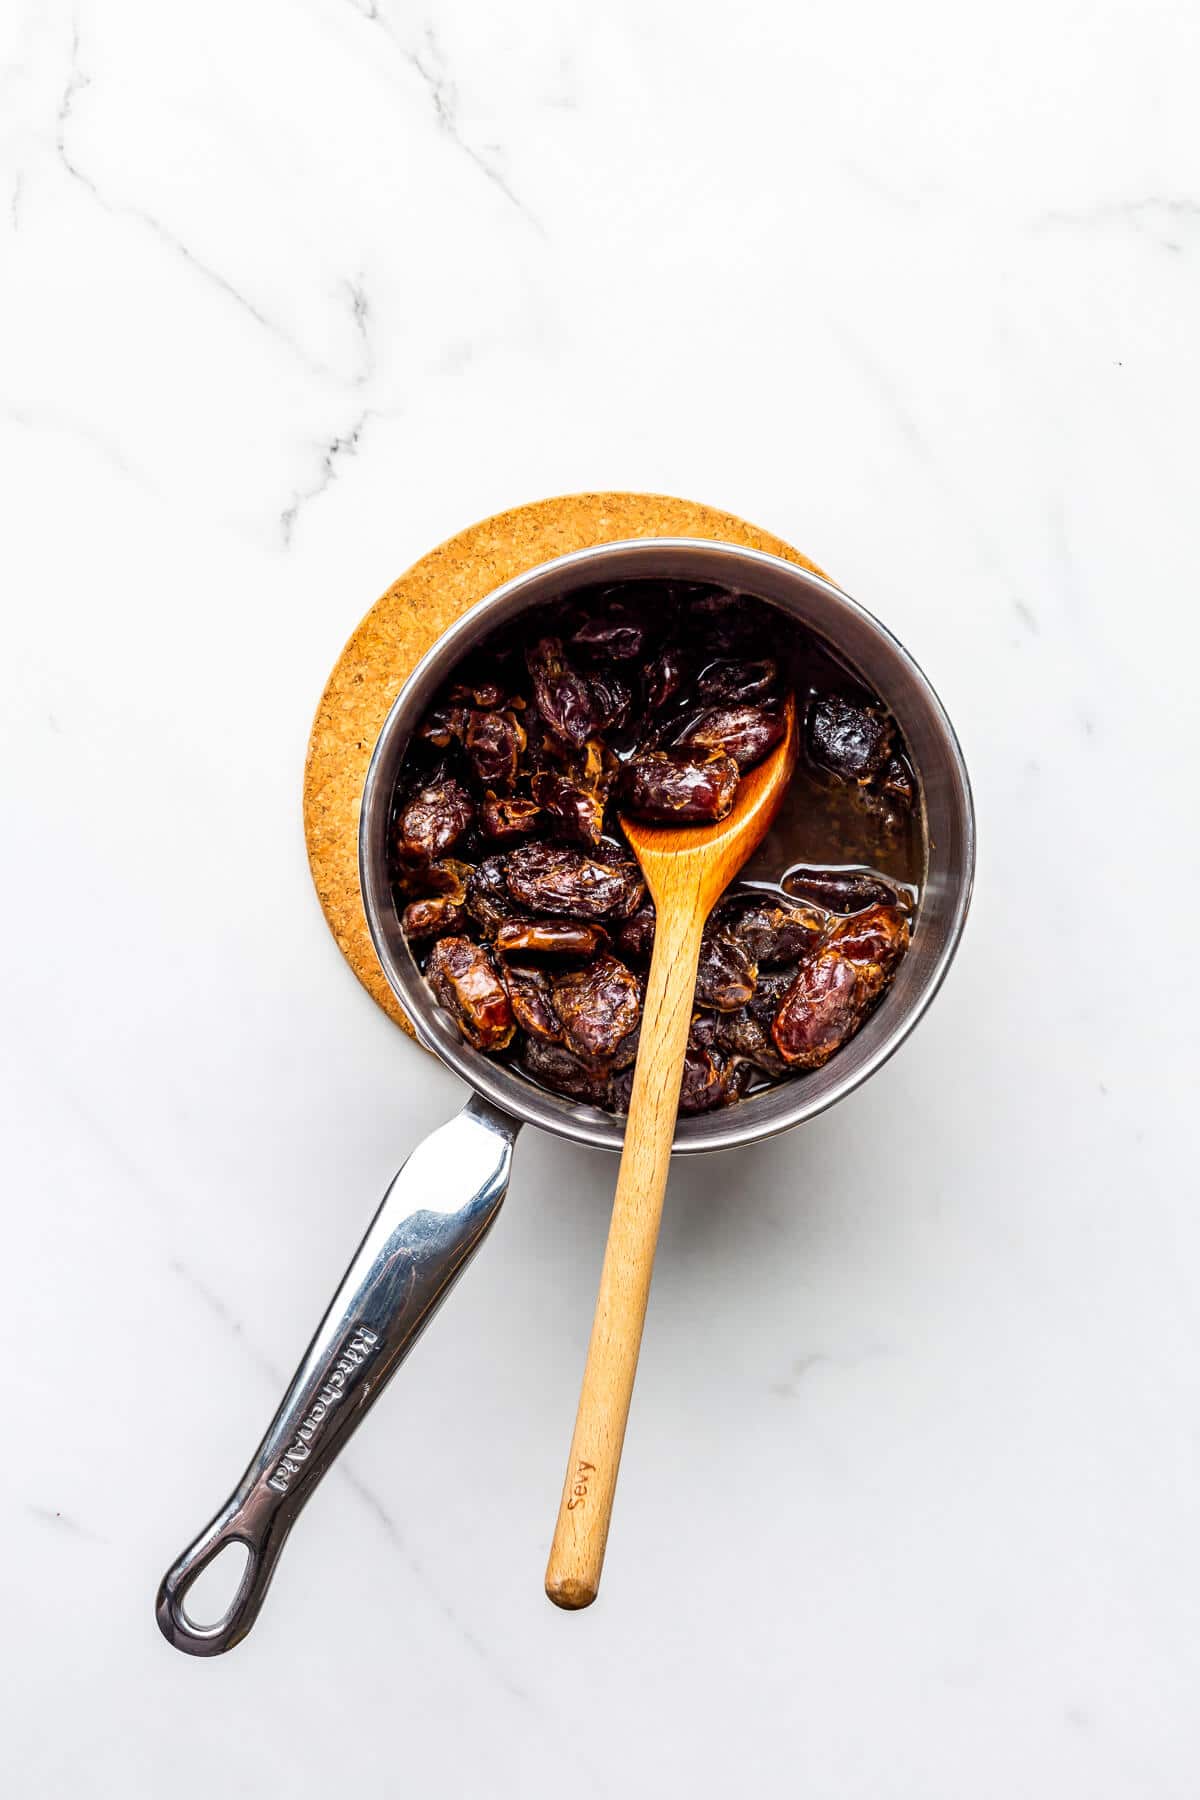
Step 1: Combine the dried dates with the water in a small saucepan.
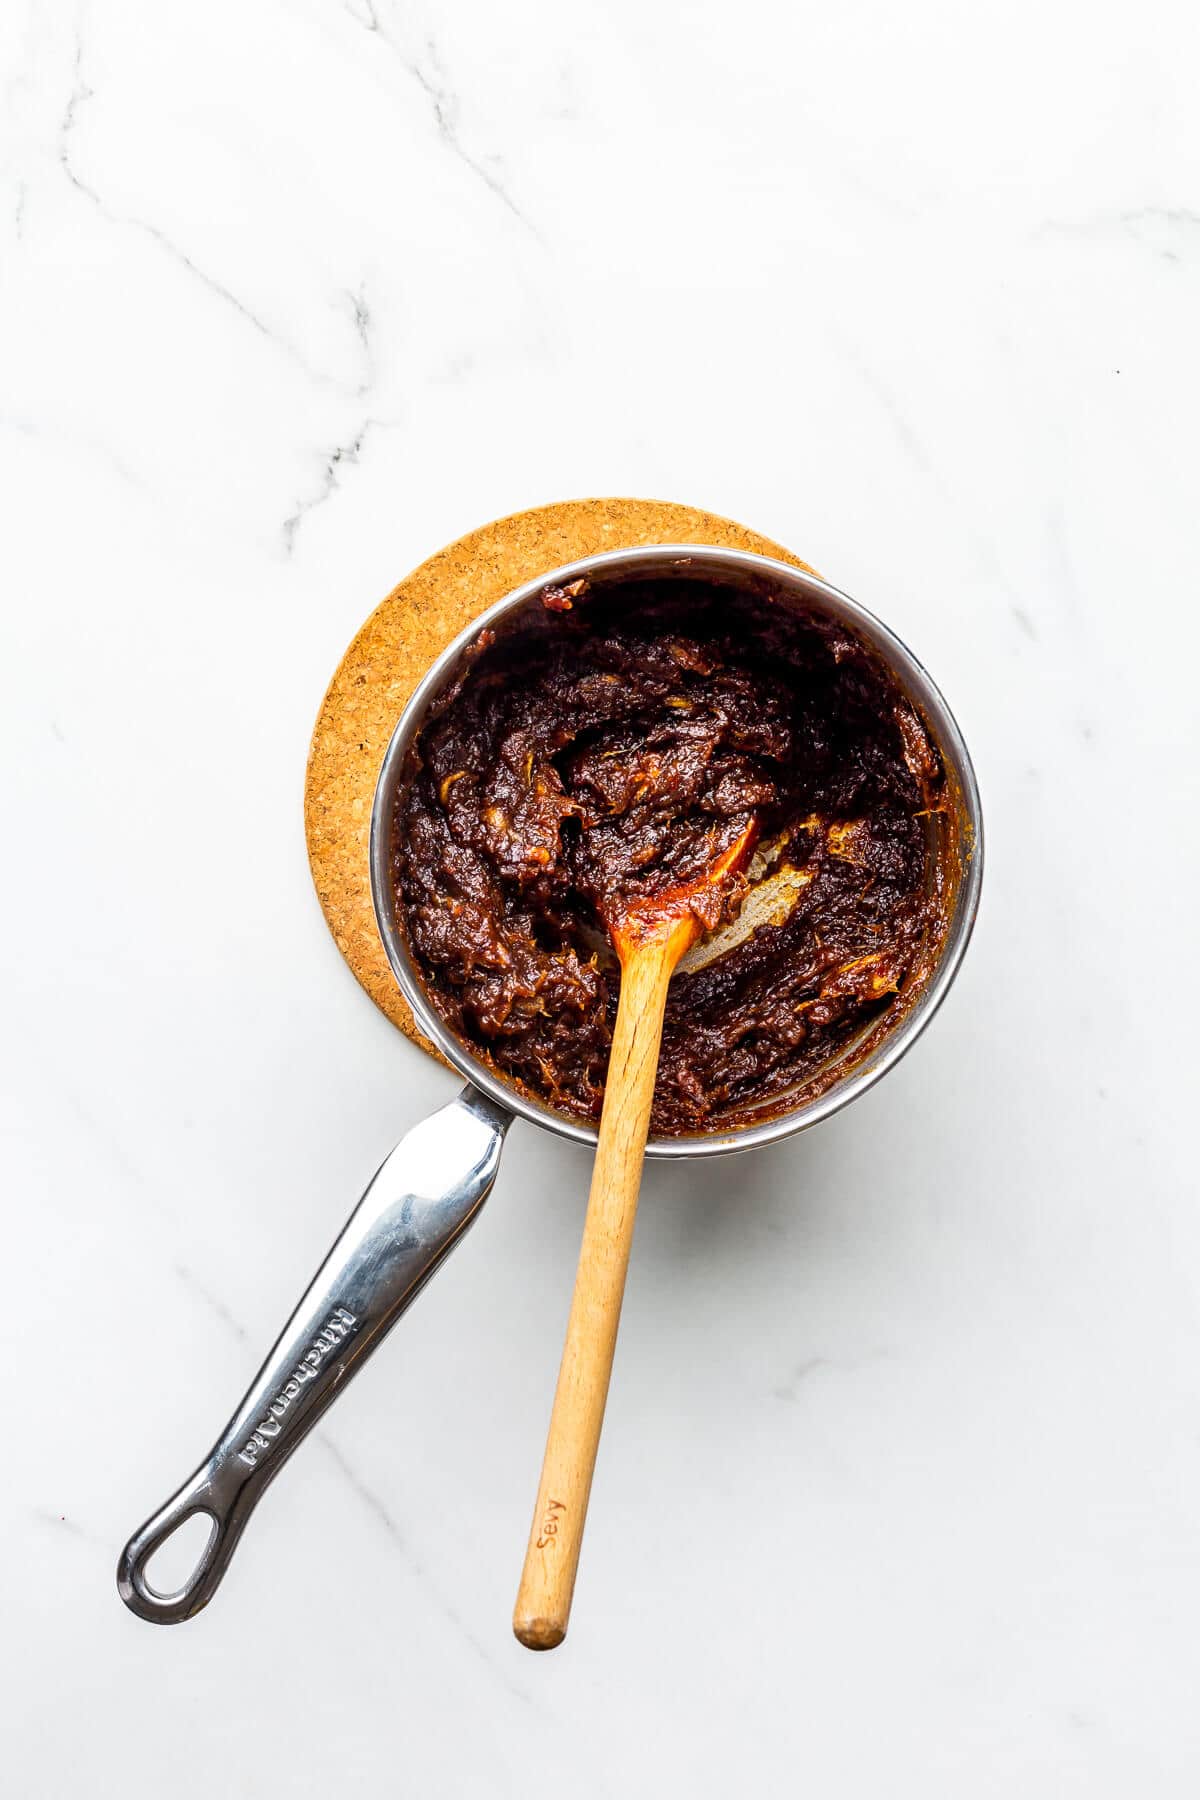
Step 2: Heat the mixture on the stove until the dates begin to break down and absorb the water.
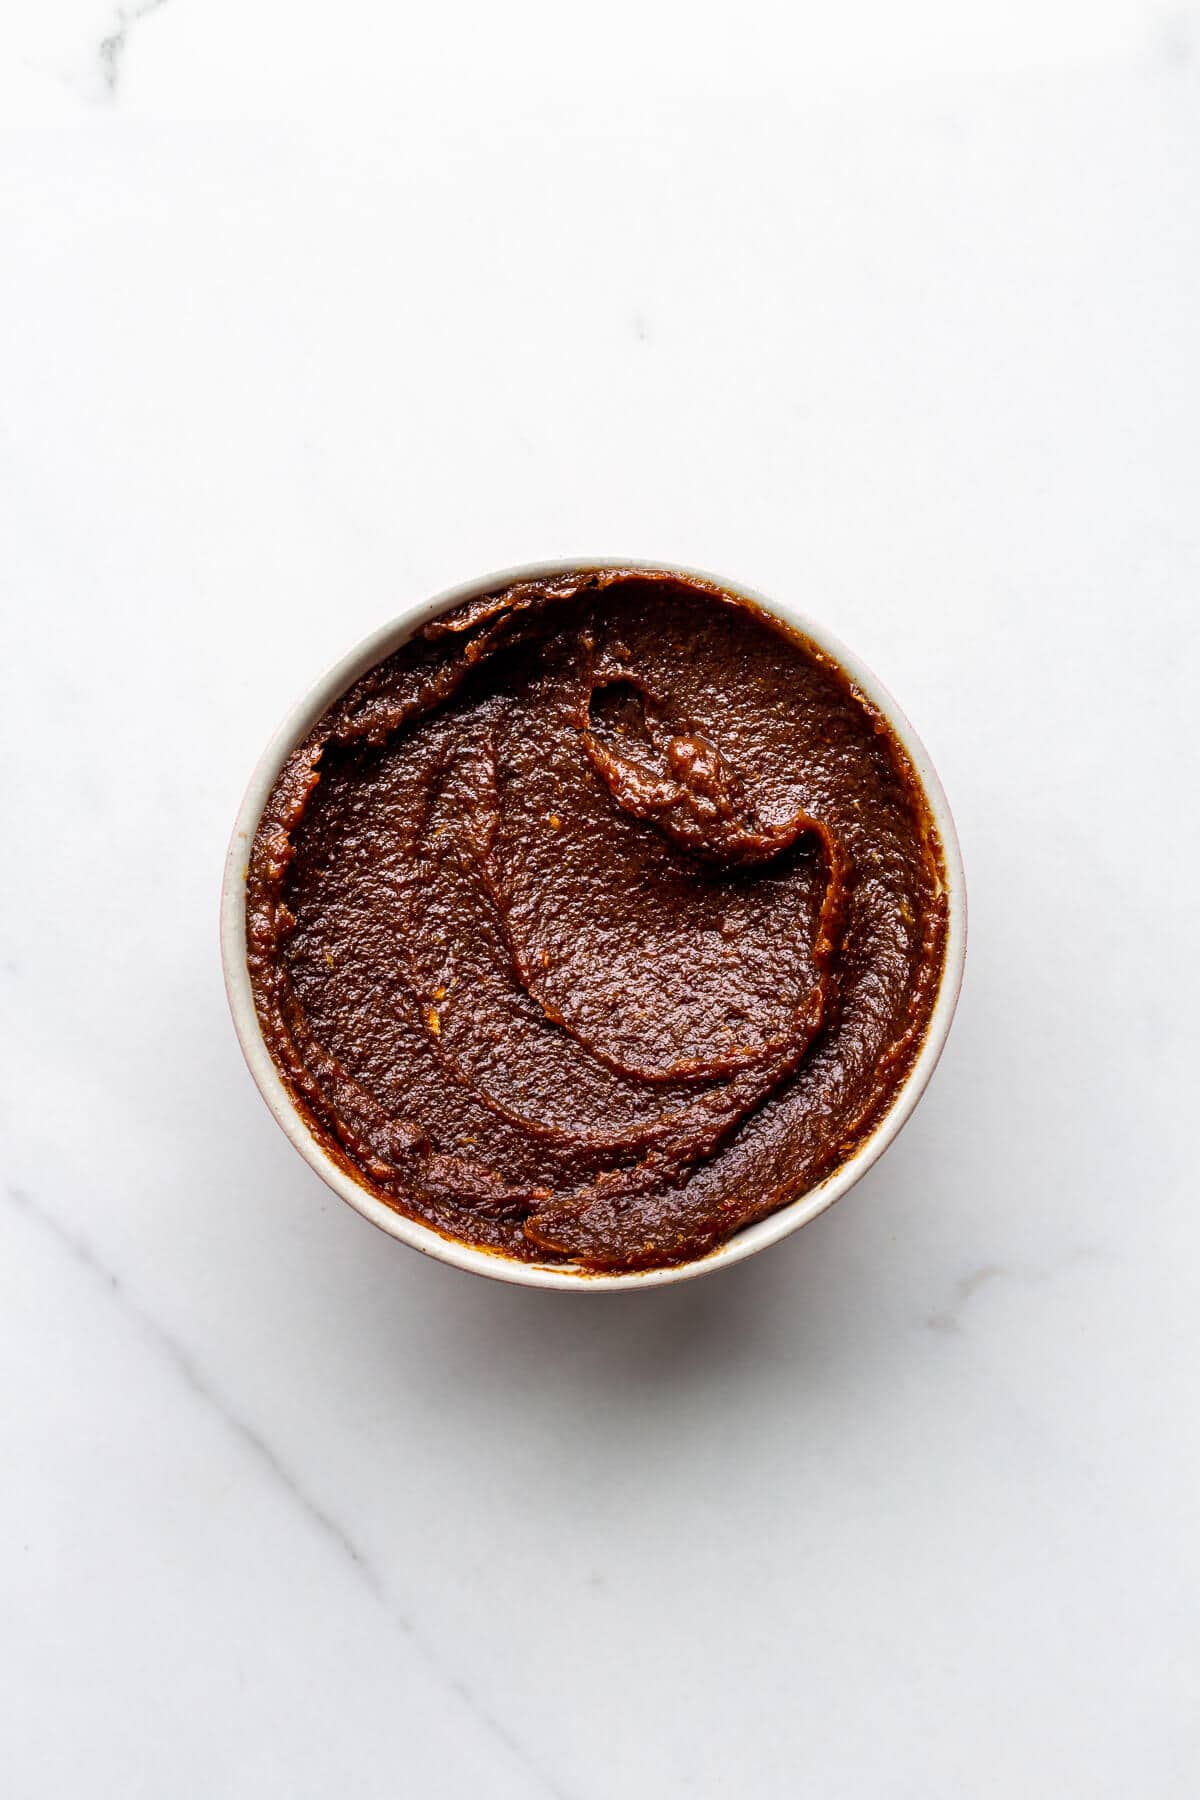
Step 3: Purée the cooked dates in a food processor to create a smooth, thick paste.
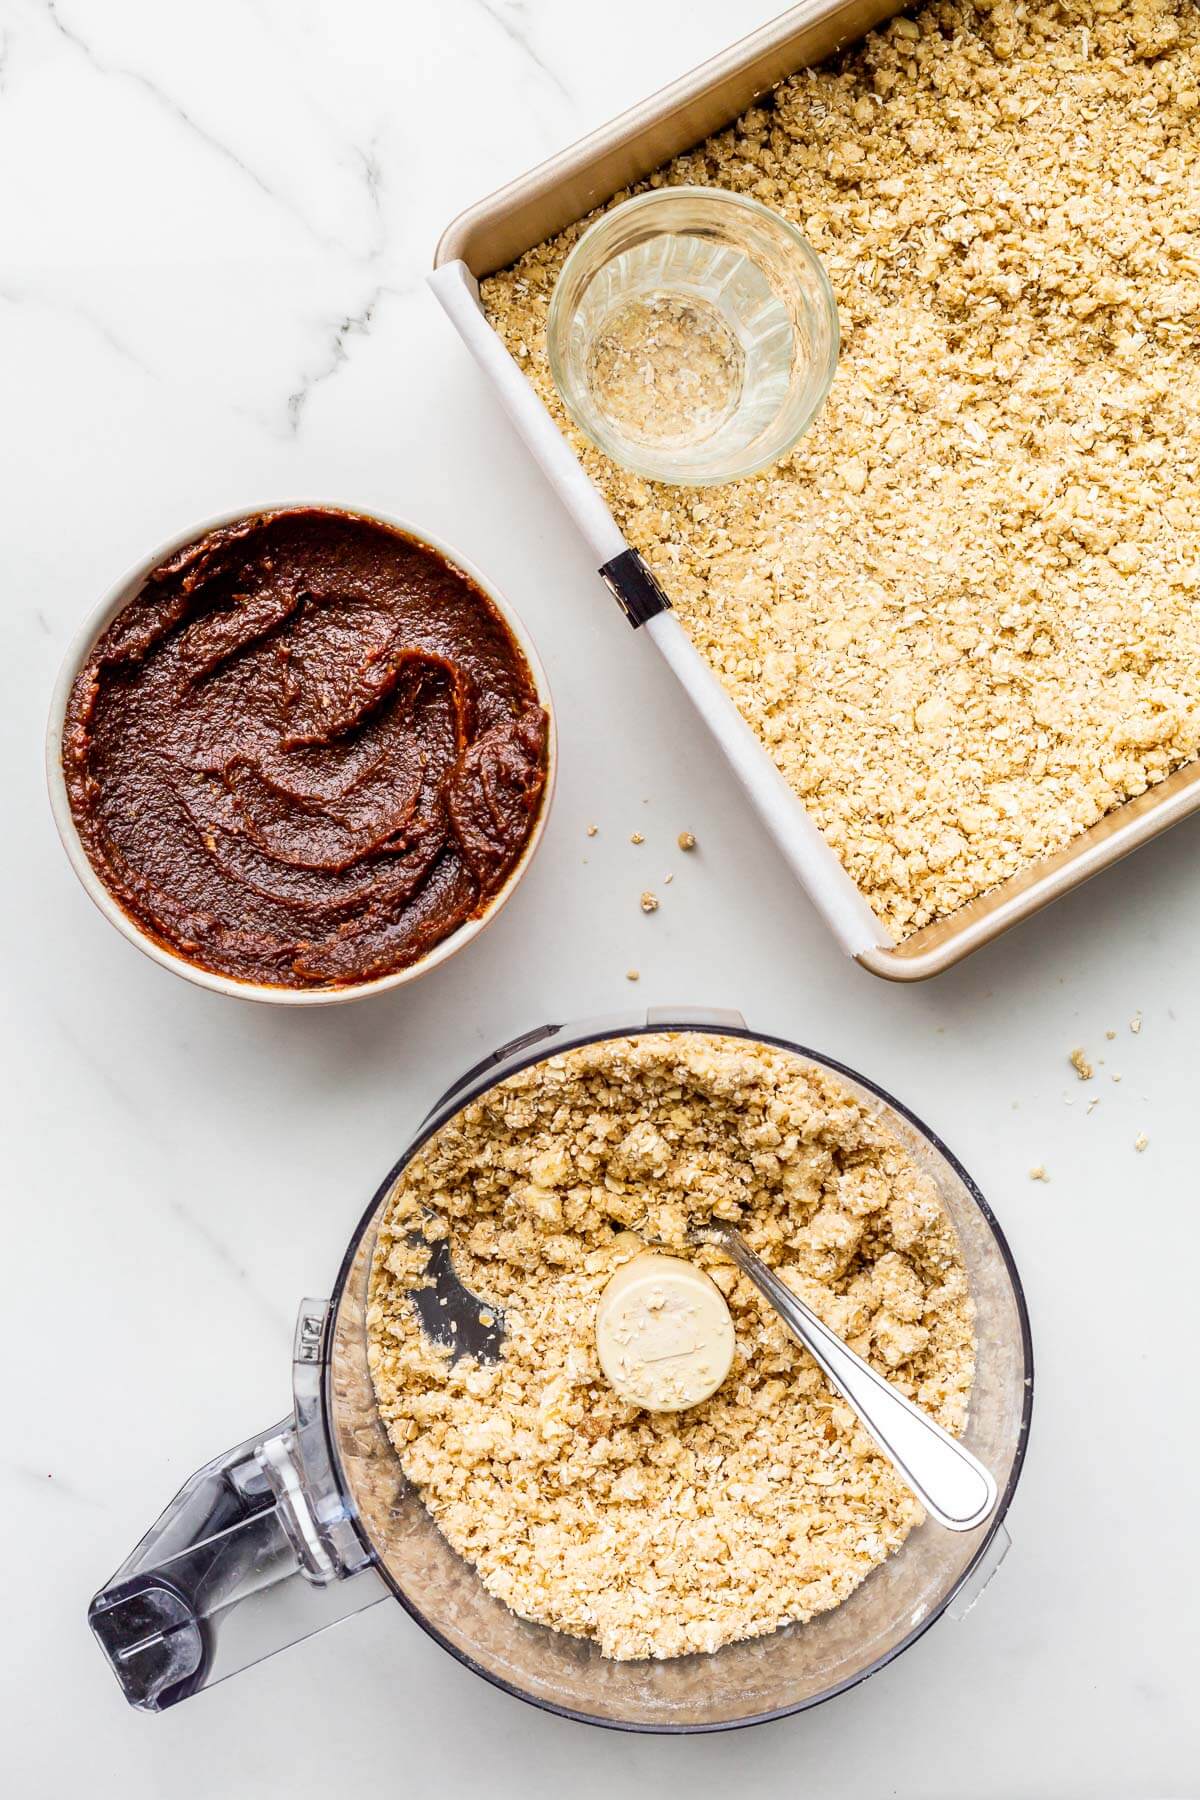
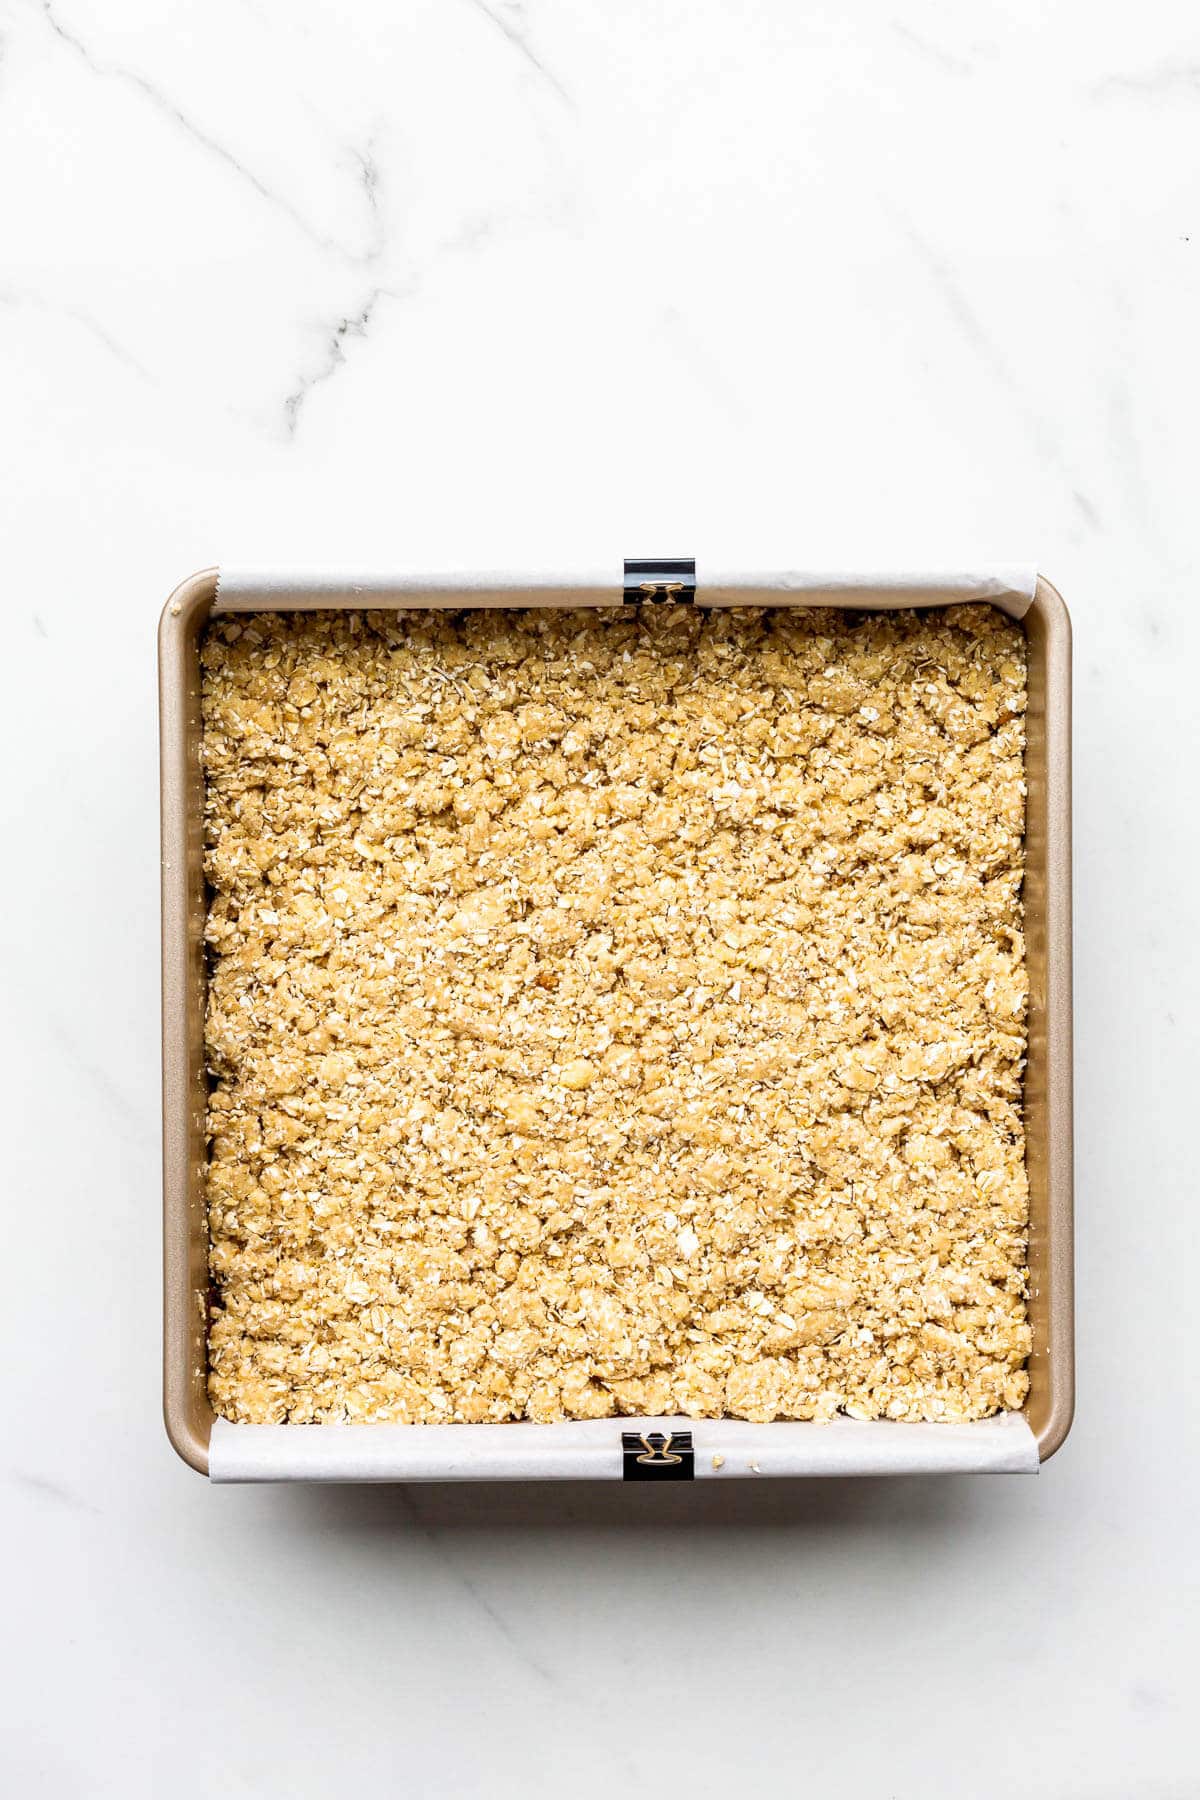
Step 4: Combine the crumble ingredients in a food processor and pulse to create a crumbly mixture that holds when pressed together. Press the crumble mixture on the bottom of the pan with a flat-bottomed glass to compact it into a firm base.
Tip: Use a flat-bottomed glass or mug and take the time to press and tighten the crumbly base to lock it in place and create a firm base that you will be able to slice with ease.
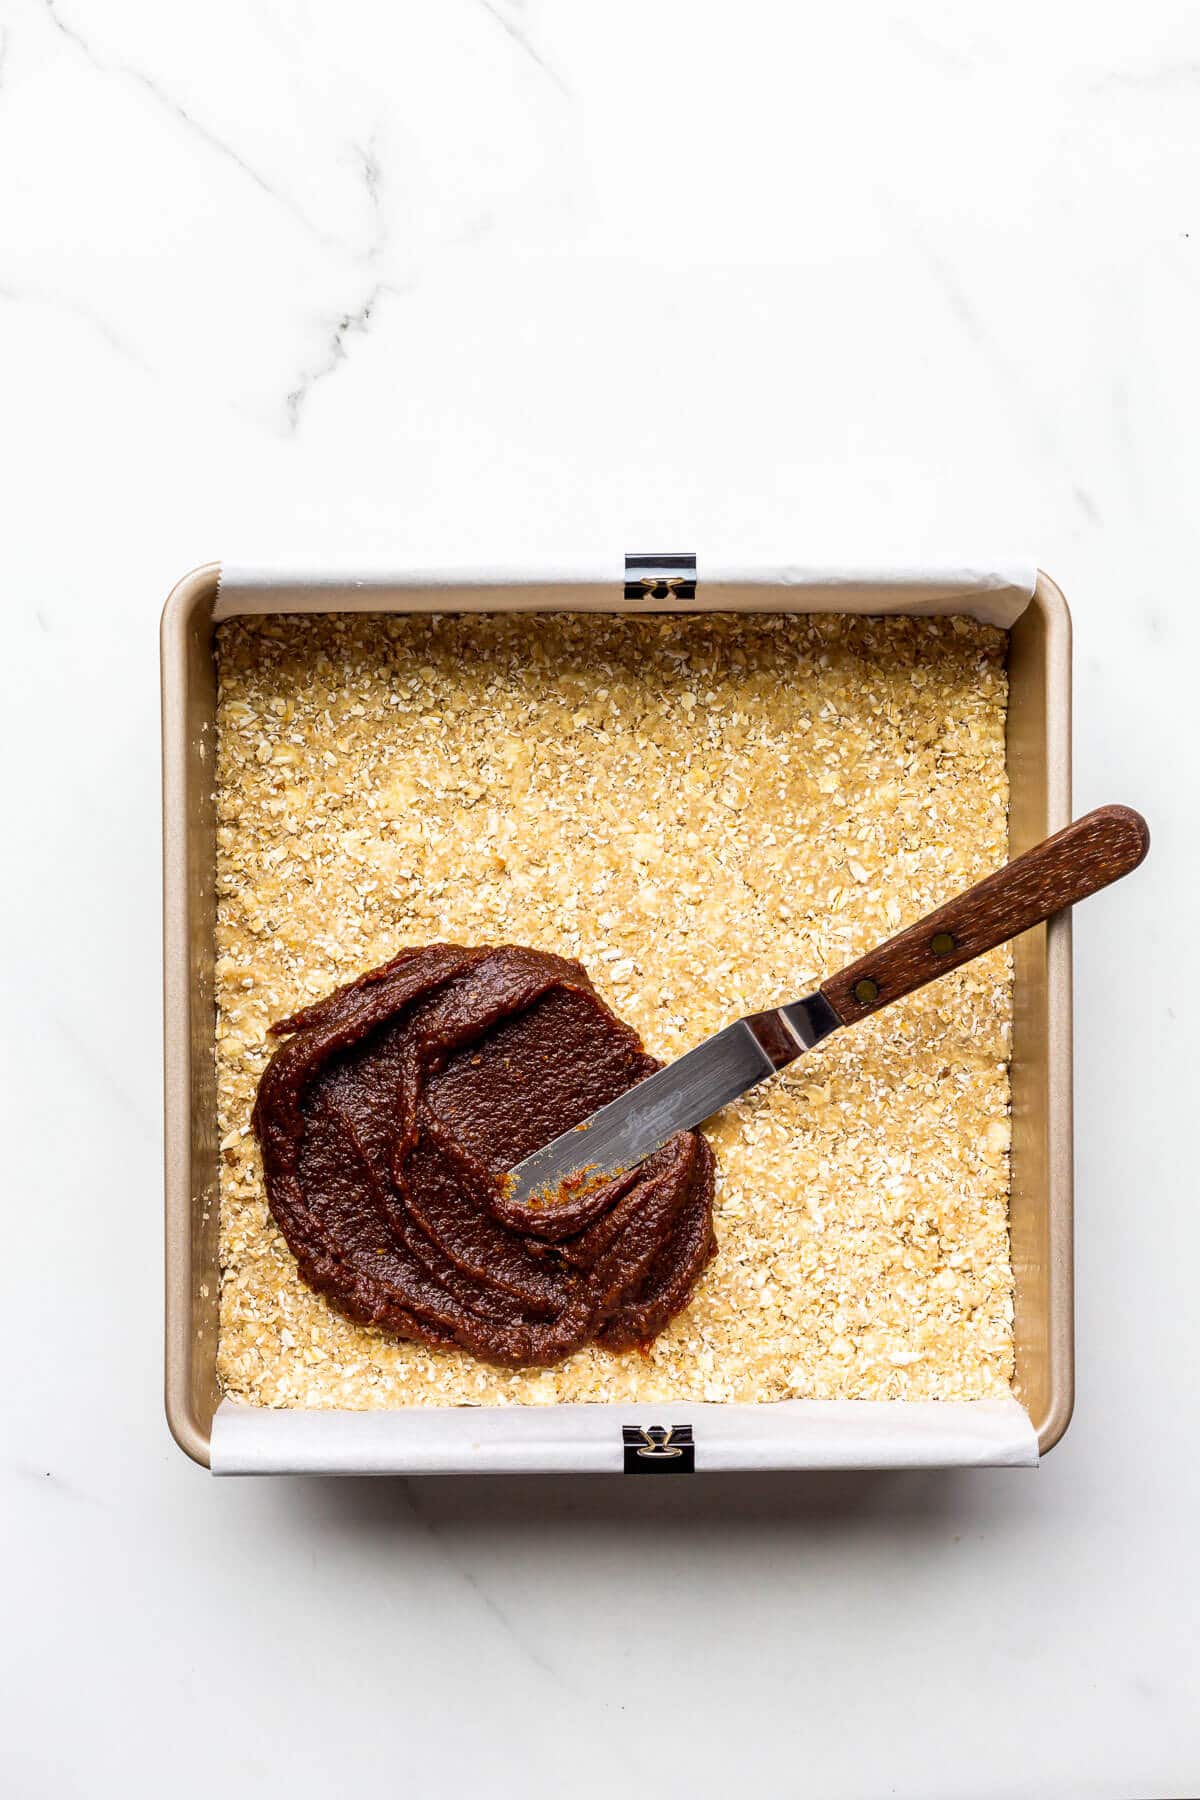
Step 5: With a mini offset spatula, smear the date purée over the compacted crumble base.
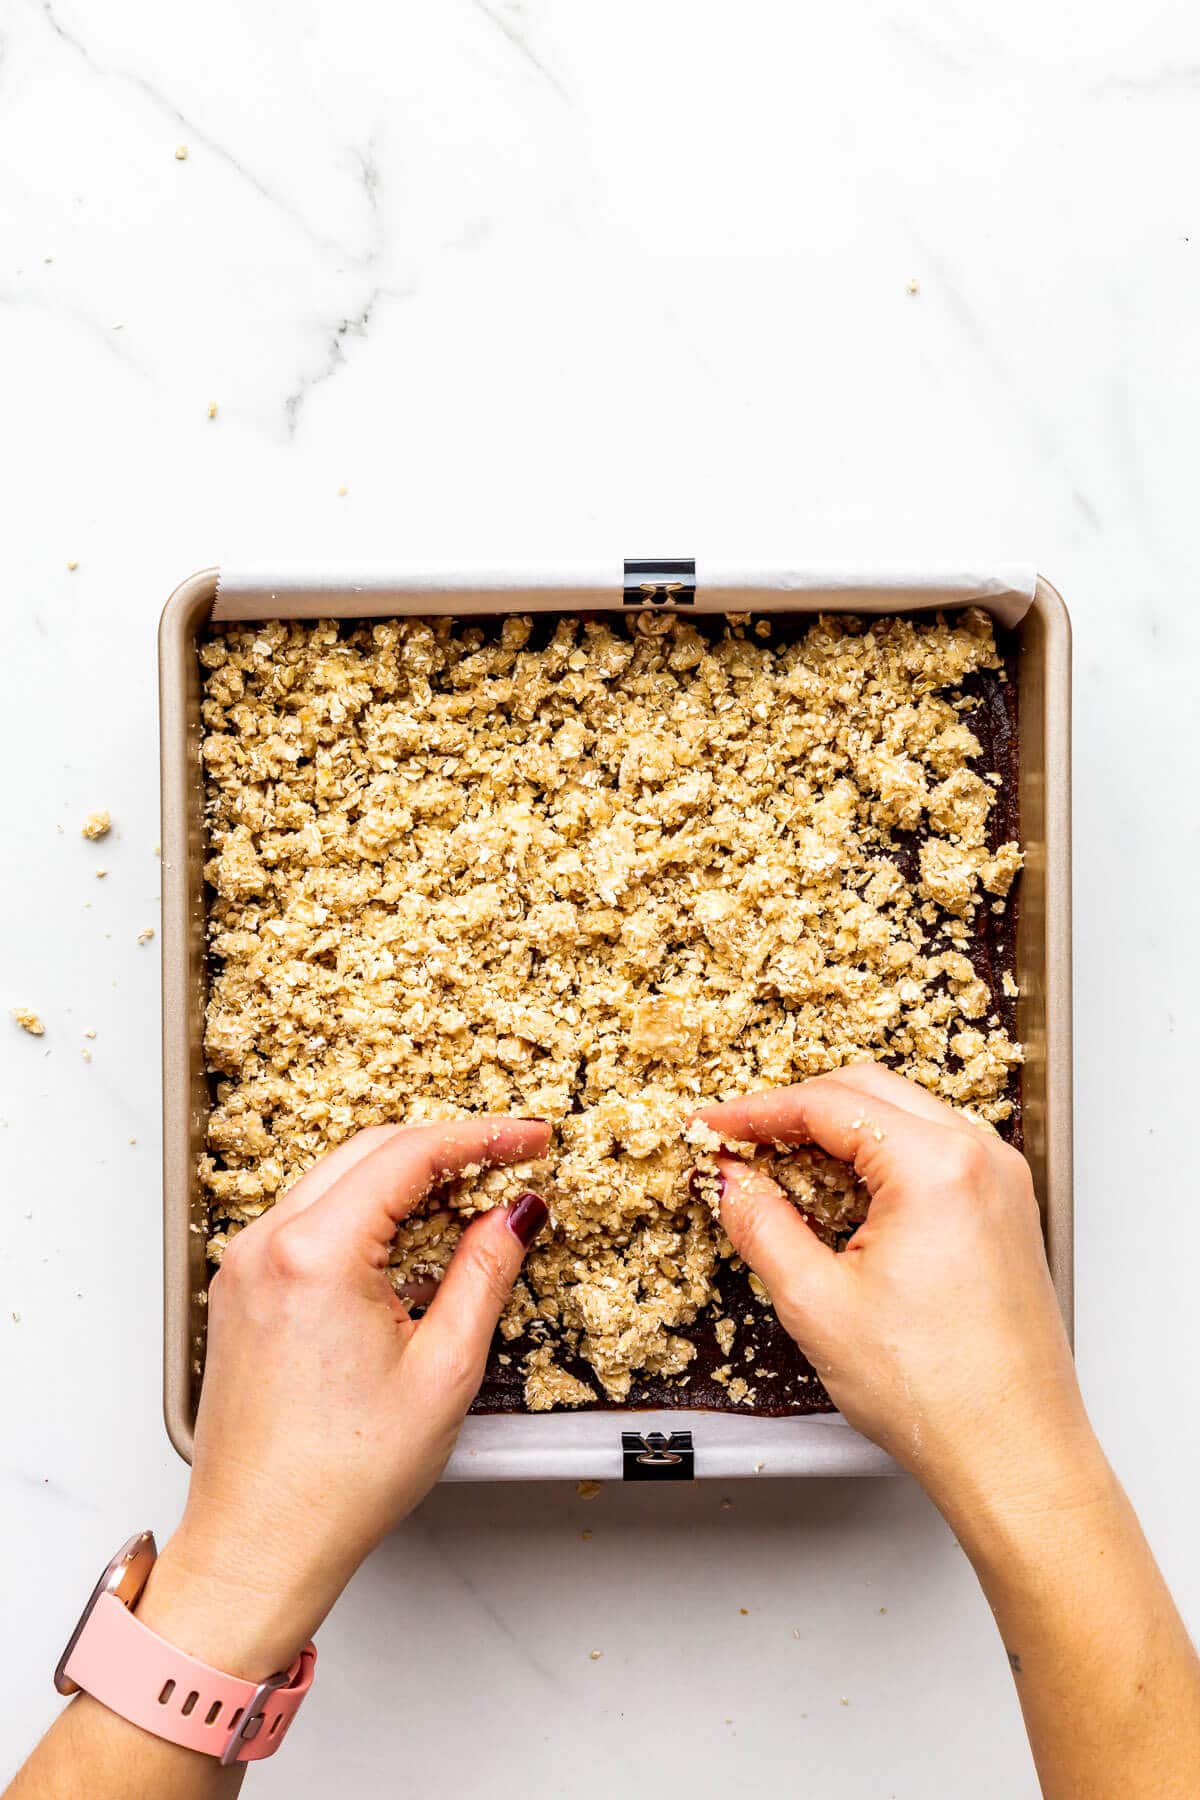
Step 6: Scatter the remaining crumble over top.
Step 7: Gently press the topping into the date paste, very lightly. The date purée will anchor the topping in place, again, making it easier to cut these bars and serve them.
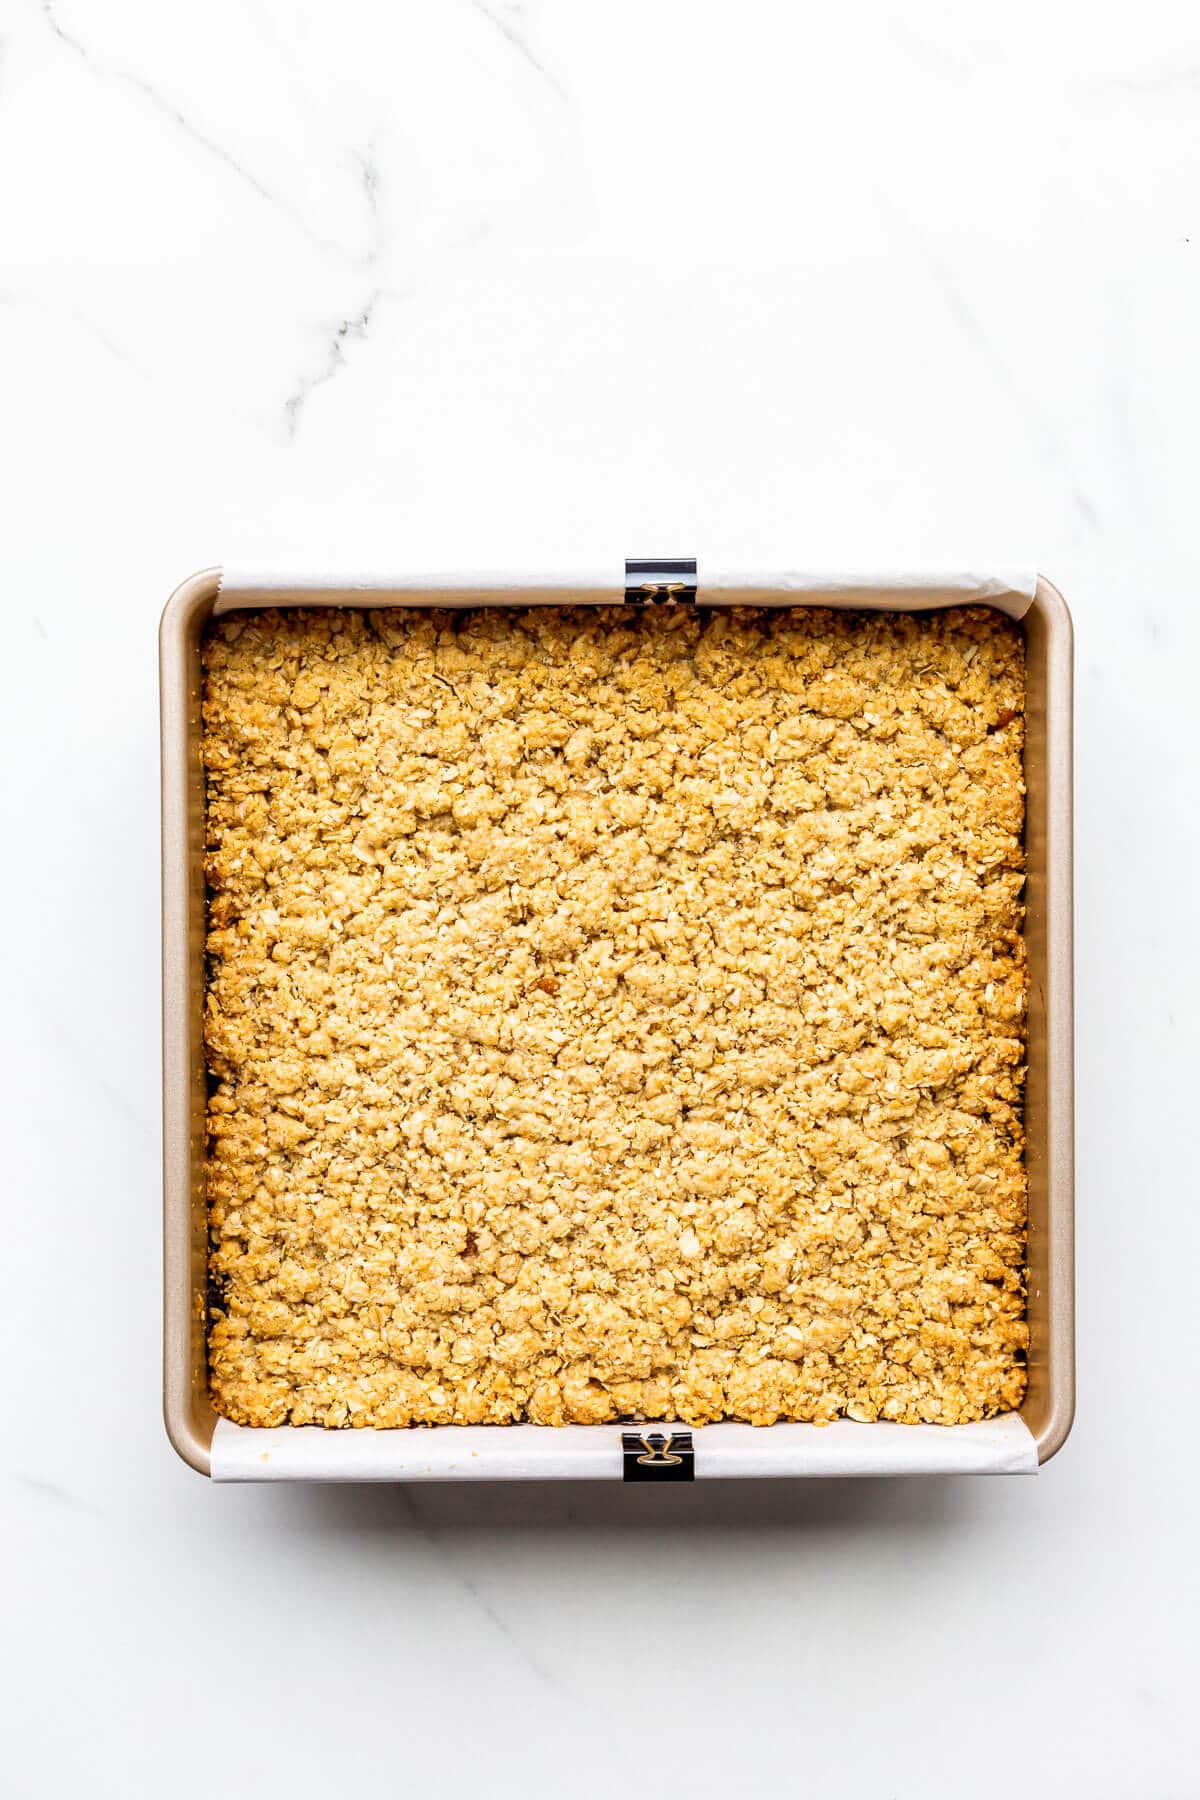
Step 8: Bake until golden brown and set. Let the bars cool completely before slicing. You can even pop them into the freezer just before cutting to make sure they are firm!
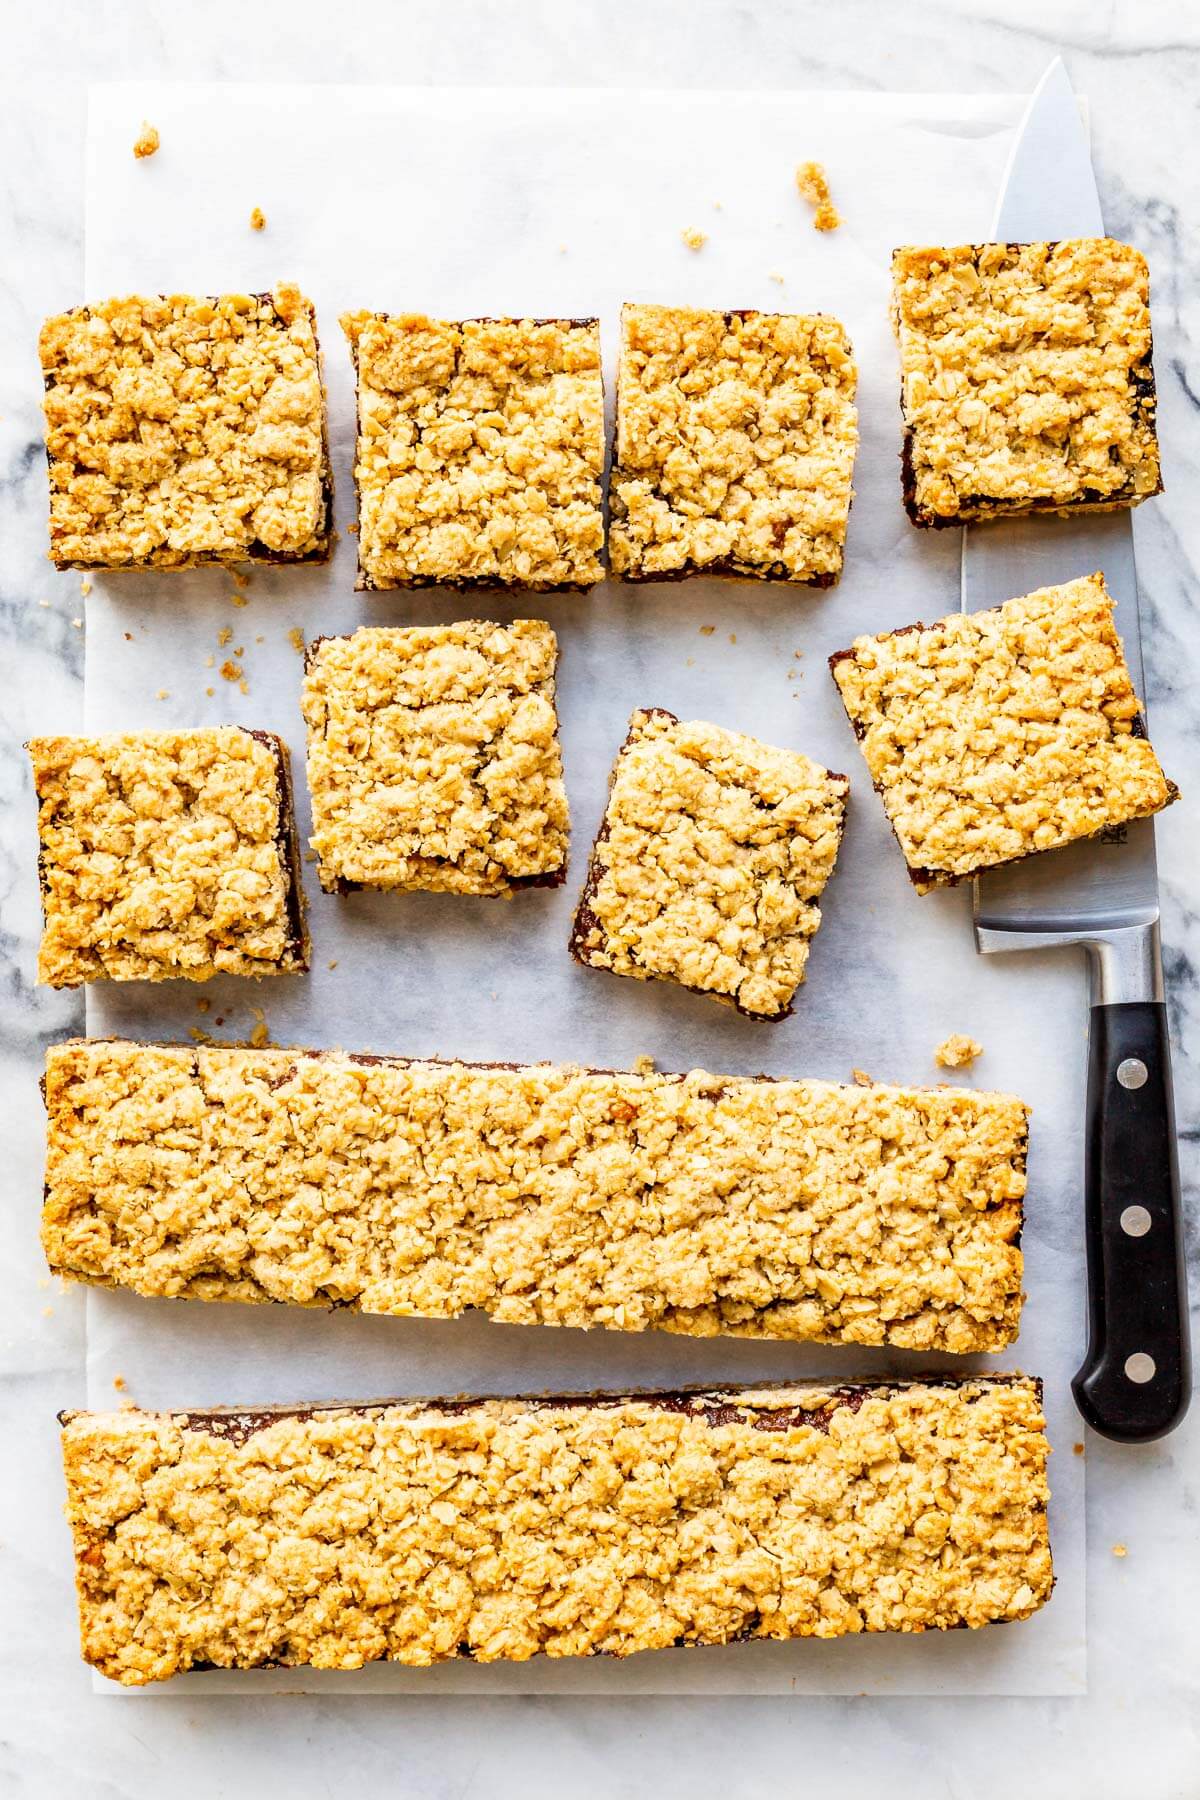
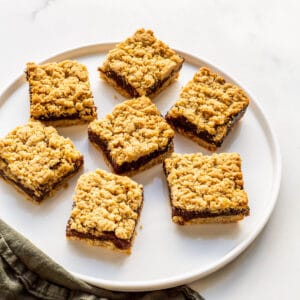
Step 9: Use a big Chef's knife and a ruler to slice the date bars into equal squares.
Adding Baking Soda To Date Filling
The beauty of date squares is that they are made from the cheaper dates at the grocery store, the kind that look the driest (they look like they will never recover). Heating dried dates with a little water transforms them into a sweet, aromatic paste. Initially, when you are rehydrating dry dried pitted dates from the baking aisle, it seems like the dates and the water will never mingle. But then, with some patience, stirring, and a little heat, the dates come together to make a rich filling.
Some will add baking soda to the pan in order to help the dates break down, to soften the skins, and to speed up the process, but I don't think it's necessary. In the end the hydrated date paste can be blended in the food processor to smooth it out if need be. No need for baking soda.
The baking soda may also neutralize some of the tannins which can lead to an astringent taste or mouthfeel. I've honestly never noticed any astringency without the baking soda, so I skip it altogether these days.
Special Equipment To Make This Recipe
This recipe calls for a food processor for:
- puréeing the rehydrated dates to make the date paste
- mixing the oat crumble topping which is also used for the crust of the date bars
You will also need a baking pan, like a brownie pan, that is a square pan with 9-inch sides that is about 2 inches tall. I like this pan, which is heavy-duty and has a non-stick coating.
Whether the pan you use is non-stick or not, I do line the bottom with parchment paper, leaving an overhang on two of the sides. This is extra insurance so your bars unmould clean without sticking or breaking. I also recommend buttering any of the pan where the parchment doesn't cover, just in case.

Making date squares without a food processor
Though this recipe does call for a food processor, it's not essential. If you don't have one:
- use your fingers to make the crumble as you would a pie dough or any other fruit crisp, working the cold butter into the dry ingredients in a big bowl until you get the right texture.
- use a fork to mash the dates really well as they heat up with the water. Also, try adding a little baking soda to them to help them break down.
The resulting date squares made without a food processor will definitely have a more "rustic" look and feel to them, but they will be just as yummy to eat!
Storage
Store date squares in the pan, covered, for up to one week. For long-term storage, cut the bars into squares and freeze them on a parchment-lined sheet pan until frozen solid, then slide them into a freezer bag to store in the freezer for up to 6 months.
To defrost these, you can take them out of the bag and set them on a sheet pan to defrost overnight in the fridge. I like to keep a stash in the freezer and take one bar out at a time when I'm craving them. I defrost the date bar in the microwave on a small plate at power level 5 for up to 1 minute. They get nice and soft and warm!
Serving suggestions
This recipe for date squares also makes a great no-fuss weeknight dessert and you can make it fancy by serving these à la mode, with vanilla bean ice cream, for example!
Date Square Recipe FAQs
Dates sold in grocery stores are dried fruit and depending on the variety and how old they are, they may be quite dry. In order to make them into a purée, you will need to rehydrate them on the stove with water to help the dried fruit absorb the liquid. They will soften so that you can easily transform them into a smooth purée. You may also add baking soda when you heat them to help soften them more quickly.
If you find your date squares are too crumbly or fragile, try pressing the bottom layer of the crumble mixture with a little more force to create a tighter, more compact layer on the bottom of the pan. Use a flat-bottomed glass or mug to press the mixture down. If you don't press enough, your base will be crumbly and so will the bars. It's as easy as that!
I store date squares at room temperature for a few days, covered with plastic wrap or foil, or stored in an airtight container. If you plan to store them for a full week, keep them in the fridge. For longer storage, you should freeze them.
Other recipes to bake with dried dates
If you love dates as much as I do, here's a list of other recipes you can bake with dates:
- date scones
- date bran muffins
- salty sweet date and chorizo loaf cake
If you tried this recipe for date squares (or any other recipe on my website), please leave a ⭐ star rating and let me know how it went in the comments below. I love hearing from you!
📖 Recipe
Date Squares
Ingredients
Date filling
- 550 grams dates such as Jaffa brand
- 250 mL water
- 5 mL pure vanilla extract
Oat crust and crumble topping
- 225 grams rolled oats (or large flake oats)
- 150 grams light brown sugar
- 125 grams bleached all-purpose flour
- 2.5 mL Diamond Crystal fine kosher salt
- 0.625 mL ground cinnamon
- 230 grams unsalted butter cubed, very cold
Instructions
- Preheat the oven to 350°F (175 °C).
- Prepare a 9×9-inch brownie pan (I use a metal pan) by greasing it and fitting a square of parchment at the bottom.
To make the date filling
- Place the dates with the water in a saucepan. Stir over medium-low heat. After 5-10 minutes, the dates will absorb all the water, soften, break open, and form a paste. Transfer the paste to a food processor, and blend until smooth (this is not absolutely necessary, but this will chop up the dates skins nicely giving a more even texture to the paste). Add the vanilla and blend for a few seconds more. Transfer to a bowl and refrigerate to cool it down fast.
To make the oat crust and crumble topping
- In the bowl of a food processor, pulse together the oats, sugar, flour, salt, and cinnamon. Add in the cold butter and pulse it with the flour/oat mixture to form a crumble. You can also do this by hand like the topping for a fruit crisp.
- Pour half of the mixture into the prepared pan. Press it down (with your fingers or the flat bottom of a glass). Be sure to get into the corners. You want a good tight base for your squares.
- Top the base with the date paste, smearing it carefully to coat the base evenly with a small offset spatula.
- Top with the rest of the crumble, scattering it evenly over the date filling with your hands. You can gently press the crumble very lightly into the date paste to anchor it in place.
- Bake the squares for 45 to 55 minutes, until the edges begin to turn golden brown. Colour is flavour and the longer baking time ensures the bottom crust is properly baked.
- Remove the pan from the oven and set on a rack to cool completely. Once the bars are room temperature, refrigerate them for at least 1 hour until really cold so that cutting them is easier. Cut into 16 squares and serve.
Notes
- This recipe calls for Diamond Crystal fine Kosher salt. If using regular table salt, add half the amount or the recipe may be too salty!
- For the date purée, some will add baking soda to the pan in order to help the dates break down and to soften the skins, but I don't think it's necessary. Blend the filling in a food processor to smooth it out. No need for baking soda.
- The baking soda may also neutralize some of the tannins which can lead to an astringent taste or mouthfeel. Again, I don't think it's necessary and I've never detected any astringency from the date filling without baking soda.
Use a flat-bottomed glass or mug and take the time to press and tighten the crumbly base to lock it in place and create a firm base that you will be able to slice with ease. - Store date squares at room temperature for a few days, covered with plastic wrap or foil or stored in an airtight container. If you plan to store them for a full week, keep them in the fridge. For longer storage, you should freeze them.
Nutrition
Nutrition information is automatically calculated and should only be used as an approximation.

Kendra says
hi hope you can answer a question for me. at both my parents tea services the caterers had a matrimonial date square type of dainty but instead of dates there was a chocolate filling. I have been searching for a filling recipe for these squares but can't find one. there were no dates or orange in them due to allergy constraints that they were made aware of as well as other allergies and intolerances. I realize it's a strange question but the squares are the only comforting memory I have of those 2 days and wanted to try to make. thank you if you are able to help
Janice Lawandi says
Hi Kendra, I have a hunch that you could replace the date filling with a chocolate ganache (1:1 dark chocolate:cream by weight) and use the same crumble as the base and topping. Probably if you used 1.25–1.5 cups of cream and 350 grams of dark chocolate that would be plenty to use as a filling. Heat the cream then take it off the stove and add the chopped chocolate, stir to melt it in to form a smooth ganache, then pour over base. I haven't tested this though so it may or may not work, but it sounds delicious! I hope that helps.
Cooking Rookie says
How crumbly and pretty! Yum!
Gwenevere says
I love dates...well I mean I love them baked into things. the chewy texture...so good. this recipe looks like it would taste so good. Can't wait to try
thefooddoctor says
I just love everything with dates...these look yummy! will try them very soon...lovely blog by the way
powderate says
These look delicious. I've avoided my 2 quart jar of pitted dates in the fridge all winter saving them for the next camping vacation. I'll try this recipe and know when we come to pack a nice bit for a ride or a ski they'll taste so good in the alfresco - after a good workout in nature. Yum.
Jan says
@Kristel I expect that this is quite a forgiving recipe and that whole wheat flour would work (though it might impart a stronger flavor), or maybe do half-half? I think next time I make these, I'm going to try grinding up some oats to make oat flour, and using the oat flour instead of the all-purpose flour.
Kristel says
I'm so excited to try this recipe! Now, I only have to get through the remaining two weeks of my detox...Could you substiture all-purpose flour for whole wheat flours instead?
Lizzy says
These look terrific~I love date cookies~
All That's Left Are The Crumbs says
I love dates and bring on those rustic crumbs! Thanks for a great-looking recipe.