
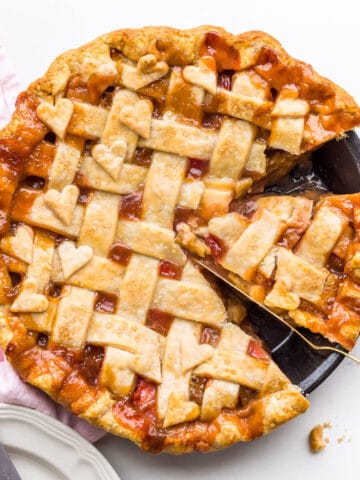
Learn how to make the perfect pie crust by hand with this easy recipe. This all-butter pie dough doesn't crack and rolls out beautifully for gorgeous pie crusts that hold their shape as they bake! This crust works great for lattice work and cutout decorations on pies too.
This is my go-to pie crust recipe that I like to make by hand. I used this recipe to make this gorgeous apple galette and this maple bourbon sweet potato pie. The basic principles and techniques are the same as for making pie crust in the food processor or pie crust in a stand mixer.
Jump to:
Ingredients
You only need a few ingredients to make pie dough and you likely have them all in your pantry and fridge! Here's what you need:
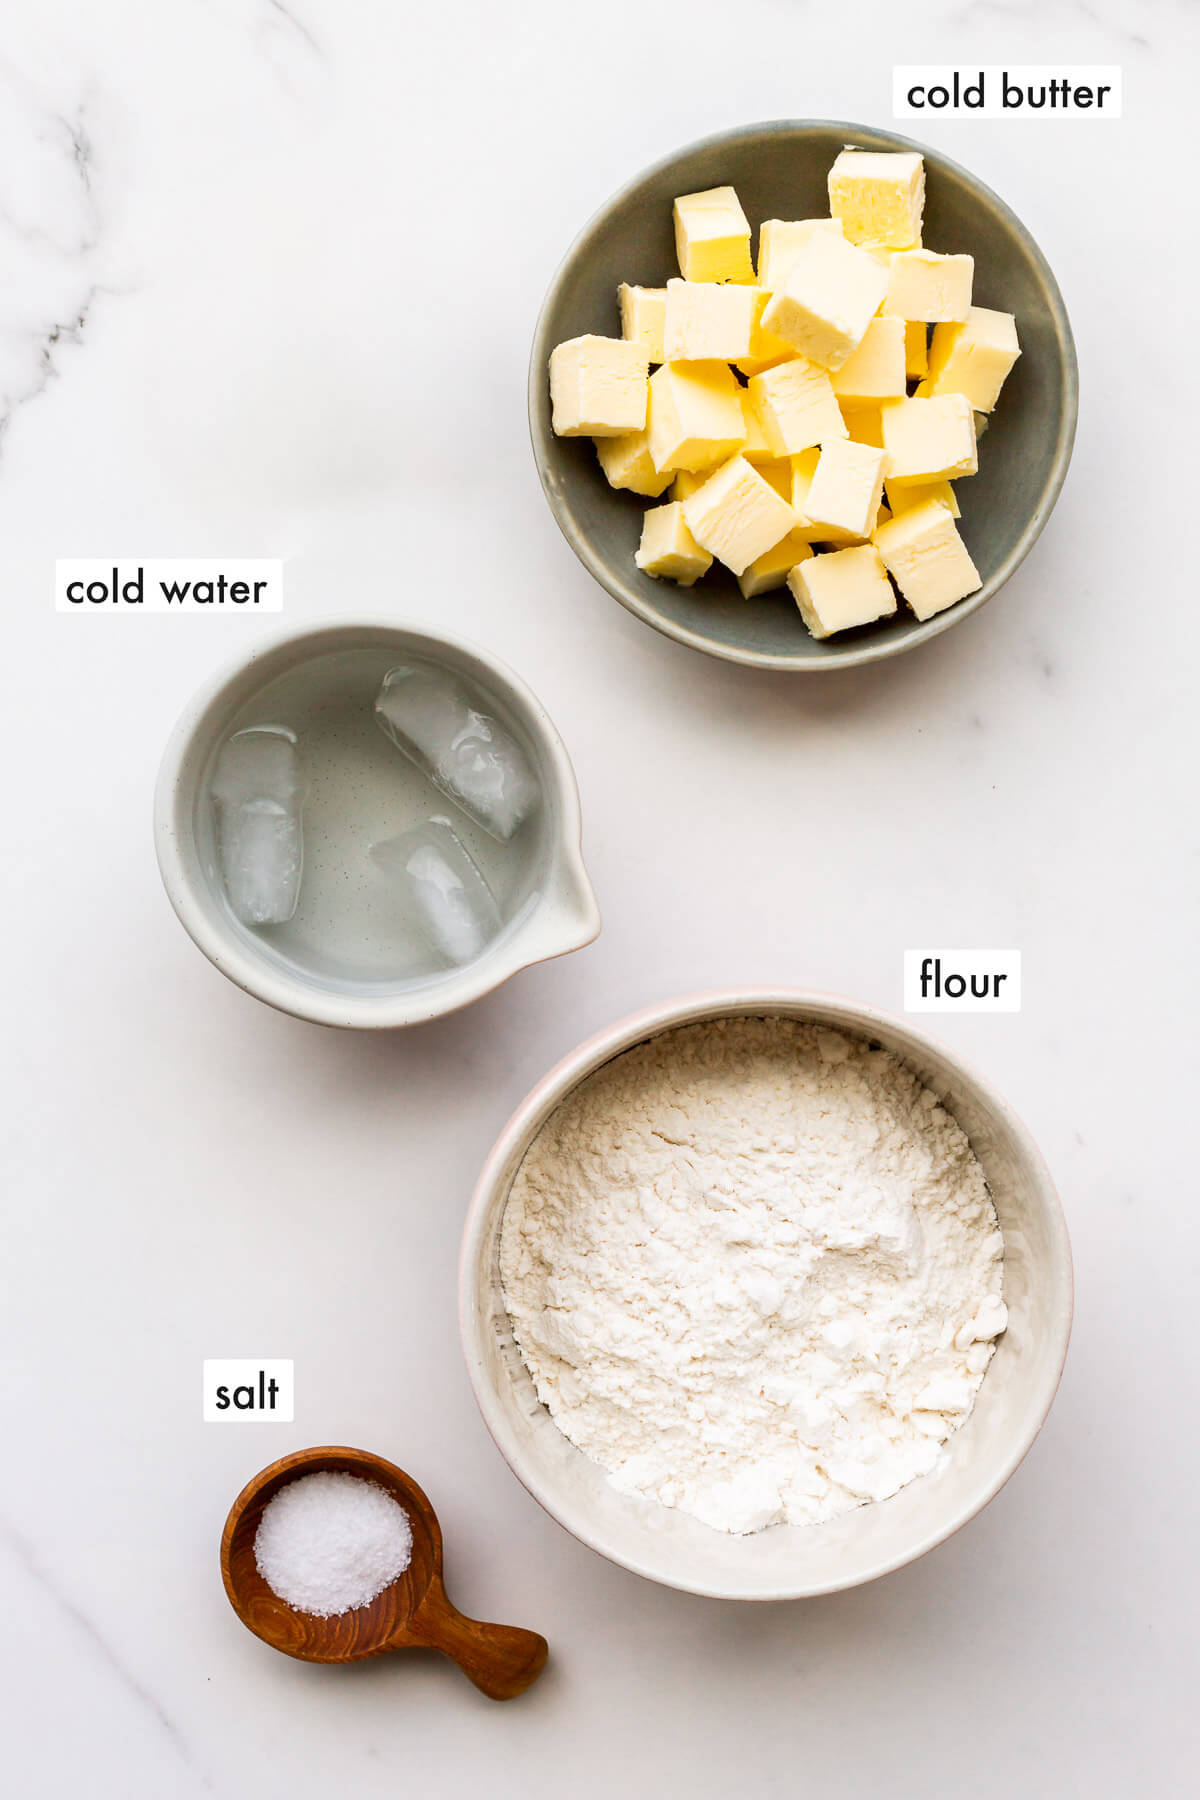
- Cold water or even ice water ensures that the butter stays cold, making it easier to handle and creating a flaky crust that isn't overly greasy.
- Flour-bleached all-purpose works great in doughs like this
- Salt-I use Diamond Crystal fine kosher salt, but if you'd like to use regular table salt, use half the amount, otherwise, the crust may be too salty
- Butter, specifically unsalted butter, though salted will work too (adjust the salt in the recipe accordingly)
Please see the recipe card for the exact ingredients and quantities.
Substitutions and Variations
With only a handful of ingredients, your pie crust substitutions are limited:
- Sugar-it's optional but just a little sugar helps to bring out the flavours and also helps with browning
- Butter-you can replace the butter with leaf lard or shortening (like Crisco), but the texture and flavour will be different. You can also replace unsalted butter with salted butter, but to do so, you will have to reduce the salt in the recipe to compensate, or else the crust may be too salty.
- Flour-you can use a mix of flours, like use part all-purpose and part whole wheat or rye, just don't replace 100 % of the flour with an alternative because the dough may be more difficult to work with and behave different, especially if the gluten is lower (or if there is none).
- Water-some people will use cold vodka instead of cold water or cold water with a splash of vinegar. Either way, the goal is to reduce gluten formation in the dough, but in my experience, gluten development isn't much of an issue with the food processor method.
- Eggs-some bakers like to add an egg to pie crust instead of water to help bind it together. I find this unnecessary and eggs are expensive.
As always, if you decide to try a substitution, take note of what you did, your experience, and the results so that you can learn and make modifications next time.
I cannot guarantee that changes or substitutions will lead to the same results.
Instructions
Making an all-butter pie crust by hand isn't hard. It's all about technique and practice. Remember to keep the ingredients cold. If you find the butter is getting too soft or warming up, chill the bowl of ingredients in the fridge at any stage of the process to firm up the butter.
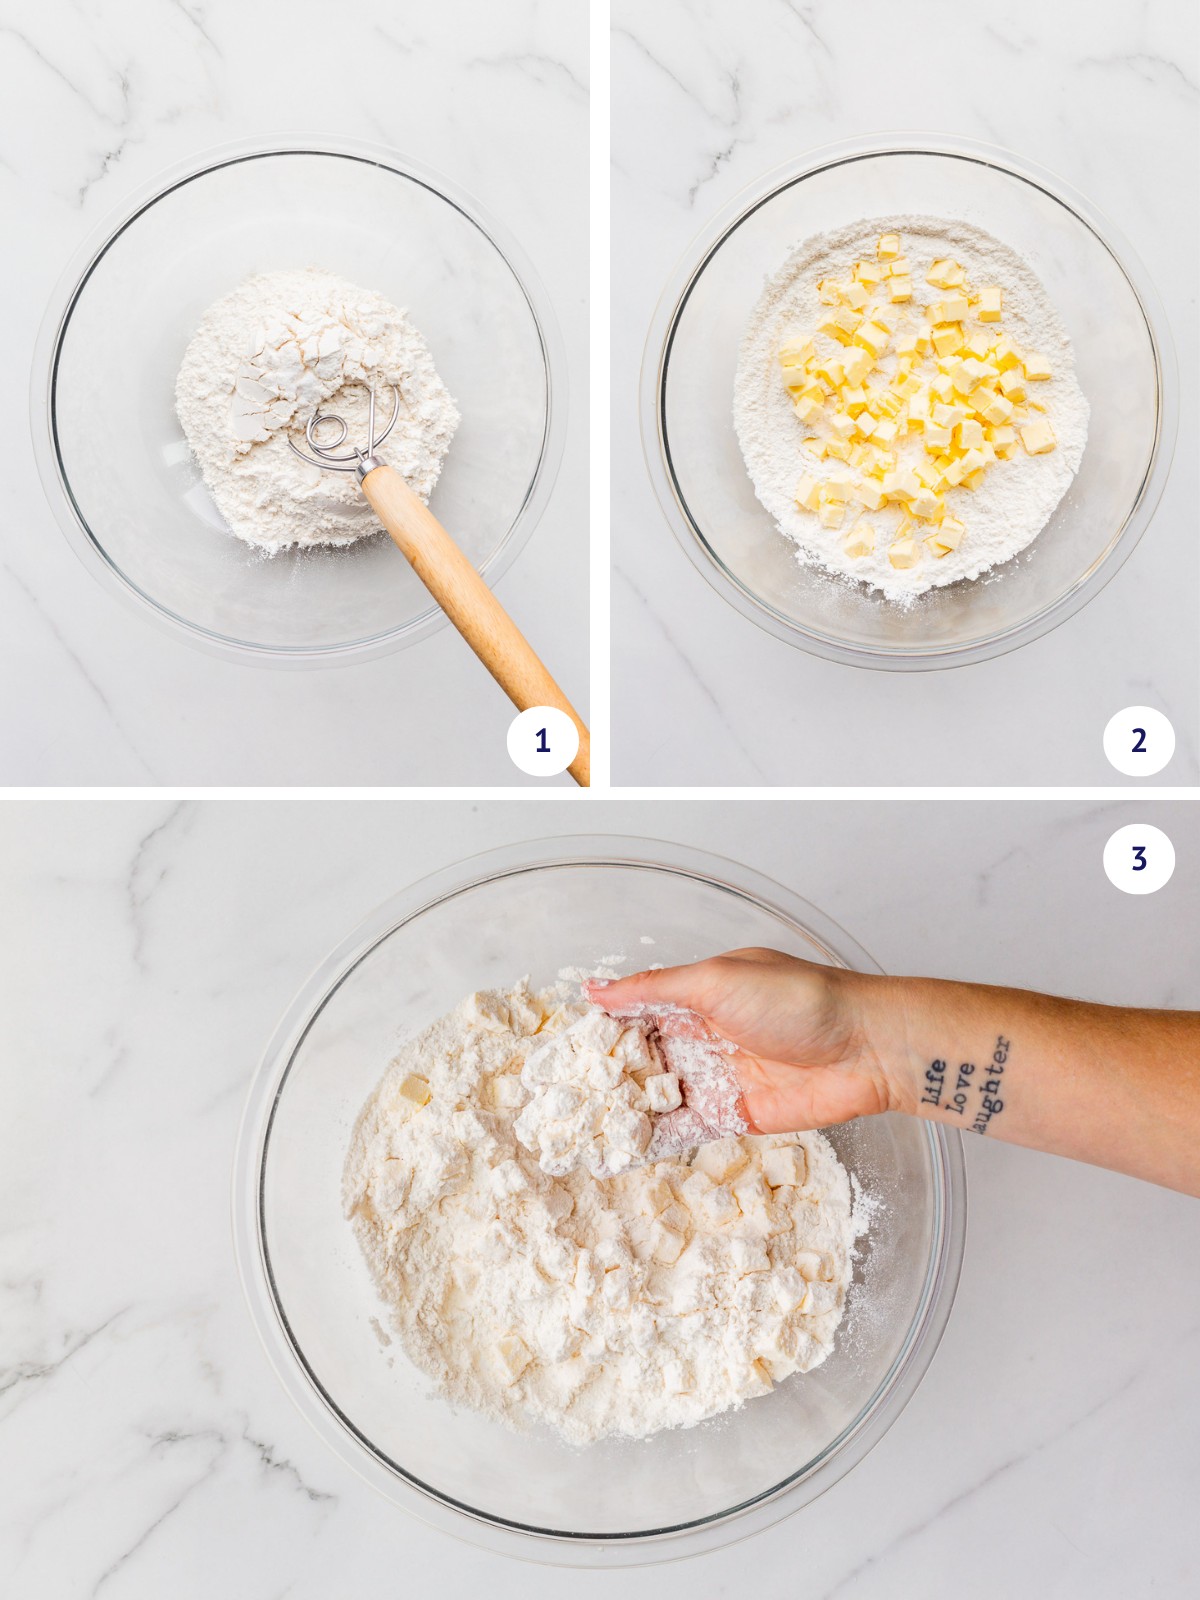
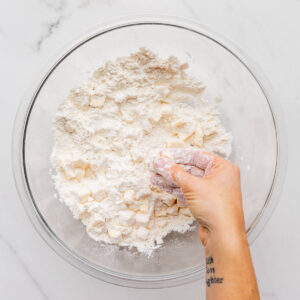
Step 1-Combine all the dry ingredients in a large bowl (image 1). Drop the cold cubed butter on top of the flour (image 2) and toss the cubes in the flour to coat them all (image 3).
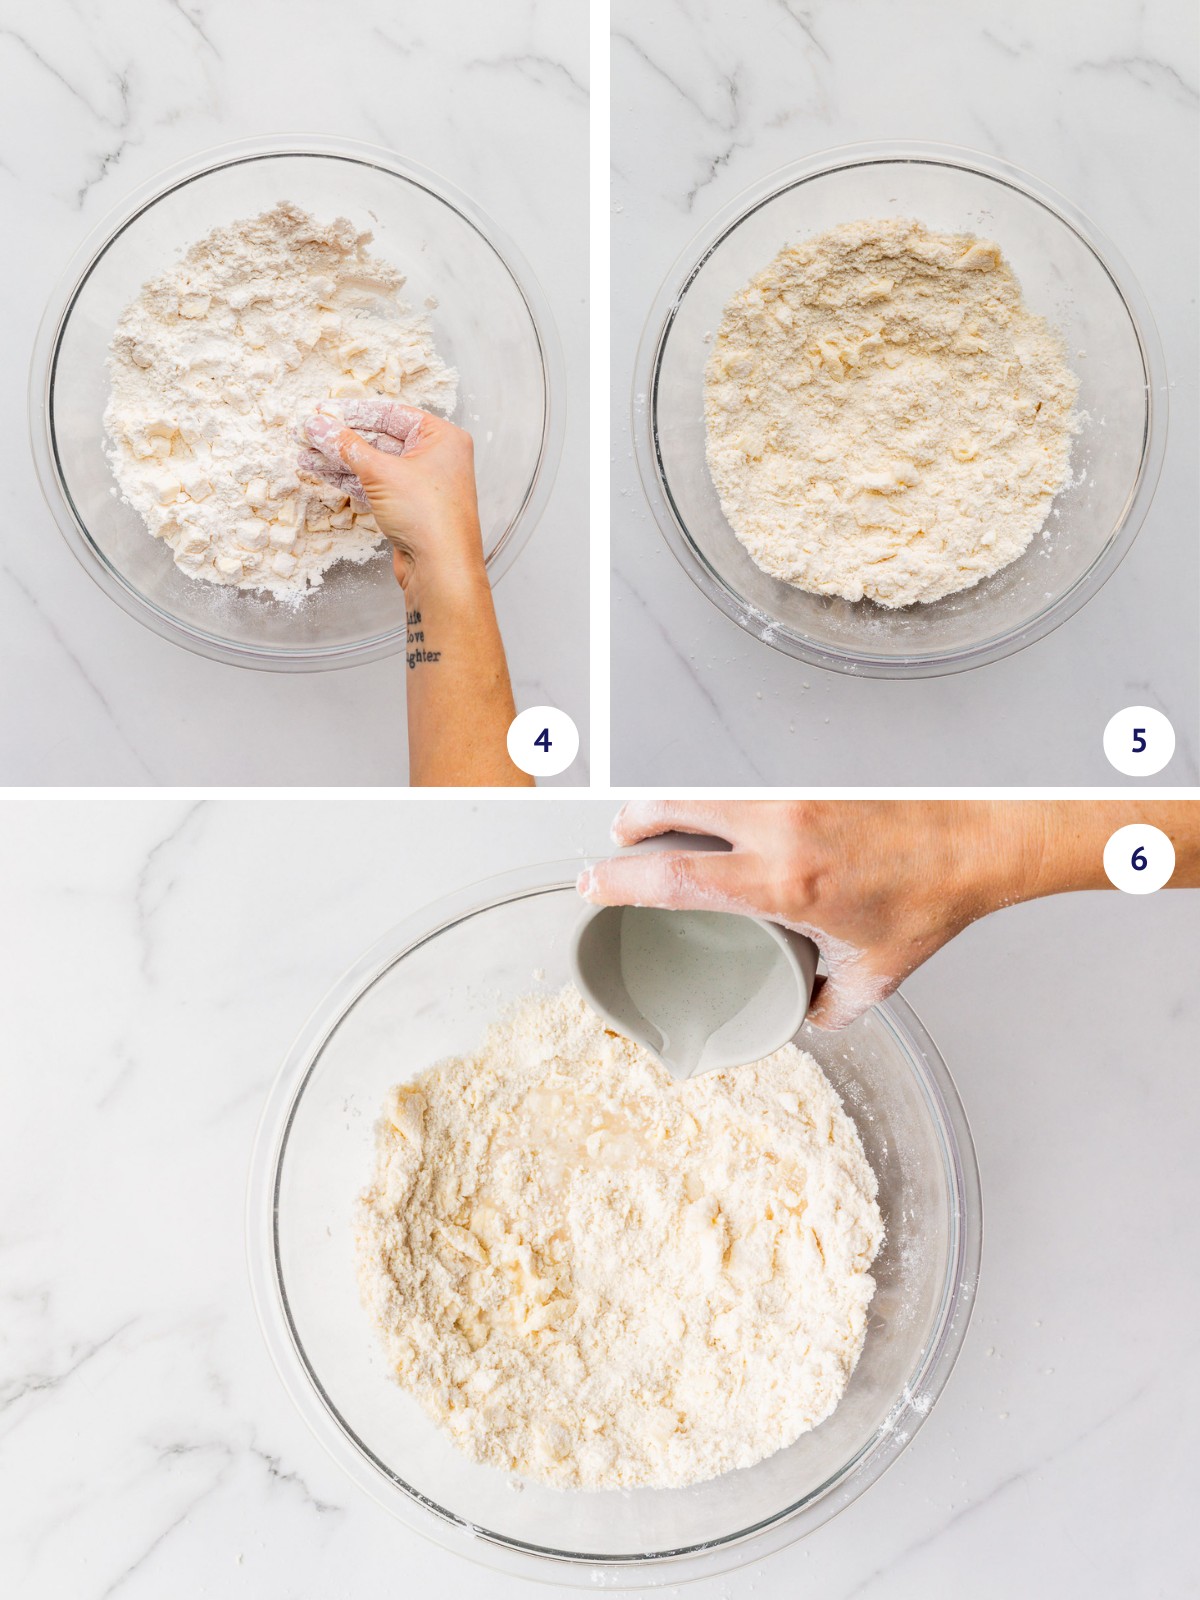
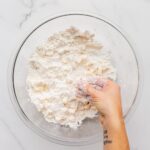
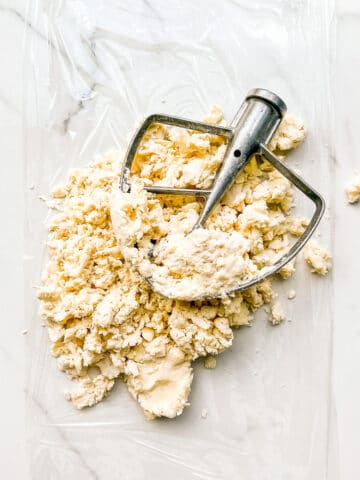
Step 2-Smush each flour-coated butter cube between your fingertips to flatten them all out (image 4) and work the butter into the flour by rubbing it between your palms quickly and briefly. The goal is to create an uneven mixture of butter and flour with lots of different textures (flat pieces and granular pieces like in image 5). Drizzle the cold water over the pie crust mixture (image 6).
Hint: you want your pie crust to have lots of thin flat-pieces of butter coated in flour, which will lead to a flaky texture. You don't want large chunks of butter on the surface of the dough because that will lead to butter melting and leaking out of the pie crust. The butter has to be worked into the dough sufficiently to create layering without escaping.
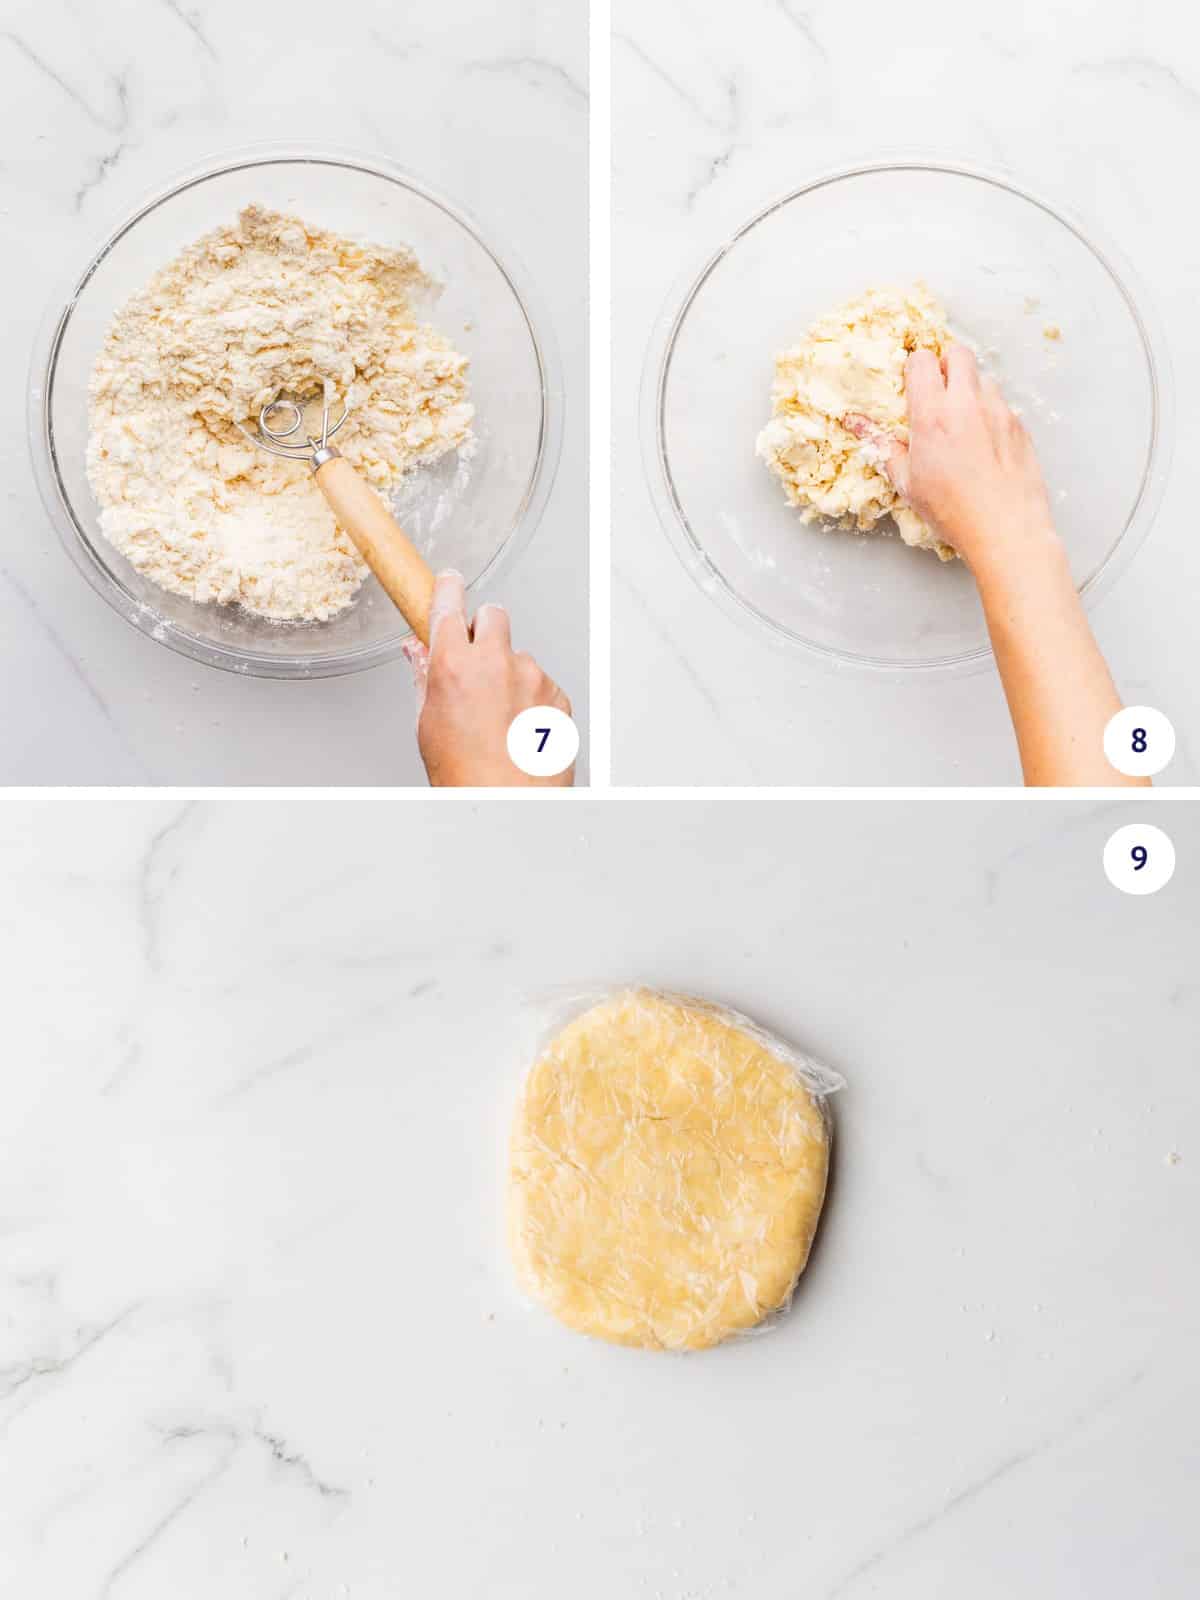
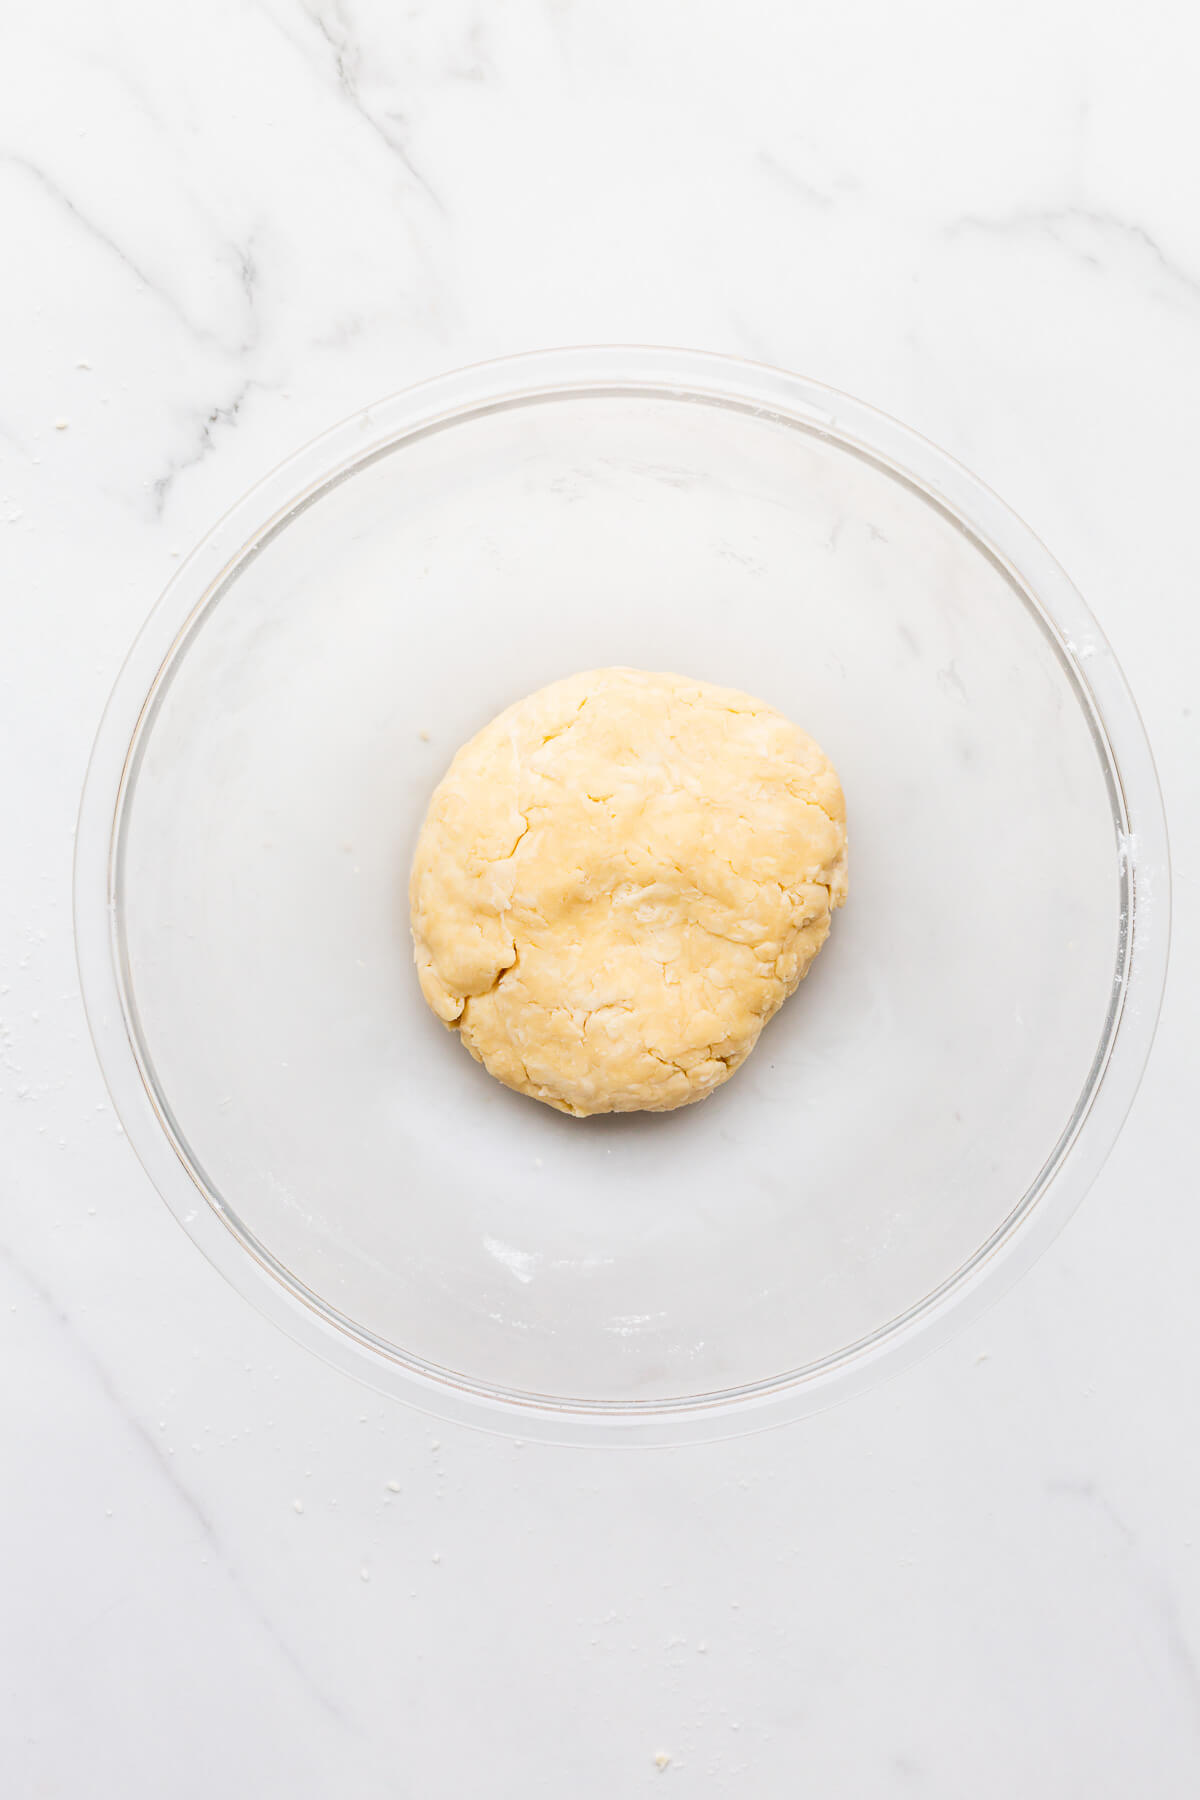
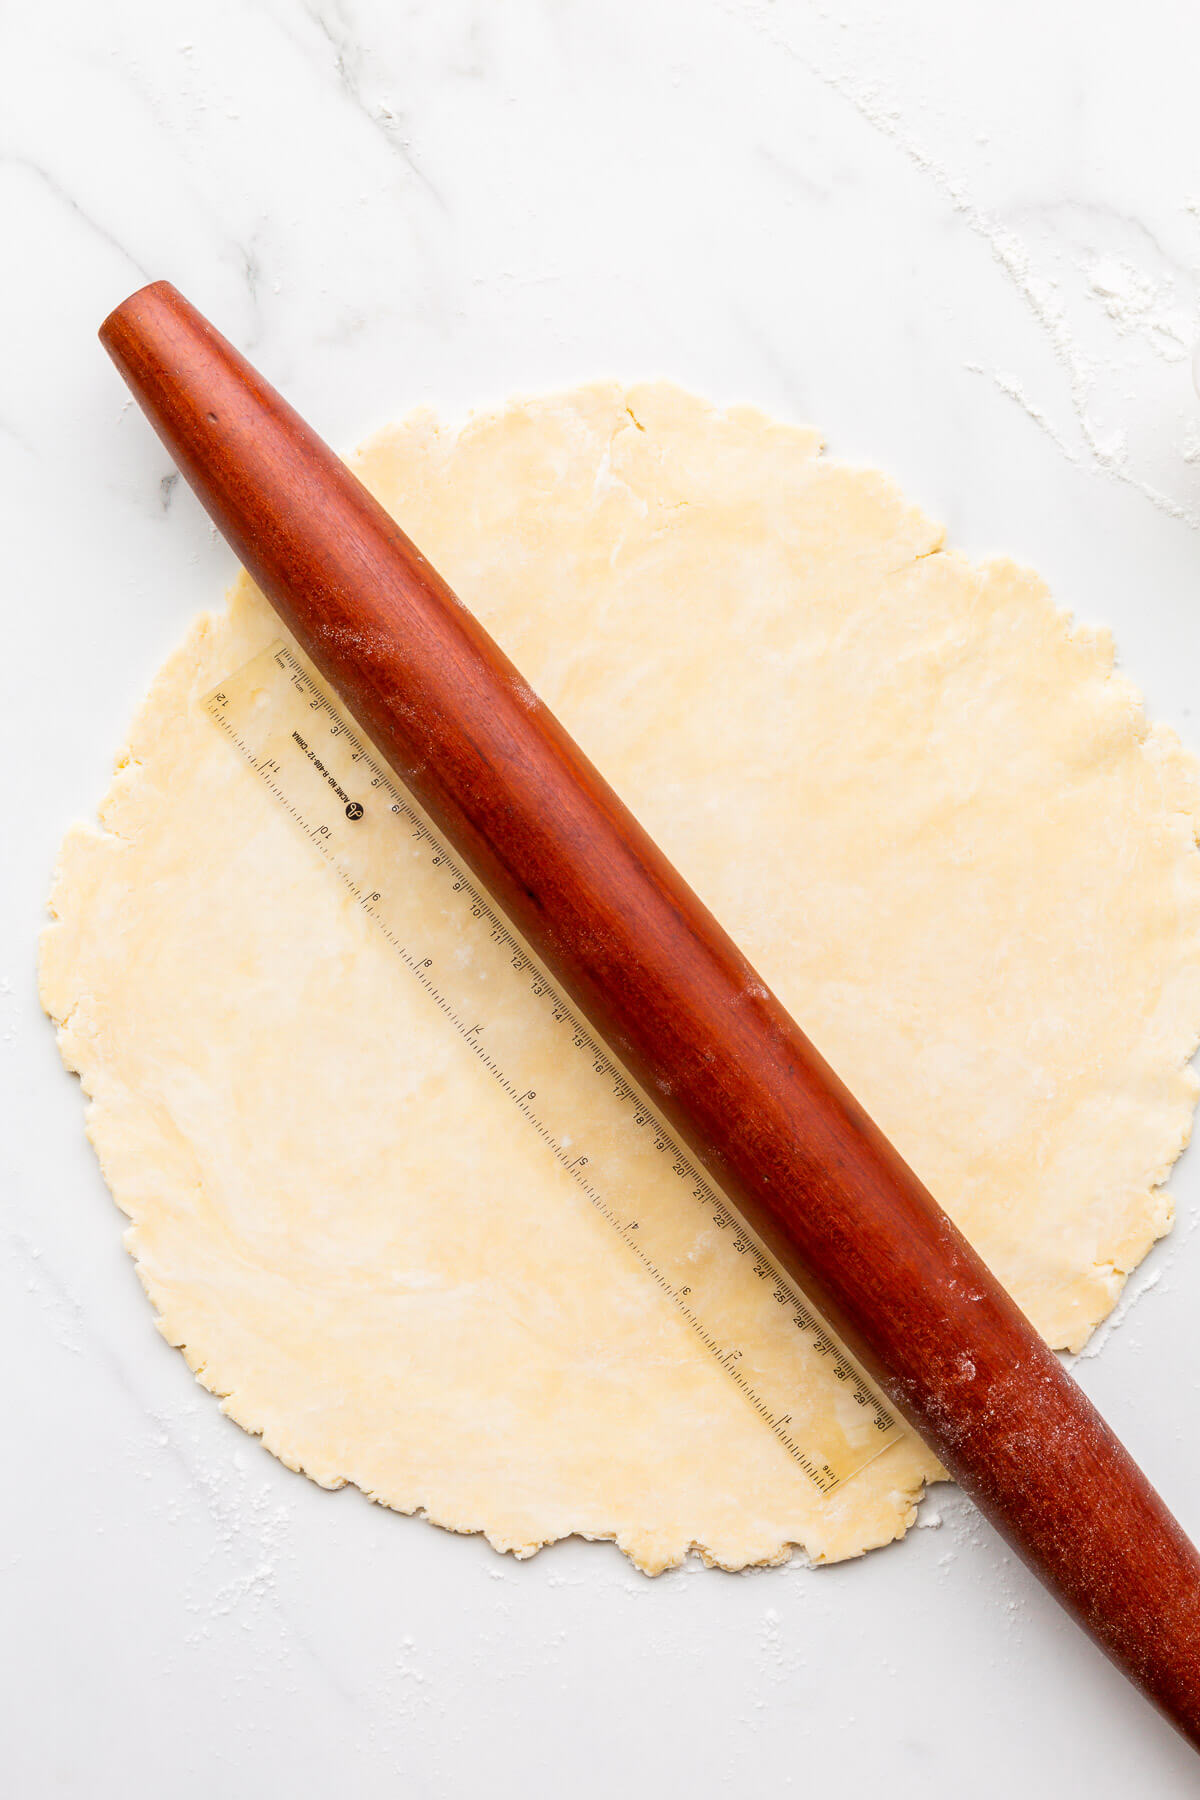
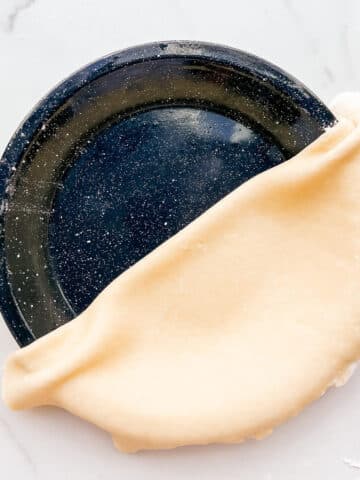
Step 3-Use a fork or a Danish dough whisk to work the water into the pie crust mixture (image 7). Eventually, switch to mixing by hand, to gather all the bits together and mix the moistened and dry bits together into a shaggy dough (image 8). Press the dough into a disk (or two) and wrap it in plastic wrap to chill in the refrigerator for at least 30 minutes before rolling it out and using it (image 9).
Pie Crust Class
If making pie crust from scratch scares you, be sure to check out my pie crust masterclass, which includes video tutorials for making pie crust in the stand mixer, food processor, and by hand!
Storage
You can store plastic-wrapped disks of pie crust in the refrigerator for up to a week (maximum 7 days). Refrigerated pie dough will take on a grey-ish tint if stored for too long.
For longer storage, freeze the dough. To free disks of pie dough, wrap them twice in plastic wrap and then store them in a freezer bag with the air removed. I store several disks in a large bag and pull out one or two as needed.
To defrost pie dough, leave it in the refrigerator overnight to slowly thaw before using. Do not defrost on the counter as it may sweat, and the outside may soften and warm up too much before the inside has a chance to defrost, leading to trouble when you have to roll it out.
Top Pie Crust Tip
Ideally, I like to briefly chill freshly made pie dough, just enough to firm up the butter and cool it down, but not so much so that the dough is too hard to roll.
If you made the dough the day before, leave the disk of pie dough at room temperature for about 20 minutes before rolling. Rolling it out will be much easier and you can always throw it back in the fridge mid-way if you find it's getting too soft or if your kitchen is too warm.
Pie Crust FAQs
Start by verifying that you measured your ingredients correctly. Too much flour or not enough water will lead to a dry dough that doesn't bind well. If you did measure everything correctly, give your shaggy dough with dry bits a squeeze to see if it will come together when pressed. As the butter warms up a little, the dry bits of dough will also be easier to gather together. You can also dump the shaggy dough onto plastic wrap and use the plastic wrap to pull the bits of dough together into a mass, pressing to shape into a disk as best you can.
But if your dough seems much to dry for any of this, you can use a spray bottle of water to lightly mist the surface of the shaggy dough and better hydrate it.
Pie crusts made in the food processor tend to be a little more sandy in texture and less flaky because the machine may break down the butter into very fine pieces. Pie crust made by hand (or in a stand mixer) tends to be more flaky because you end up with small thin sheets of butter within the dough.
Related
Now that you know how to make perfect pie crust by hand, try this technique with these pie recipes:


If you tried this recipe for pie crust by hand (or any other recipe on my website), please leave a ⭐ star rating and let me know how it went in the comments below. I love hearing from you!
📖 Recipe
Perfect Pie Crust by Hand
Ingredients
- 250 grams bleached all-purpose flour
- 1.25 mL Diamond Crystal fine kosher salt
- 170 grams unsalted butter cold, cut into little cubes
- 60 mL cold water
Instructions
- Whisk the flour and salt together in a large bowl before adding in the cold cubed butter. You can use a Danish dough whisk or a fork for this.
- Toss the butter into the bowl of the flour and stir to coat all the pieces. Smash each piece of butter in the flour to flatten out the pieces between your fingertips. You can also use a fast rubbing motion to work the butter into the flour between your palms to achieve different textures.
- Pour the cold water on top and use your fork or your Danish dough whisk to start to incorporate the water. You will need to finish working the dough by hand, pressing the pieces together.
- Press all the bits together into a somewhat cohesive mass, flatten it into a disk and wrap with plastic wrap. Refrigerate for at least 30 minutes before using it.
Notes
- This recipe makes a single pie crust with scraps that you can reroll to make pie crust cookies. This is enough dough for one large galette (12-14 inch finished size) or one regular 9-inch pie decorated with pie crust cookie cutouts.
- Substitutions and Variations
- Sugar-it's optional but just a little sugar helps to bring out the flavours and also helps with browning. A tablespoon is all you need for this amount of dough.
- Butter-you can replace the butter with leaf lard or shortening (like Crisco), but the texture and flavour will be different. You can also replace unsalted butter with salted butter, but to do so, you will have to reduce the salt in the recipe to compensate, or else the crust may be too salty.
- Flour-you can use a mix of flours, like use part all-purpose and part whole wheat or rye, just don't replace 100 % of the flour with an alternative because the dough may be more difficult to work with and behave different, especially if the gluten is lower (or if there is none).
- Water-some people will use cold vodka instead of cold water or cold water with a splash of vinegar. Either way, the goal is to reduce gluten formation in the dough, but in my experience, gluten development isn't much of an issue with the food processor method.
- Salt-This recipe calls for Diamond Crystal fine Kosher salt. If using regular table salt, add half the amount or the recipe may be too salty!
Explore More With AI
Nutrition
Nutrition information is automatically calculated and should only be used as an approximation.

Leave a Reply