

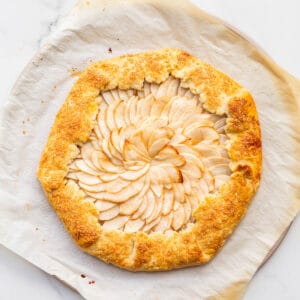
This easy apple galette with pie crust is much simpler to make than an apple pie, and yet just as satisfying to eat! Galettes are a great place to start if you aren't familiar with pie-baking because the recipes are less fussy.
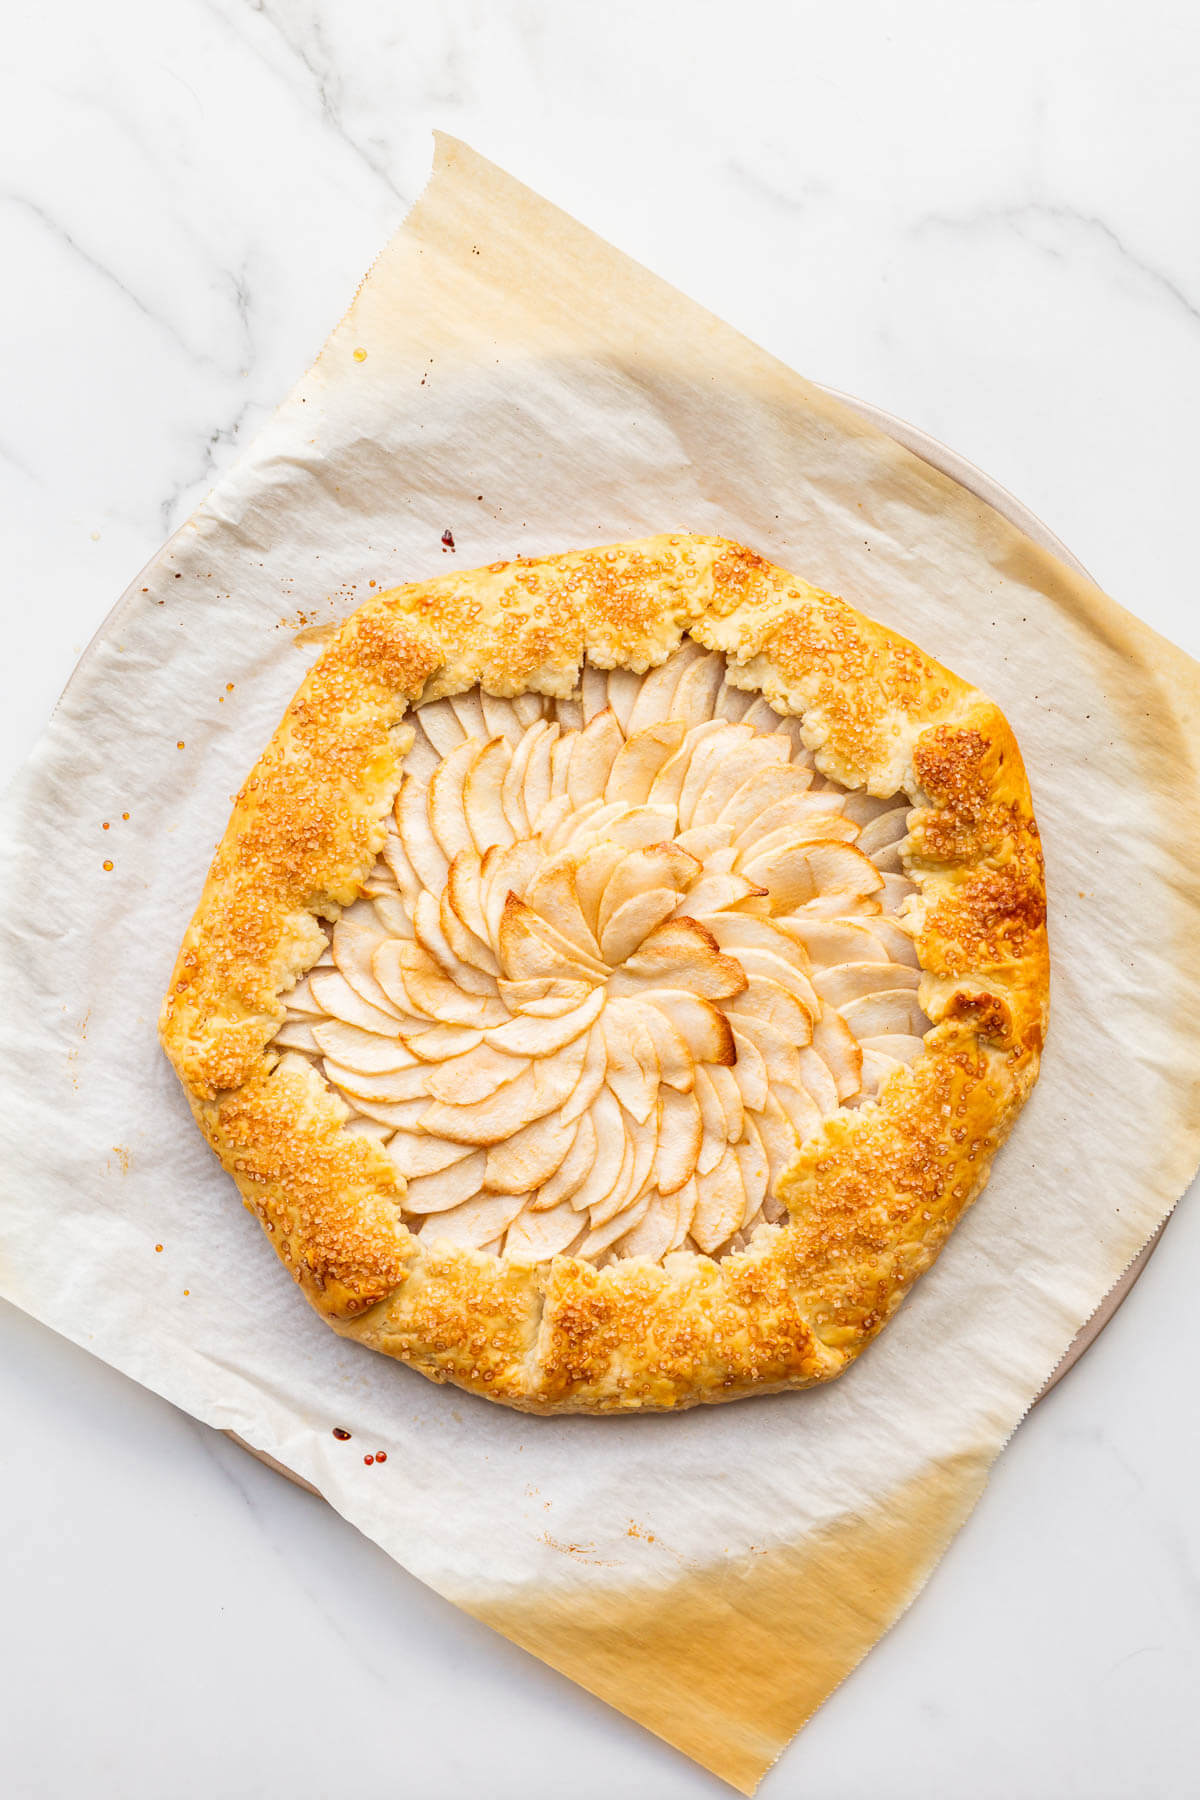
A galette is a single-crust pie or an open-faced pie. Galettes are flatter than pies and they are usually baked on sheet pans so you don't need a pie plate or a special plate to make one. The beauty of the galette is that they are simpler and faster to make.
In this case, we are referring to an open-faced fruit pie that has a single crust with fruit arranged in the centre before baking. Galettes are made from two components: a crust and a fruit filling.
Jump to:
Ingredients
The beauty of the apple galette is in its simplicity. Here's what you need to make it:
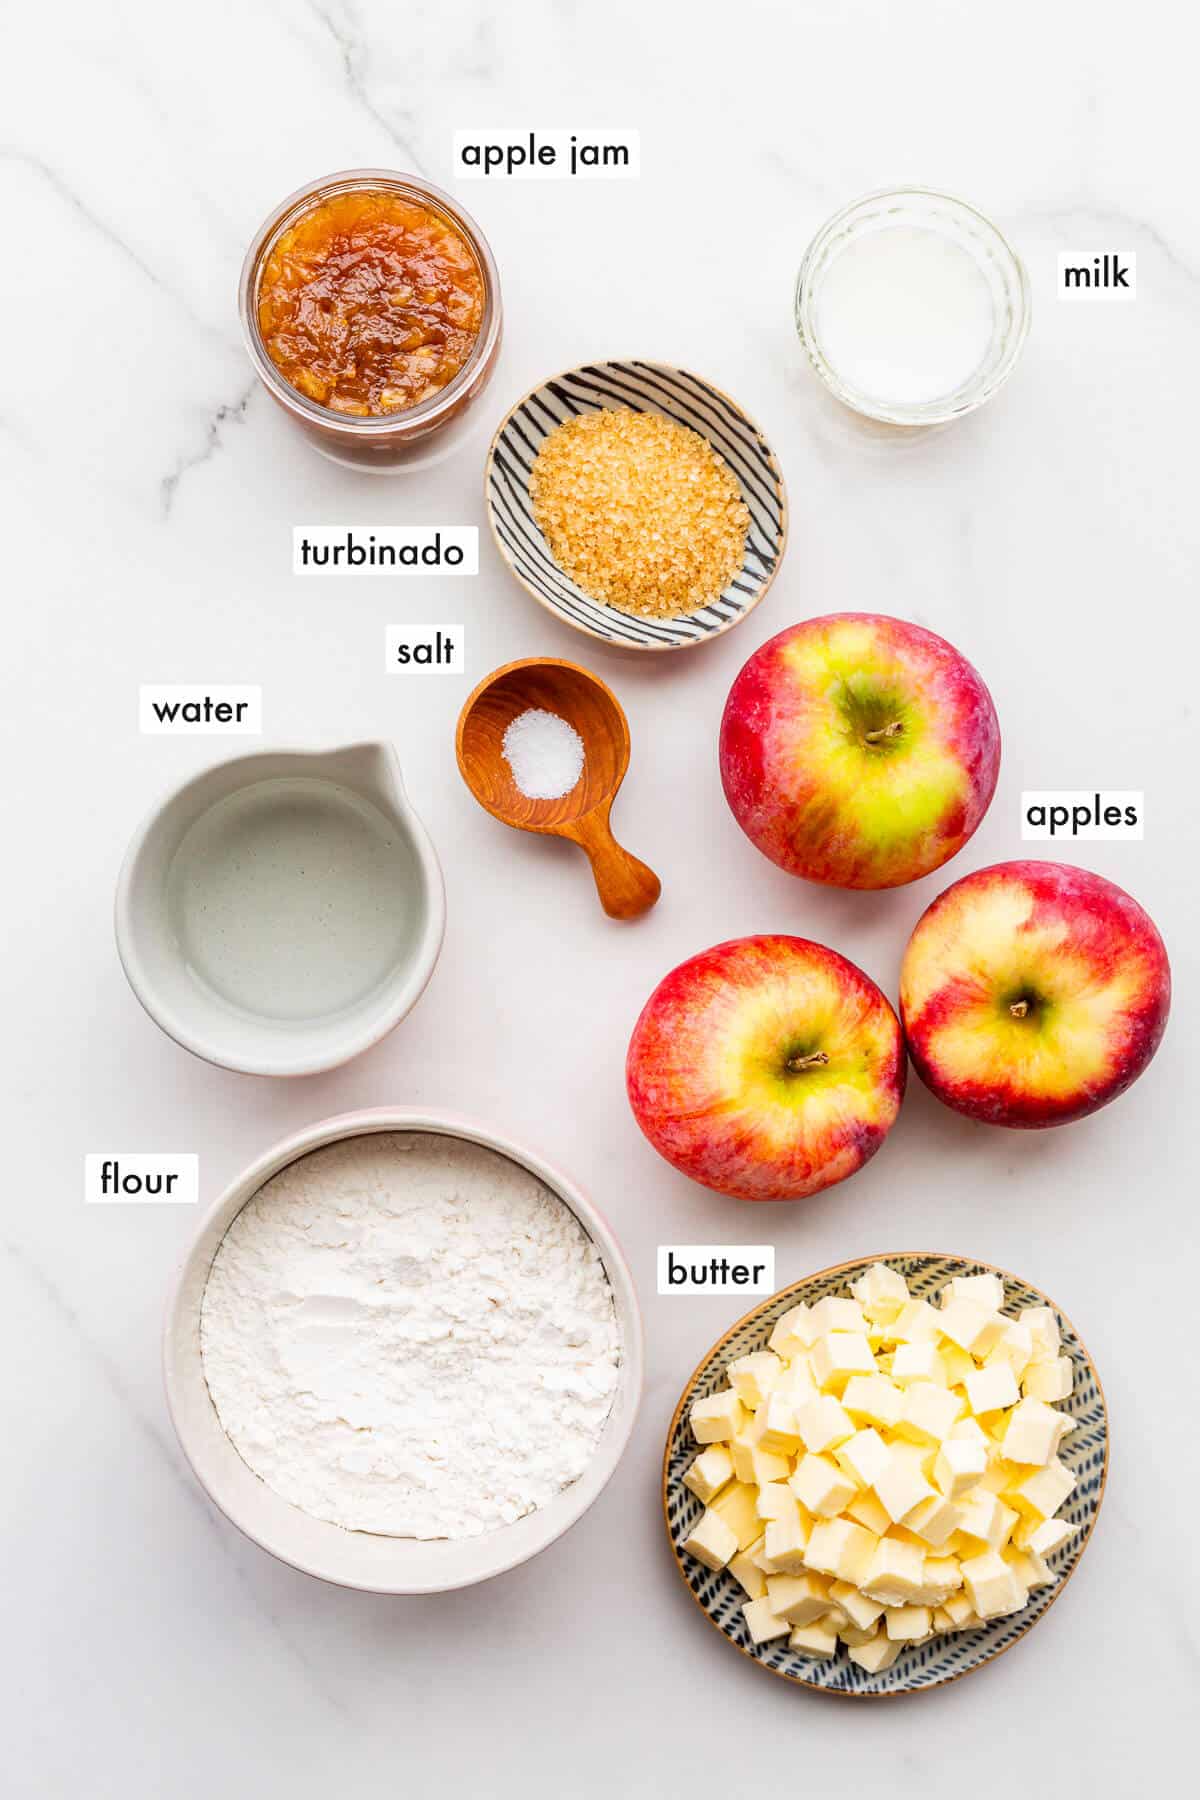
- pie crust-this galette is made from an all-butter pie crust. The dough is simply flour, butter, and water, with a little salt for flavour. If you are short on time, head to your local bakery and ask them to sell you pie dough. You will need roughly 450 grams (1 pound) of pie dough for this recipe)
- apple jam-I used a homemade cinnamon apple jam but a good quality store-bought jam is also great
- apples-I used Cortland variety apples, which are a readily available baking apple in my area. These apples are not too sweet
- coarse sugar-I like to use coarse turbinado raw sugar to add crunch to the pastry edges
- milk-I brushed the pastry edge with a little milk to help the coarse sugar stick
Please see the recipe card for the exact ingredients and quantities.
Substitutions and Variations
- Apple variety: use apples that hold their shape when baked, so Cortland, Lobo, Spartan, Granny Smith, Golden Delicious, HoneyCrisp, etc. Apples like McIntosh or Empire may break down and become more saucy when baked in a galette and may not work well in this recipe.
- Apple filling: I smeared homemade cinnamon apple jam on the bottom crust before layering the sliced apple on top. The jam enhances the apple flavour of the dessert and brings a little sweetness. You can replace this with apple jelly or even apple butter!
- Cinnamon sugar: I usually sprinkle the pie crust edges with turbinado sugar, but you could also use cinnamon sugar which will give the crust more flavour!
- Glaze: I like to brush a little maple syrup over the sliced apples after baking the galette. This sweetens them and also gives them a little colour as they may look a little "anemic". You can also glaze the fruit with a neutral glaze or some melted apple jelly. Both will give the fruit more shine.
How to Make an Apple Galette with Pie Crust
While the instructions indicate to make the dough by hand, feel free to use a food processor or even a stand mixer to cut the butter into the flour. The results will be similar, though with the food processor, if you process the dough more, the butter pieces will be smaller, and your galette crust will be less flaky.
Tip: If making pie crust from scratch scares you, be sure to check out my pie crust masterclass, which includes video tutorials for making pie crust in the stand mixer, food processor, and by hand!
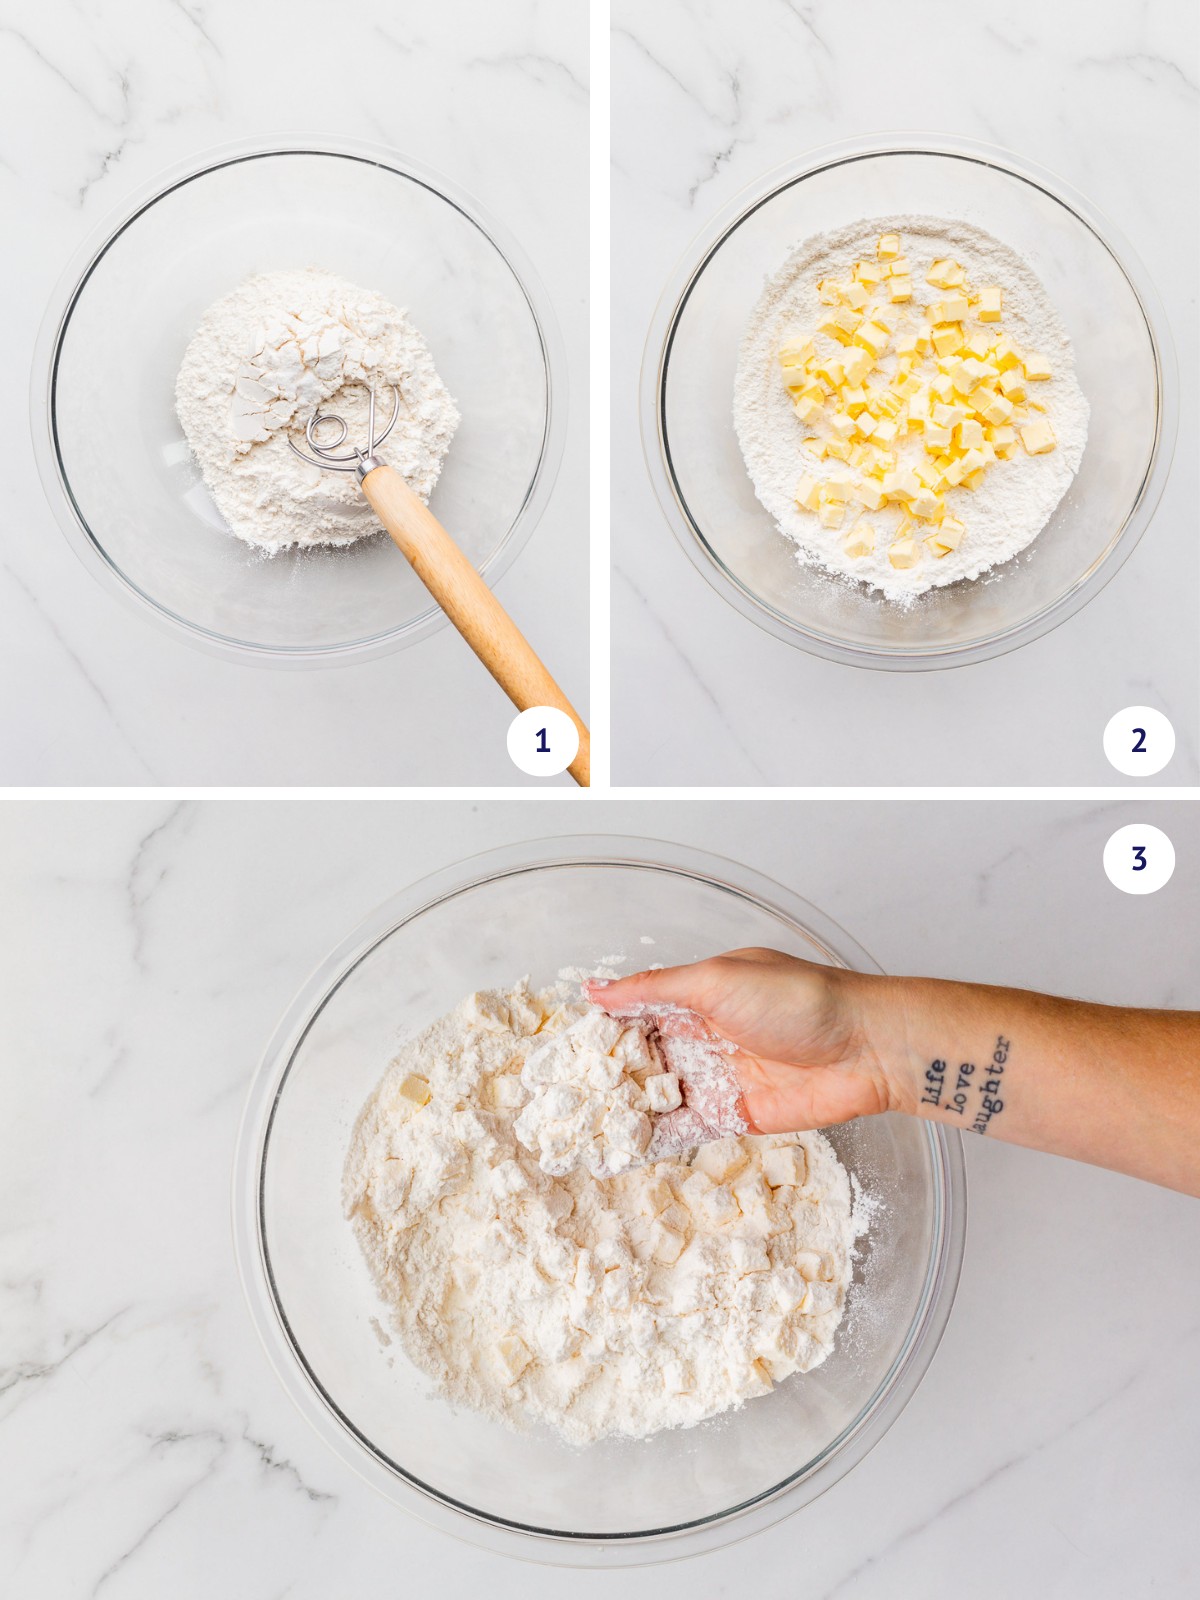
Step 1: Start by whisking the flour and salt together with a Danish dough whisk (image 1) before adding in the cold cubed butter (image 2). I like to toss the butter in the flour to coat all the pieces before proceeding (image 3).
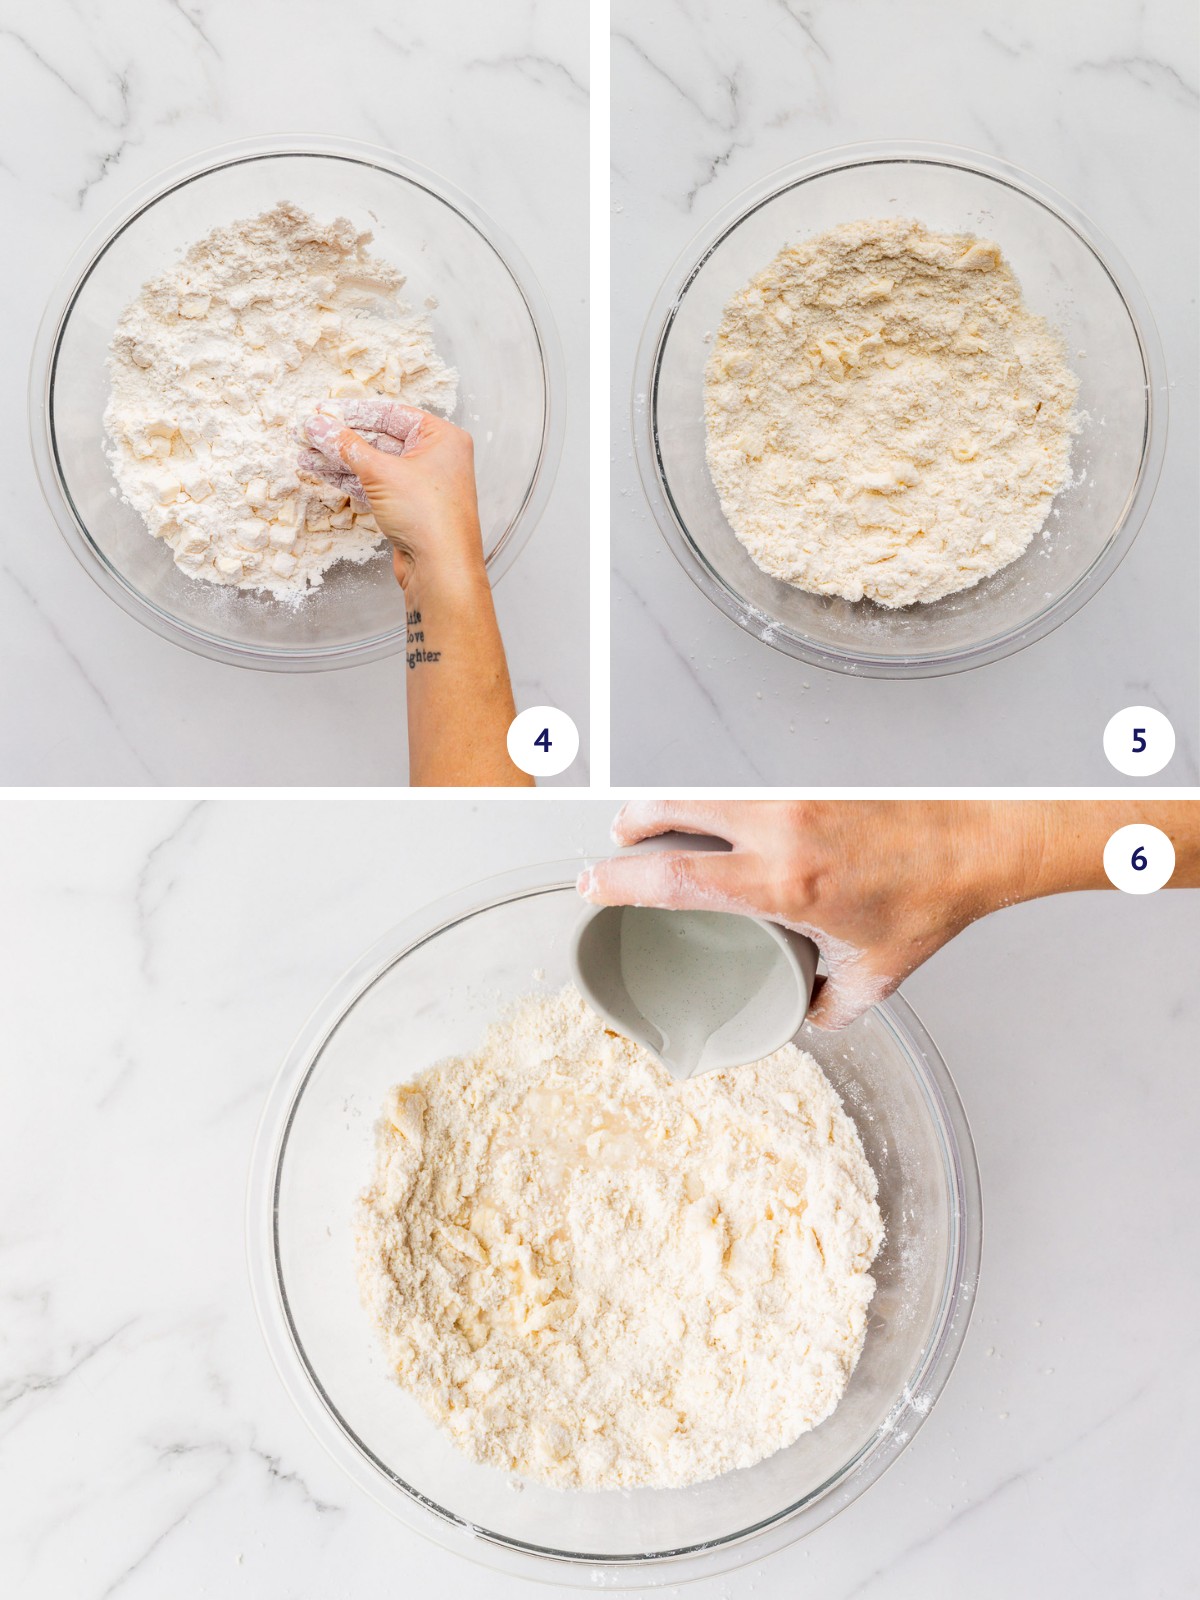
Step 2: Smash each piece of butter in the flour to flatten out the pieces (image 4). You can also use a fast rubbing motion to work the butter into the flour to achieve different textures (image 5). Pour the cold water on top (image 6).
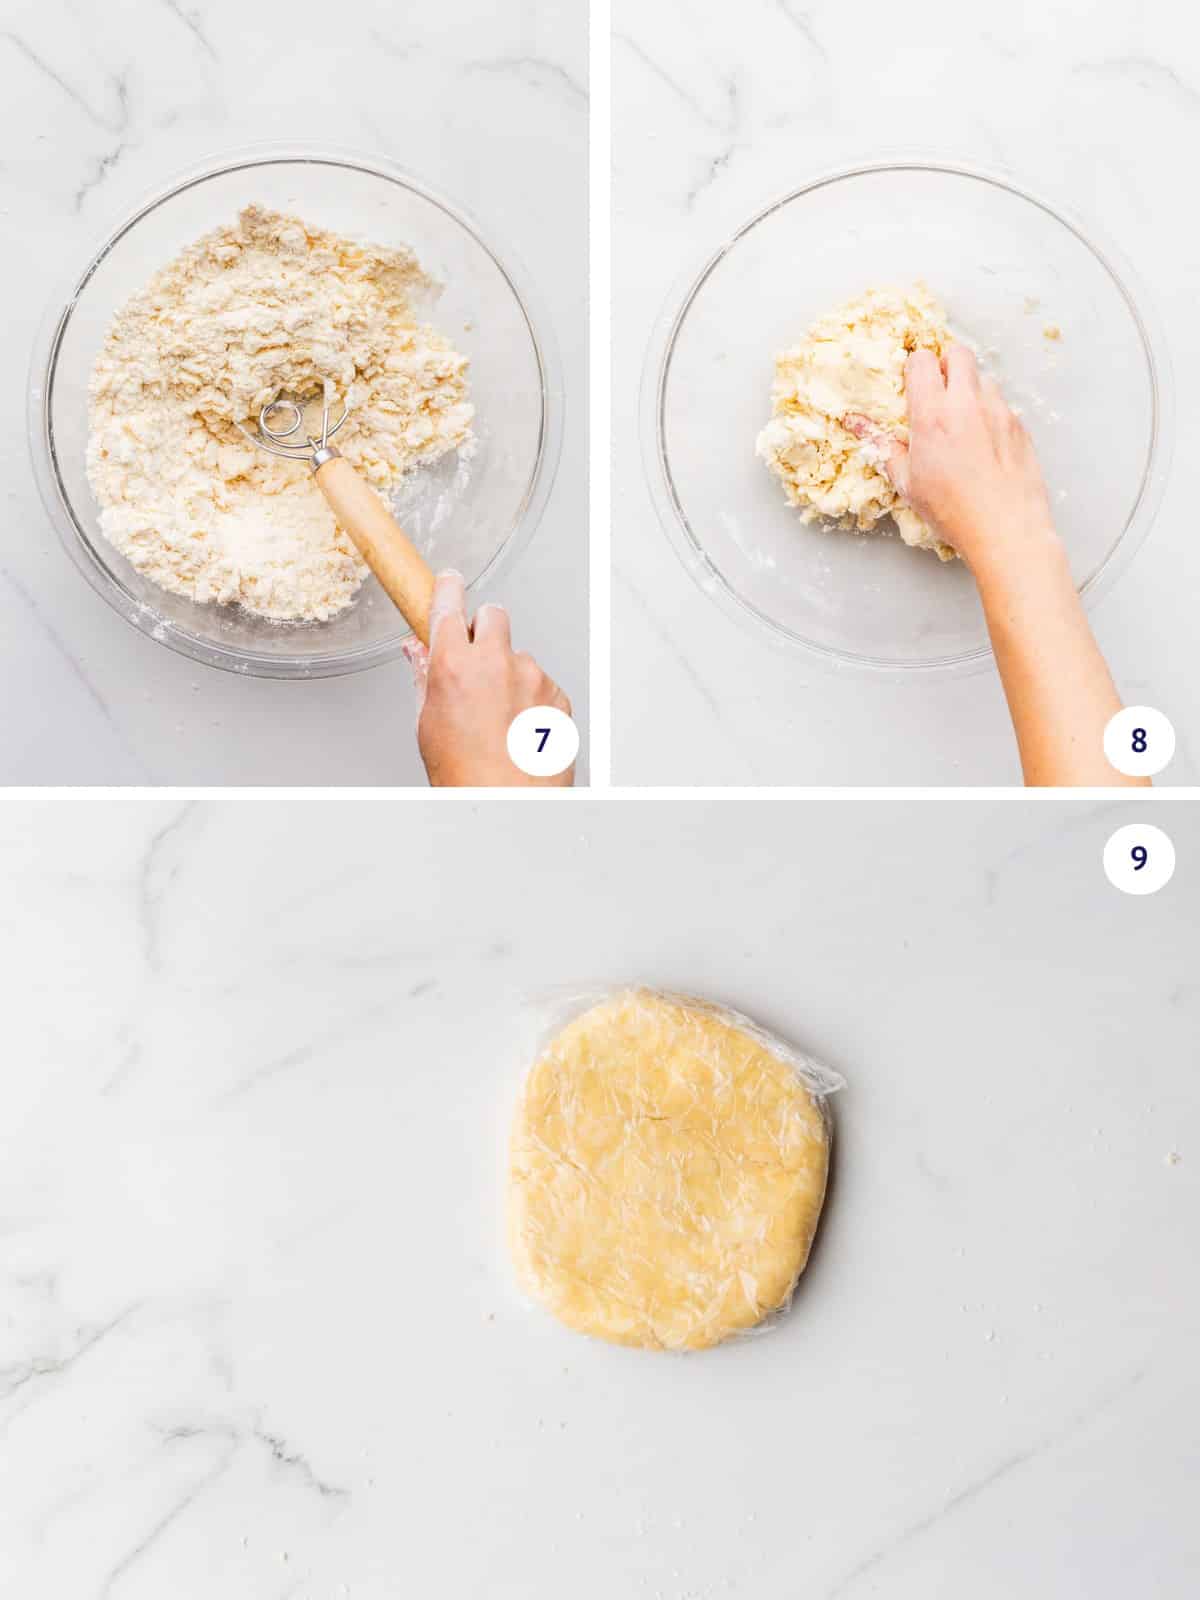
Step 3: Use the Danish dough whisk again to start to incorporate the water (image 8) but you will need to finish working the dough by hand, pressing the pieces together (image 8). Flatten the dough into a disk and wrap in plastic wrap to chill for 30 minutes (image 9).
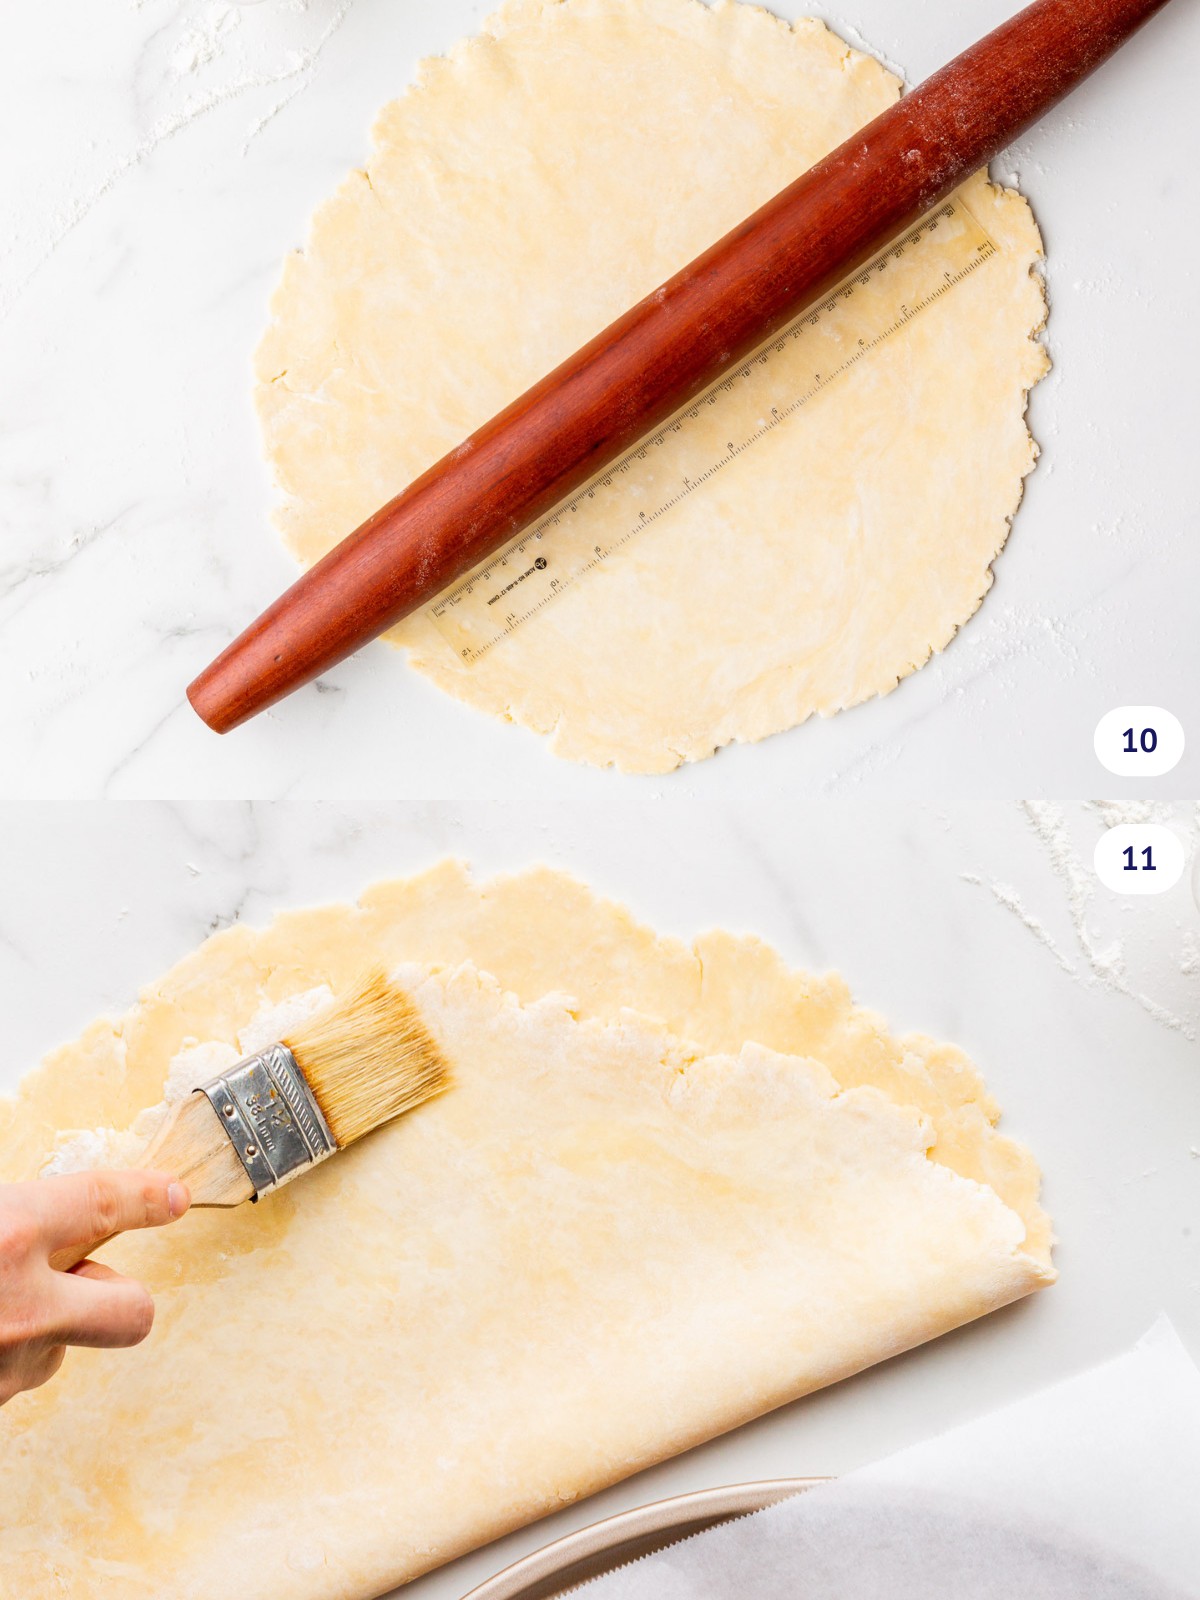
Step 4: Roll out the chilled dough to a round disk that has a diameter of roughly 14 inches (35.5 cm) and is approximately ⅛ inch thick (3.2 mm) on a lightly floured surface (image 10). Brush the excess of flour away with a pastry brush (image 11). Transfer the dough to a large parchment paper-lined pizza pan to chill while you prepare the apples.
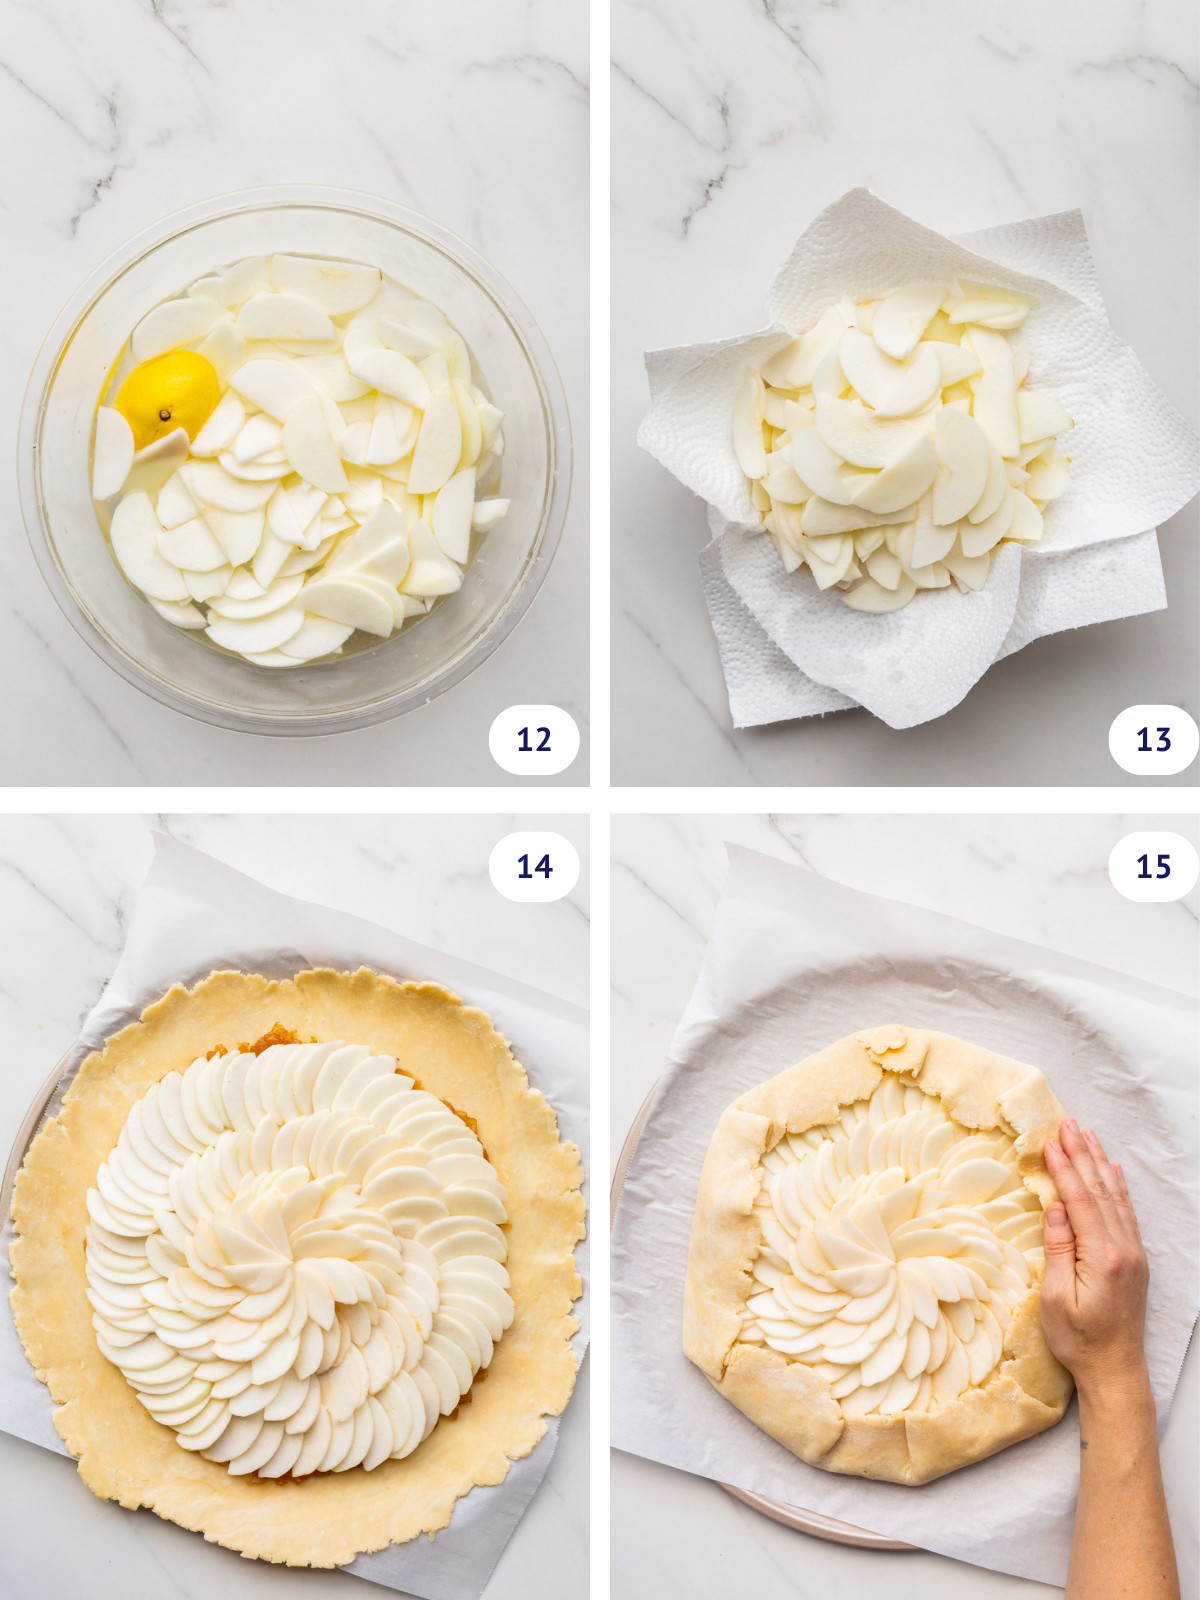
Step 5: Peel, core, and thinly slice the apples. Since this takes time, you may keep the apples in a bowl of acidified water (a mixture of water and lemon juice or apple cider vinegar) (image 12). When you've sliced all the apples, you can strain them and pat them dry before assembling the galette. I use a couple of sheets of paper towel to absorb the excess moisture (image 13). Spread apple jam (or jelly or apple butter) on the surface of the chilled pie crust, leaving a 1.5-inch (3.8 cm) border all the way around, then arrange the thinly sliced apples on top (image 14). Fold the crust edge right over the apples so there are no gaps between the pastry and the fruit (image 15).

Step 6: Brush the folded edge with a little milk (image 16) and sprinkle with coarse turbinado sugar (image 17) or some cinnamon sugar.
Tip: Arranging the apples into a pretty pattern can be intimidating, so feel free to just layer the sliced apples in a more disordered fashion. It doesn't really matter, though the goal is to layer them as tightly as possible so that there are fewer gaps and air pockets in between. As the apples bake, they will soften and cook down, so you want to use a lot of sliced apples to make sure the filling is generous.
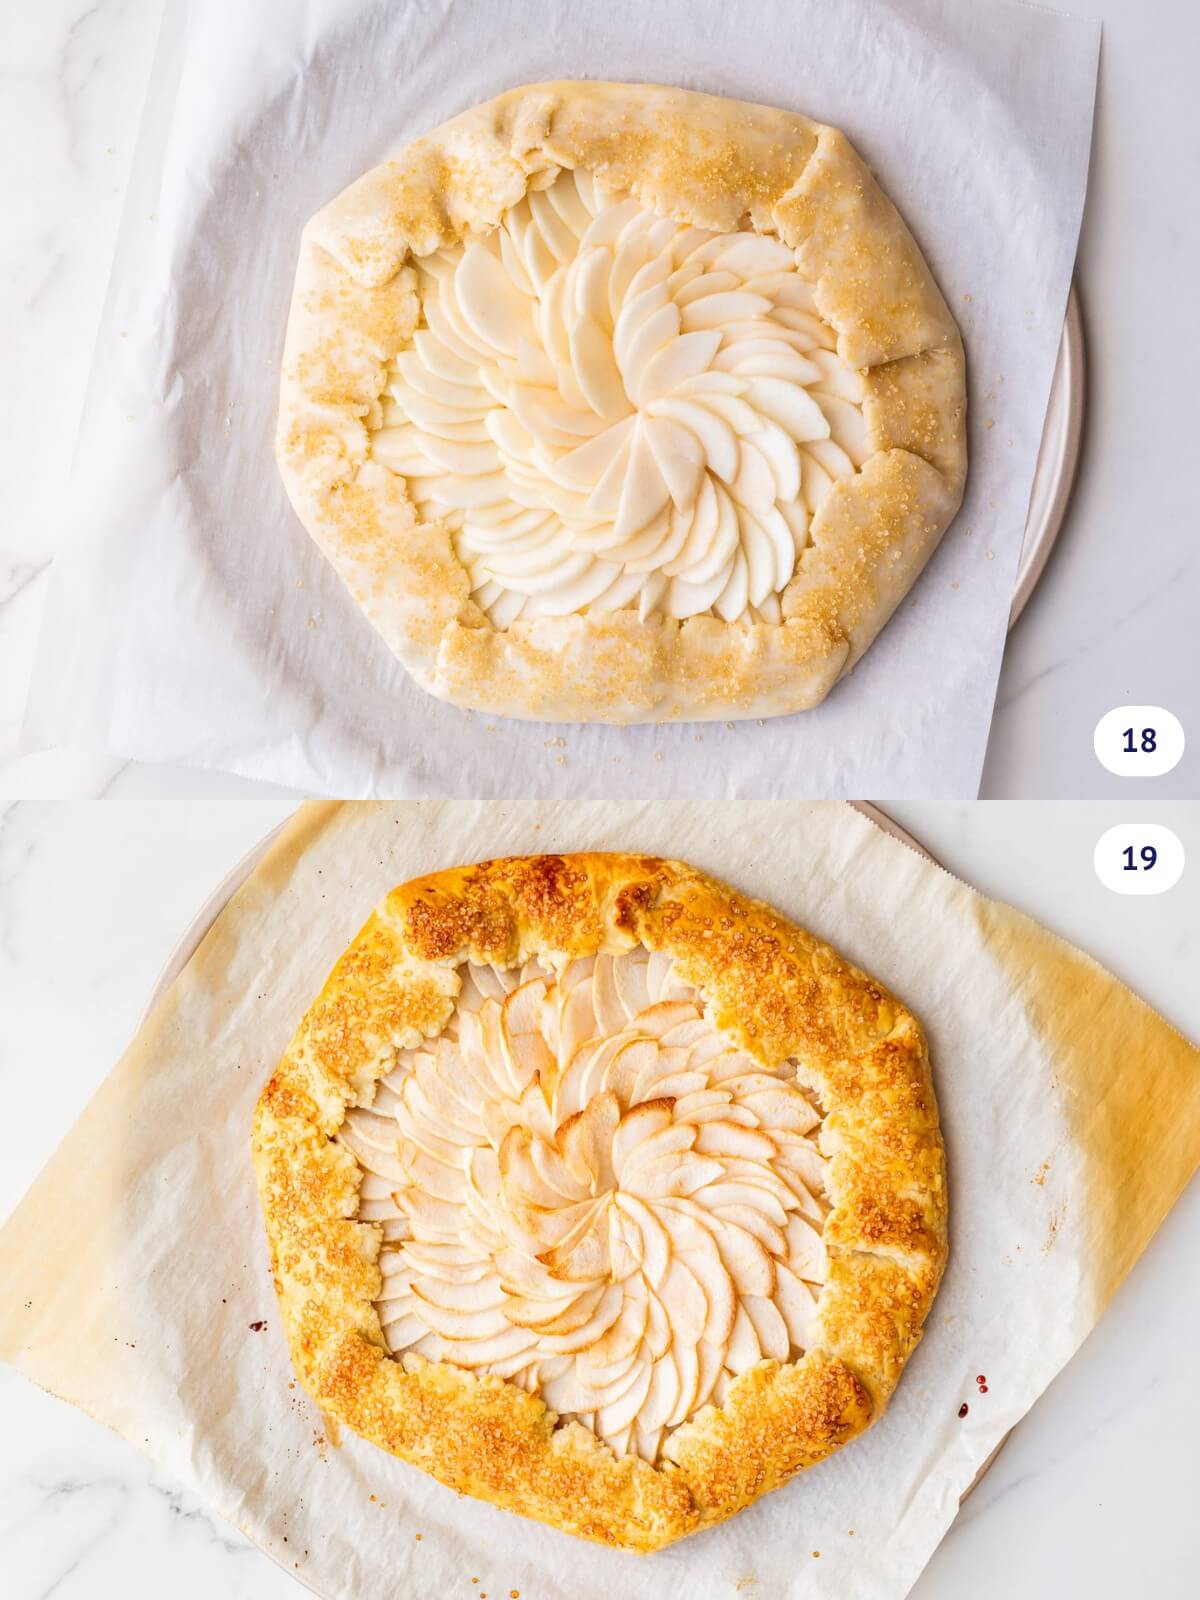
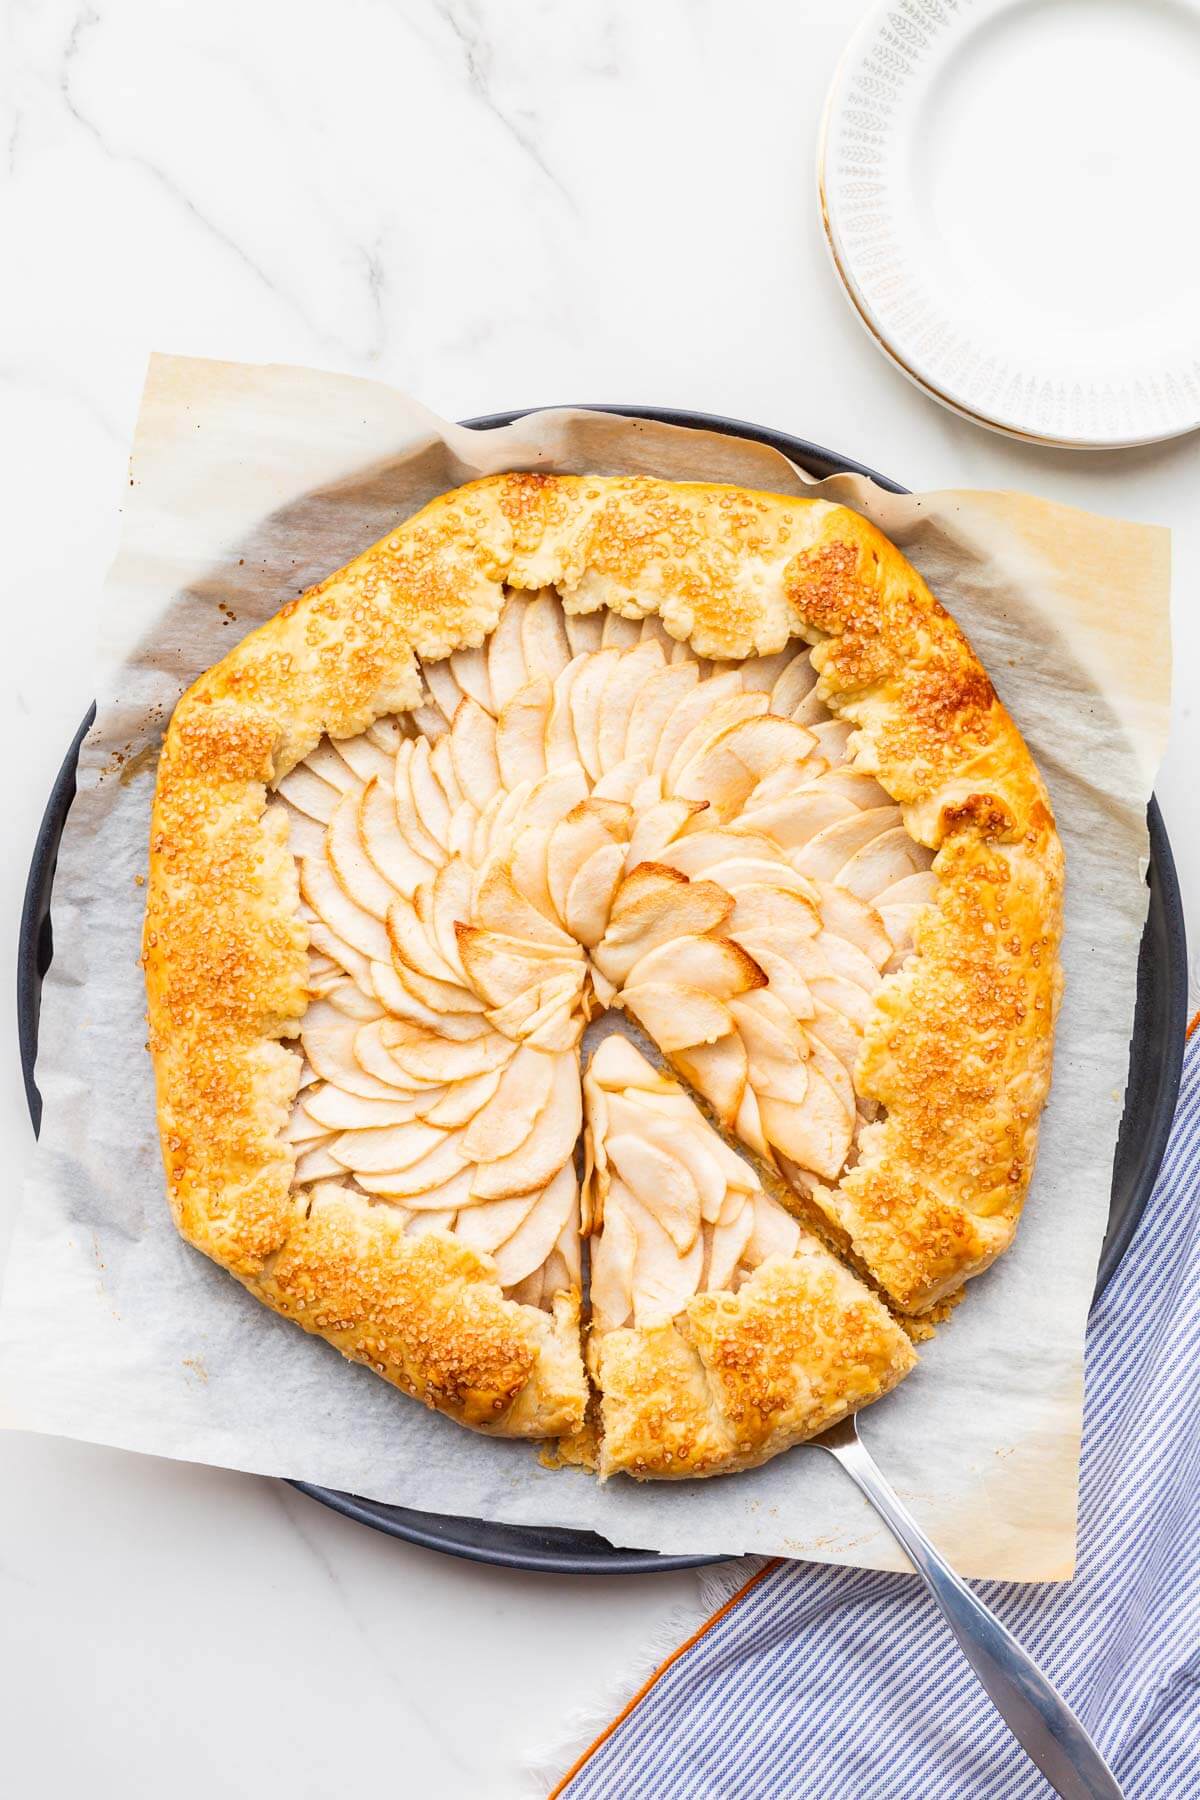
Step 7: Feel free to rearrange any of the apple slices to make them neat (image 18) then bake until the pie crust is golden brown (image 19).
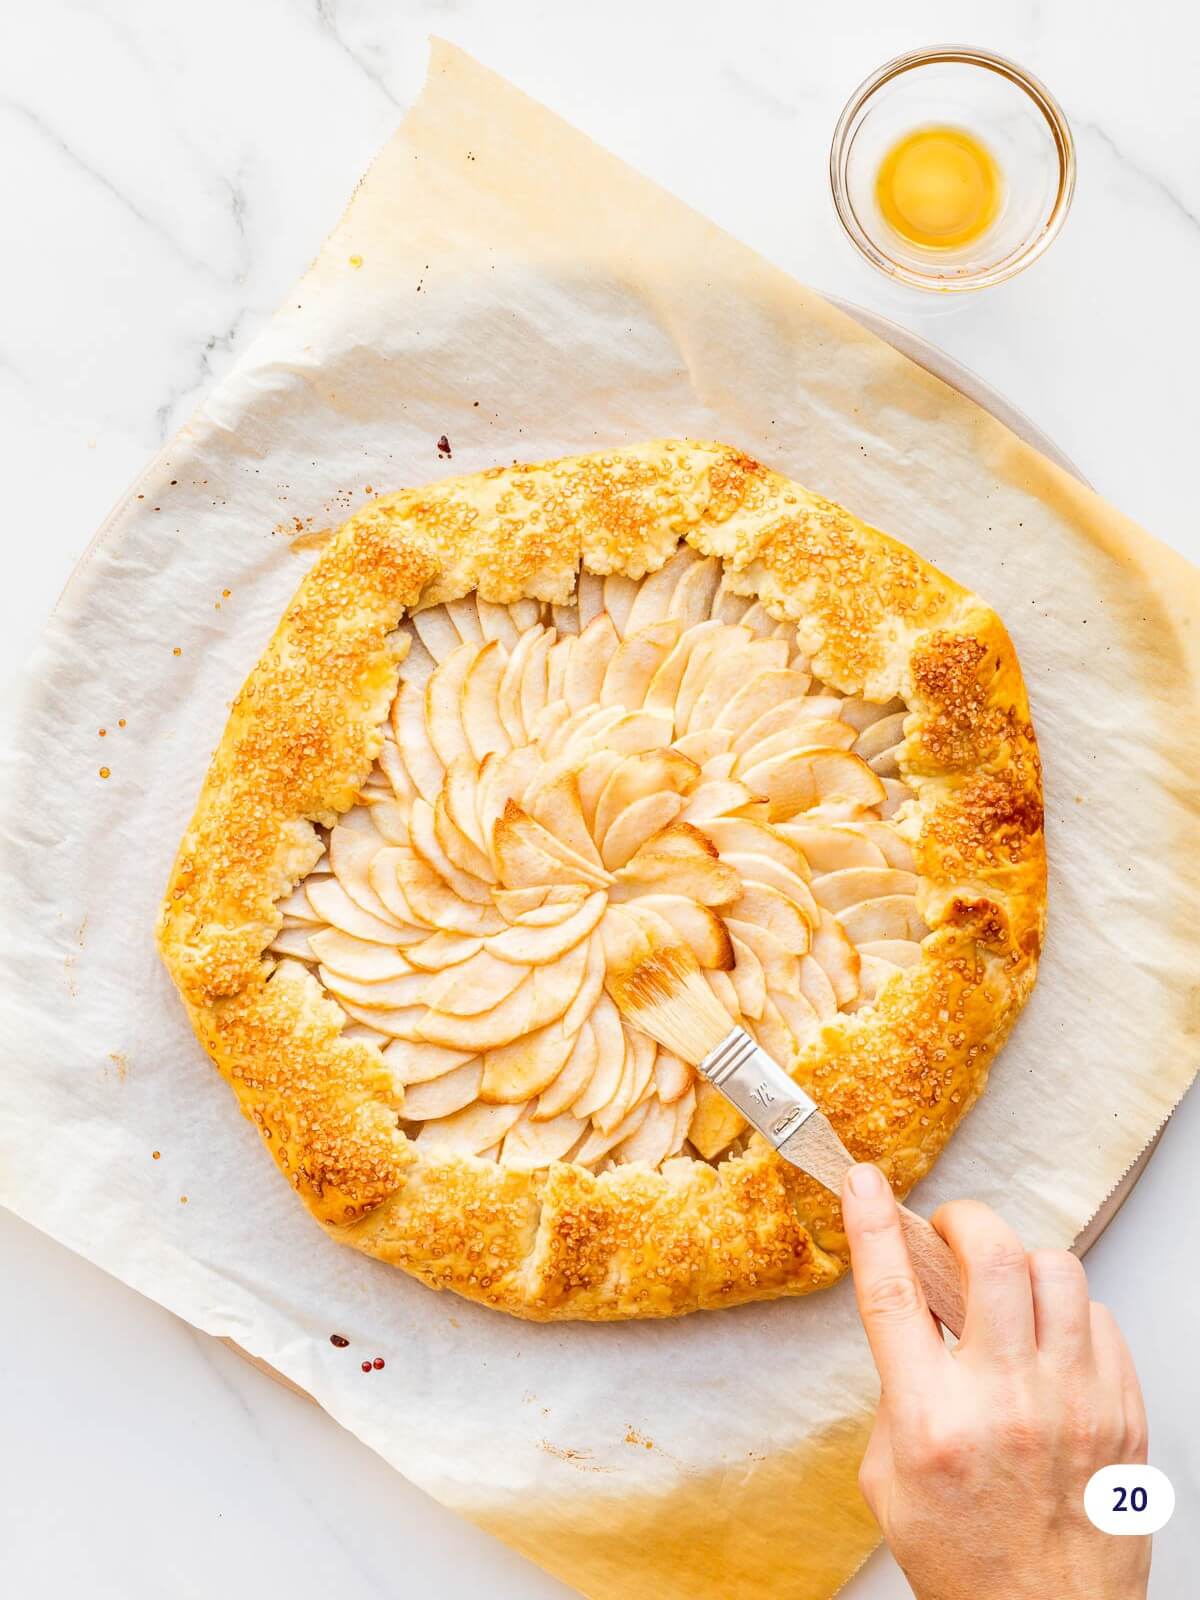
Optional step for finishing the galette: Brush the fruit with a glaze like melted apple jelly or a neutral glaze to add shine, or maple syrup (step 20) to add a little colour and sweetness to the decorative apples.
Apple Galette FAQs
Galette is a French baking term that can refer to many things: a thick cookie (especially where I live in Quebec-"galettes à la mélasse" are thick and chewy molasses cookies), a crêpe (a "galette au sarrasin" is a buckwheat crêpe), a round stuffed pastry (the galette des rois is two disks of puff pastry baked with a filling of frangipane (almond cream) in between), or an open-faced fruit pie (like the apple galette here or these mini raspberry galettes).
I like to bake my fruit pies and galettes on the bottom oven rack to ensure they get as much heat as possible directed to the bottom crust, which bakes more evenly. I also recommend baking on a metal pan (preferably aluminum), which is a good heat conductor. Also baking on a darker sheet pan will also help the bottom crust brown.
Apple galettes are best consumed within a couple of days of baking, but honestly, you probably won't have leftovers for longer than that! You can serve the apple galette plain or serve warm à la mode, topped with scoops of homemade vanilla bean ice cream, cardamom ice cream, or lemon custard ice cream.
You could freeze the unbaked galette on a sheet pan until it's frozen solid, then wrap in several layers of plastic wrap and foil to protect it. When you are ready to bake it, unwrap the frozen galette and place on a pizza pan (or large sheet pan) to bake it from frozen, following the instructions in the recipe. You'll have to add a few minutes to the timer in the end. Remember you are aiming for the crust to be golden brown and the filling to be well cooked (apples should be soft). Don't pull the pie out before you are sure that the crust is baked, even on the bottom. Try to lift an edge of the galette to make sure it's browning underneath.
More Delicious Apple Recipes
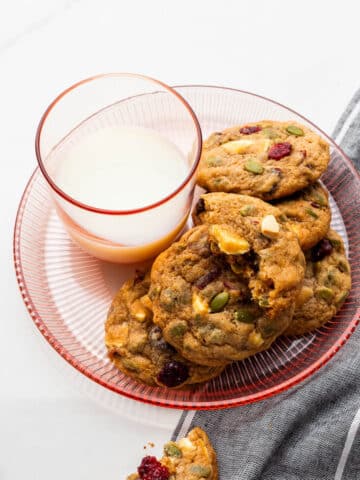
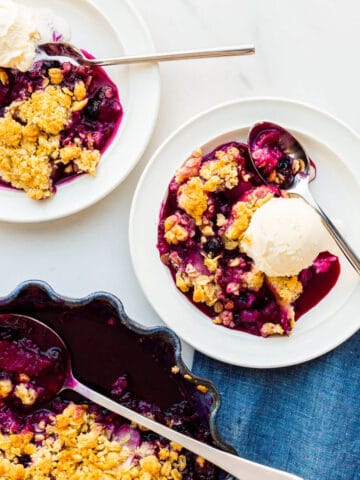
Take advantage of apple season and bake these other apple desserts:

If you tried this recipe for the best apple galette (or any other recipe on my website), please leave a ⭐ star rating and let me know how it went in the comments below. I love hearing from you!
📖 Recipe
Easy Apple Galette with Pie Crust
Equipment
Ingredients
- 250 grams bleached all-purpose flour
- 1.25 mL Diamond Crystal fine kosher salt
- 170 grams unsalted butter cold, cut into little cubes
- 60 mL cold water
- 3 Cortland apple(s) I used large apples but if your apples are smaller, you might need 5 apples to fill the galette
- 125 mL apple jam
- 15 mL skim milk (fat free)
- Turbinado sugar for sprinkling over the crust before baking
Instructions
- Whisk the flour and salt together in a large bowl before adding in the cold cubed butter. You can use a Danish dough whisk or a fork for this.
- Toss the butter into the bowl of the flour and stir to coat all the pieces. Smash each piece of butter in the flour to flatten out the pieces between your fingertips. You can also use a fast rubbing motion to work the butter into the flour between your palms to achieve different textures.
- Pour the cold water on top and use your fork or your Danish dough whisk to start to incorporate the water. You will need to finish working the dough by hand, pressing the pieces together.
- Press all the bits together into a somewhat cohesive mass, flatten it into a disk and wrap with plastic wrap. Refrigerate for about 30 minutes.
- Preheat the oven to 400 °F (200 °C). Roll out the chilled dough to a 14-15-inch disk (35.5-38 cm). Transfer the disk to a parchment paper-lined sheet pan or pizza pan and chill while you prepare the apples.
- Peel, core, and slice apples as thinly as possible with a knife. This task can take some time: you may want to place the peeled and sliced apples in a bowl of lemon water to make sure the fruit doesn't brown.
- Take the rolled dough out of the fridge, and remove the top sheet of parchment. Brush the apple jam over the crust leaving 1-1.5 inches of crust bare (2.5-3.8 cm).
- Top the apple jam with the sliced apples arranging them in concentric circles to make it pretty and still keeping the 1-1.5-inch edge bare (2.5-3.8 cm).
- Gently fold over the bare crust over towards the middle to make a rustic edge. With your palms, press and push the fold towards the middle a little to "tighten" the galette.
- Brush the crust with milk and sprinkle with the crust coarse sugar.
- Bake for 20 minutes then lower the oven to 375 °F (190 °C) and bake for another 30-40 minutes until the crust is golden brown delicious and the apples are soft.
- Let cool about 20 minutes before serving
Notes
- Apple variety: use apples that hold their shape when baked, so Cortland, Lobo, Spartan, Granny Smith, Golden Delicious, HoneyCrisp, etc. Apples like McIntosh or Empire may break down and become more saucy when baked in a galette and may not work well in this recipe.
- Apple filling: I smeared homemade cinnamon apple jam on the bottom crust before layering the sliced apple on top. The jam enhances the apple flavour of the dessert and brings a little sweetness. You can replace this with apple jelly or even apple butter!
- Cinnamon sugar: I usually sprinkle the pie crust edges with turbinado sugar, but you could also use cinnamon sugar which will give the crust more flavour!
- Salt: This recipe calls for Diamond Crystal fine Kosher salt. If using regular table salt, add half the amount or the recipe may be too salty!
- Glaze: I like to brush a little maple syrup over the sliced apples after baking the galette. This sweetens them and also gives them a little colour as they may look a little "anemic". You can also glaze the fruit with a neutral glaze or some melted apple jelly. Both will give the fruit more shine.
Explore More With AI
Nutrition
Nutrition information is automatically calculated and should only be used as an approximation.


Kurt says
Very delicious! Thank you for this nice recipe!