

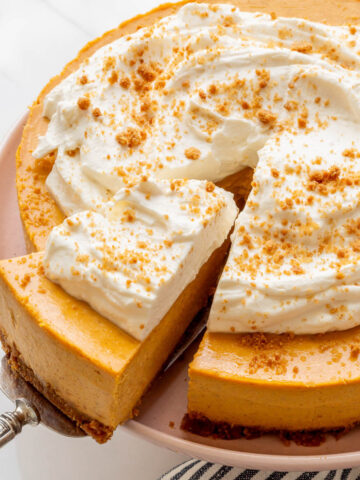
Learn how to make the best pumpkin pie without evaporated milk with this easy recipe. This is the perfect pumpkin dessert for Thanksgiving.
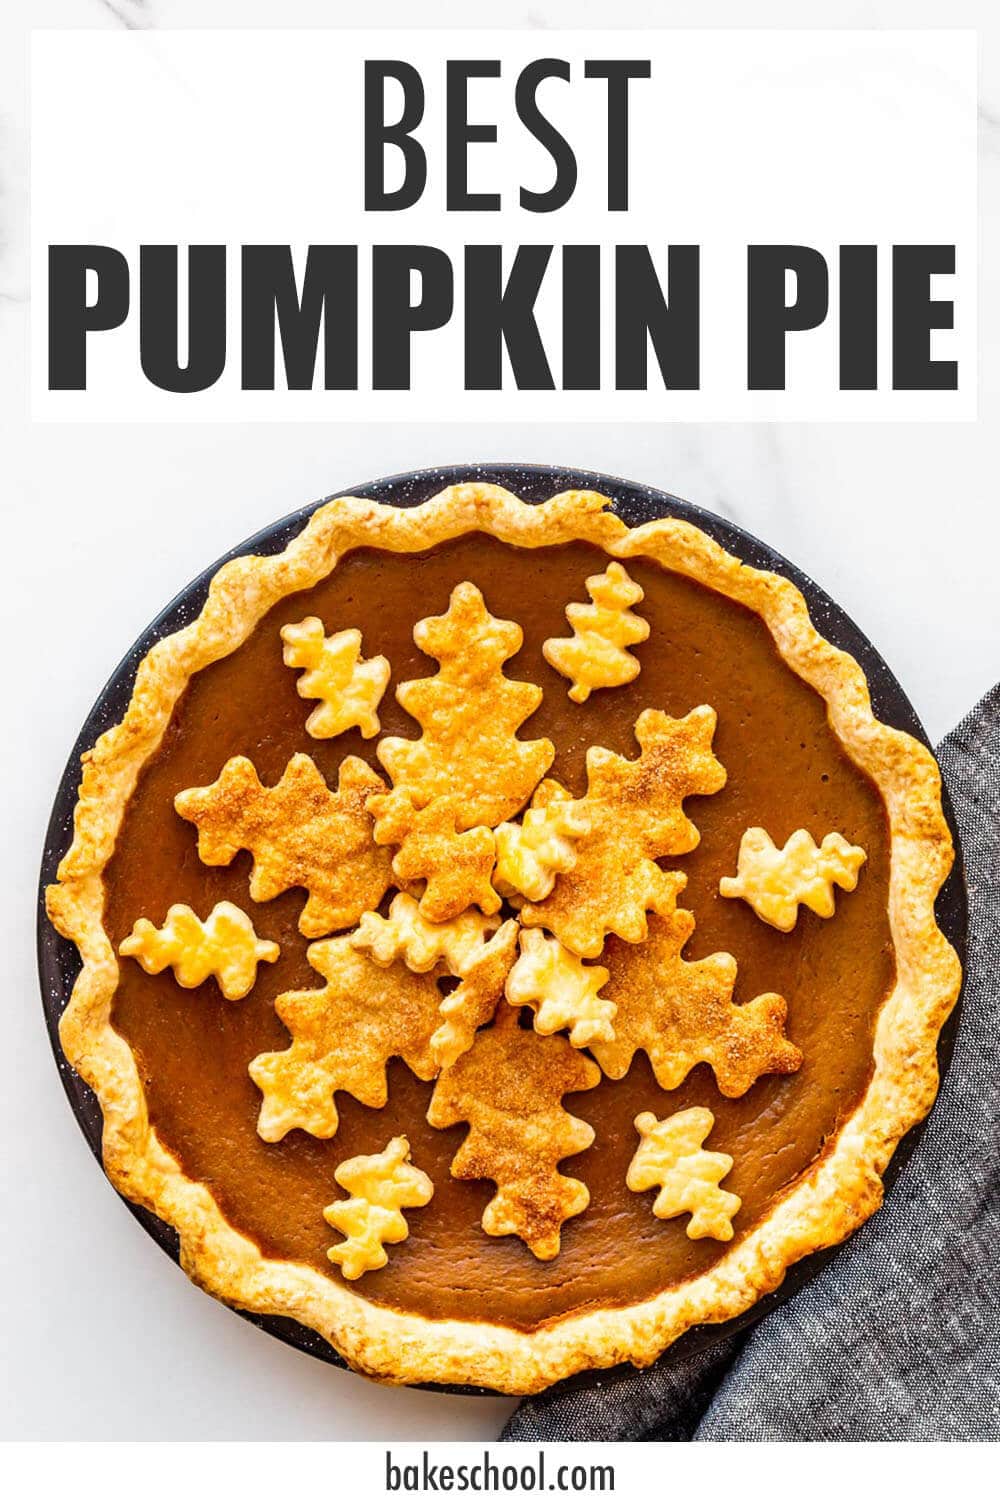
If you want to take pumpkin a little further than the usual pumpkin loaf cake, this pumpkin pie without evaporated milk is a real treat! Most pumpkin pie recipes rely on canned milk for their creamy texture. This recipe makes the classic Thanksgiving pumpkin dessert that everybody knows and loves, but with cream instead of evaporated milk!
If you love to bake with pumpkin, order your copy of the e-book All About Pumpkin so you can celebrate this star ingredient!
Jump to:
What You Need to Make Pumpkin Pie Without Evaporated Milk
There are two major components to this recipe: the crust and the pumpkin pie filling. Here's what you will need to make this pumpkin dessert:
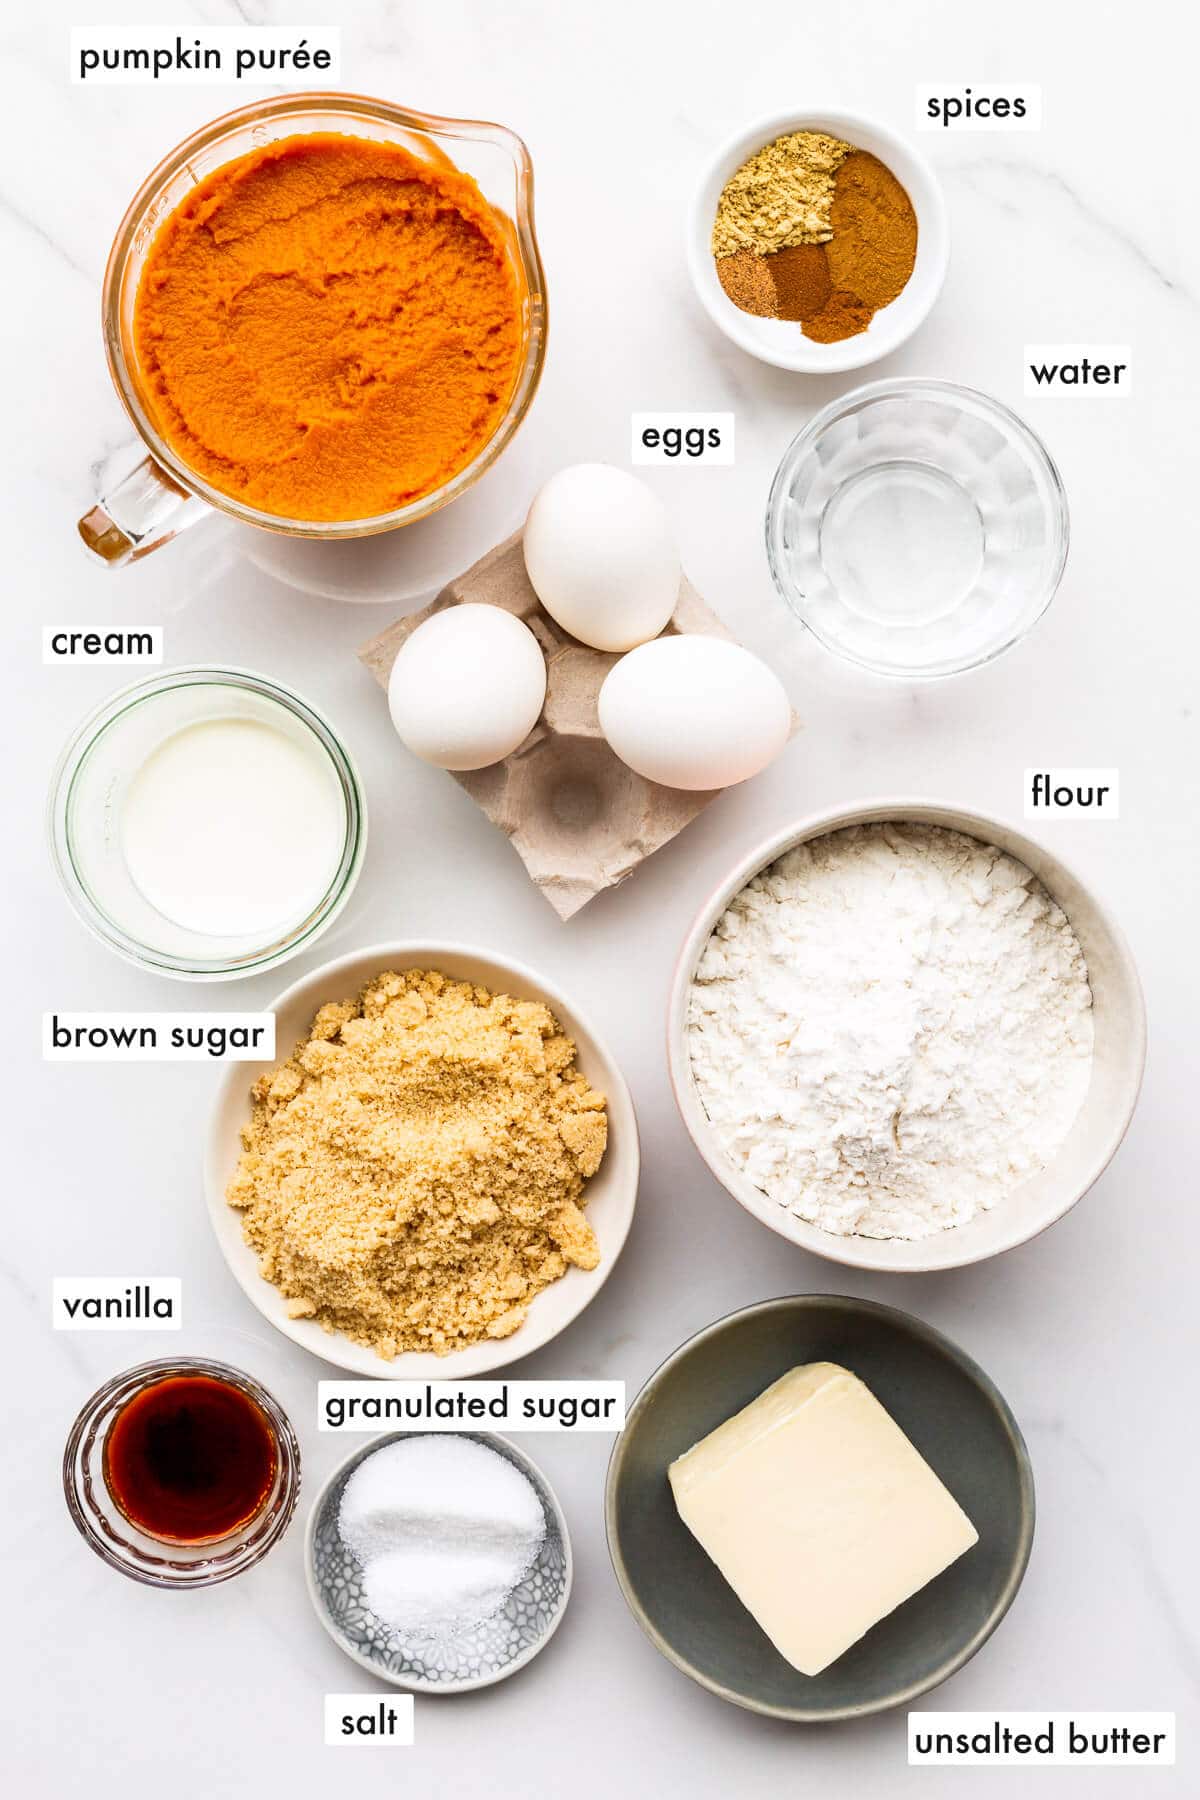
- all-purpose flour is the base ingredient for the crust to give it structure and to help the crust hold its shape as the pie bakes
- sugar-both granulated and brown sugar
- salt is really important to balance out the sweet flavour in the filling and also to balance out the sour notes. Don't skip it. I like to use Diamond Crystal fine kosher salt, but table salt will work, though the pie dough will be saltier and you may want to halve the salt.
- butter, preferably unsalted butter because you add salt to the dough, but if you have salted, it will work. Just adjust the salt in the recipe accordingly, otherwise, your pie crust may be too salty
- large eggs to help set the custard filling so that it is smooth and slices cleanly
- pumpkin spice or a mixture of warm spices, specifically cinnamon, ginger, allspice, nutmeg, and cloves.
- whipping cream or half-and-half which will add body and richness to the filling. I prefer using whipping cream for the filling with 35 % fat because fat is flavour
- vanilla extract or vanilla bean paste adds sweetness and depth to the filling, enhancing the flavour of the filling.
See recipe card for exact quantities.
Substitutions and Variations
- Crust: this recipe includes the ingredients and steps to make the pie crust using a food processor. If you are short on time (or don't want to do that), simply buy a ready-made all-butter pie crust from your local bakery. They are usually sold frozen so you will defrost it in the refrigerator overnight before using it.
- Pumpkin: you can use canned pumpkin, homemade pumpkin purée, or even mashed butternut or kabocha squash. Please read about how to make pumpkin purée because it's very important to cook down or strain the pumpkin before baking with it
- Spices: the homemade pumpkin pie filling is flavoured with a mixture of ground cinnamon, ginger, allspice, nutmeg, and cloves. This is essentially a homemade pumpkin spice blend. Feel free to omit all these spices and replace them with up to 15 mL (1 tablespoon) pumpkin spice blend.

Tip: Remember that pumpkin purée may contain a lot of water, so after you have roasted and puréed it, it's best to strain it through a cheesecloth to remove some of the water. Otherwise, your filling may end up watery from the excess moisture!

How To Make the Best Pumpkin Pie
Please refer back to this post about how to make pie crust in a food processor if you are making the pie crust and need more information and step-by-step photos!
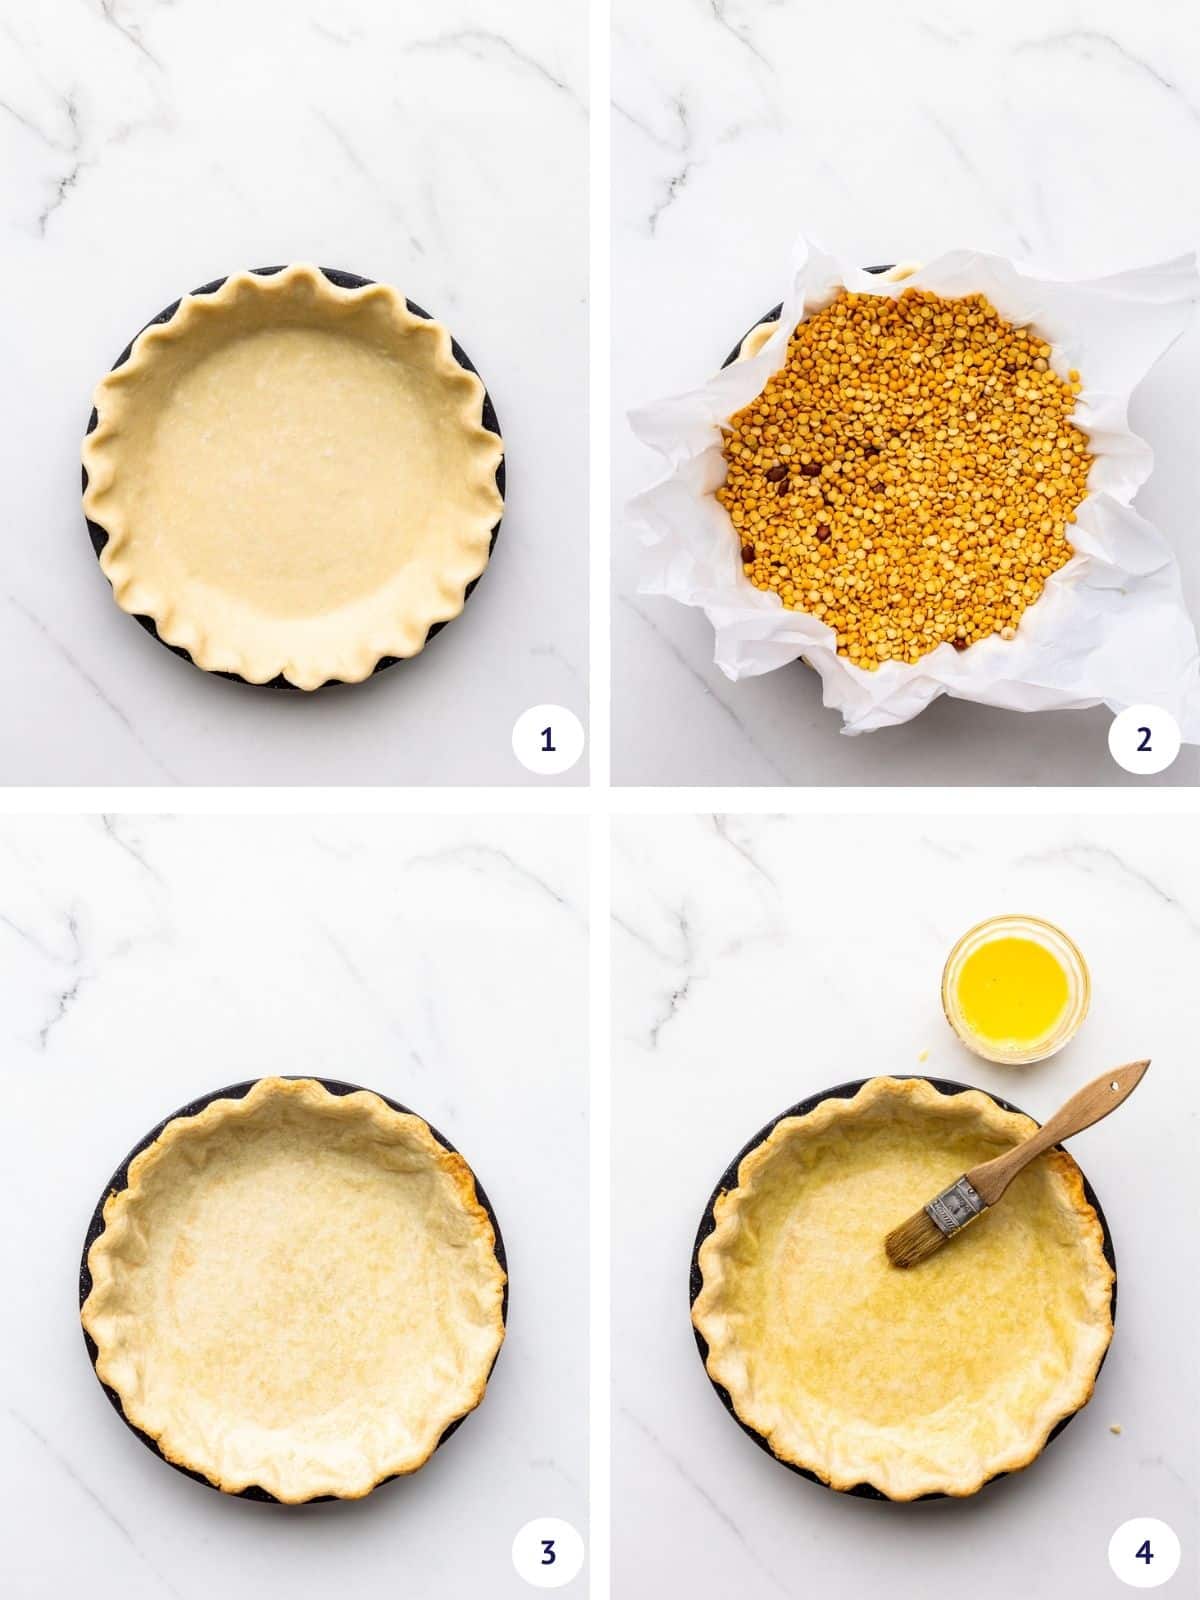
Step 1: Par-bake the pie crust by first lining a metal pie pan with the crust, crimping the edges decoratively (image 1), then covering it with crumpled parchment paper and filling it with pie weights or dry beans (image 2). Bake the crust until set and dry (image 3) then brush the inside of the crust with an egg wash (image 4) to seal it before pouring the wet filling. This will help prevent a soggy pie bottom.
If making pie crust from scratch scares you, be sure to check out my pie crust masterclass, which includes video tutorials for making pie crust in the stand mixer, food processor, and by hand!
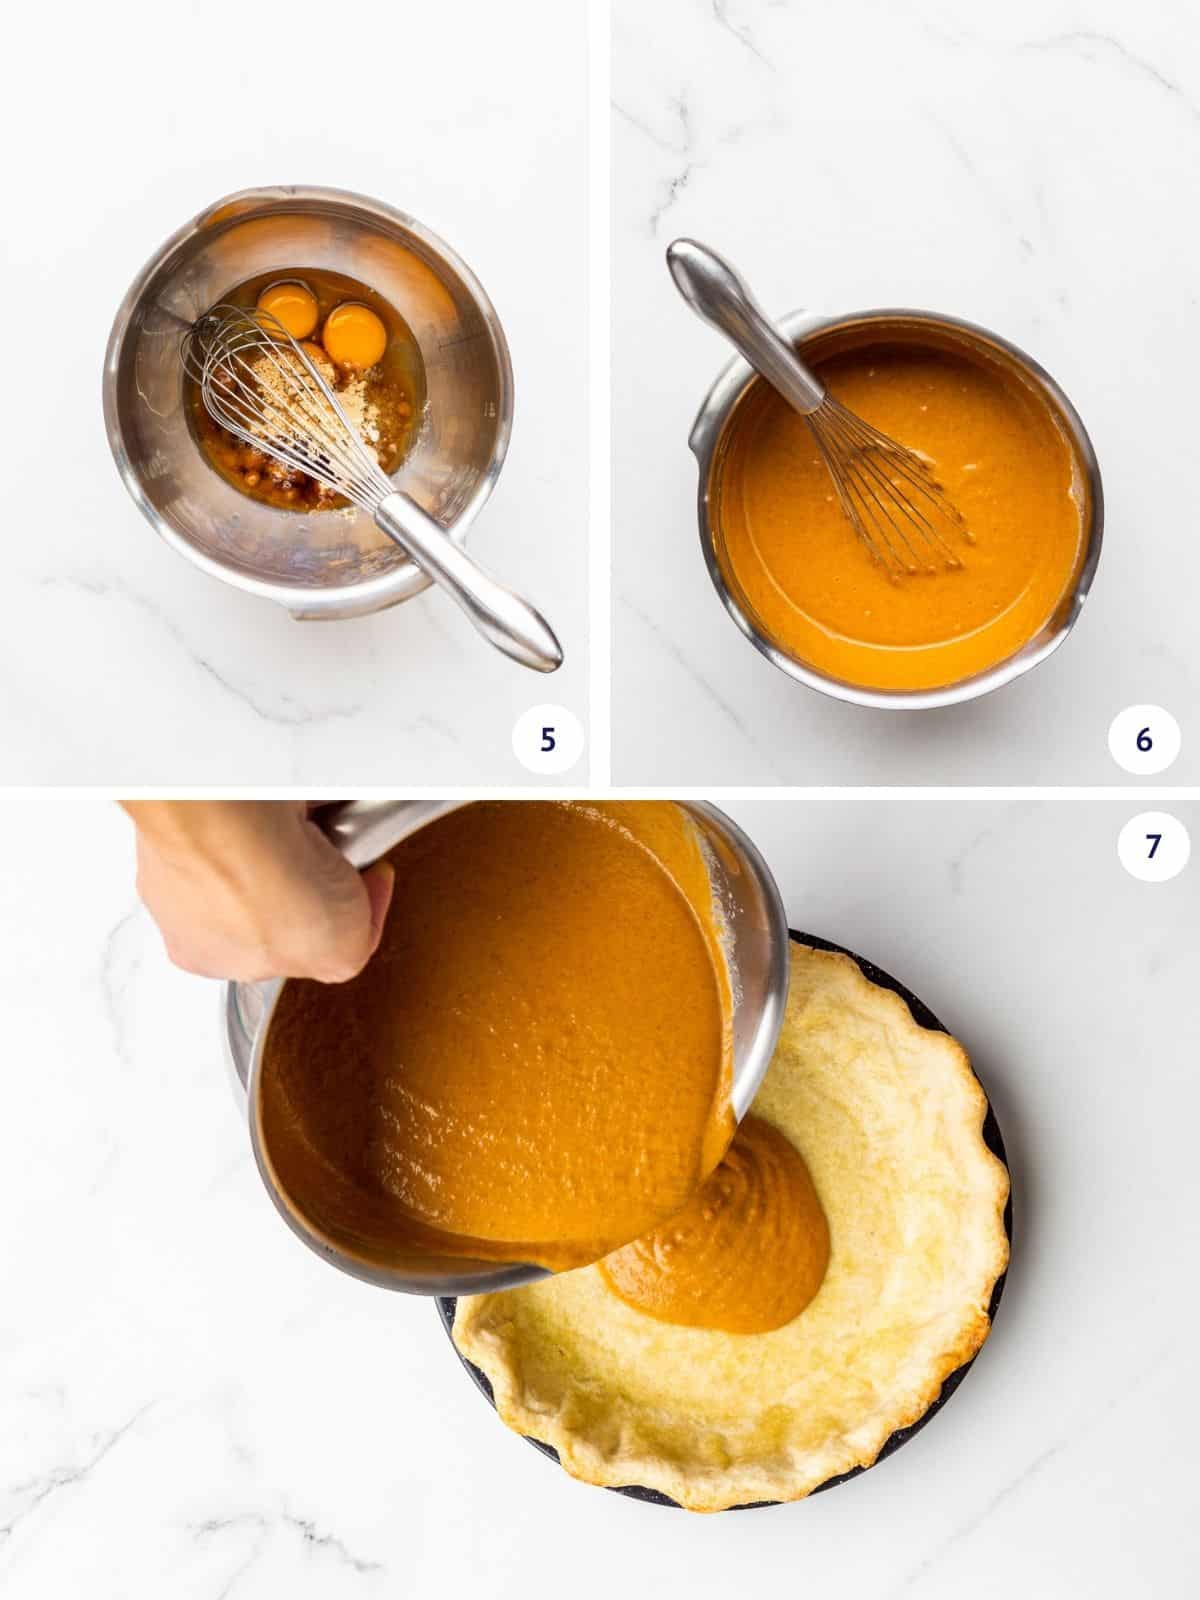
Step 2: Whisk the ingredients in a large bowl with a spout (image 5). The pumpkin pie filling should be completely smooth (image 6). Pour the filling in the par-baked crust (image 7).
Not sure what kind of pie pan to use? I prefer using a metal pie plate. Metal is a good heat conductor, which means it will help drive heat to the bottom crust in contact with the pan. This will help cook the bottom so that it isn't raw. For a deep-dive on metal versus glass, check out this guide to baking pans and bakeware.
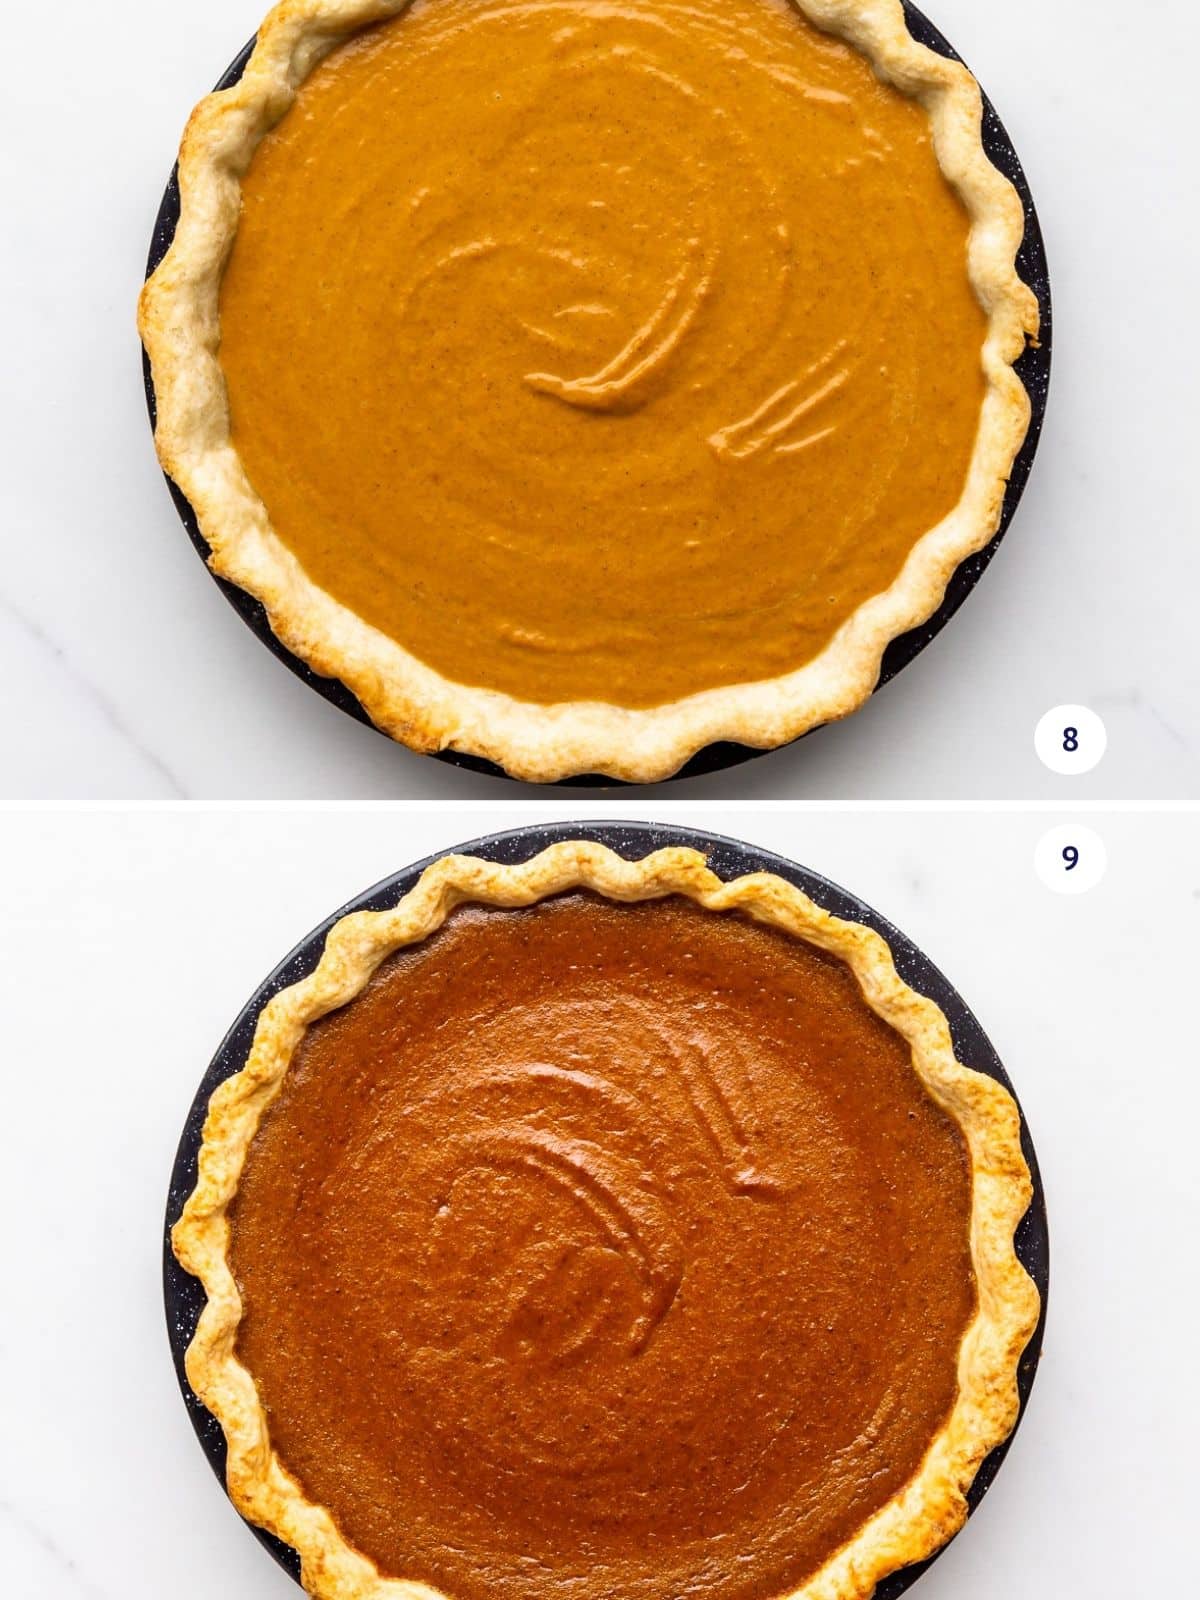
Step 3: Smooth the top of the filling (image 8) and bake it until the filling edges are set but the centre still jiggles a little (image 9).
Once baked and cooled down to room temperature, you can store your pumpkin pie in the fridge until it's time to serve. Let it come to room temperature for 30 minutes before serving. Cover leftover pumpkin with aluminum foil and refrigerate.
Top Tip
Most recipes do not suggest blind-baking or par-baking the pie shell before filling and baking pumpkin pies, but over the years, I've discovered that I much prefer the results when I par-bake the pie shell before filling it. This ensures the crust is baked through and golden brown even on the bottom!
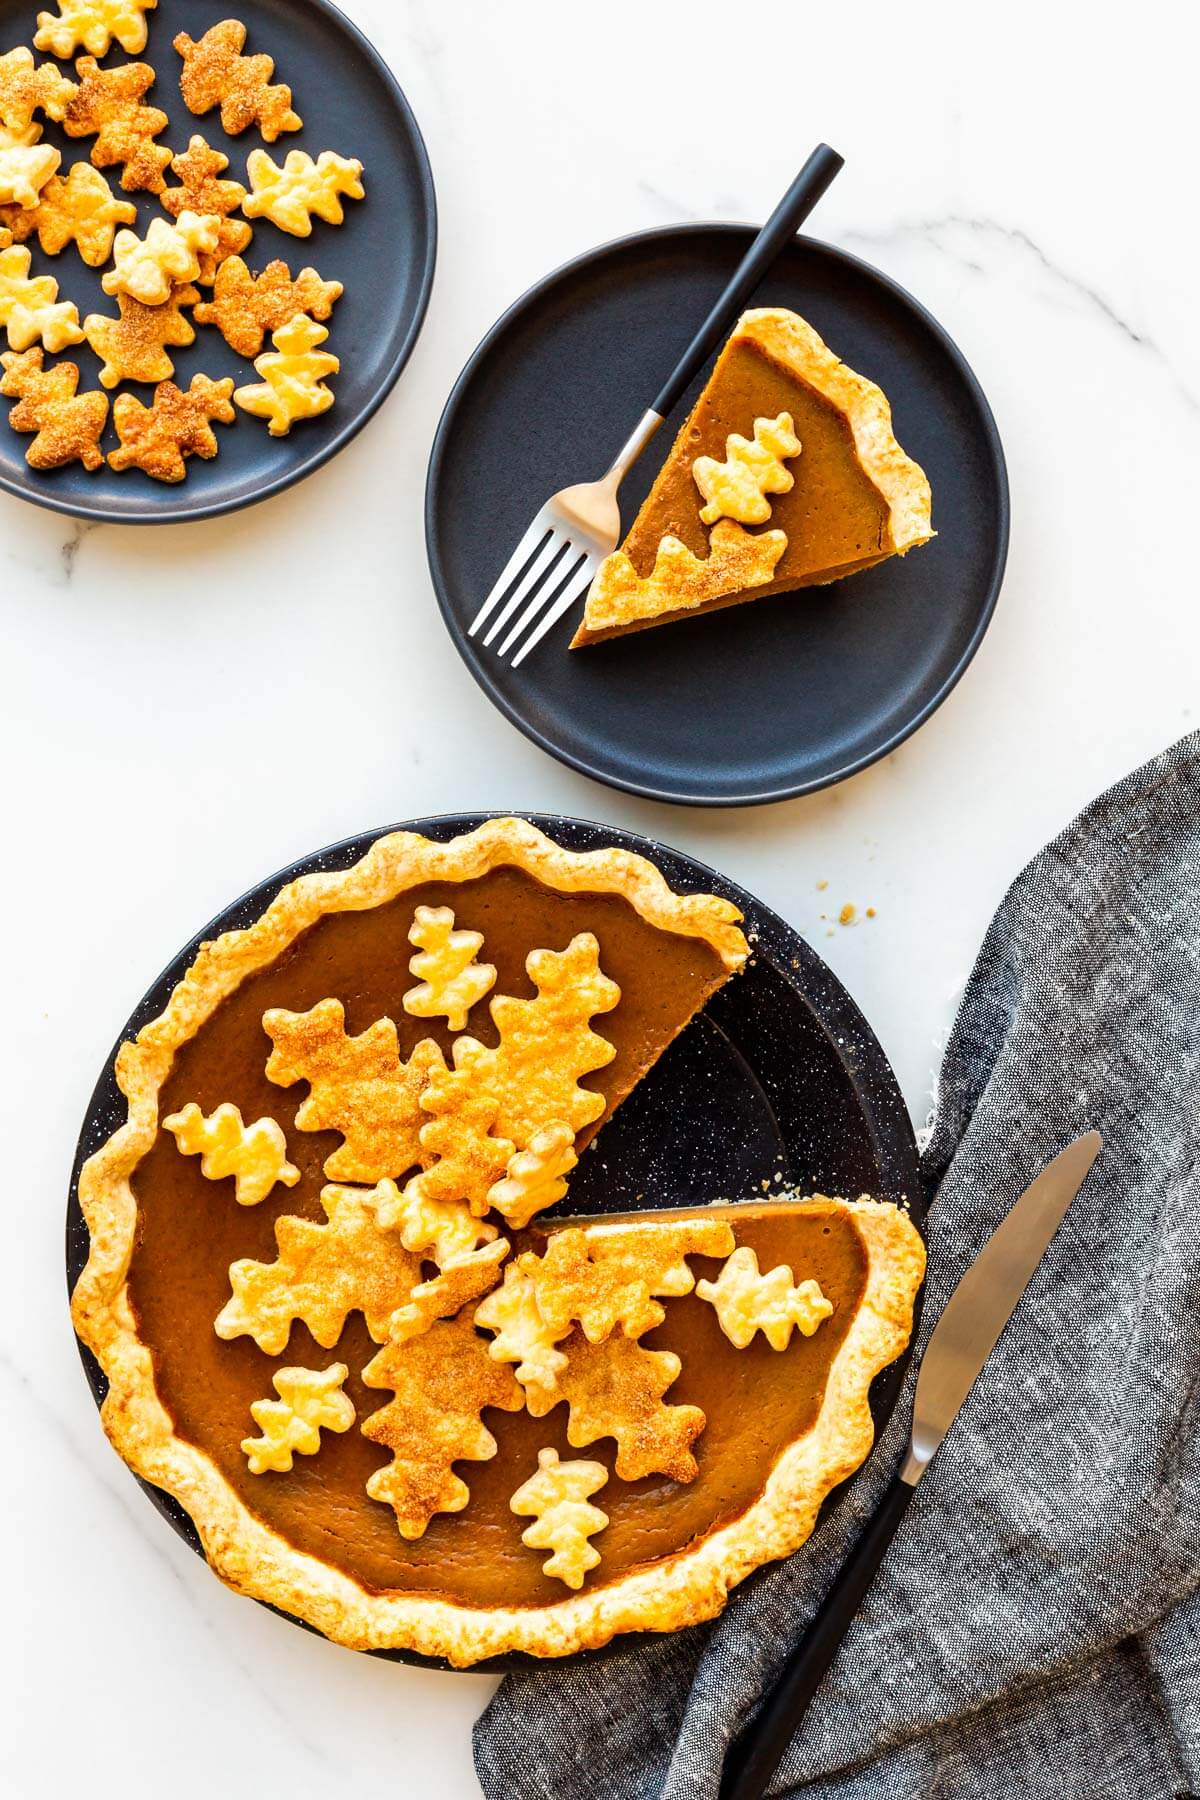
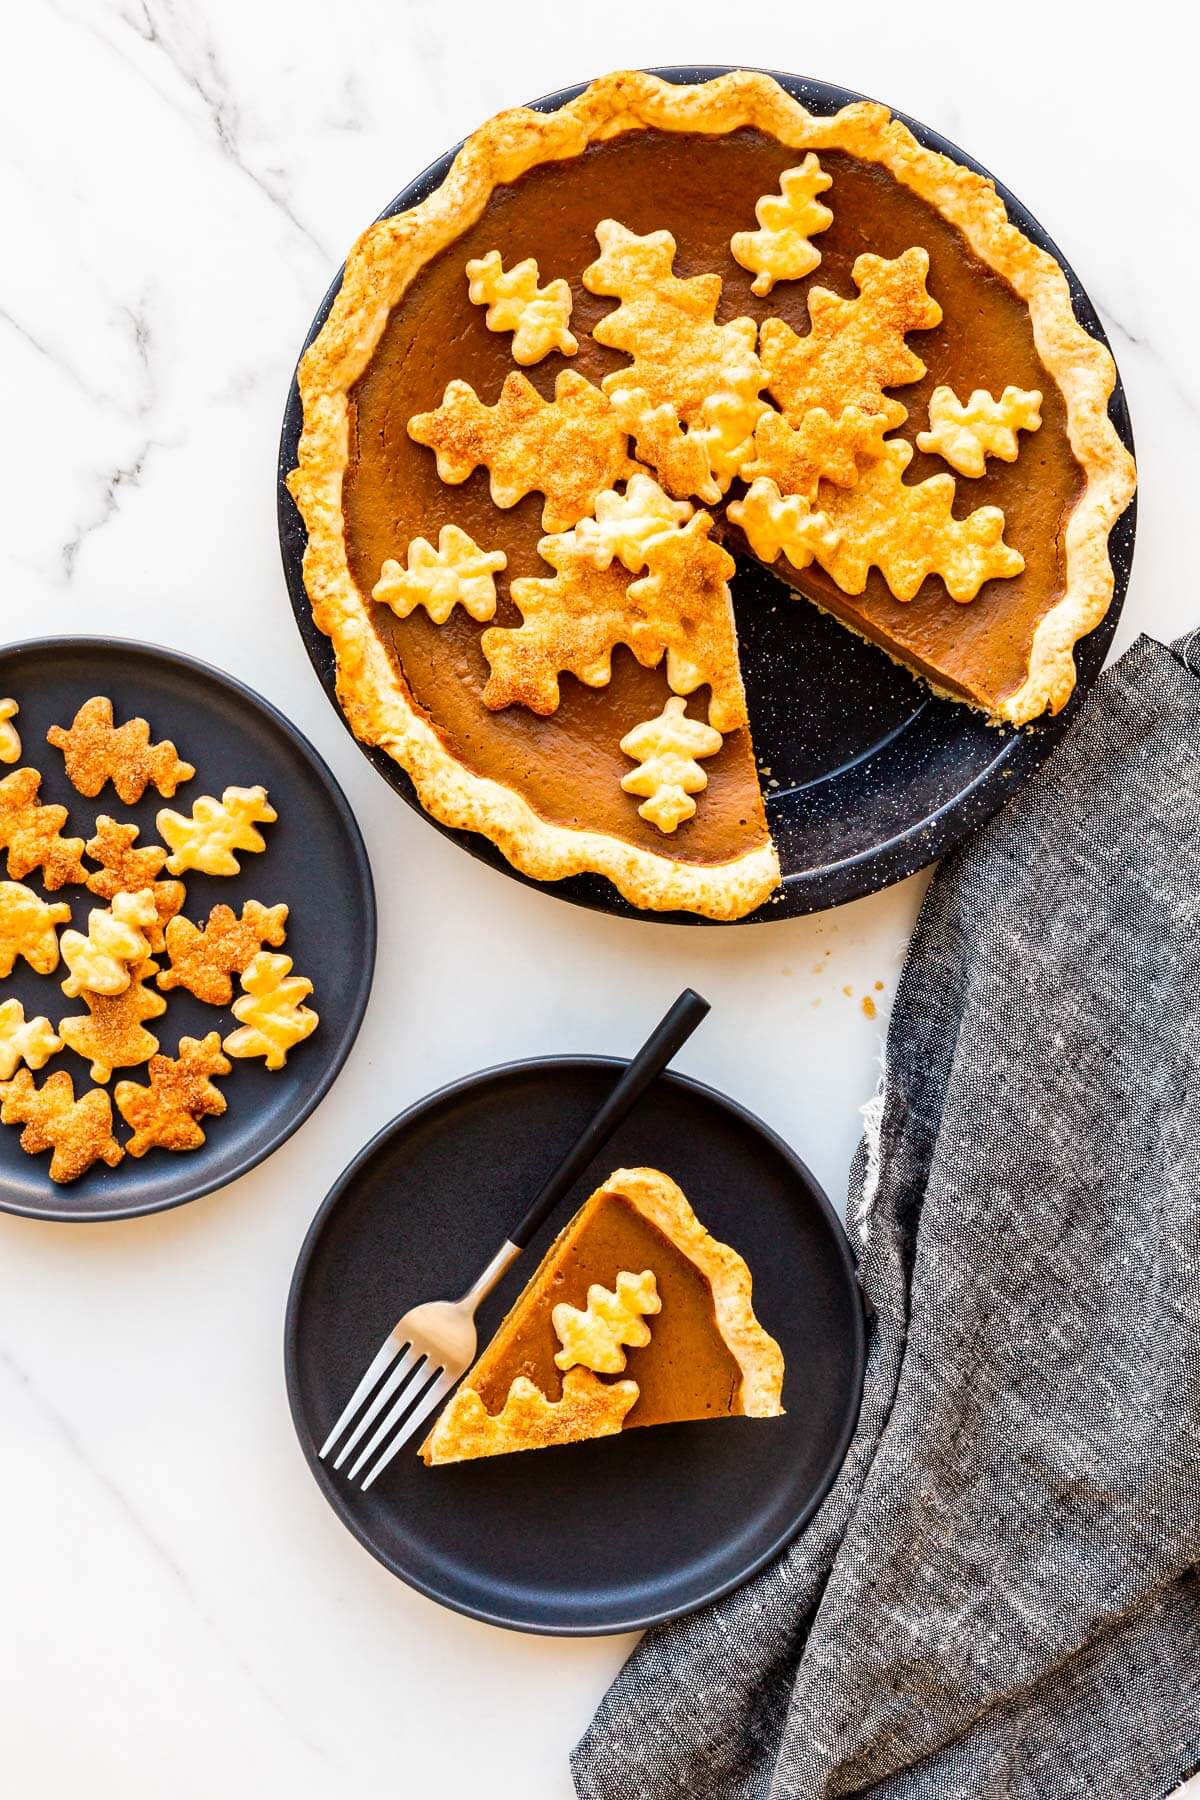
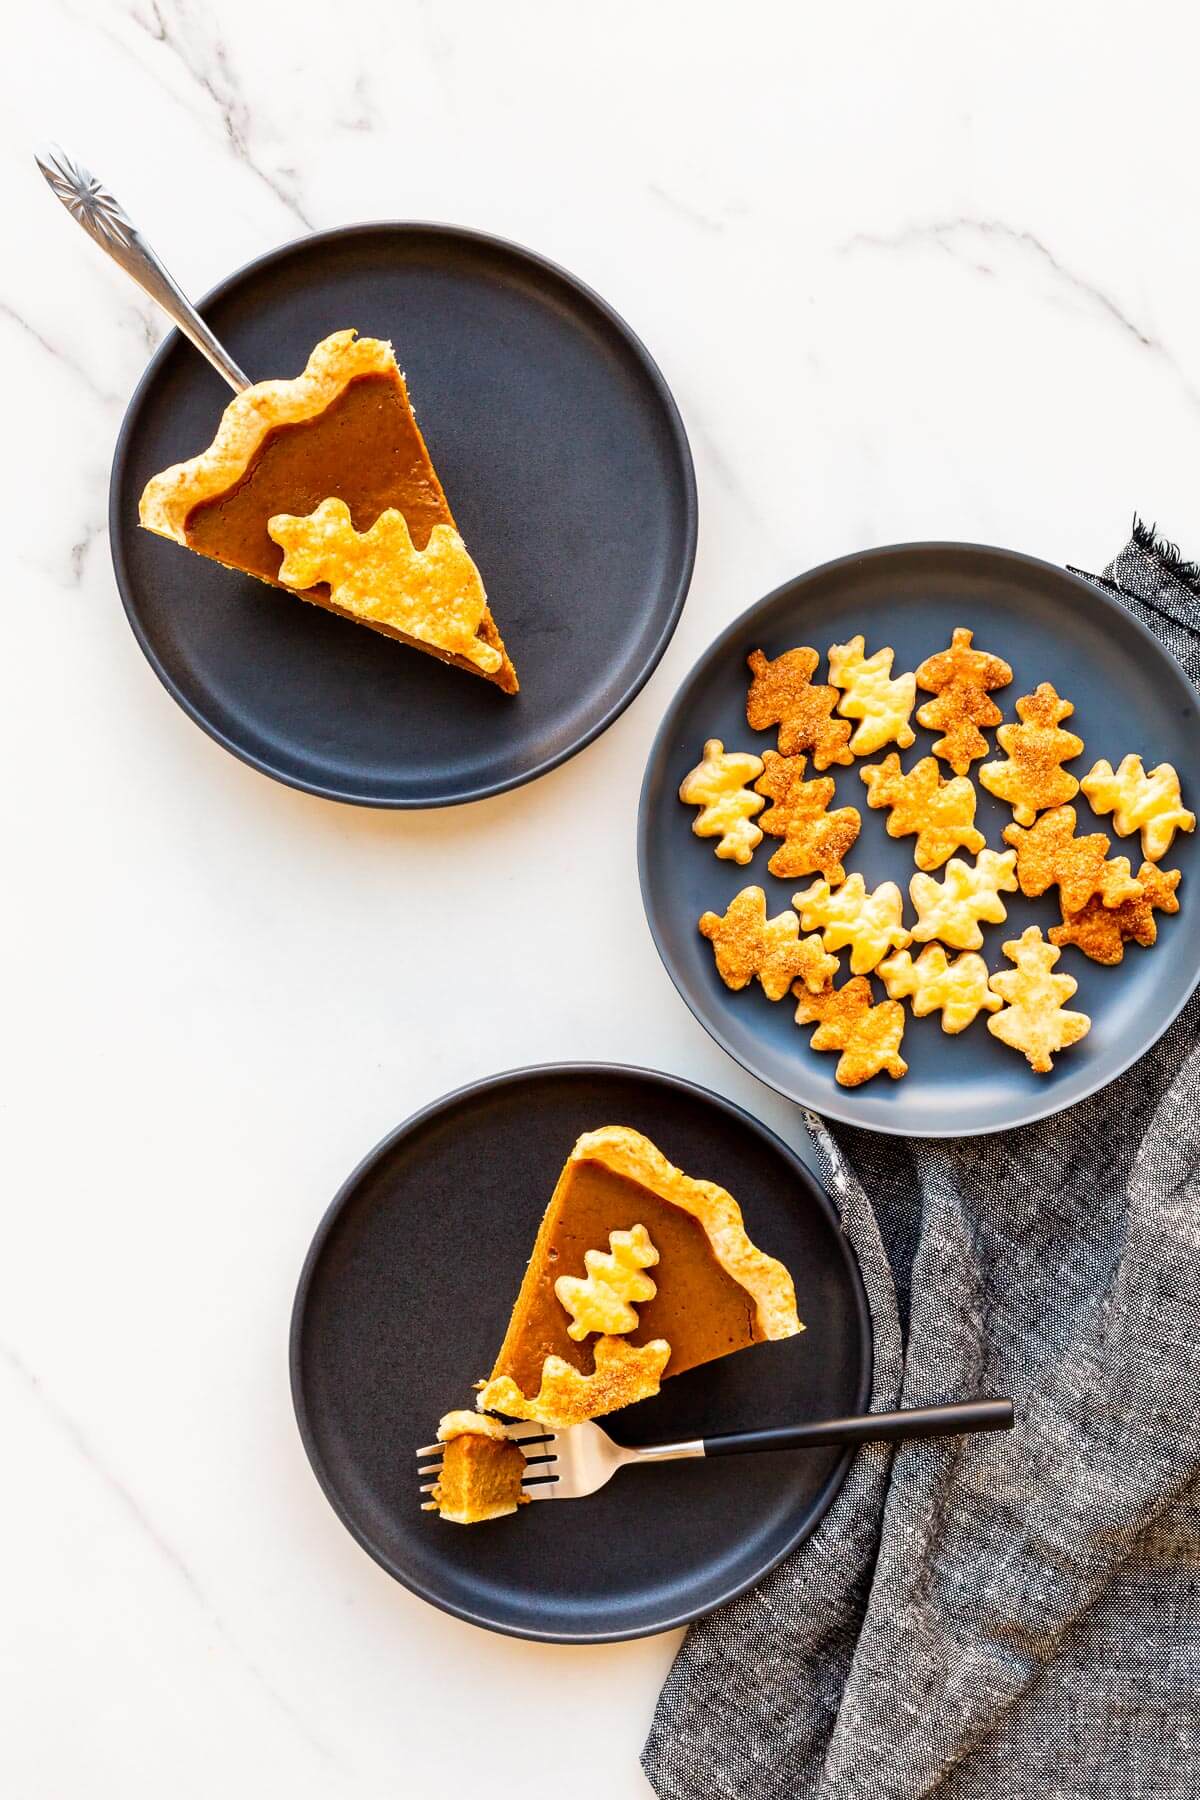
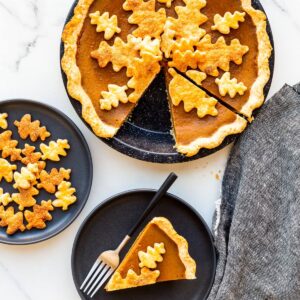
Decorating Pumpkin Pie
I top pumpkin pie with decorative pie cutouts, made from leftover pie dough. I bake the cutouts separately so that they are perfectly crispy and baked until golden brown. Not only do these pie cookies allow you to create a very festive decorated pumpkin pie, the cutouts allow you to hide any cracks that sometimes happen when the filling cools down and shrinks back slightly.
When you cut into a pie with decorative cutouts like this, be sure to lift off the cookies first to avoid them tearing through the rich, creamy custard.
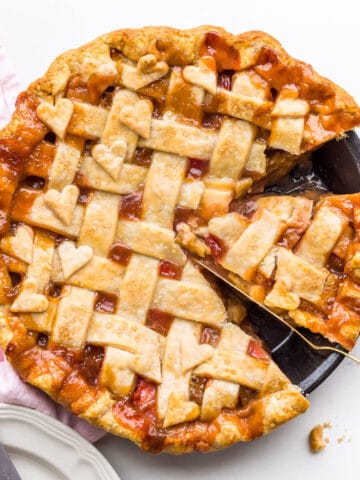
Another option would be to stencil the top using a doily and powdered sugar as I did for this apple butter pie.
Pumpkin Pie FAQs
Pumpkin filling or pumpkin pie mix in the can is not a good baking substitution for pure pumpkin without making some adjustments to your recipe. Canned pure pumpkin is 100 % pure Dickinson pumpkin. Nothing else is added to this product. It is canned plain and it is not to be confused with pumpkin filling or pumpkin pie mix, which contains more ingredients than just pumpkin.
Overbaked pumpkin pie filling will crack because the egg proteins contract and tighten. This also leads to the filling weeping when the pie cools, similar to what can happen with lemon bars. The good news is that the moisture that is released on the surface of the pumpkin pie can be blotted, gently, using a paper towel. Once blotted, it's unlikely that the pie will weep again.
More Pumpkin Baking Recipes
If you tried this pumpkin pie recipe without evaporated milk (or any other recipe on my website), please leave a ⭐ star rating and let me know how it went in the comments below. I love hearing from you!
📖 Recipe
Pumpkin Pie Without Evaporated Milk
Ingredients
Food processor all-butter pie dough for double crust
- 312 grams bleached all-purpose flour
- 15 mL granulated sugar
- 5 mL Diamond Crystal fine kosher salt
- 173 grams unsalted butter cut into cubes, very cold, plus extra to butter the pie plate
- 100 mL cold water
Egg wash
- 1 large egg(s)
- 15 mL water
- 1 pinch Diamond Crystal fine kosher salt
Pumpkin pie filling
- 3 large egg(s)
- 150 grams light brown sugar
- 440 mL pumpkin purée canned or homemade
- 188 mL whipping cream (35 % fat)
- 10 mL vanilla extract
- 7.5 mL ground cinnamon
- 2.5 mL ground ginger
- 1.25 mL ground nutmeg
- 1.25 mL ground allspice
- 0.625 mL ground cloves
- 0.625 mL Diamond Crystal fine kosher salt
Pie crust cutouts
- 30 mL cinnamon sugar more or less
Instructions
Easy all-butter pie dough in the food processor
- In the bowl of a food processor fitted with the metal blade, combine the flour, sugar, and salt. Add the cold butter and pulse to form a coarse crumble.
- Add the water and pulse it in, then let the food processor run just until the dough comes together. I use my Cuisinart Food Processor from Amazon for this recipe.
- Divide the dough in two and transfer both pieces to your work surface. Shape each piece into a disk and wrap each in plastic wrap and chill for 30 hour.
- After 30 minutes of chilling, retrieve one disk of dough. Roll the disk to a 14" circle. Transfer to buttered metal pie plate and fit it in place.
- Trim and fold under the edges, then crimp the edge using your thumb and forefingers to create a wavy edge.
- Place the pie shell in the fridge for 30 minutes until the pie shell is cold and hard.
- Preheat the oven to 425 °F (220 °C). Move the oven rack to the lower ⅓ of the oven.
- Retrieve the pie shell from the fridge. Line with a big square of parchment and fill the pie with dry beans or pie weights, enough to fill the pie shell up to the top of the crimped edges.
- Par-bake the pie crust for 20 minutes.
- Remove the pie shell from the oven and place on a cooling rack. Carefully lift off the parchment with the pie weights. Set aside. Put the pie shell back in the oven and continue to bake for another 3-5 minutes until the bottom looks dry and set.
- Take the par-baked pie shell out of the oven. Lower the oven temperature to 375 °F (190 °C).
Egg wash
- Whisk together the egg, water, and a pinch of salt while the pie shell is baking.
- As soon as the par-baked pie crust comes out of the oven, brush the bottom and sides with egg wash but do not brush the edges! Let the pie shell cool completely while you make the filling. Save the leftover egg wash for the pie crust cutouts.
Pumpkin pie filling
- In a large bowl (preferably one with a pouring spout like this), whisk together the filling ingredients until thick, creamy, and homogenous.
- Once the par-baked pie shell has cooled, pour the filling in it.
- Bake the pumpkin pie until the edges are set but the centre still jiggles a little. This takes about 35-40 minutes.
- Take the pie out of the oven and place on a cooling wrack. Let the pie cool to room temperature, then refrigerate for several hours or overnight so that the pie sets properly before serving.
- Decorate with pie cutouts before serving with whipped cream.
Pie crust cutouts
- Preheat the oven to 425 ºF (220 °C).
- On a lightly floured surface, roll the second disk of dough out until it's ¼-1/8" thick.
- Cut out leaf shapes (or whatever shape you want). Place them on parchment-lined baking sheets, leaving a little space between them for air circulation.
- Brush the cutouts with a thin layer of the leftover egg wash and sprinkle with cinnamon sugar.
- Bake the cutouts until evenly golden brown and baked through, about 15-20 minutes.
- Let the cutouts (and the pie) cool completely before decorating. You can store the leftover crust cutouts in an airtight container and eat them like cookies.
Notes
- If you are short on time, use a store-bought pie crust. I prefer to use frozen pie crust from my local bakery, made with butter.
- Use canned pumpkin purée, not canned pumpkin pie filling. If using homemade pumpkin purée (or even squash purée), make sure to strain it before measuring and using it to remove the excess water.
- This recipe calls for Diamond Crystal fine Kosher salt. If using regular table salt, add half the amount or the recipe may be too salty!
- Par-bake the crust before filling to ensure that it will bake properly to a golden-brown crispy crust.
- Bake the filled pie until the filling is set around the edges but still jiggles slightly in the middle.
- I like to use the harvest cookie cutter set for creating decorative pie crust cookies to top fall pies and you can buy the set on Amazon.
Explore More With AI
Nutrition
Nutrition information is automatically calculated and should only be used as an approximation.


Leave a Reply