

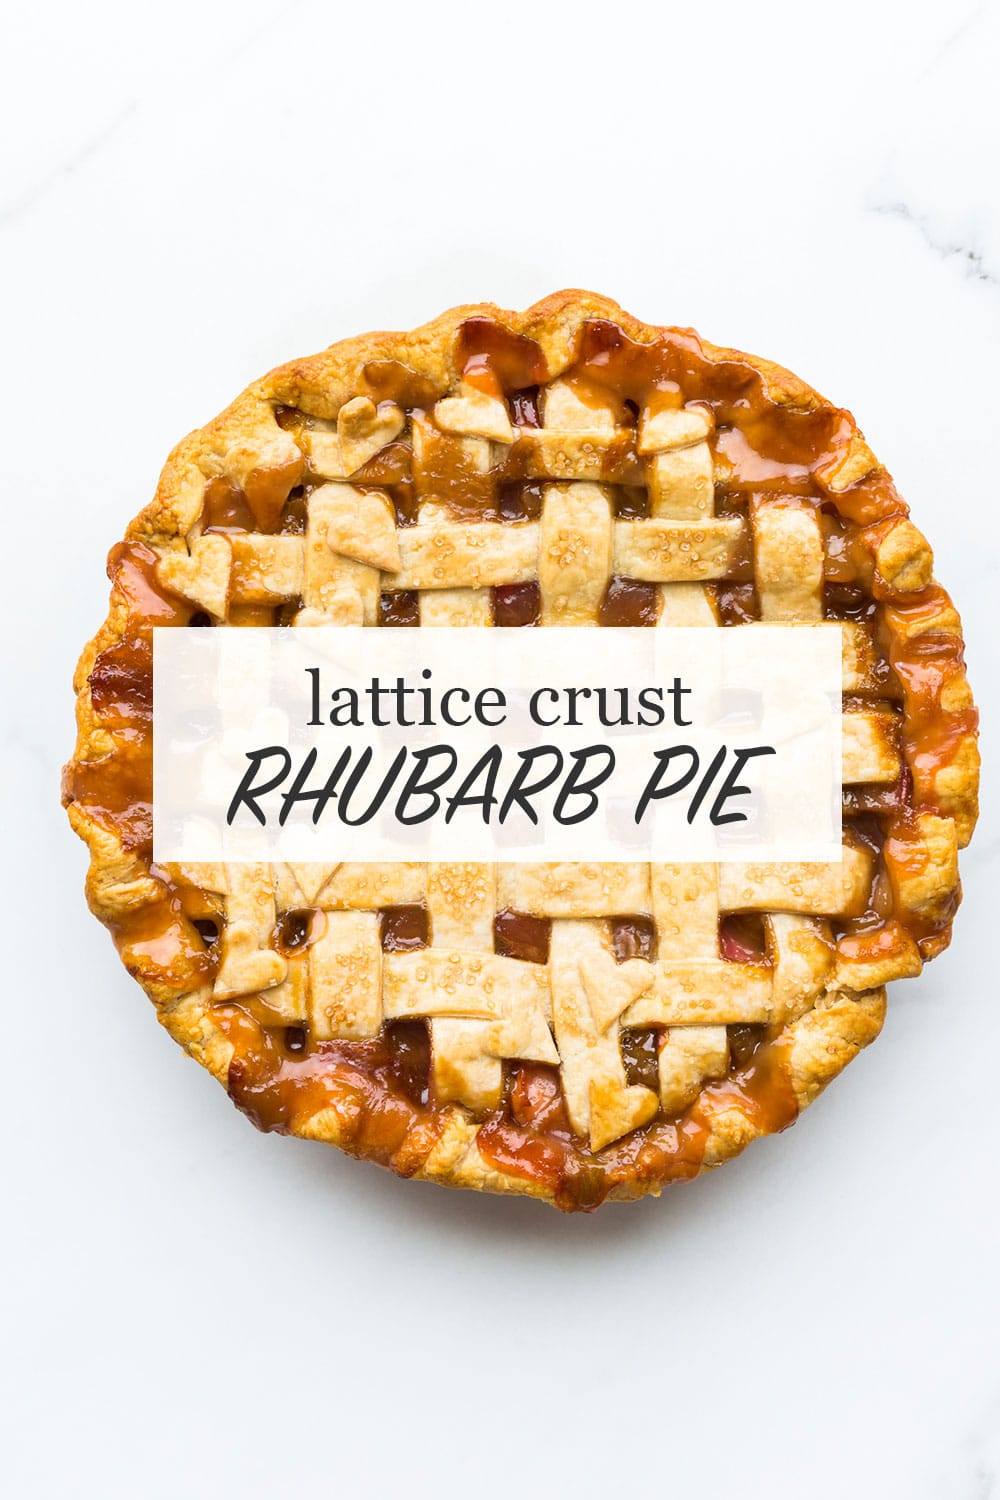
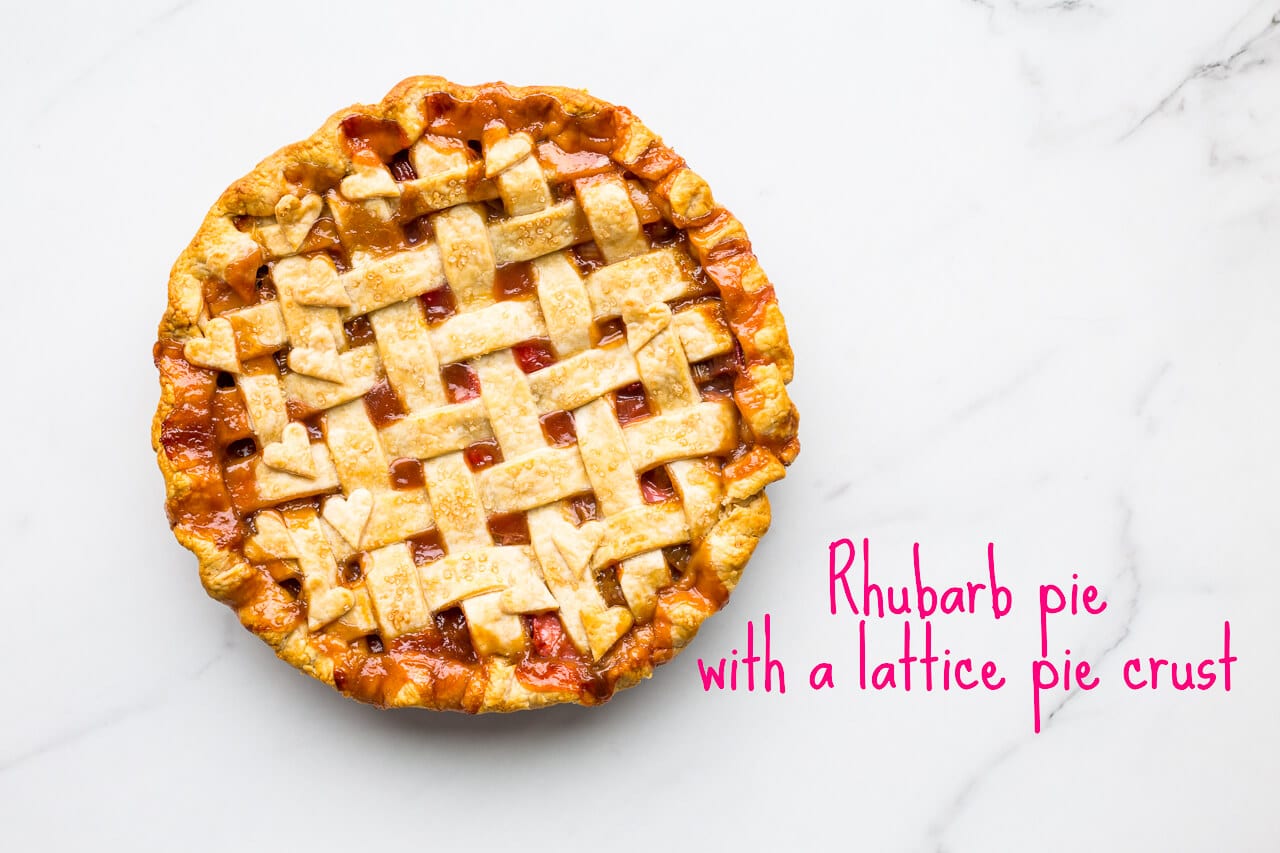
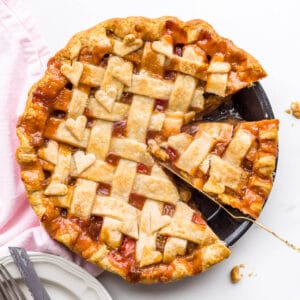
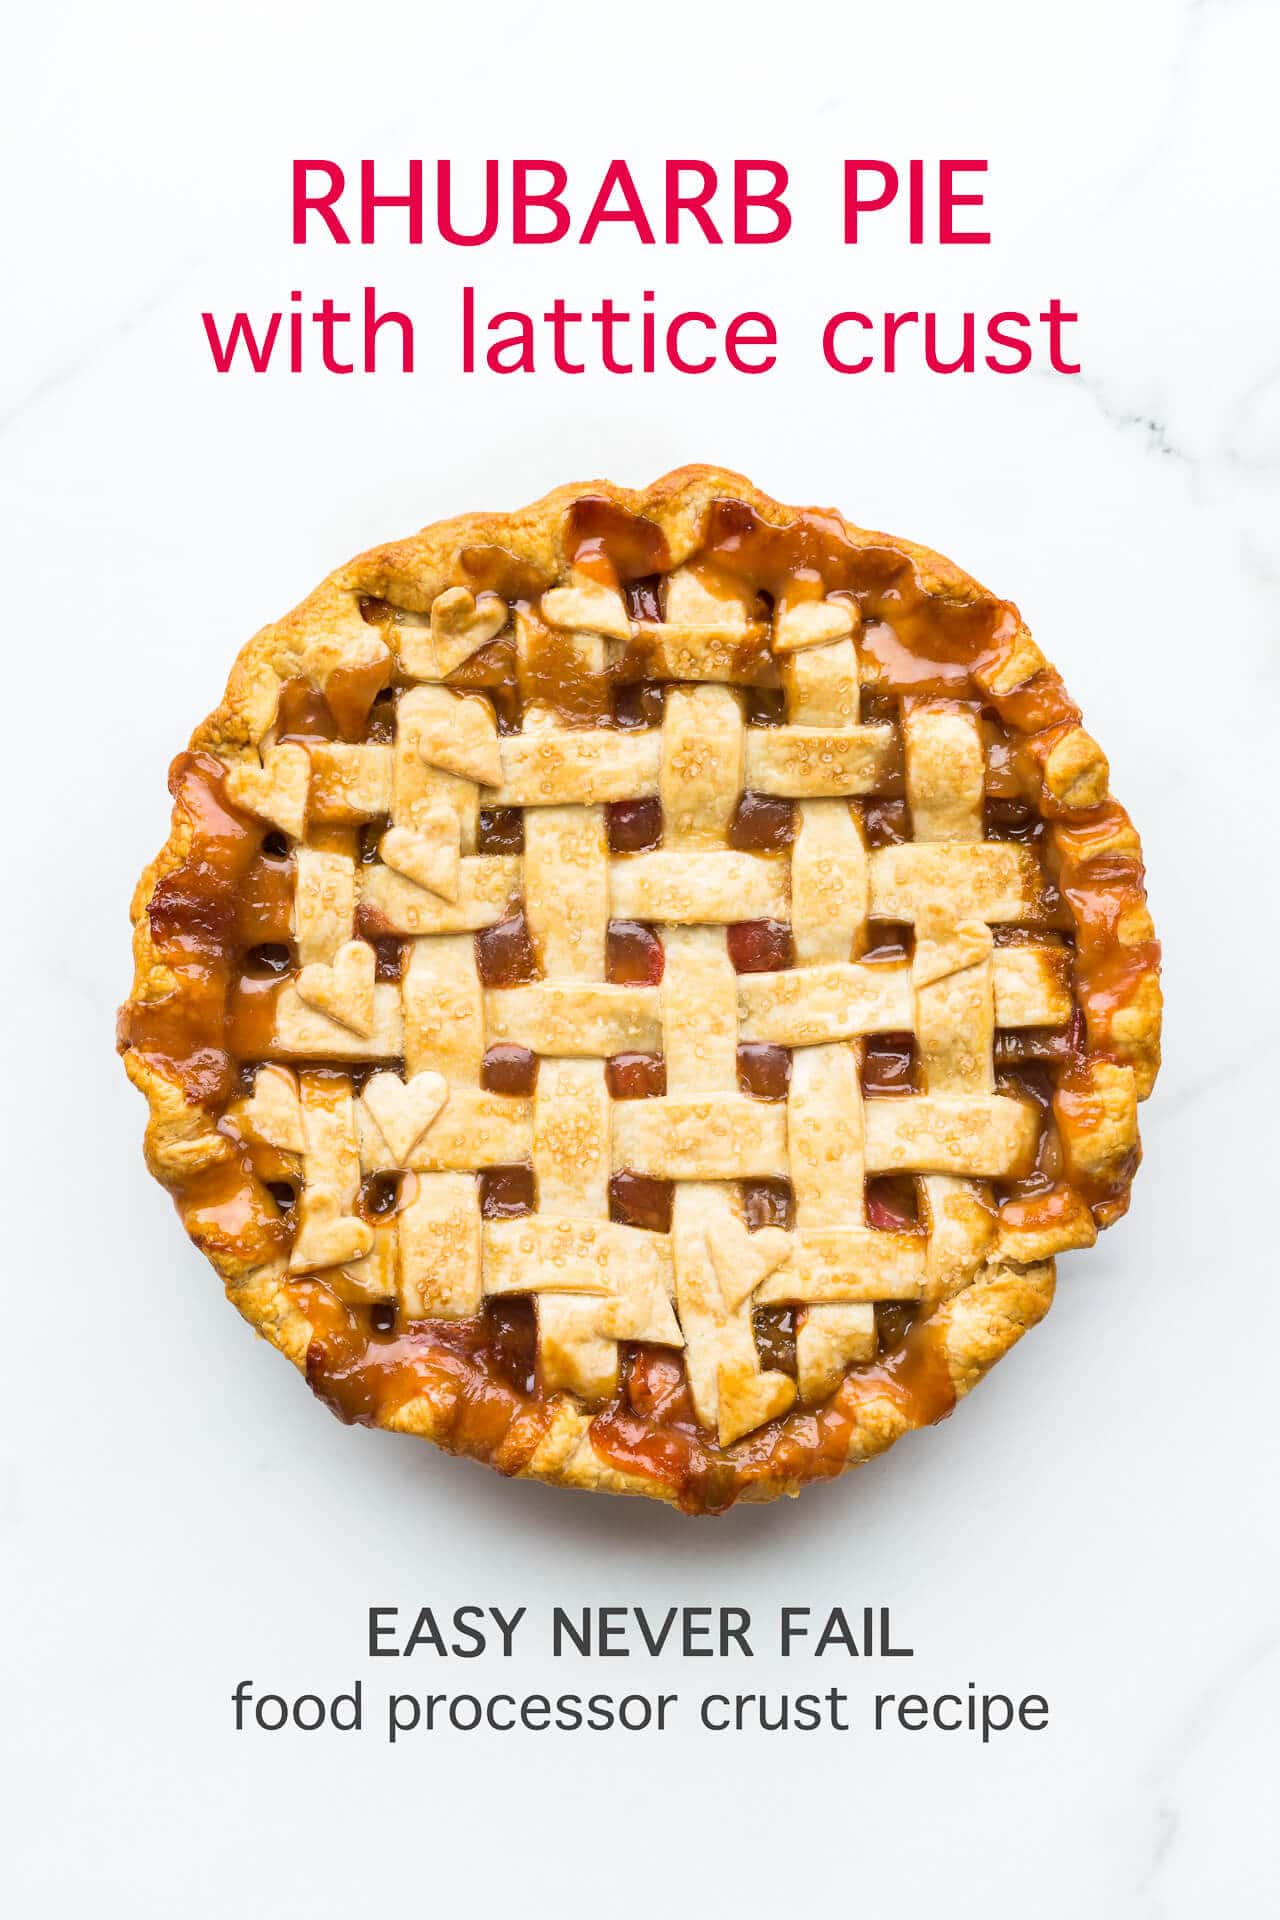
In spring and early summer, take your fresh rhubarb and make the best rhubarb pie without strawberries. The filling is thickened with tapioca starch so that it is juicy, but not runny. Watch the how-to video for weaving the lattice top crust.
Jump to:
- Rhubarb contains a lot of water
- Thickener for rhubarb pie: tapioca starch
- What you need to make this pie
- Par-bake the rhubarb filling
- Easy food processor all-butter pie dough
- Special tools and equipment
- Video demo of how to make a lattice crust
- Slicing pie
- Variations
- Substitutions
- What to do with pie dough scraps
- Other rhubarb recipes to bake
- Freezing instructions for rhubarb pie
- What to serve with pie
- Storage
- 📖 Recipe
Rhubarb contains a lot of water
Rhubarb is rather deceptive: if you look at it and you cut into, it doesn't exactly seem like a juicy fruit, especially when compared to something like a plum or a peach.
Rhubarb actually does contain a lot of water. Rhubarb is almost 94% water! This means that as you bake your rhubarb pie, the cells will break down and the water will be forced out into your pie filling. All that extra water will make a very soupy rhubarb pie that is too liquidy and difficult to serve, if you aren't careful. To avoid this, you have to use the right thickener.
Thickener for rhubarb pie: tapioca starch
Like with all pie fillings, you have many options to gel all that liquid and set the filling: flour, cornstarch, quick-cooking tapioca, and tapioca starch, among many others.
For rhubarb pie, I use tapioca starch as the thickener for the filling and I recommend to use a lot of it: 60 grams (½ cup) tapioca starch to gel 2 pounds of rhubarb. And though this seems like too much tapioca starch because it is a lot more thickener than you would use for, say, an apple pie, after letting the baked pie rest/gel overnight, the set of the pie is perfect. Soft, still a touch fluid, but not soupy at all. This is the same ratio I used for to make the best blueberry pie, with a perfect set that slices beautifully.
Rhubarb pie filling ratio: use 30 grams (¼ cup) of tapioca starch to properly set every 450 grams (1 pound) of fresh rhubarb. That's the rhubarb pie filling ratio to keep in mind for future pies. It works!
In general, tapioca starch has a higher thickening power than flour, which means:
- use tapioca starch to thicken pies made with very wet fruit, like rhubarb, raspberries, blueberries, etc. For this kind of fruit, you will need a fair amount of starch (as in the recipe below)
- use tapioca starch if you want to achieve a clear set, but use sparingly for fruit that are less juicy, like in this wine-poached pear pie where I only used 1 tablespoon
- use flour as a thickener for an apple pie, like in this maple apple pie or this whiskey peach pie
- use eggs for a custard filling like in this beautiful, traditional maple syrup pie, apple butter pie, or pumpkin tarts where your filling is made from a liquid like maple syrup
Note that for crisps and crumbles, like this blueberry rhubarb crisp with oat crumble topping, I like to use less thickener because I prefer the fruit layer in these to be more "saucy" and less set.
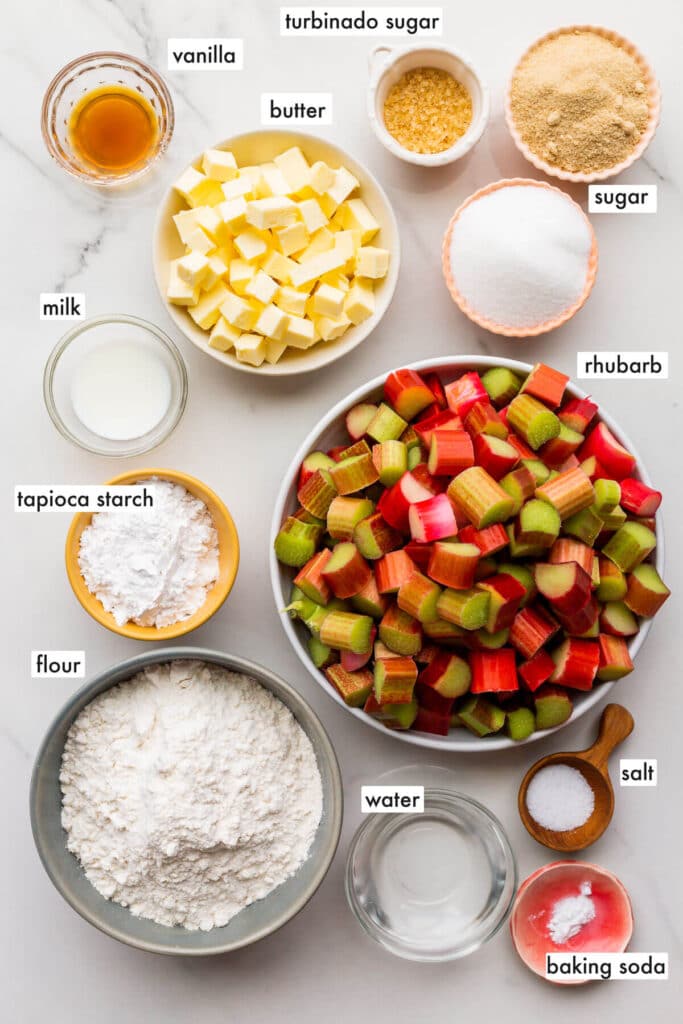
What you need to make this pie
To make an all-butter pie dough for a double crust
This recipe requires enough pie dough for two crusts (top and bottom). To make enough dough for this double crust pie, you will need:
- all-purpose flour is the base ingredient for the crust to give it structure and to help the crust hold its shape as the pie bakes
- granulated sugar is added to the crust (just a little) to sweeten it slightly but to also help with browning
- salt is really important to balance out the sweet flavour in the filling and also to balance out the sour notes. Don't skip it. I like to use Diamond Crystal fine kosher salt, but table salt will work, though the pie dough will be saltier and you may want to halve the salt.
- butter, preferably unsalted butter because you add salt to the dough, but if you have salted, it will work. Just adjust the salt in the recipe accordingly, otherwise your pie crust may be too salty
- cold water is needed to develop some of the gluten in the flour and also to hydrate the dough.
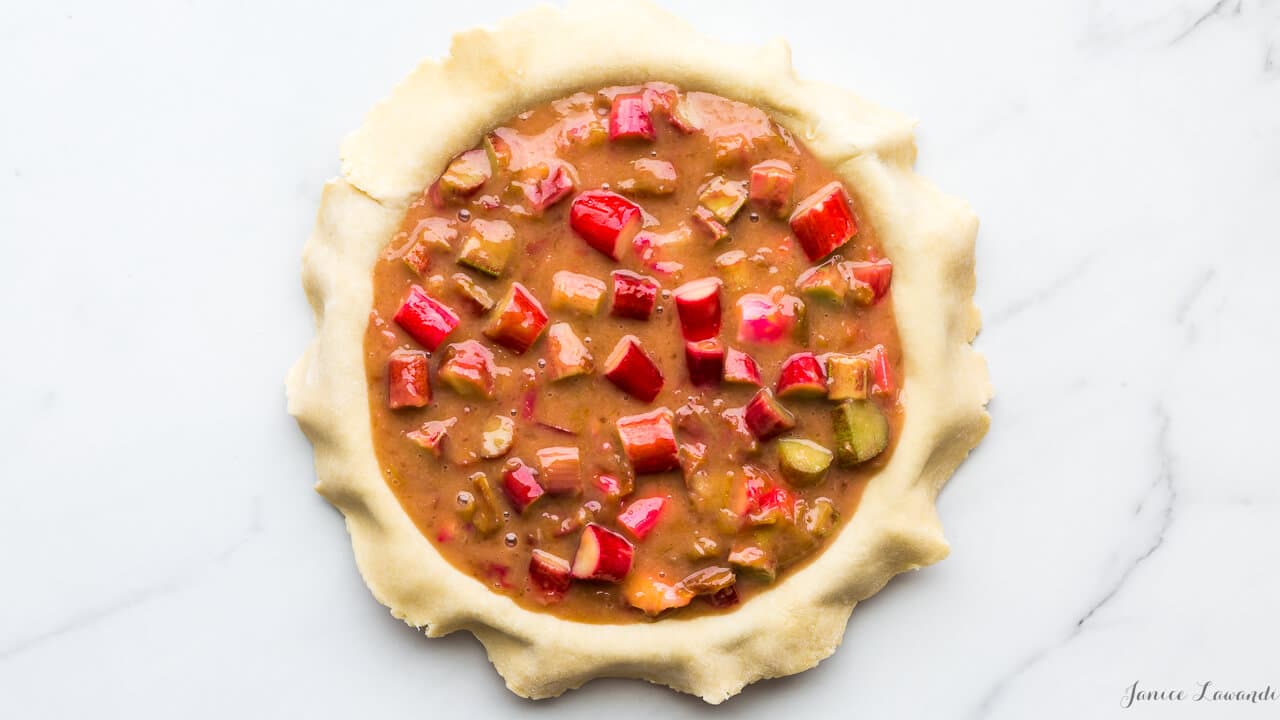
To make the rhubarb pie filling
Because of the water content of rhubarb, making pie filling can be tricky. Here's are the ingredients you will need to make this recipe:
- fresh rhubarb, washed and trimmed-remove and discard the leaves which have a higher concentration of oxalic acid which is toxic
- sugar to sweeten the rhubarb, which can be very sour-I used a combination of maple sugar and regular granulated sugar but all granulated sugar works too
- a thickener, in this case tapioca flour (also called tapioca starch), but arrowroot flour (also called arrowroot starch) could work too
- vanilla bean paste or vanilla extract to add some depth of flavour to the rhubarb filling
- milk or an egg wash if you prefer to give the top crust more shine
- turbinado sugar, which adds a crunchy texture and sweet flavour to the top crust
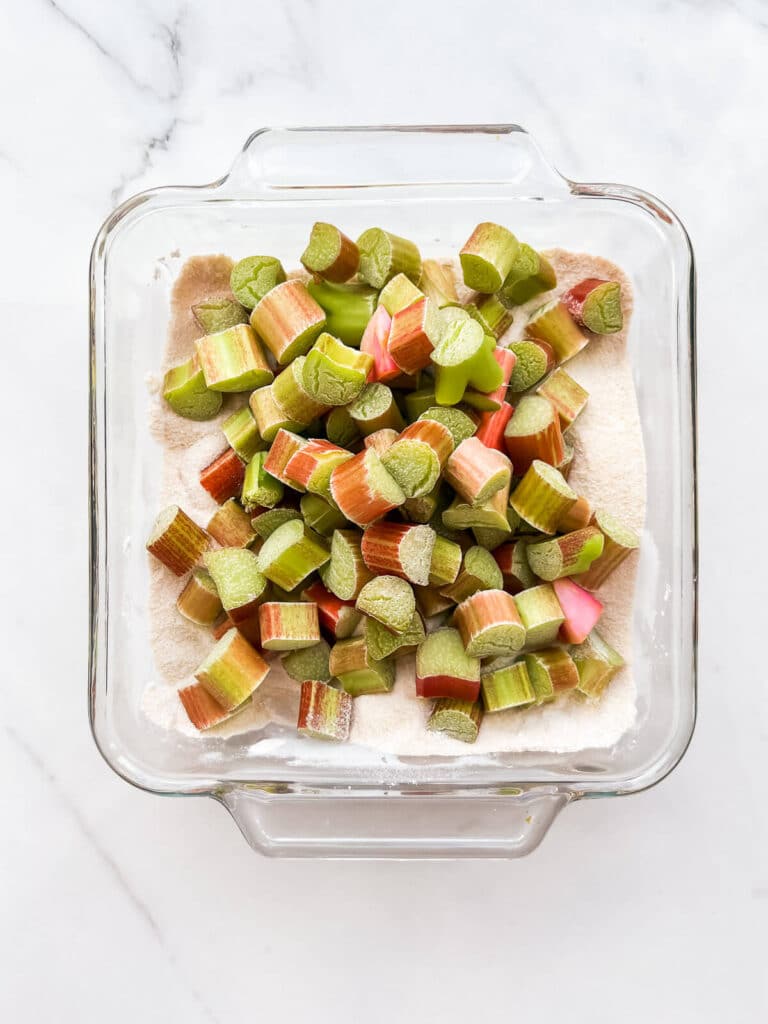
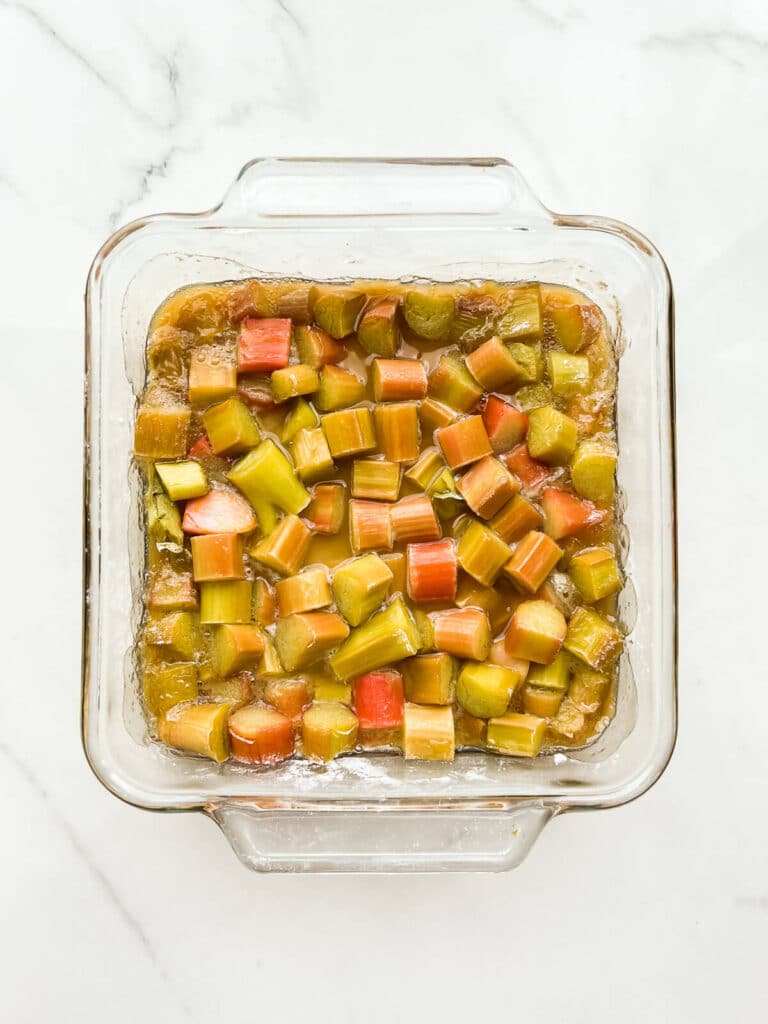
Par-bake the rhubarb filling
For this rhubarb pie recipe, I used fresh rhubarb and, just like with many blueberry pie recipes, I cooked half the rhubarb to soften it and allow the juices to run, then mixed that soft rhubarb filling with more fresh rhubarb to make the ultimate rhubarb pie filling. This is a technique I picked up from Stella Parks.
Par-cooking the filling allows you to more evenly mix in the sugar which will dissolve with the sugar of the fruit and the thickener will begin to hydrate so that it gels more evenly. The goal is to avoid having a pie filling with clumps of sugar at the bottom or patches of starch.
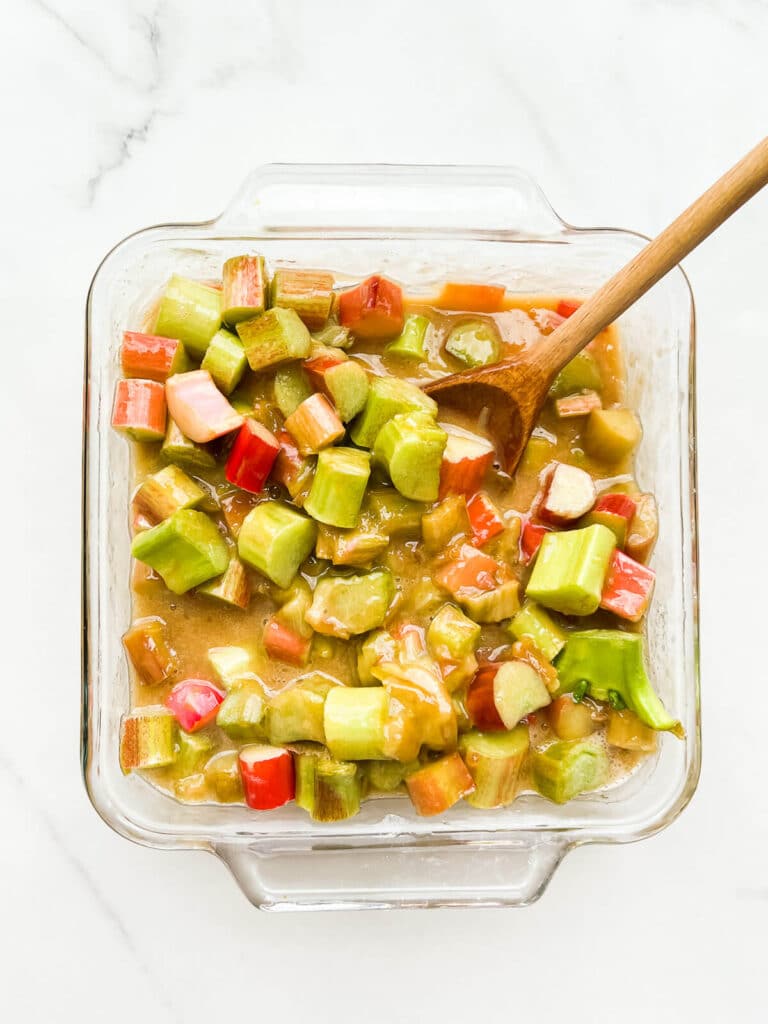
I sweetened the filling with a mixture of granulated sugar and maple sugar (for some extra flavour) and I added a lot of vanilla, which really enhanced the filling. I also followed Stella Parks trick to add a little baking soda to the filling to reduce that astringent "spinach teeth" filling that rhubarb can leave behind. It certainly did not eliminate the issue, but I felt it was reduced. Definitely something to experiment with next time you make a rhubarb pie or a rhubarb crumble.
Easy food processor all-butter pie dough
After unsuccessfully trying other people's recipes for pie dough that have more butter to achieve a richer crust, more complicated folding techniques for better layering, and different rolling techniques, I decided to throw all those recipes out the window and to return to the pie dough that works for me. This pie dough might be less rich than some, and it's certainly not as flaky as a rough puff pastry, but you know what? This pie dough works well and is very easy to make and to use.
The dough is made in the food processor. It's extremely easy to roll and to work with, it keeps it's shape in the oven, it doesn't ooze butter as it bakes... Screw all the other recipes. This is still my go-to crust. I like it. It works well. It's forgiving. Most importantly, after hours of pie-making work, this dough doesn't leave me feeling like the worst baker on the planet like some of the others that have complicated my life over the years.
If making pie crust from scratch scares you, be sure to check out my pie crust masterclass, which includes video tutorials for making pie crust in the stand mixer, food processor, and by hand!
Special tools and equipment
Pie doesn't require that many tools if you make the dough by hand. Still, this list of equipment will make baking pies a lot easier for you. Here are some of my favourite pie tools:
- food processor-you can make the dough by hand using a bowl and your fingers, but I like the ease of making pie dough in a food processor
- pie plate-I prefer a metal pie plate because it's a better heat conductor, whereas glass is insulating
- rolling pin-I am most comfortable with a French rolling pin made out of wood. It has tapered ends and I find it easy to handle
- pastry brush-I prefer natural bristle pastry brushes, though silicone works too
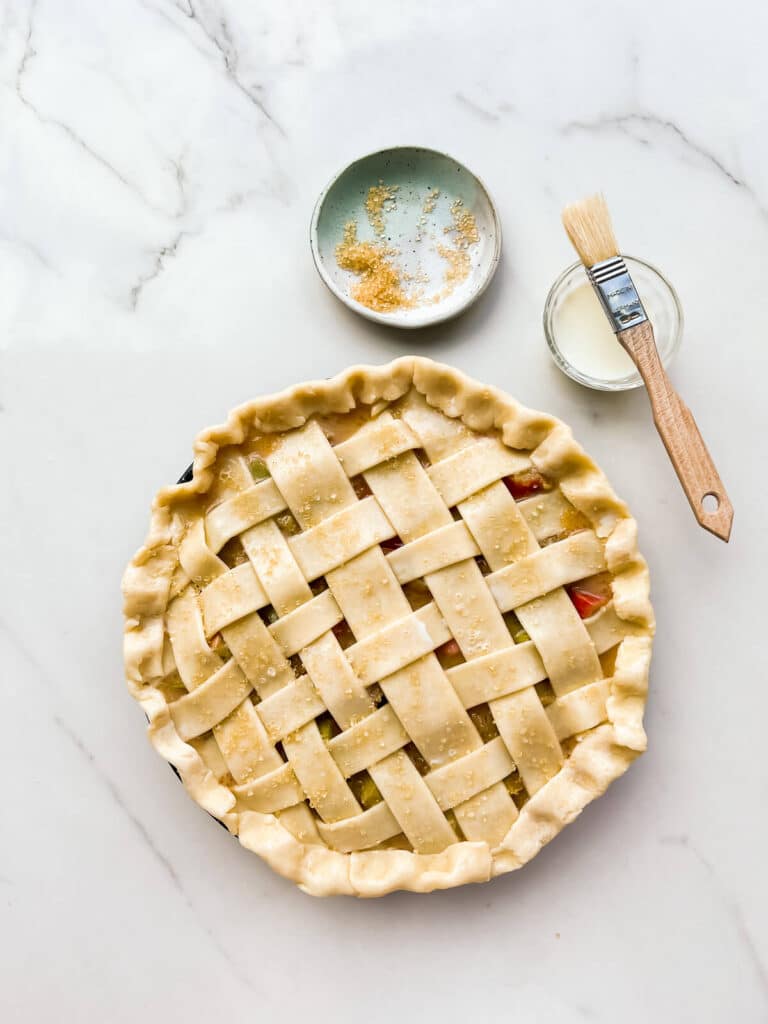
- pizza cutter, also called a pizza wheel to cut out strips. You could also invest in an adjustable lattice pastry cutter, which is like five pizza wheels in one so that you can cut more strips at a time, faster and more evenly.
- large rimmed sheet pan, like a half sheet pan lined with parchment to catch the drips as the pie bakes in the oven. Trust me when I say you don't want to skip this, unless you like cleaning the floor and racks of your oven
- glass baking dish, like an 8x8 Pyrex dish to roast the rhubarb. Note that you could also do this in a saucepan on the stove, but I like the ease of just throwing the pan in the oven so that I can make the crust while the fruit is roasting.
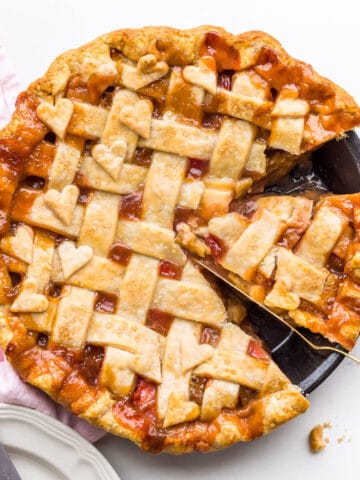
Video demo of how to make a lattice crust
I have messed up lattice crusts so many times, I felt like it was time I took matters into my own hands and master the lattice pie crust. If you ever wondered how to make a lattice crust (or struggled like me), I have included a video to show you how to weave the lattice using raw pie dough.
The most important rule for a beautiful pie crust that holds its shape is to start with a dough that has the butter well incorporated into it, in smaller pieces. It will be a little less flaky, but the results are better for holding shapes. The texture is still crisp and light on the edges and it holds a crimp very well! I like this easy all-butter pie dough made in the food processor.
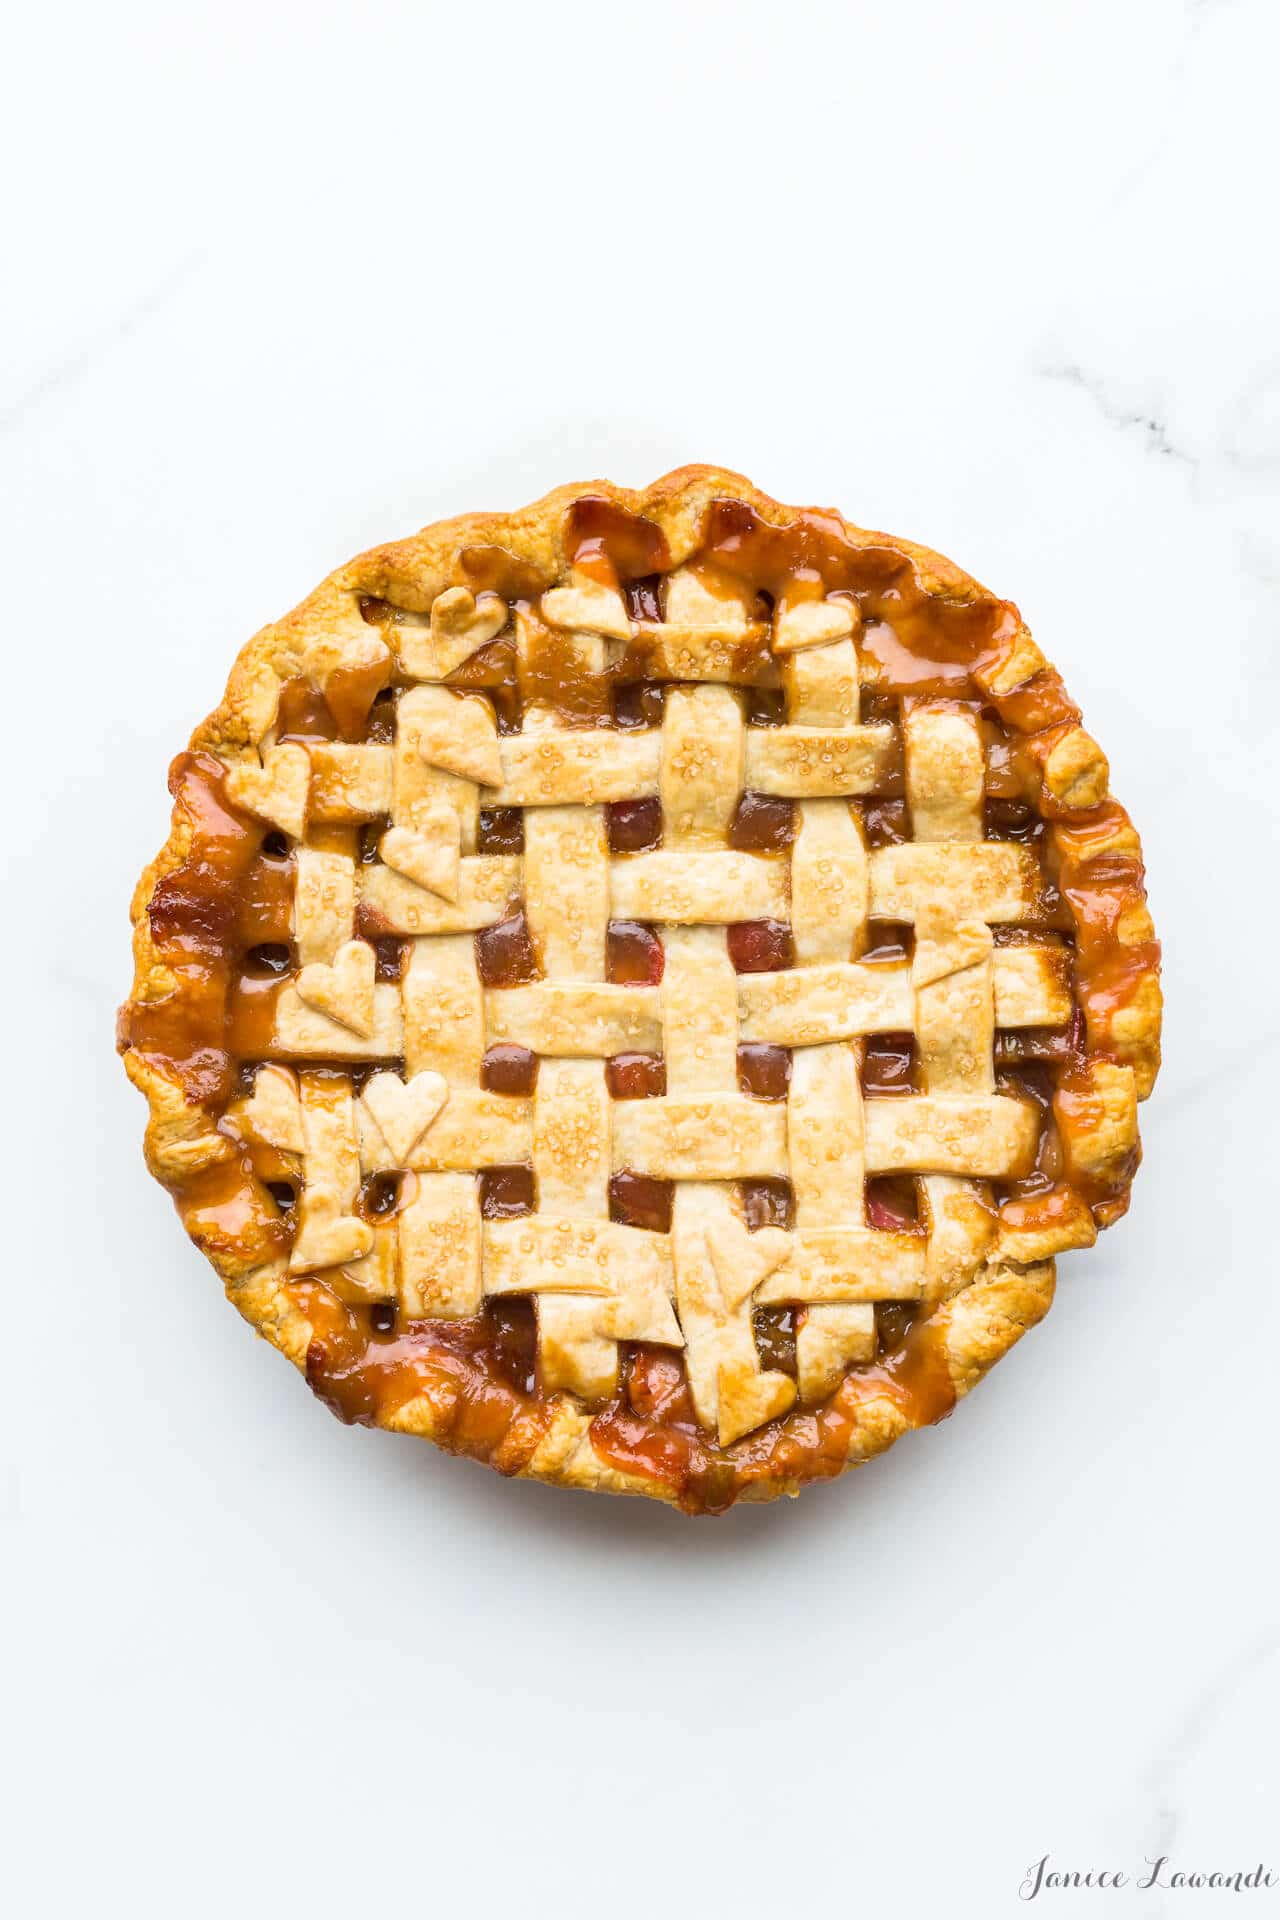
To make a lattice pie, you need enough dough to make a double-crust pie. You can vary the size and number of strips of dough you use to make a really big lattice (with just 2 or 4 strips) or a very fine lattice (with as many as 24 or more strips of dough). All roads lead to pie and hopefully only smiles (and no tears). Read about how to make a lattice pie crust for more information.
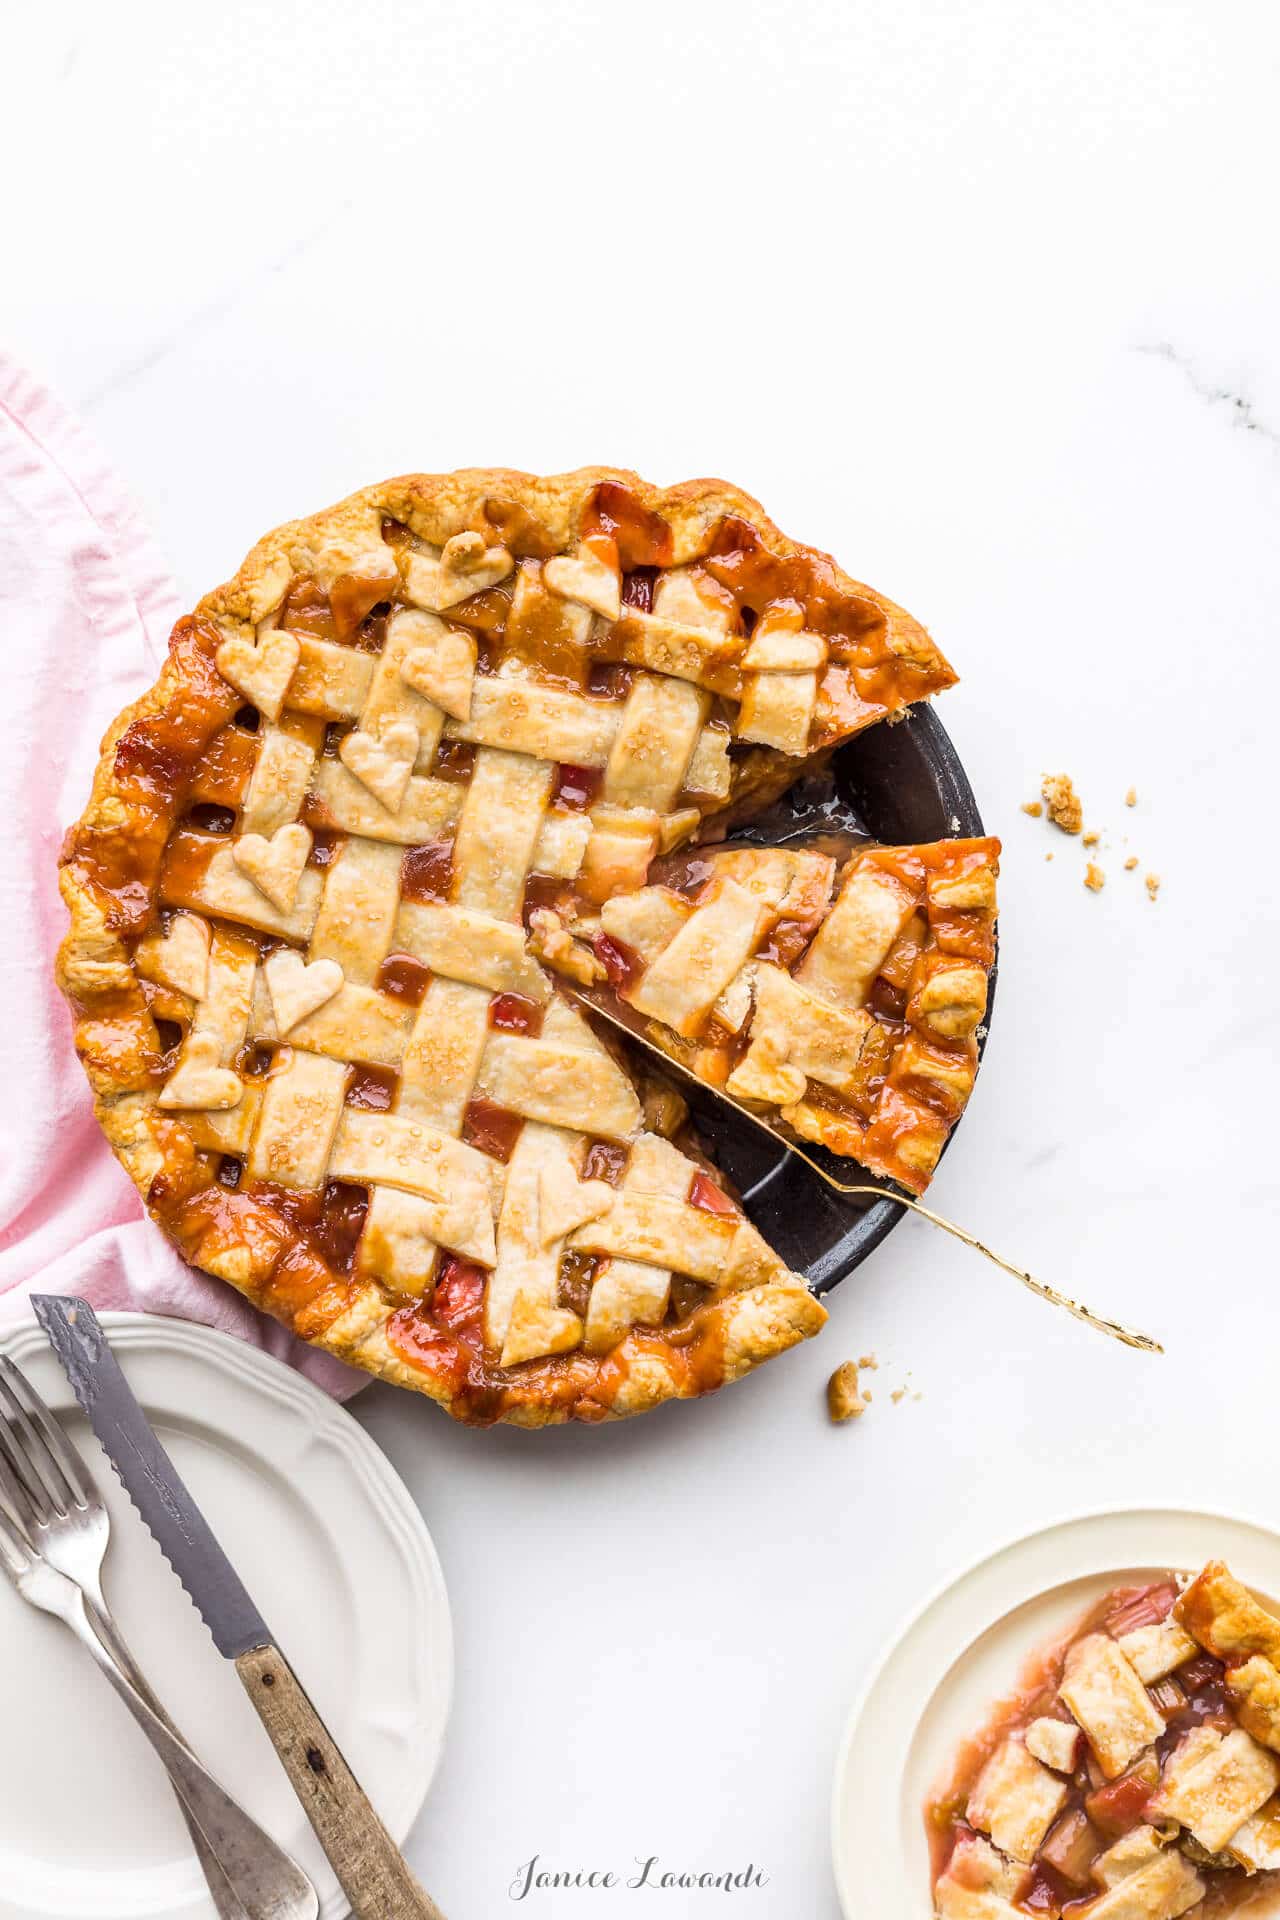
Slicing pie
This rhubarb pie filling is perfect, in my opinion. But you can't slice it right away! It's better to let the pie cool down and to give the filling time to gel and set. If you let the pie cool down completely to room temperature for at least 12 hours, the filling will thicken perfectly. You can cut a slice very cleanly from the pie with zero soupiness!
Variations
I love rhubarb pie because it's tart, but if you find rhubarb a little too sour and astringent, feel free to replace half the weight of rhubarb with strawberries.
Substitutions
Pies are tricky and you have to make substitutions carefully. Here are a few options:
- replace the maple sugar with granulated sugar or light brown sugar
- replace the tapioca starch with arrowroot starch preferably, but cornstarch should also work
- replace the homemade pie dough with a store-bought pie dough, defrosted overnight in the fridge. You will need a double crust dough, so about 700-800 grams of pie dough to do the lattice.
What to do with pie dough scraps
Inevitably, when you make a pie, you will be left with a pile of pie dough scraps. Gather them up and press them together to shape them into a disk and use them to make pie crust cookies!
Other rhubarb recipes to bake
This rhubarb pie with a lattice crust is one of the best pies I've made in a long time and one of the best rhubarb recipes on the blog. I'm hoping this double crust rhubarb pie is the first of many great pies to come.
If pie seems like too much effort right now, you have other options of recipes to bake with rhubarb:
- a plain but super comforting rhubarb crumble, this fantastic blueberry rhubarb crisp, or even these honey-sweetened strawberry rhubarb crumbles baked in ramekins
- rhubarb bostock recipe made with slices of brioche, almond cream, rhubarb jam, and fresh rhubarb
- rhubarb scones, like small tea biscuits made with rhubarb
- rhubarb jam without pectin is also a great option, if you don't have time for any of the more elaborate recipes.
Freezing instructions for rhubarb pie
Please note that if you want to freeze this pie, you can freeze it after baking. Then defrost overnight in the fridge, and warm up in the oven before serving.
If you want to freeze this pie baking, here are the steps:
- make the filling and the dough, assemble the pie as if you were going to bake it today
- freeze the unbaked assembled pie completely for about 1 hour until it's frozen solid
- wrap the frozen rhubarb pie in plastic wrap tightly. Use several layers
- wrap in aluminum foil and label the pie with what it is and today's date
- store in freezer
Baking a frozen raw pie
You can bake the raw pie from frozen but it will take ages to properly bake the crust and get the filling to heat through and come to a boil in the middle. For this reason, I recommend defrosting the pie in the refrigerator overnight before baking. Place it on a parchment-lined sheet pan to defrost in the fridge overnight, in case some of the juices overflow.
What to serve with pie
Serve this rhubarb pie à la mode with scoops of creamy homemade ice cream! You're going to love it with:
Storage
I prefer to store this pie at room temperature, wrapped with aluminum foil. I don't think it's necessary to store it in the fridge, but if it's very hot where you live, you might want to consider refrigerating the baked pie in that case.
📖 Recipe
Best Rhubarb Pie with Lattice Crust
Ingredients
Rhubarb pie filling thickened with tapioca starch
- 900 grams fresh rhubarb
- 150 grams granulated sugar
- 150 grams maple sugar
- 60 grams tapioca starch
- 1.25 mL Diamond Crystal fine kosher salt
- 0.625 mL baking soda
- 15 mL pure vanilla extract
Easy all-butter pie dough made in food processor
- 312 grams bleached all-purpose flour
- 15 mL granulated sugar
- 5 mL Diamond Crystal fine kosher salt
- 173 grams unsalted butter cut into cubes, very cold
- 100 mL water
Optional
- 1 tablespoon whole milk (3.25 % fat)
- 1 tablespoon Turbinado sugar
Instructions
Start by making the rhubarb pie filling
- Preheat the oven to 400ºF (200 °C).
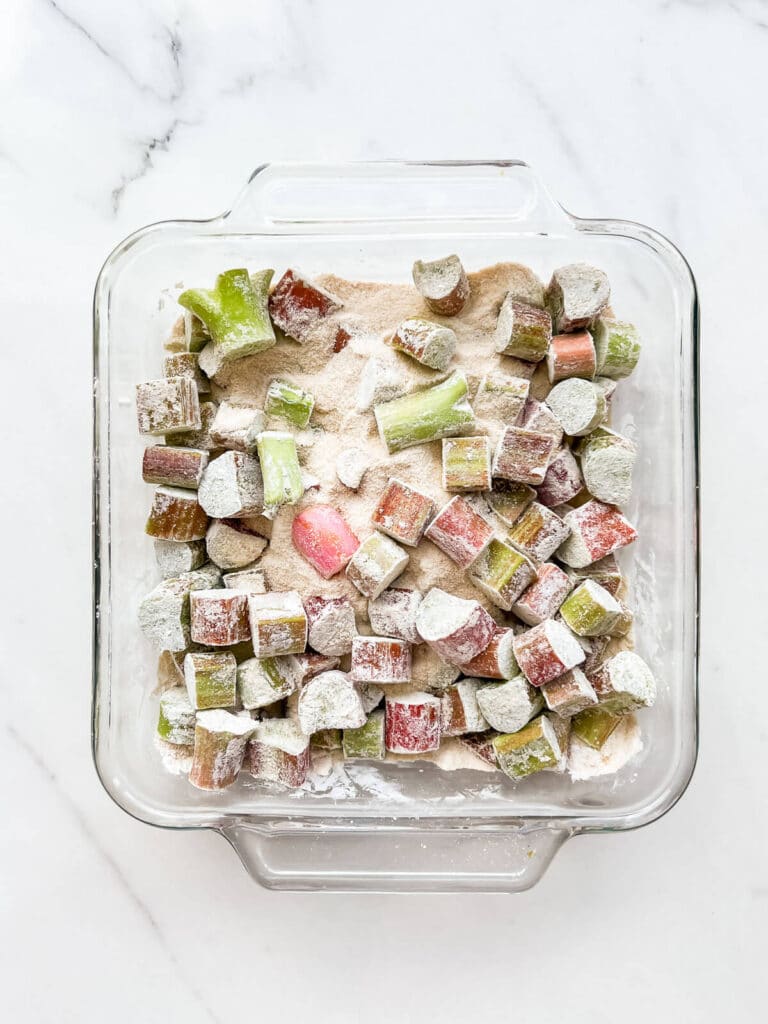
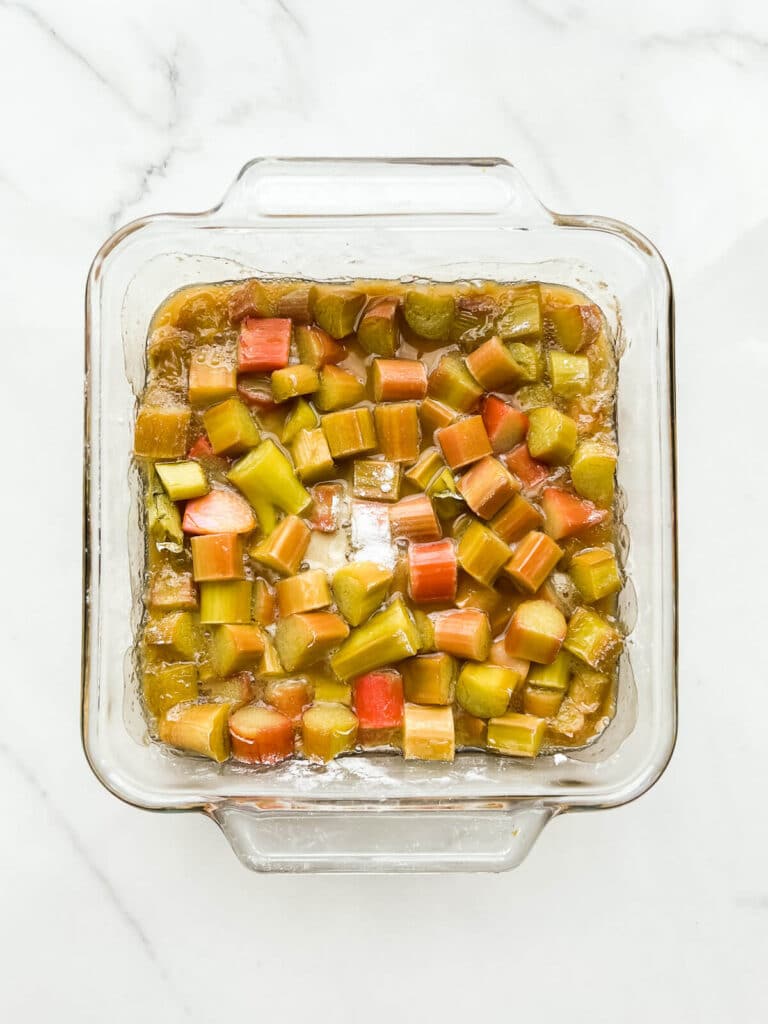
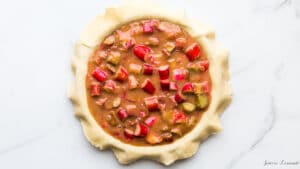
- Slice the rhubarb into ½-inch to 1-inch chunks. Place half of the chopped rhubarb into a 8x8 non-reactive glass baking (I used a Pyrex baking dish you can find on Amazon). Mix it with the granulated sugar, maple sugar, tapioca flour, and salt. Cover tightly with aluminum foil. Bake for 30 minutes or until the fruit is soft and the juices have run.
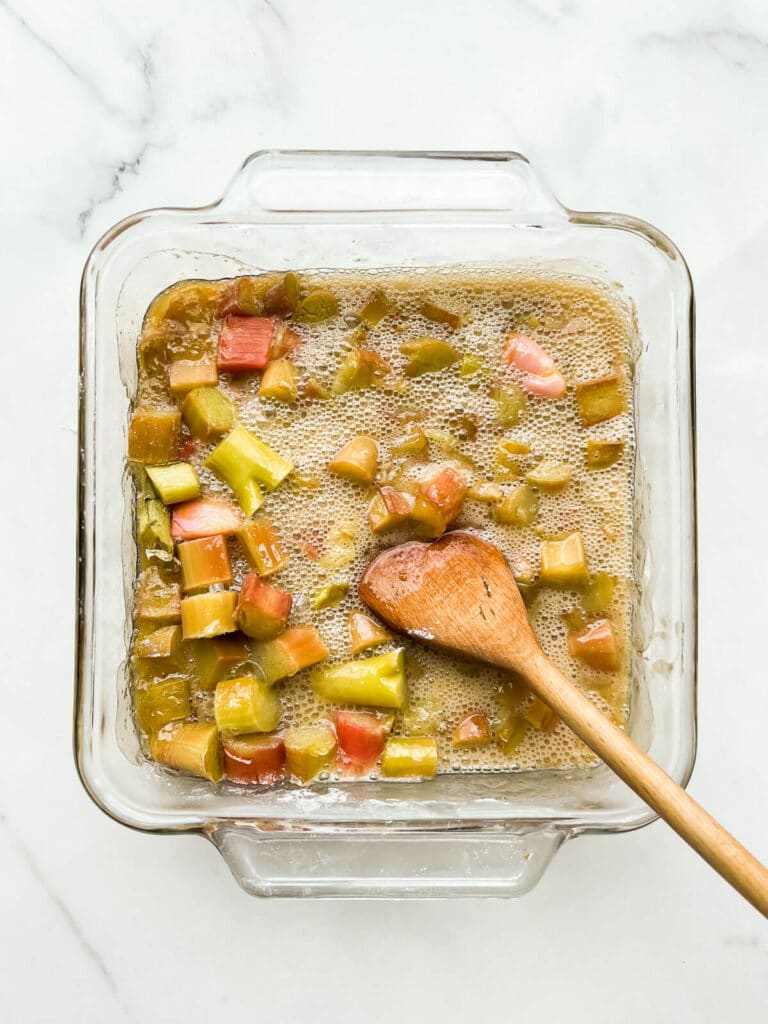
- Remove from the oven and add baking soda. Mix well. Add the rest of the rhubarb and the vanilla, stir, and transfer to a bowl then place in freezer to chill.
Meanwhile, make the easy all-butter pie dough in the food processor
- In the bowl of a food processor fitted with the metal blade, combine the flour, sugar, and salt. Add the cold butter and pulse to form a coarse crumble.Add the water and pulse it in, then let the food processor run just until the dough comes together. I bought my Cuisinart Food Processor on Amazon.
- Divide the dough in two and transfer both pieces to your work surface. Shape one piece into a disk. Shape the other into a rectangle. Wrap both in plastic wrap and chill for 1 hour.
- After 45 minutes of chilling. Retrieve the rectangle of dough. Roll it to a 10x15 rectangle on a floured surface. Transfer to a big cookie sheet and chill again.
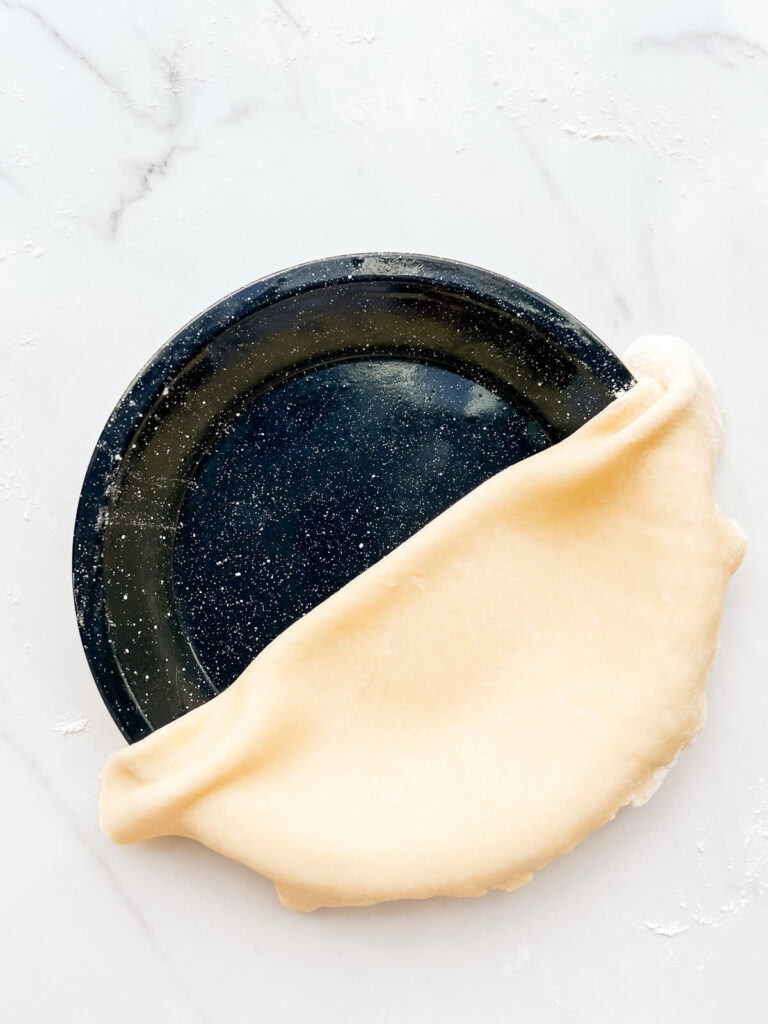
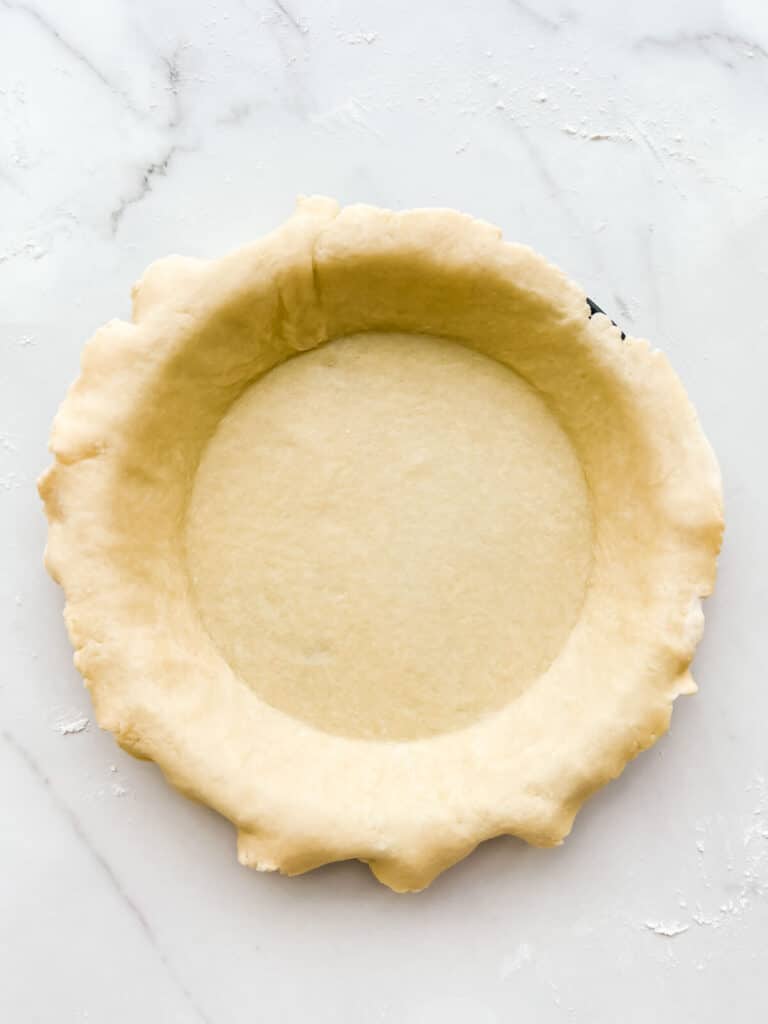
- Roll the disk to a 14" circle. Transfer to metal pie plate and fit it in place. Pour the chilled filling into the pie and smooth it so it's even. Place in the fridge.

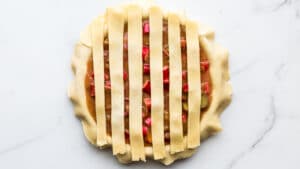
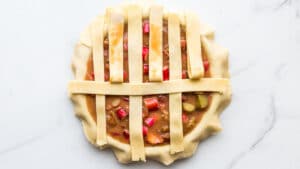
- Retrieve the big 10x15 rectangle of dough. Cut it into at least 12 one-inch strips. Take the pie out of the fridge and place 6 strips side by side vertically.
- Now weave in the other 6 strips horizontally to form a lattice (check out the video). Trim and crimp the edges.
- Chill the pie in the fridge for 45 minutes. Meanwhile place a large cookie sheet on the bottom rack of the oven. You will bake the pie on this sheet so make sure there's enough headspace for a pie!
- When the pie has chilled, brush the surface of the lattice with milk and sprinkle with turbinado. Bake the pie on the bottom rack on the preheated cookie sheet for 30 minutes at 400ºF (200 °C). Lower the oven temperature to 350ºF (175 °C) and continue baking until the edges and top of the pie crust are golden brown. The filling should be bubbling and very hot. This takes at least 50-60 minutes more of baking.
- Let the pie cool to room temperature, preferably overnight (even 24 hours) so that the pie sets properly before serving.
Video
Notes
- This recipe calls for Diamond Crystal fine Kosher salt. If using regular table salt, add half the amount or the recipe may be too salty!
Nutrition
Nutrition information is automatically calculated and should only be used as an approximation.


Leave a Reply